Mecanoo B.15 Modelmaking Award 2016

We are very pleased to announce the return of the Mecanoo B.15 Modelmaking award for 2016!

04

Eligibility and Award Short-listing

The awards are open to MSA Part One Third year students and Sixth Year Part Two students. There will be three prizes for each year.

Short-listing and final judging will focus on process, purpose and finished quality of models within design and presentation stages.


This year we will be joined by Mecanoo in-house modelmaker Laurens Kistemaker who will assist with project short-listing and offer advice on student projects. Laurens will be on hand in the B.15 workshop throughout Friday 15th April and Friday June 3rd to observe and discuss your ideas. Be sure to come along and speak to Laurens for a unique insight from one of Mecanoos’ full-time modelmakers.

Laurens Kistemaker

Judging will take place on  Friday June 10th ahead of the annual MSA show opening where the awards will be presented.

AWARDS PRESENTATION (4)About Mecanoo 

Mecanoo are an award winning international architecture practice based in Delft, The Netherlands. Current projects include a renovation of the New York Public Library and the design for the new Manchester Engineering Campus Development (MECD) project. Having now opened a Manchester office to support projects in the region the company are eager to strengthen their links with up and coming architecture graduates leaving the Manchester School of Architecture. Last years modelmaking awards yielded a strong interest from all participants and several employment opportunities followed.

Find out more about Mecanoo here: www.mecanoo.nl and click here to watch our short video about Mecanoo Modelmaking.

Following on from last year B.15 will be directing the award and will also support sponsorship for the prize winners.

DSC04539

BA Graduate Sara Hammond accepting her award last year. Sara has gone on to work for Mecanoo’s Manchester office.

We look forward to seeing what great projects come out of the coming months of work and wish you all the best of luck!

Jim, Scott and the team at Mecanoo

Continuity in Architecture 1:500 Bollington Site model by Will Priest

Will recently completed this working site model of an area of Bollington made from a CNC routed block of Mahogany. Once the CNC job was completed will spend several hours hand finishing details such as the building footprints and road details.

It’s worth considering this aspect when using the CNC route for a wooden model. Even though the bulk of material is removed with the machine there is usually a considerable amount of finishing to be factored in.

Will Priest CNC (5)

“I required a site model to make massing and programme arrangement decisions in relation to the topography and trees on the site. I chose to use the CNC machine because unlike the laser cutter, it allowed me to get smooth contours at the 1:500 scale and as a result decisions could be made at the smaller scale.

Will Priest CNC (9)

It required considerable sanding to remove the CNC excavation lines. For this is started with a low grit sand paper slow working my way up to a fine grit. I used mahogany because it is a hardwood with an attractive grain which gave the model a material connection to the actual wooded site.

Will Priest CNC (16) Will Priest CNC (17)

The trees were an experiment in process. I wanted to recreate the densely wooded appearance on the site with varied tree types. For this I used a variety of modelling trees, brass wire and pieces of bush.”  Will Priest 2016

will priest2 will priest3

Experimenting with Modelling in Plasterboard

When casting with plaster you always have to contend with mould design, consistency of mixing the plaster and the eventual extraction from the mould. These factors can cause a fairly high fail rate if one or more are carried out incorrectly. One way we can get around the need to mould and cast slabs of plaster is to utilise a ready made substitute in the form of plasterboard. Pre-cast plaster board can be purchased readily and cheaply from most DIY stores. It provides a consistent slab of plaster that can be easily worked using hand tools or machine cutting.

5th Year Lost Spaces (5)

In its bought state plasterboard has a layer of paper adhered to the outside which can be removed using a wet cloth. This is the most laborious aspect of using this material but is a small price to pay for the time and expense of trying to cast slabs from scratch.

DSC05132

5th Year Lost Spaces (2)Once clean of paper the board should be left to thoroughly dry before being worked.

With this particular project slabs of plaster board were cut to size before being engraved with detailing on the laser cutter. This level of detail created a cast concrete imitation that would be very difficult to replicate from a cast piece.
5th Year Lost Spaces (15)The main disadvantage of this engraved method is in its fragility. Once completed the engraved pieces have to be held with great care to avoid damaging the surface. One method of strengthening the pieces is to spray over a layer of clear lacquer. Even with this coverage the surface can easily be damaged so this process is really for aesthetic purposes and doesn’t lend itself to models that need to be handled.

To create the impression of a solid cast block the edges of each piece were mitred prior to being engraved. Mitering the edges made for an even more fragile edge that required filling with a quick drying Poly-filla which was then lightly blended with sand paper.

Lost Spaces – Nine Elms Cold Store

Initial experiments with this method were done by George Thomson, Jilly Clifford and Ayo Karim as part of the 5th year Lost Spaces workshop brief. Their project was focussed on the Nine Elms Cold Store.

“The choice of using a plasterboard method of construction was derived from our aim to have a scaled model which reflected the materiality of the Nine Elm’s cold store. The cold store was a prominent concrete landmark alongside the River Thames in the 1970’s with no apparent human scale; its only characteristic to the outside world was a repetitive façade detail wrapping the entirety of the building – something we successfully represented on the plasterboard model and by using the laser cutter.”

Nine Elms Cold Store (13) Nine Elms Cold Store (15) Nine Elms Cold Store (25)

Bollington Mill Project – Continuity in Architecture

Following on from this project Continuity in Architecture students Robbie Stanton, Sam Stone and Jahan Ojaghi chose to experiment using the same method to represent a derelict Mill in Bollington.5th year Bollington Mill (3)

Robbie Stanton explains the project:

Our initial research into Bollington exposed the town’s rich industrial heritage and emphasised the hugely influential role cotton manufacture has played in defining physical environment and local history and culture. However, many mill structures – the powerful emblems of a rich, multi-faceted past – have been lost. As a consequence, the physical townscape seems disconnected from its socio-historical context. The installation proposes a recognition of the lost forms of Ingersley Vale Mill, one such site at risk of being demolished and forming a further void in Bollington’s continual identity. By artificially lighting the ‘ghost’ structure we aim to draw attention back to a lost icon, re-stitching the building into the wider industrial fabric of Bollington. Continuity in Architecture 5th years were running a competition for a live installation on our site. This project is one of the short-listed 6 and basically proposed artificially lighting the ghost forms of a derelict mill using electroluminescent wire. We chose to try laser etched plasterboard because we wanted a model which could appear highly textured and lends itself to the decaying qualities of a ruin. A combination of CAD and hand scratching / editing were used to get a varied result.”

In addition to the laser engraved plasterboards the group used polly-filla to marry the land mass of the site with the walls of the building.

5th year Bollington Mill (7) 5th year Bollington Mill (8)5th year Bollington Mill (9)

The finished effect, as with the Nine Elmes Cold Cold Store Project is fantastic at capturing the rustic look of the building. It worth noting that this technique can be time consuming and the resulting pieces are very fragile so certainly don’t suit anything intended to be handled. North close up presentation photo south agled perspective

In the style of Piranesi – Experimenting with Metal Powders in Resin

“Designed in the 18th century by the artist Giovanni Battista Piranesi (1720-1778), Caffè degli Inglesi in Rome, just moments away from the Spanish Steps, is a prime example of a lost ‘cultural cafè’. Renowned for its eccentric Egyptian style, it was a main hub for British artists visiting the Eternal City. Although it was a key centre for culture and artistry, the café’s design divided opinion. Caffè Degli Inglesi only survived for circa 20 years. 

Only two plates etched by Piranesi himself have survived that depict one long and one short internal wall. Because of this, our main challenge was re-imagining the space. As the cafè is long gone and we have no information in regards to the materials, colours, techniques employed, it therefore seems clear that the physical architecture of this space shouldn’t be our main focus, but capturing the lost atmosphere by trying to create a ‘shadow’ of the lost physical space.

Image


When creating a three-dimensional model, it was obvious we needed to depict the two undocumented walls in a way that does not mimic nor assume, but can capture the spirit needed for the café’s re-interpretation. We are therefore suggesting the use of mirrored walls, providing an immersive experience, without compromising the integrity of Piranesi’s unknown original design.

 
The material choice for the rest of the model was intended to hint towards Piranesi himself’s original metallic plates. The time and expense required in producing real metal plates was soon deemed too unrealistic, therefore an innovative solution was found in aluminium powder mixed with resin to create a metallic, durable cast acrylic sheet. From these they were able to be handled by machines such as the laser cutter in creating the etchings on both sides. 
 
A challenge came in the creation of the vaulted roof, where the material was heated following the etching process and formed around a pre-made mould. The 4 sheets were then filed so that the edges could align as best as possible. Assembly of the model involved super-glue, epoxy resin (made metallic in the same way as the cast sheets to match) and finishing using 3mm self-adhesive lead strips.
 
We were asked to display the model on a 400x400mm plinth. This was created with a number of feature to help enhance the model, for instance the plinth was created to be 1500mm high in order for the model to be viewed from eye level and allowed the viewer to experience the mirroring of the materials within. The rectangular shape of the model was then rationalised by creating a series of steps at the top of the square plinth, the final step incorporating a step down to fit the model so that the floor plate runs smoothly from outside to inside. The plinth was then painted in a matt white, with a shadow gap creating a neat finish between plinth and floor.” – Vanessa Torri & Daniel Kirkby 2015

Istituto Nazionale per la GraficaCOLLEZIONE2Opere12-00392853-49Media24210.jpg

 Making the Model

For this project it was decided to make the wall thickness 3mm for ease of construction as well as keeping the material use to a minimum. Simple tray moulds were made up using strips of 3mm MDF that were double sided taped down to a base. This aids an easier removal from the mould once the cast has cured.

Note – if it is clear that a lot of the same component are require (in this case resin slabs) that it may be worth making the mould using a silicone to allow repeat casts and easy cast removal. As this project was very much ‘try it and see’ the required moulds were made as needed. 

Once the basic mould was complete the surfaces were coated with a barrier coat of Vaseline to prevent the resin penetrating the surface of the MDF when poured.

Metal powders

The use of metal powders in casting allows us to create a lightweight and, when compared to full metal casting, low cost but effective substitute material. The process uses very fine metal powder to coat the surface of a desired cast that can then be polished as if it were cast in the metal in use. In this case Aluminium powder was chosen to emulate lead. 

DSC05234In order to guarantee a good coat of metal powder on the surface of casts the mould should be dusted with the desired powder. The excess powder can be poured from the mould and reused. 

Mixing/Pouring Resin

For ease and speed of casting fast-cast- polyurethane resin was used as the stock material for the cast slabs. The resin is usually mixed at a 50/50 ratio but always check the instructions as some brands do vary their instructions on ratio mixing. As we were going for a metallic finish overall metal powder was also mixed into the resin to back up the surface coat already ducted into the mould. As the resin is poured the metal powder particles naturally want to sink to the lowest point so having them in the resin only increases or chances of a successful finish on the face of the cast.

DSC05240

DSC05242


DSC05243


Surface Finishing and Laser Engraving

Once the slabs have poured they can be carefully removed from the mould and all being well will have a dull but flat finish on the down face. Using wire wool the surface can be polished up to the desired shine.

DSC05251

5th Year Lost Spaces (8)

Next up for this project was the engraving of the Piranesi drawings onto the plates. Using the laser cutters Daniel and Vanessa were able to engrave into the polished surface of the plates as well as the back face which would end up being inside the model.

5th Year Lost Spaces (13)

DSC05247DSC05268

The roof components required heat forming to create its vaulted shape. This shaping occurred after being engraved and cut to shape which required significant time to figure out correctly.

DSC05278 The final detail to be added to the model was lead finishing strip as used on leaded windows. As well as finishing the panel gaps this strip. lent itself to the model design and matched the metallic finish perfectly.

DSC05279

Pitanesi model (2) Pitanesi model (4) Pitanesi model (5)The model will be on display as part of the 5th year ‘Lost Spaces’ workshop display at the end of year show in June.

U.S.E. Dortmund 1:1250 Masterplan Model

The focus of this year’s U.S.E. atelier is the city of Dortmund, Germany. I was fortunate to be able to take part in the study trip that saw the group, both 5th and 6th years, exploring and documenting the proposed site along with several post industrial sites. It was agreed early on in the trip that a masterplan model should be created for group discussions throughout the year and as a center piece for the end of year show taking place next June.

Photo 08-10-2015, 12 12 54Photo 07-10-2015, 14 31 48DSC_2475


“After returning from Dortmund, U.S.E. split into site analysis teams. alongside research groups, whose work was collated into a large compendium document, we were tasked with the fabrication of a physical masterplan model of the Union Quarter. 

A scale of 1:1250 was chosen due to material constraints, fitting the width of a 2440x1220mm MDF sheet. For an appropriate portrayal of information at this scale, we largely focused on the massing and blocking whilst acknowledging the railway lines, running at a lower level to the rest of the site and splitting the Union Quarter into three parcels. Other than this drastic level change, we chose to ignore other topographical features of the area; whilst the site features a gradual incline towards the westpark, this would be largely negligible at 1:1250 and would have added considerable time and effort to the construction process.

dortmundsite

To demarcate the site boundary, we chose to raise the union quarter on a plinth above the main model base. To economise on time, we also chose only to build massing on this plinth; outside the site boundary, roads and buildings are indicated by engravings on a plasma cut mild steel sheet. This was left outside over a weekend to rust, acting as a material metaphor for Dortmund’s steel heritage, which is highly prominent on site.

DSC05047

DSC05081

DSC05083

The raised Union Quarter plinths are produced from 12mm clear acrylic recycled from display cabinets at the Manchester Museum. laser cut polystyrene sheeting was plastic welded on top, forming pavements and streets, before being spray painted white. the plinths were originally constructed from cnc’d MDF, though these were scrapped as we were not satisfied with the finish or the joining with the polystyrene sheets, which did not stick well to the timber.

DSC05086DSC05051

DSC05061For the massing, we were advised by workshop staff to use chemi-wood, a resin-based material known for its ease of cutting and crisp finish. buildings were hand cut; whilst being a lengthy process, we were able to add a greater level of complexity to blocking than would normally be possible with the laser cutter, such as pitched roofs.

DSC05084

1

Blocks were then spray painted with shades of white and grey to identify their general usage, broken down into residential, public, commercial and industrial. though nearly finished to a presentation-quality standard, in future we are looking to add trees to the model as the union quarter is a particularly green urban area.”

– Daniel Kempski & Peter Lee December 2015

The main base feature of this model was the engraved 2mm thick steel sheet. On it’s arrival the steel had a light coating of oil to prevent rust which, unusually when it comes to the use of metal, was exactly the finish the group didn’t want!

DSC05104There were several discussions about how to best subtly age the steel which were all trial and error with regard to retaining the engraved detail. It was decided to clean the oil from the face of the steel and leave it outside over the weekend having been lightly sprayed with Epsom salts.

image1At best we thought it may have started to surface rust by Monday morning. To our surprise and temporary horror the rust had completely coated the sheet in the heavy rain that had ensued. Thankfully the group were able to rub back the rust with fine grade sandpaper and the effect turned out to be better than was hoped for.

DSC05118 DSC05119


3The buildings were fixed to the floor plates and the arranged in position on the steel base. Only trees remain to emphasis the green spaces across the site but have been left off for now until the final assembly closer to the end of the year. – Scott

2 7

Social Housing 1:50 Model Kits – Material Politics in Ecuador

Earlier this year students from the Material Politics atelier were involved in a live social housing project in Ecuador. The project was concerned with the design and construction of social housing that was affordable and sustainable. In addition the design required a level of variability determined by location, need or individual preference. In order to convey these potential variants of construction the group designed a model kit that would allow the community to engage with the proposed construction and personally modify the arrangement of their future home through the model.

Each model kit was designed as a series of singular or pre-constructed elements made from laser cut plywood. The production of such parts requires some testing to ensure correct fit of joints as well as the issue of space within the components boxes.

6th Year Material Politics (10) 6th Year Material Politics (13) 6th Year Material Politics (18)


The 1:50 flexible model showcases a social housing typology designed for the informal neighbourhood of Monte Sina­, in Guayaquil, Ecuador. The typology proposes a construction system which can be adapted to each family’s particular needs and be constructed incrementally, rather than a set building design. As a result, the 1:50 model acts both as a device to communicate the structural principles of the typology and a co-production tool, allowing each family to design their home according to specific needs, wishes and conditions. In each model kit taken to Monte Sina­, a manual is included, explaining the contents of the kit and the structural components out of which the houses are made. The neighbours were therefore able to debate their spatial needs in an illustrative manner and mock up their future houses with ease.

More information on the social housing project: http://www.materialpolitics.com/#!suya/c10fk

– Eira Capelan, Material Politics 2015


1.50 model
1.50 model IIThe group produced an accompanying assembly guide for families wanting to use the kits. This serves as a great insight for us to the design of the model and how such thorough thought can be applied and transferred to full scale construction planning. The guide can be viewed online here.

Many thanks to Eira Capelan for her summary of the project.

‘Urban Mining: The St. Johns Quarter’ 1:100 & 1:50 Models by Daniel Kempski

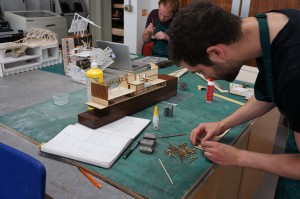
5th Year MA student Daniel Kempski came to the workshop fairly late on in his project with a need to convey multiple aspects of his design proposals through model making. Having successfully completed his two projects and some valuble lessons learnt. Of particular note was the time consuming engraving and cutting of the cork elements. The results of this were fantastic but it should be noted that this can be very time consuming and therefore potentially costly in terms of laser cutting time. We asked if Daniel would write us a piece to accompany some images of his models – he responded in great detail!

We look forward to seeing some more of Daniels projects next year.

The full description of the project and the application of the models made with us is explained here:

“The culture of use:reuse within the construction industry is an emerging area of importance within the field – with firms being placed under increasing scrutiny to change their methods building demolition and deconstruction in order to evolve to meet the growing demands of waste management. It is key to address this issue parallel to the growing dereliction within our cities – with many buildings being demolished once being deemed unusable.

How this can be linked to programme arrives through the notion of an Urban Auction House: a place where individuals can bring their waste materials (arriving as deconstructed elements) and then be further sold to buyers who can make use of these products.

The scheme acts as a hub for all types of individuals within the construction industry. It tries to establish an even playing field for its users, with products being available at a reduced price due to their imperfect nature – enabling the customer to be able to purchase construction materials at a cheaper rate, seeking to reduce the current gap between small and large scale developers within the market.

The aim of the design is to maximise retention of the existing building (Albert Warehouse), while not constraining myself to remain within the existing structures parameters and potentially harming the programmatic outputs. I aimed to change and manipulate these aspects of the existing form that I felt did not fulfil its true architectural potential.

An entire new central bay is established between two existing segments of the build – enabling a more focused entrance point to be generated – recessed back from the roadside, with an element of grandeur created through the staggered, vaulted stonework.

1.100 model (10)

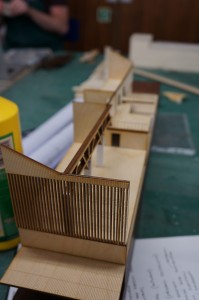
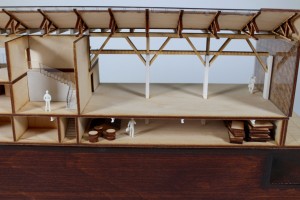
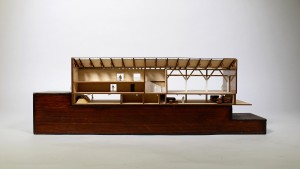
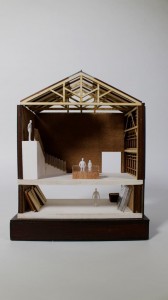
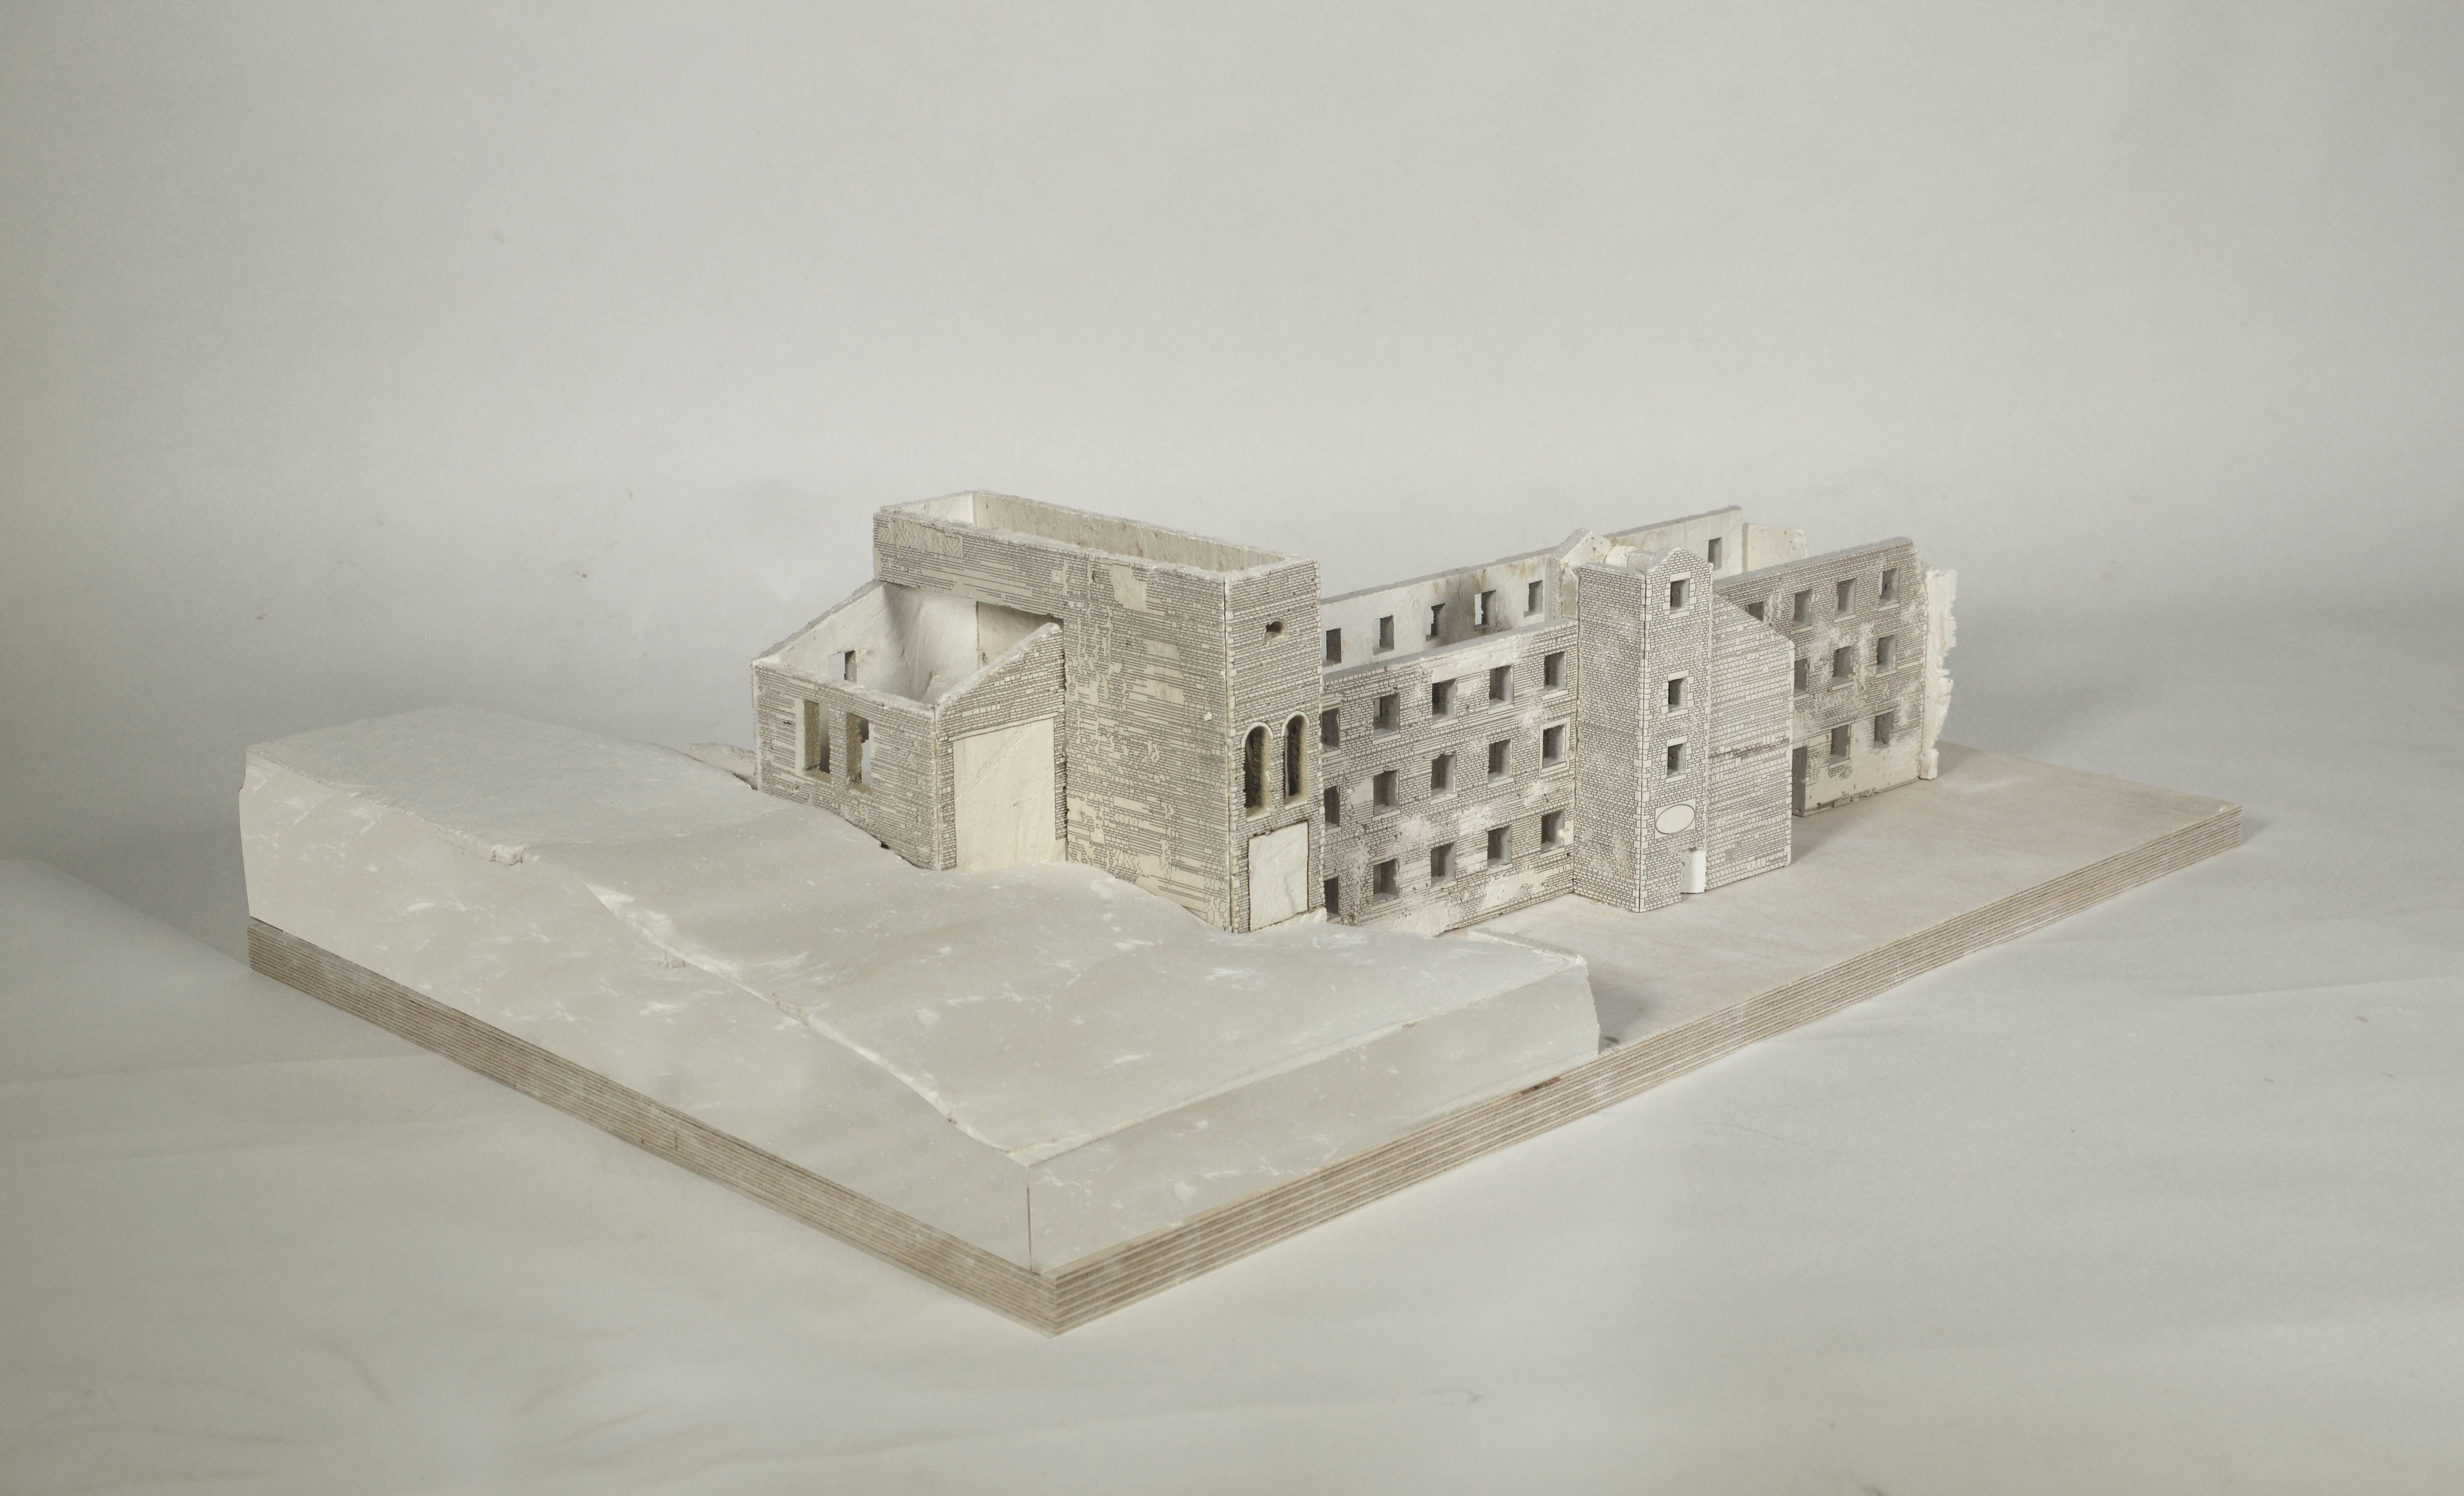
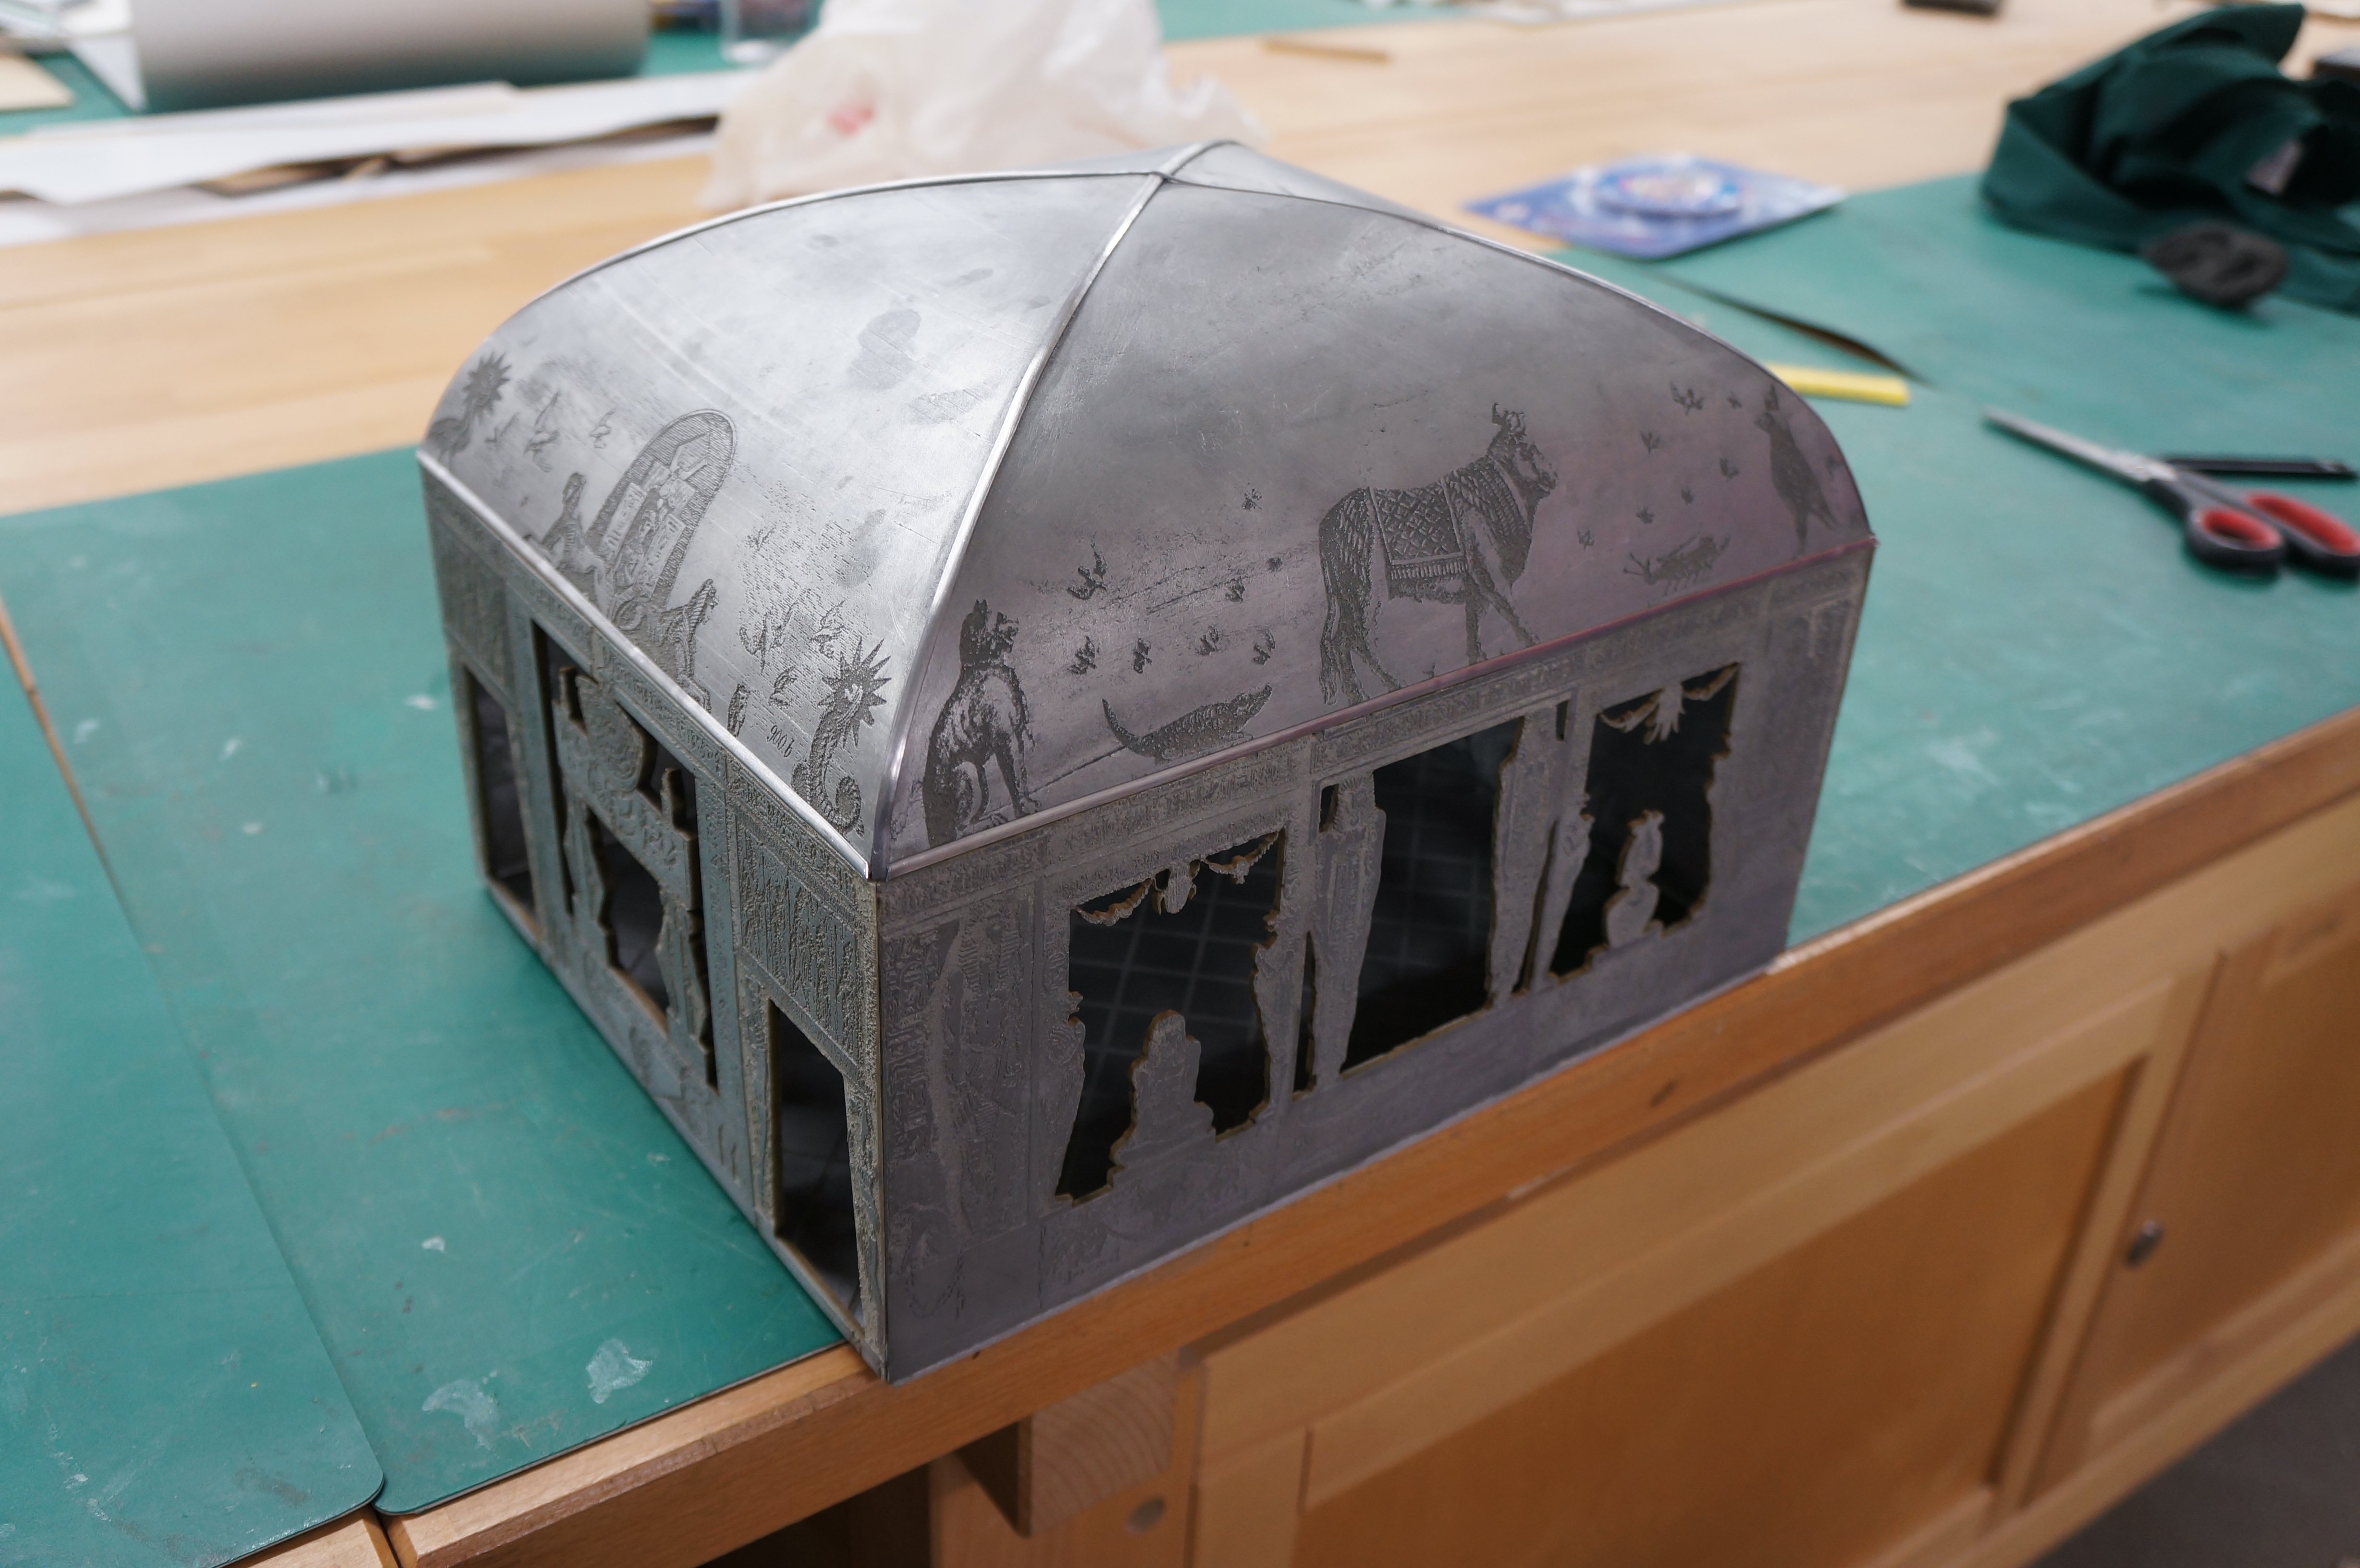
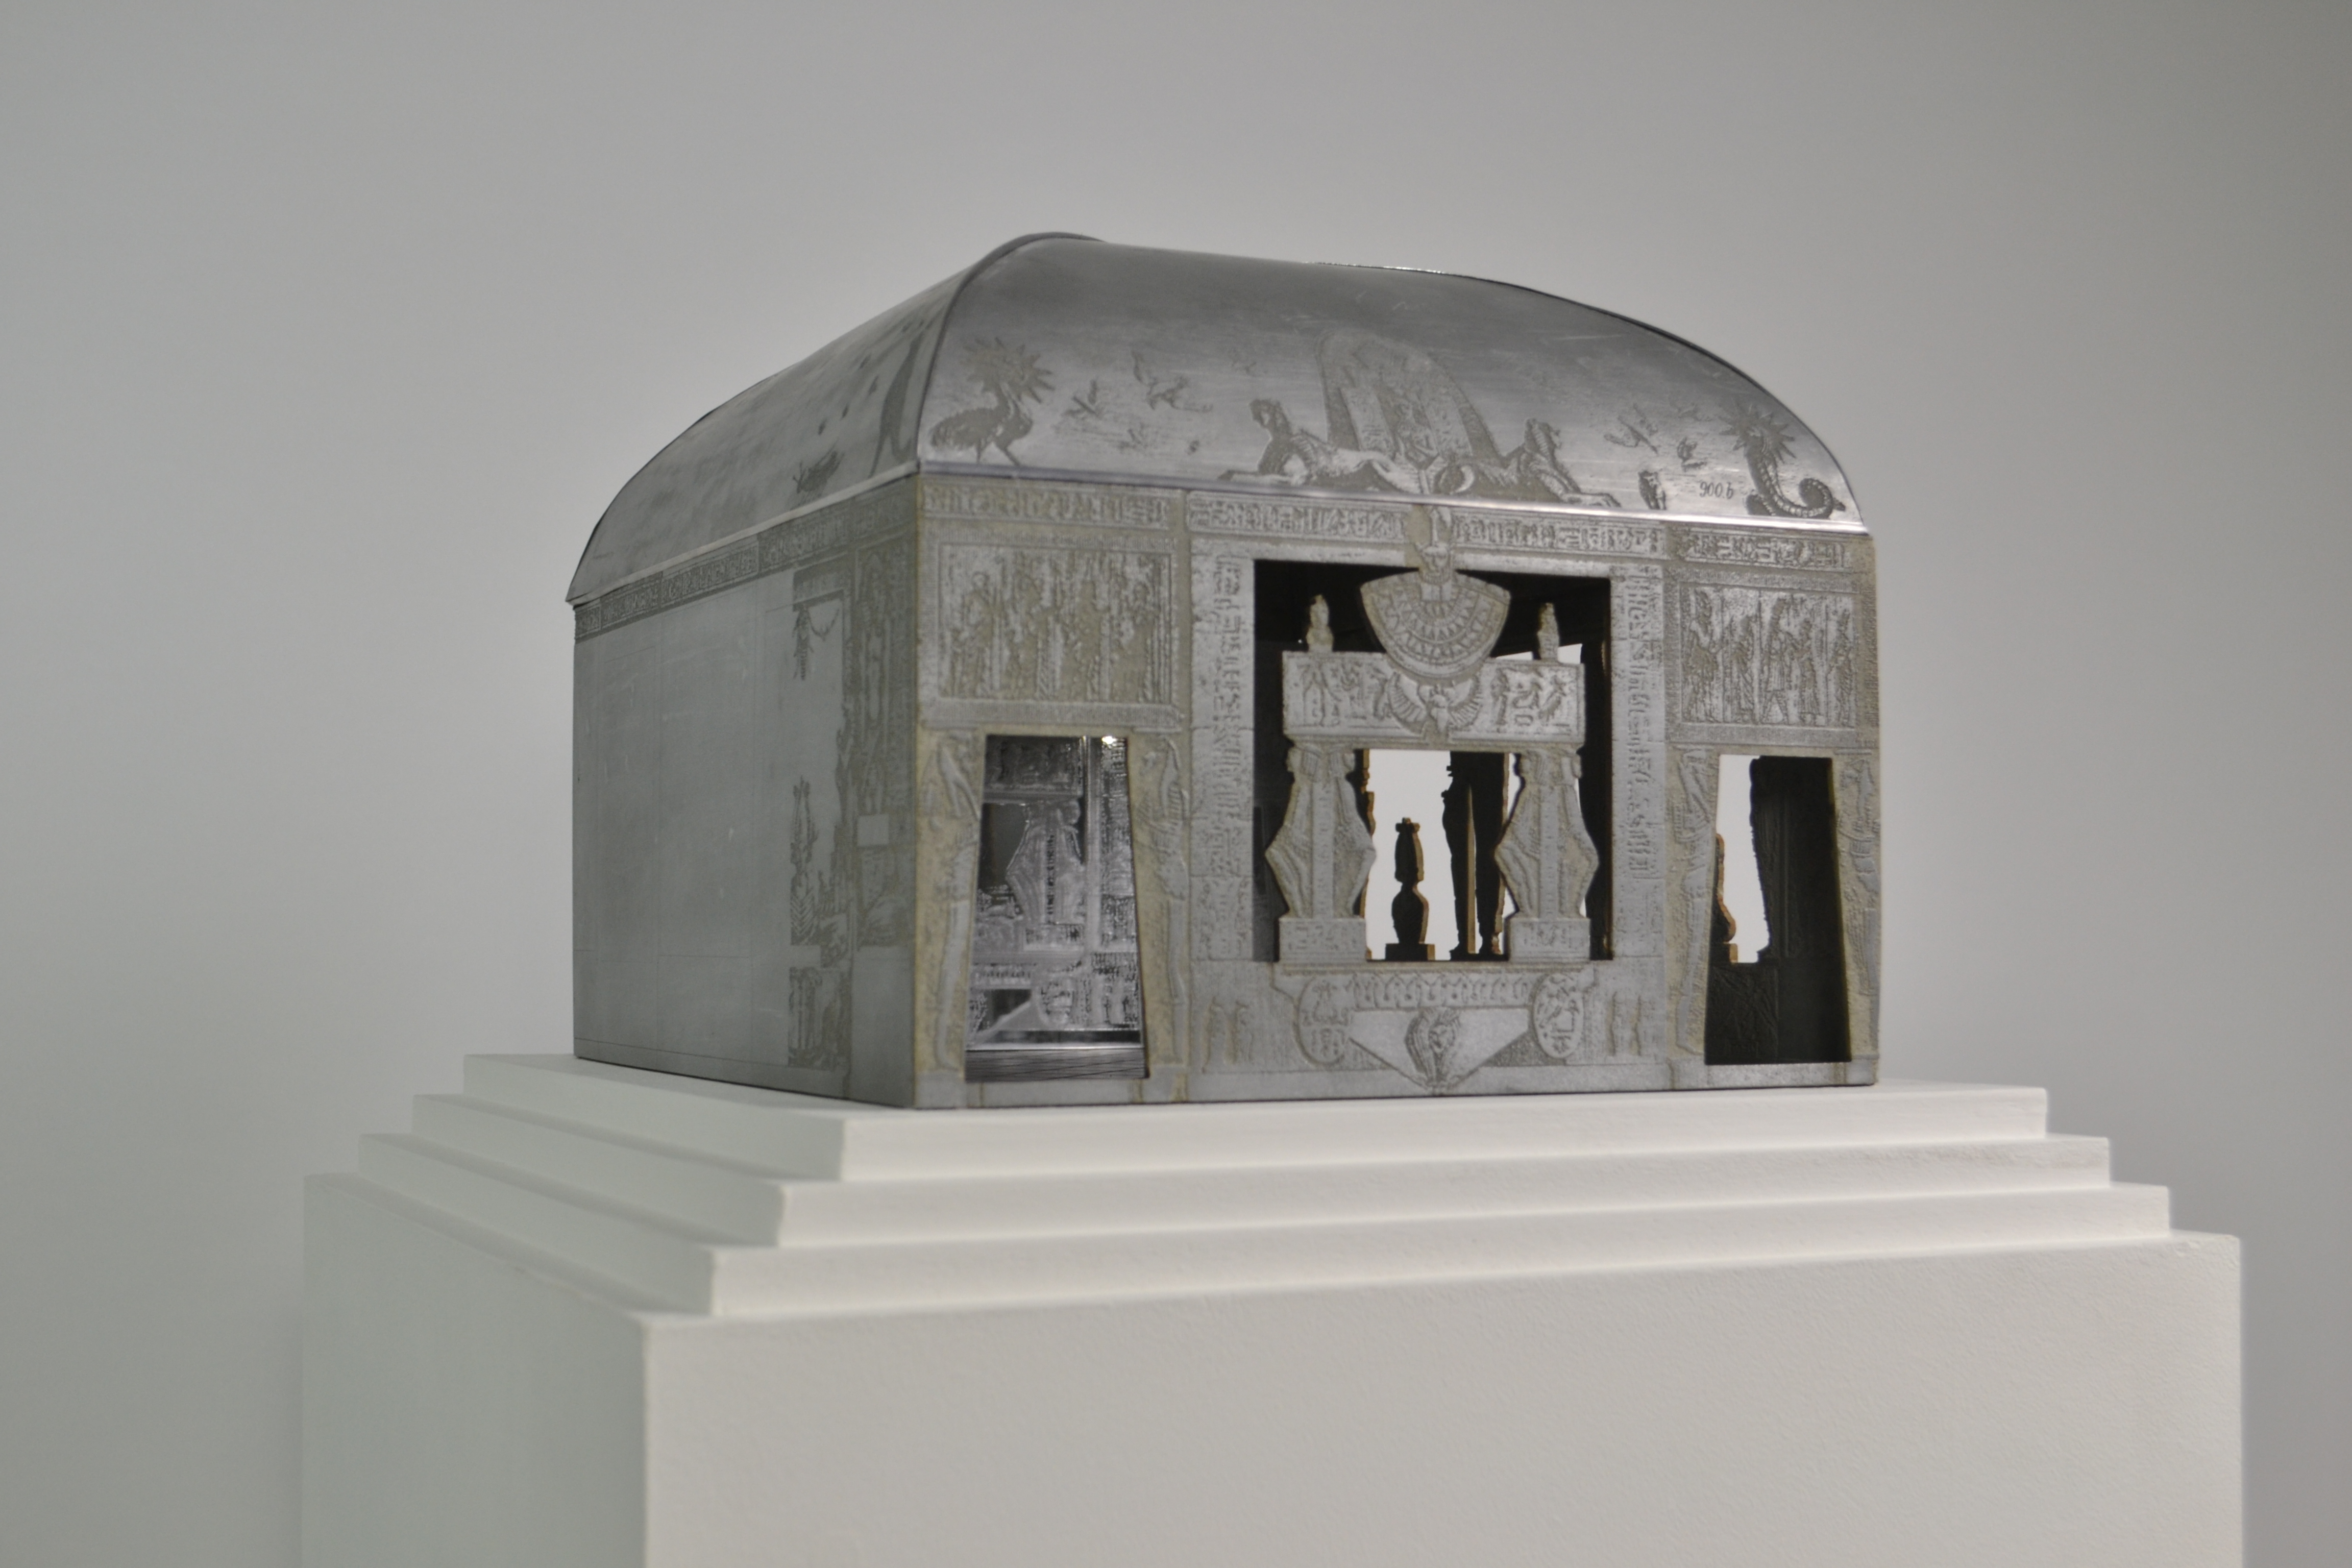
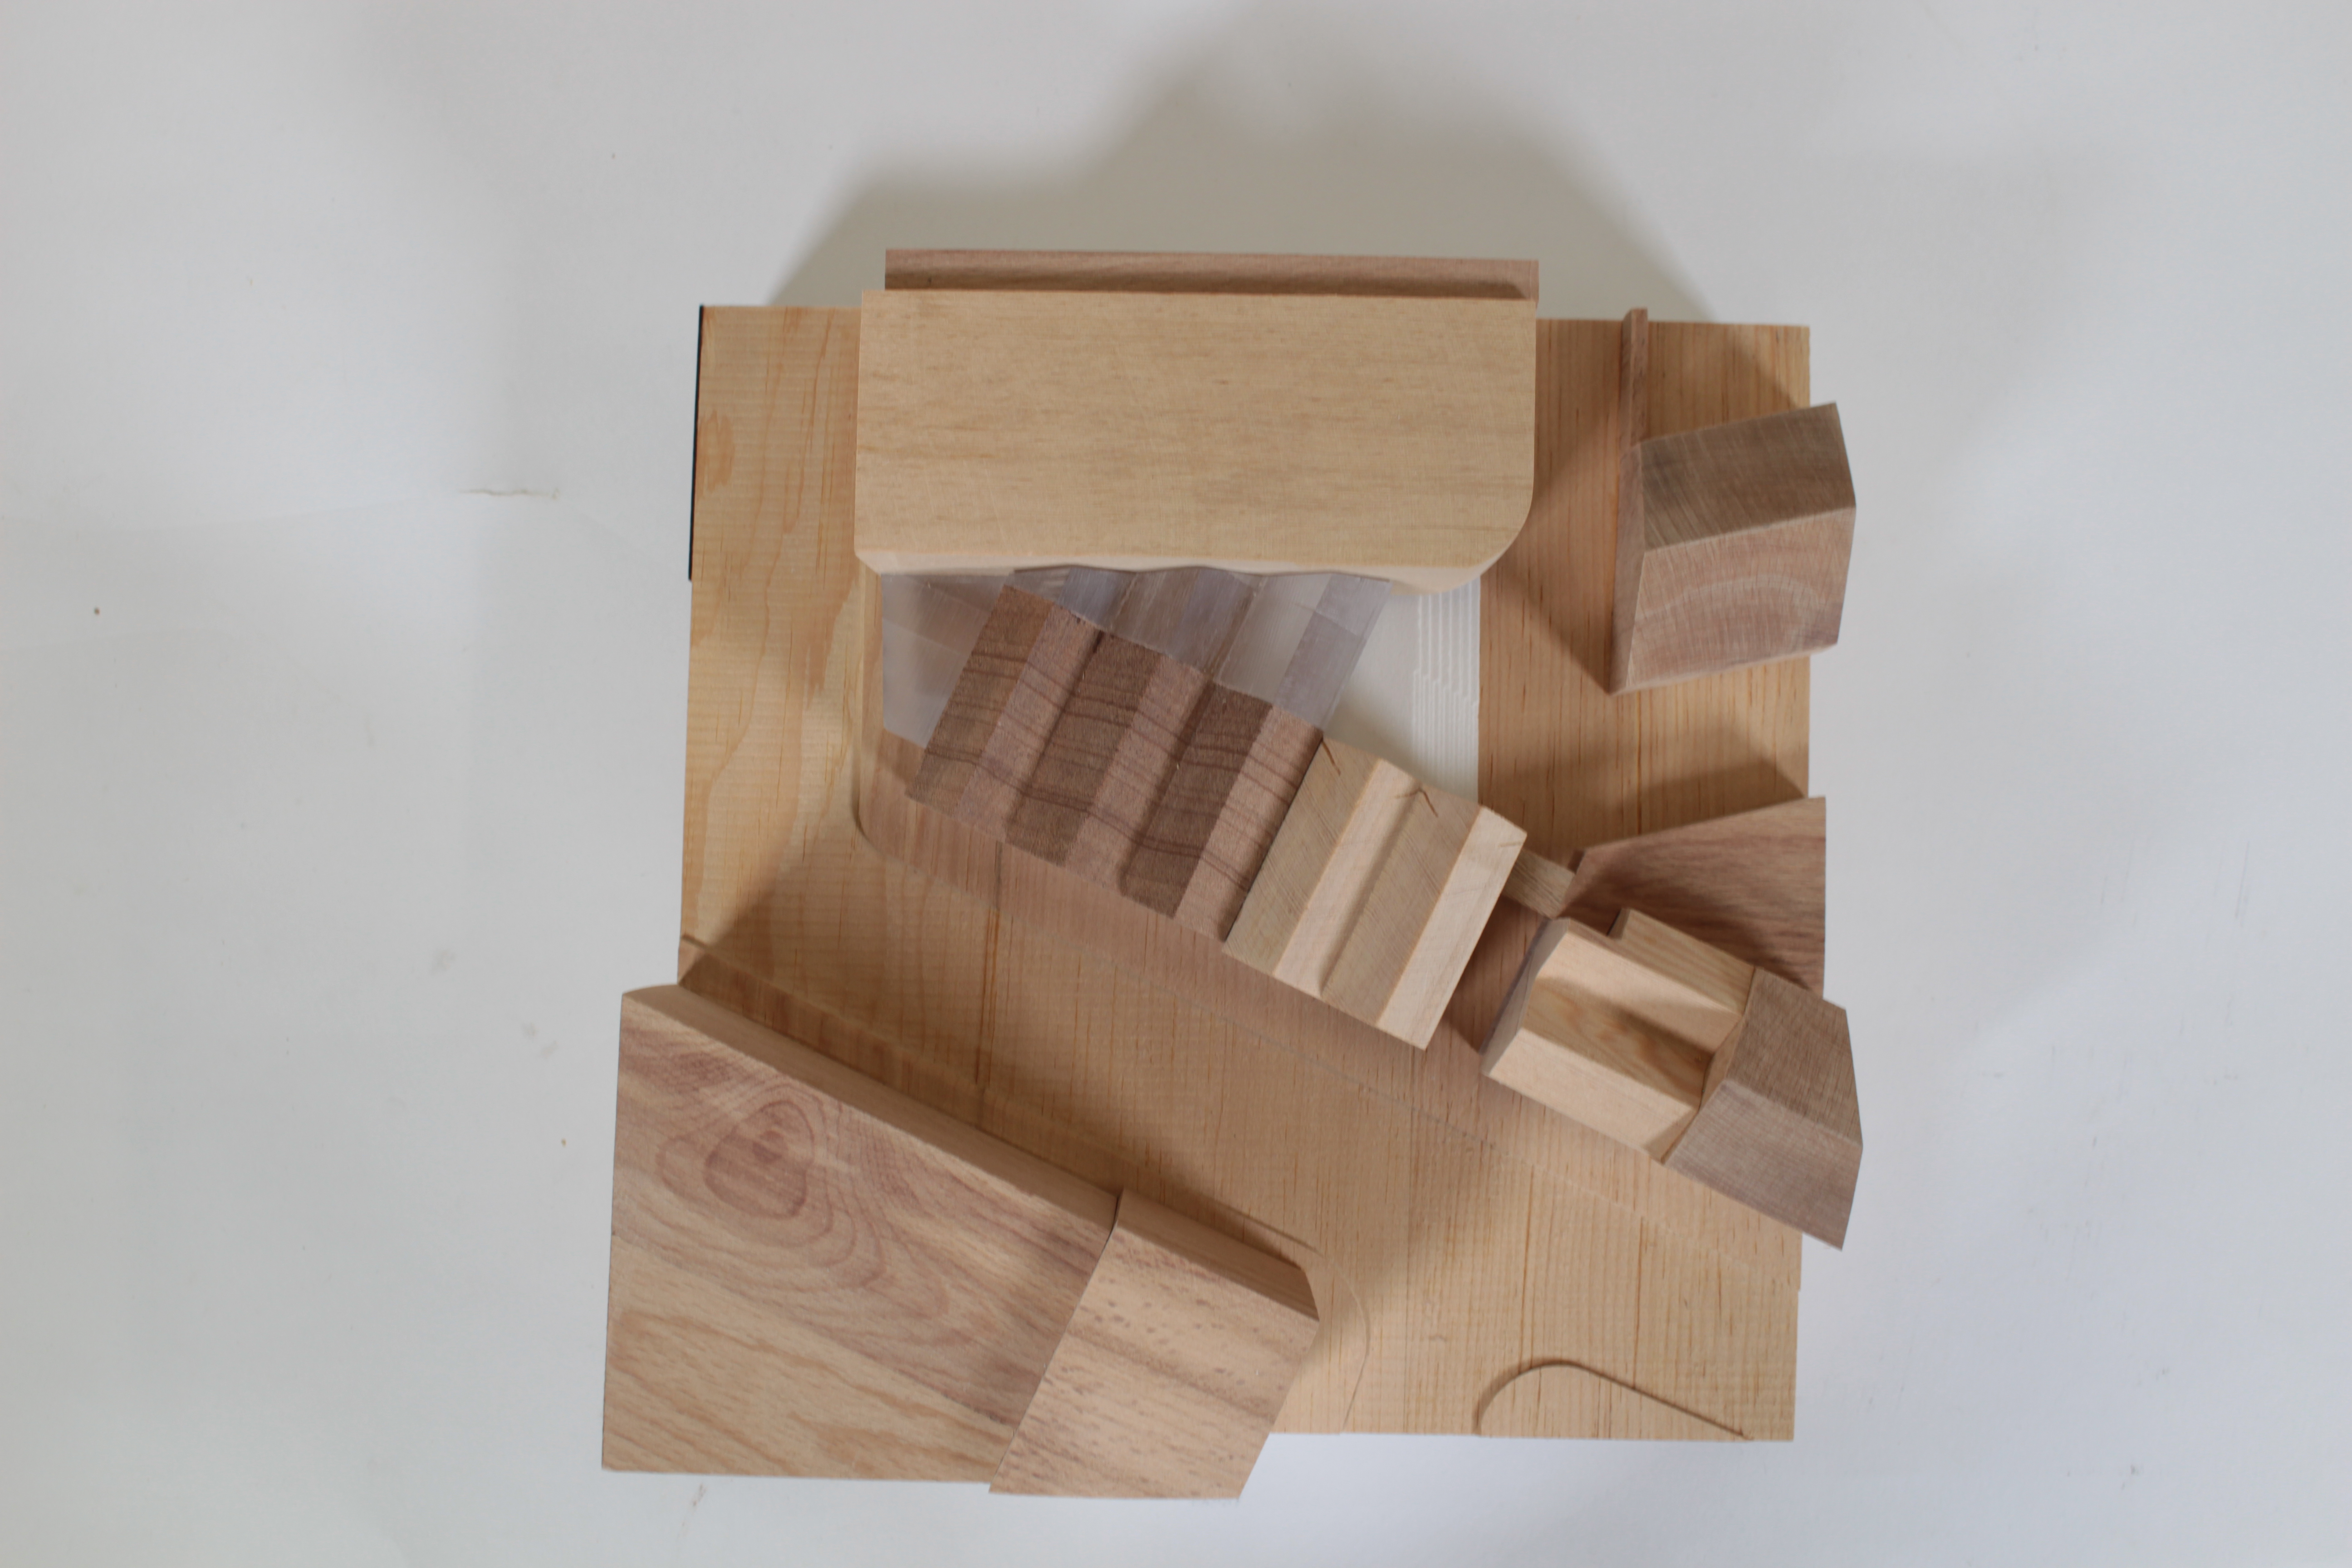
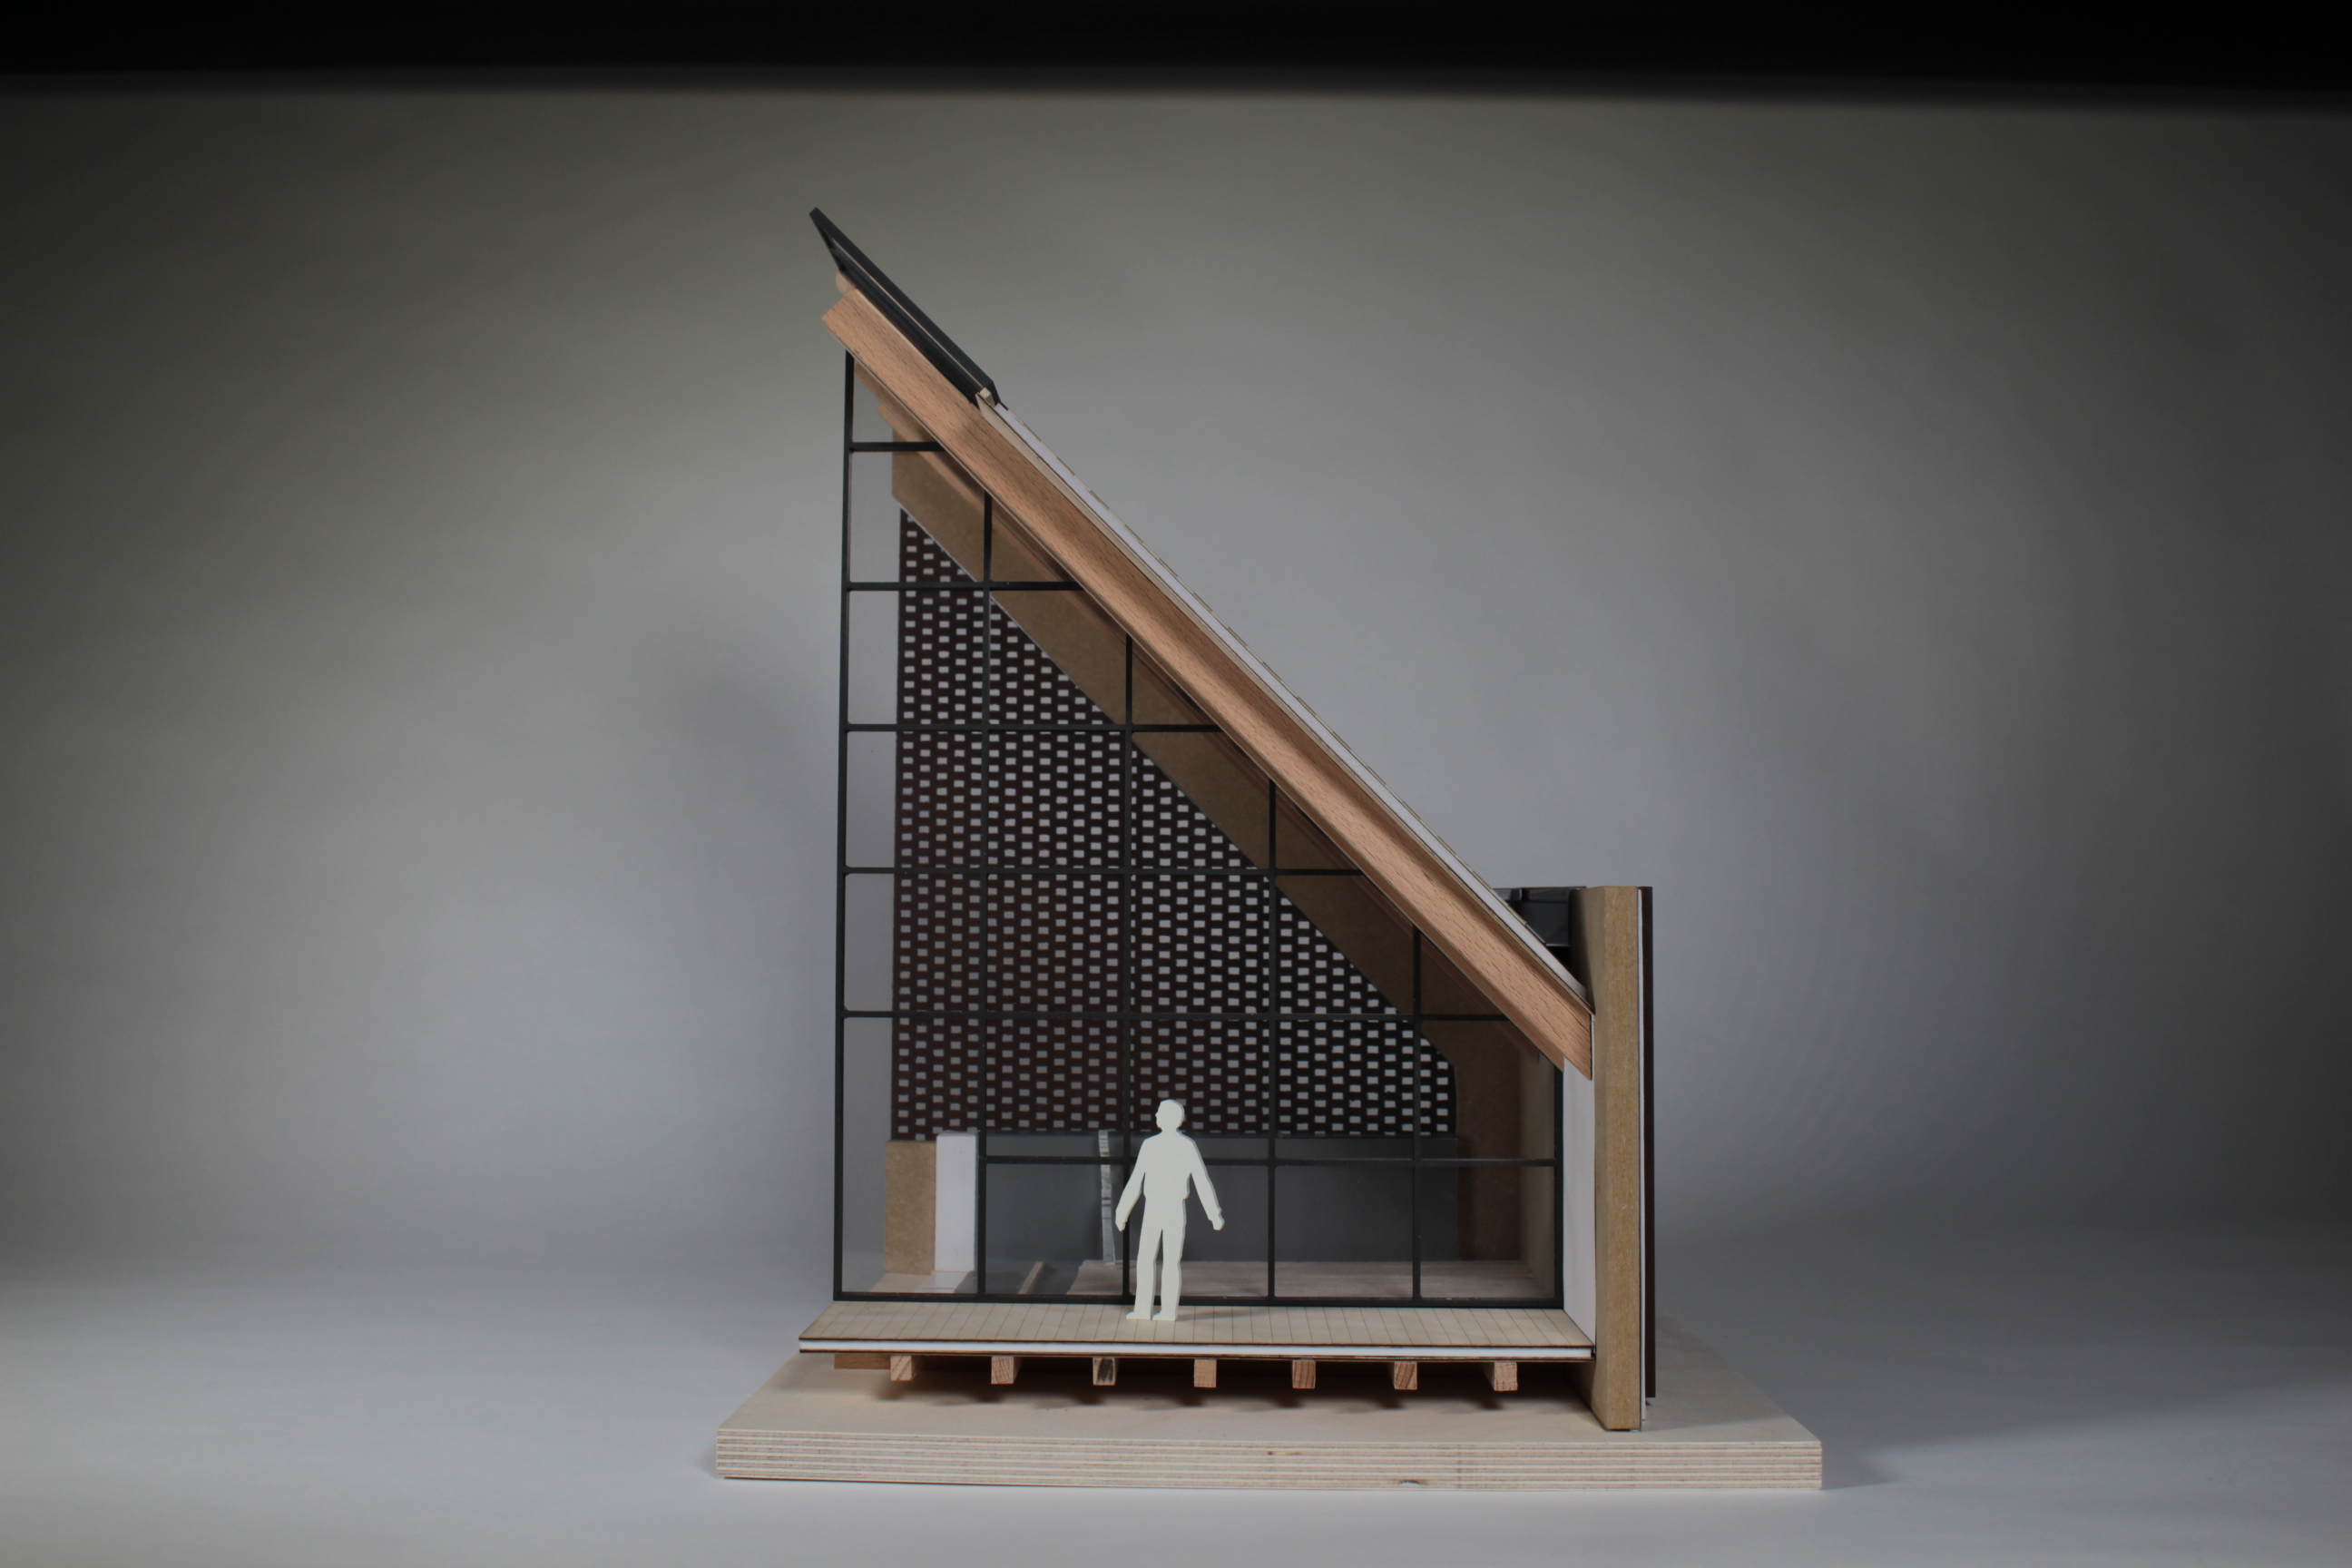
I feel it was key to investigate the building in two different scale models: a 1:100 Section through the scheme in order to understand the internal workings programmatically; and a 1:50 Bay Study to investigate the materiality and light qualities.
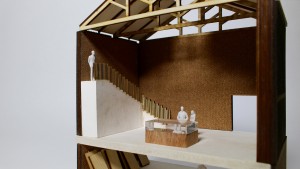
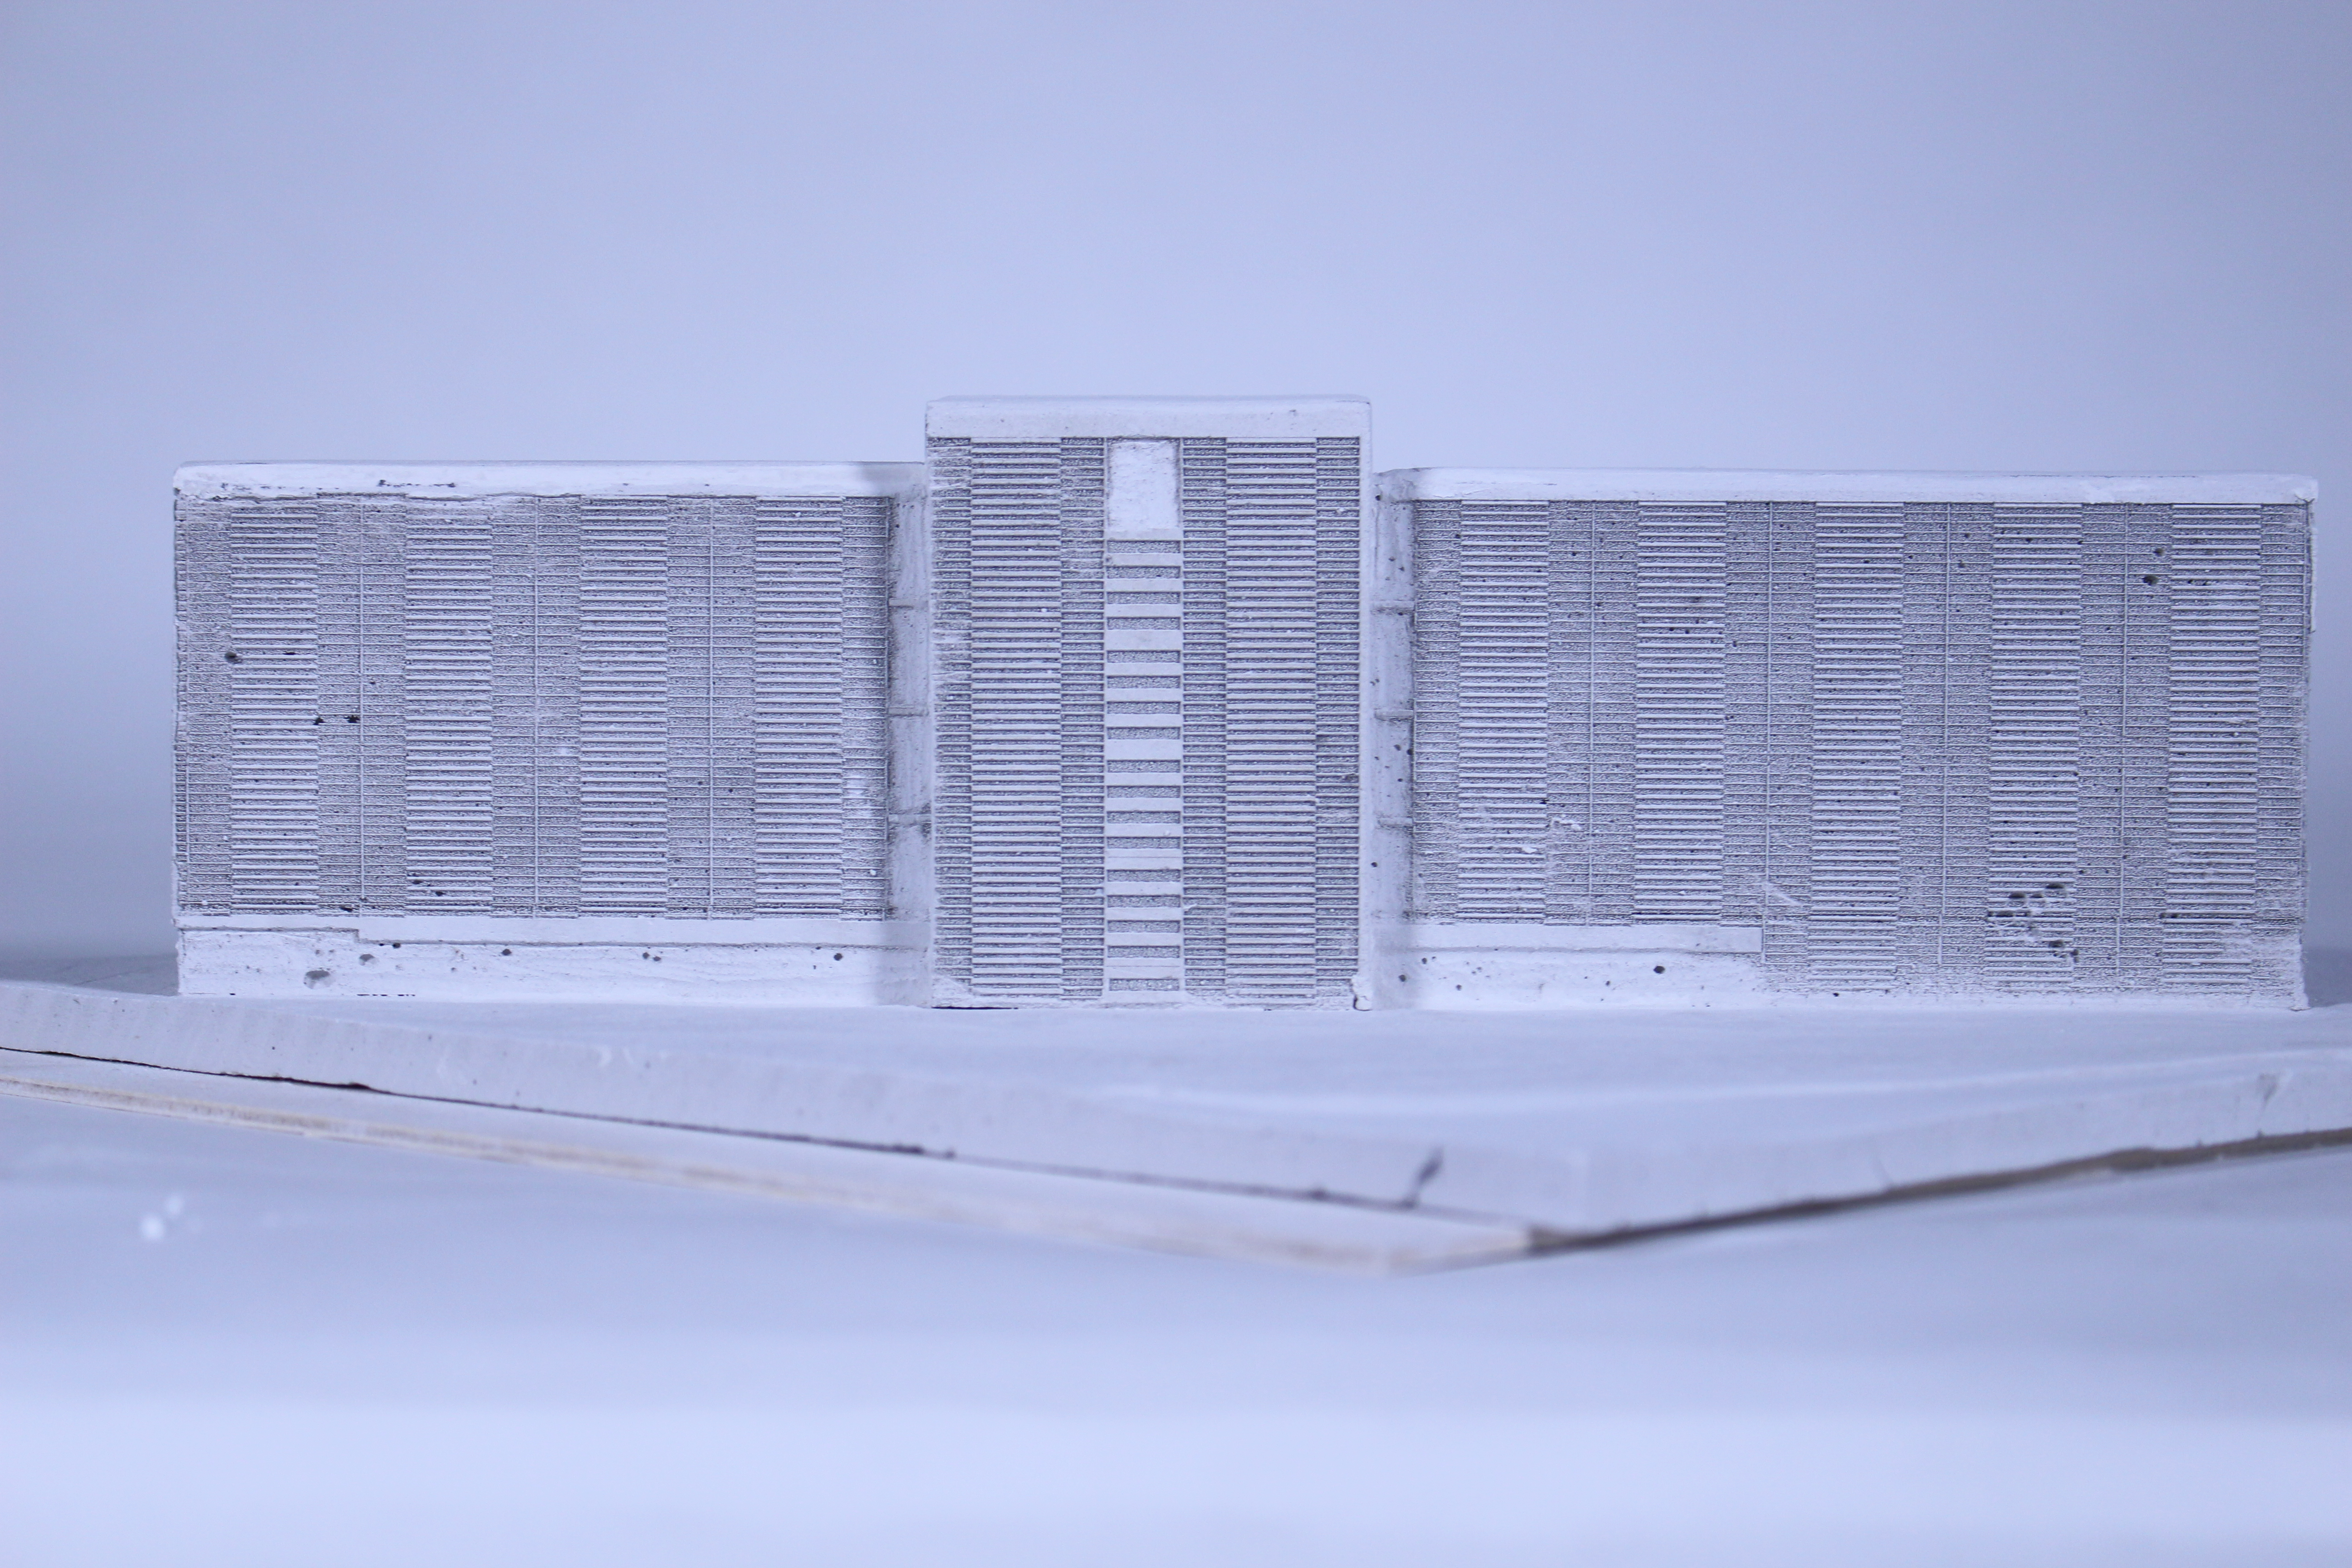
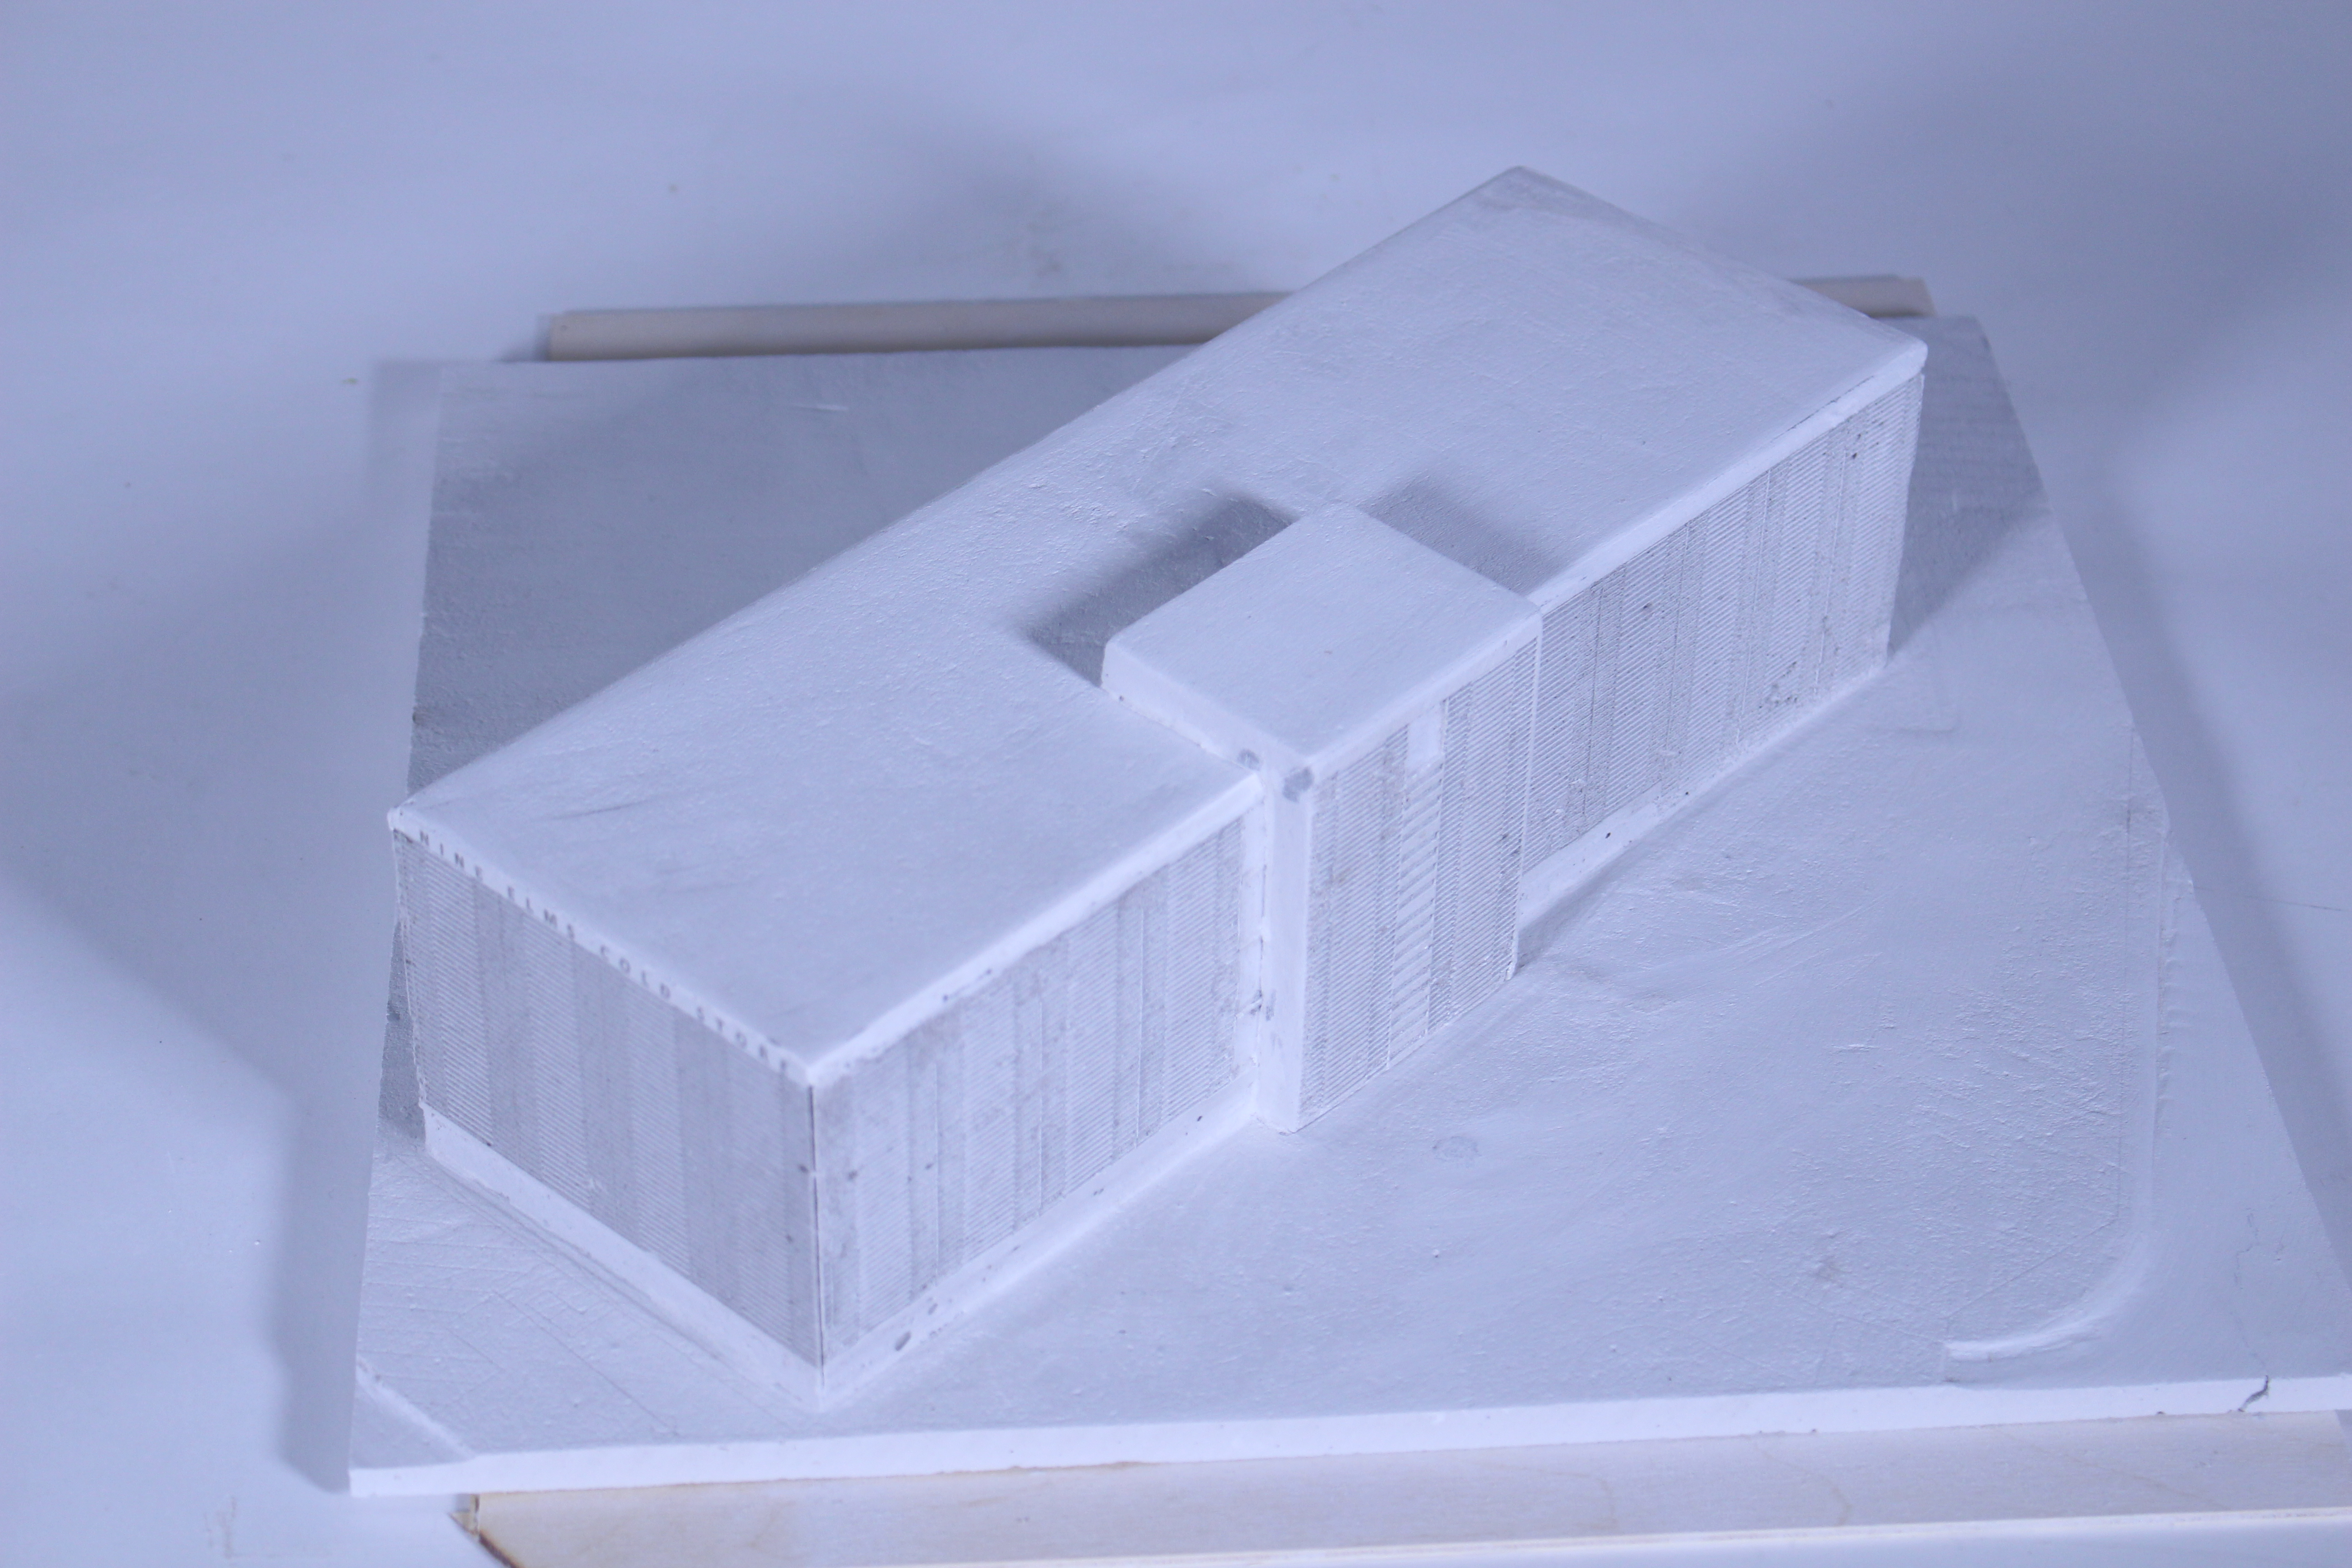
1:100 Model

One of the more demanding changes to the existing structure arrives in the form of the central bay being deconstructed and replaced by a primary structure primarily formed by reclaimed stonework sourced from Quay House (one of the four Urban Mines). It was vital to interject a new, more accessible entrance to the building for the main visitors entrance in order to establish a focal point for the east facade (for sake of both functionality and aesthetics).

Recessing the entrance away from the pavement provides a much needed forecourt, reinforcing this new change of threshold through vaulted stonework encapsulating the individual as they proceed to enter the Auction House.

1.100 model (11)

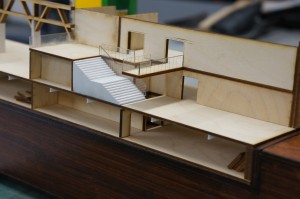
The Auction Hall is embodied within a double-height space, overlooking the River Irwell – creating the sense of theatre to be instilled upon the individual, with grand, exposed structure and a resonating acoustic acting as key protagonists. A raised platform further enables individuals to spectate during the auctions.

In contrast, the Lower Ground Floor functions as a back-of-house storage and preparation area. The workers gather and move the materials during their journey within the Auction House.
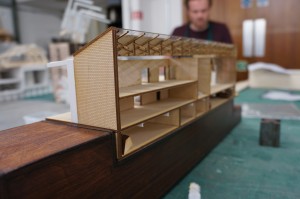
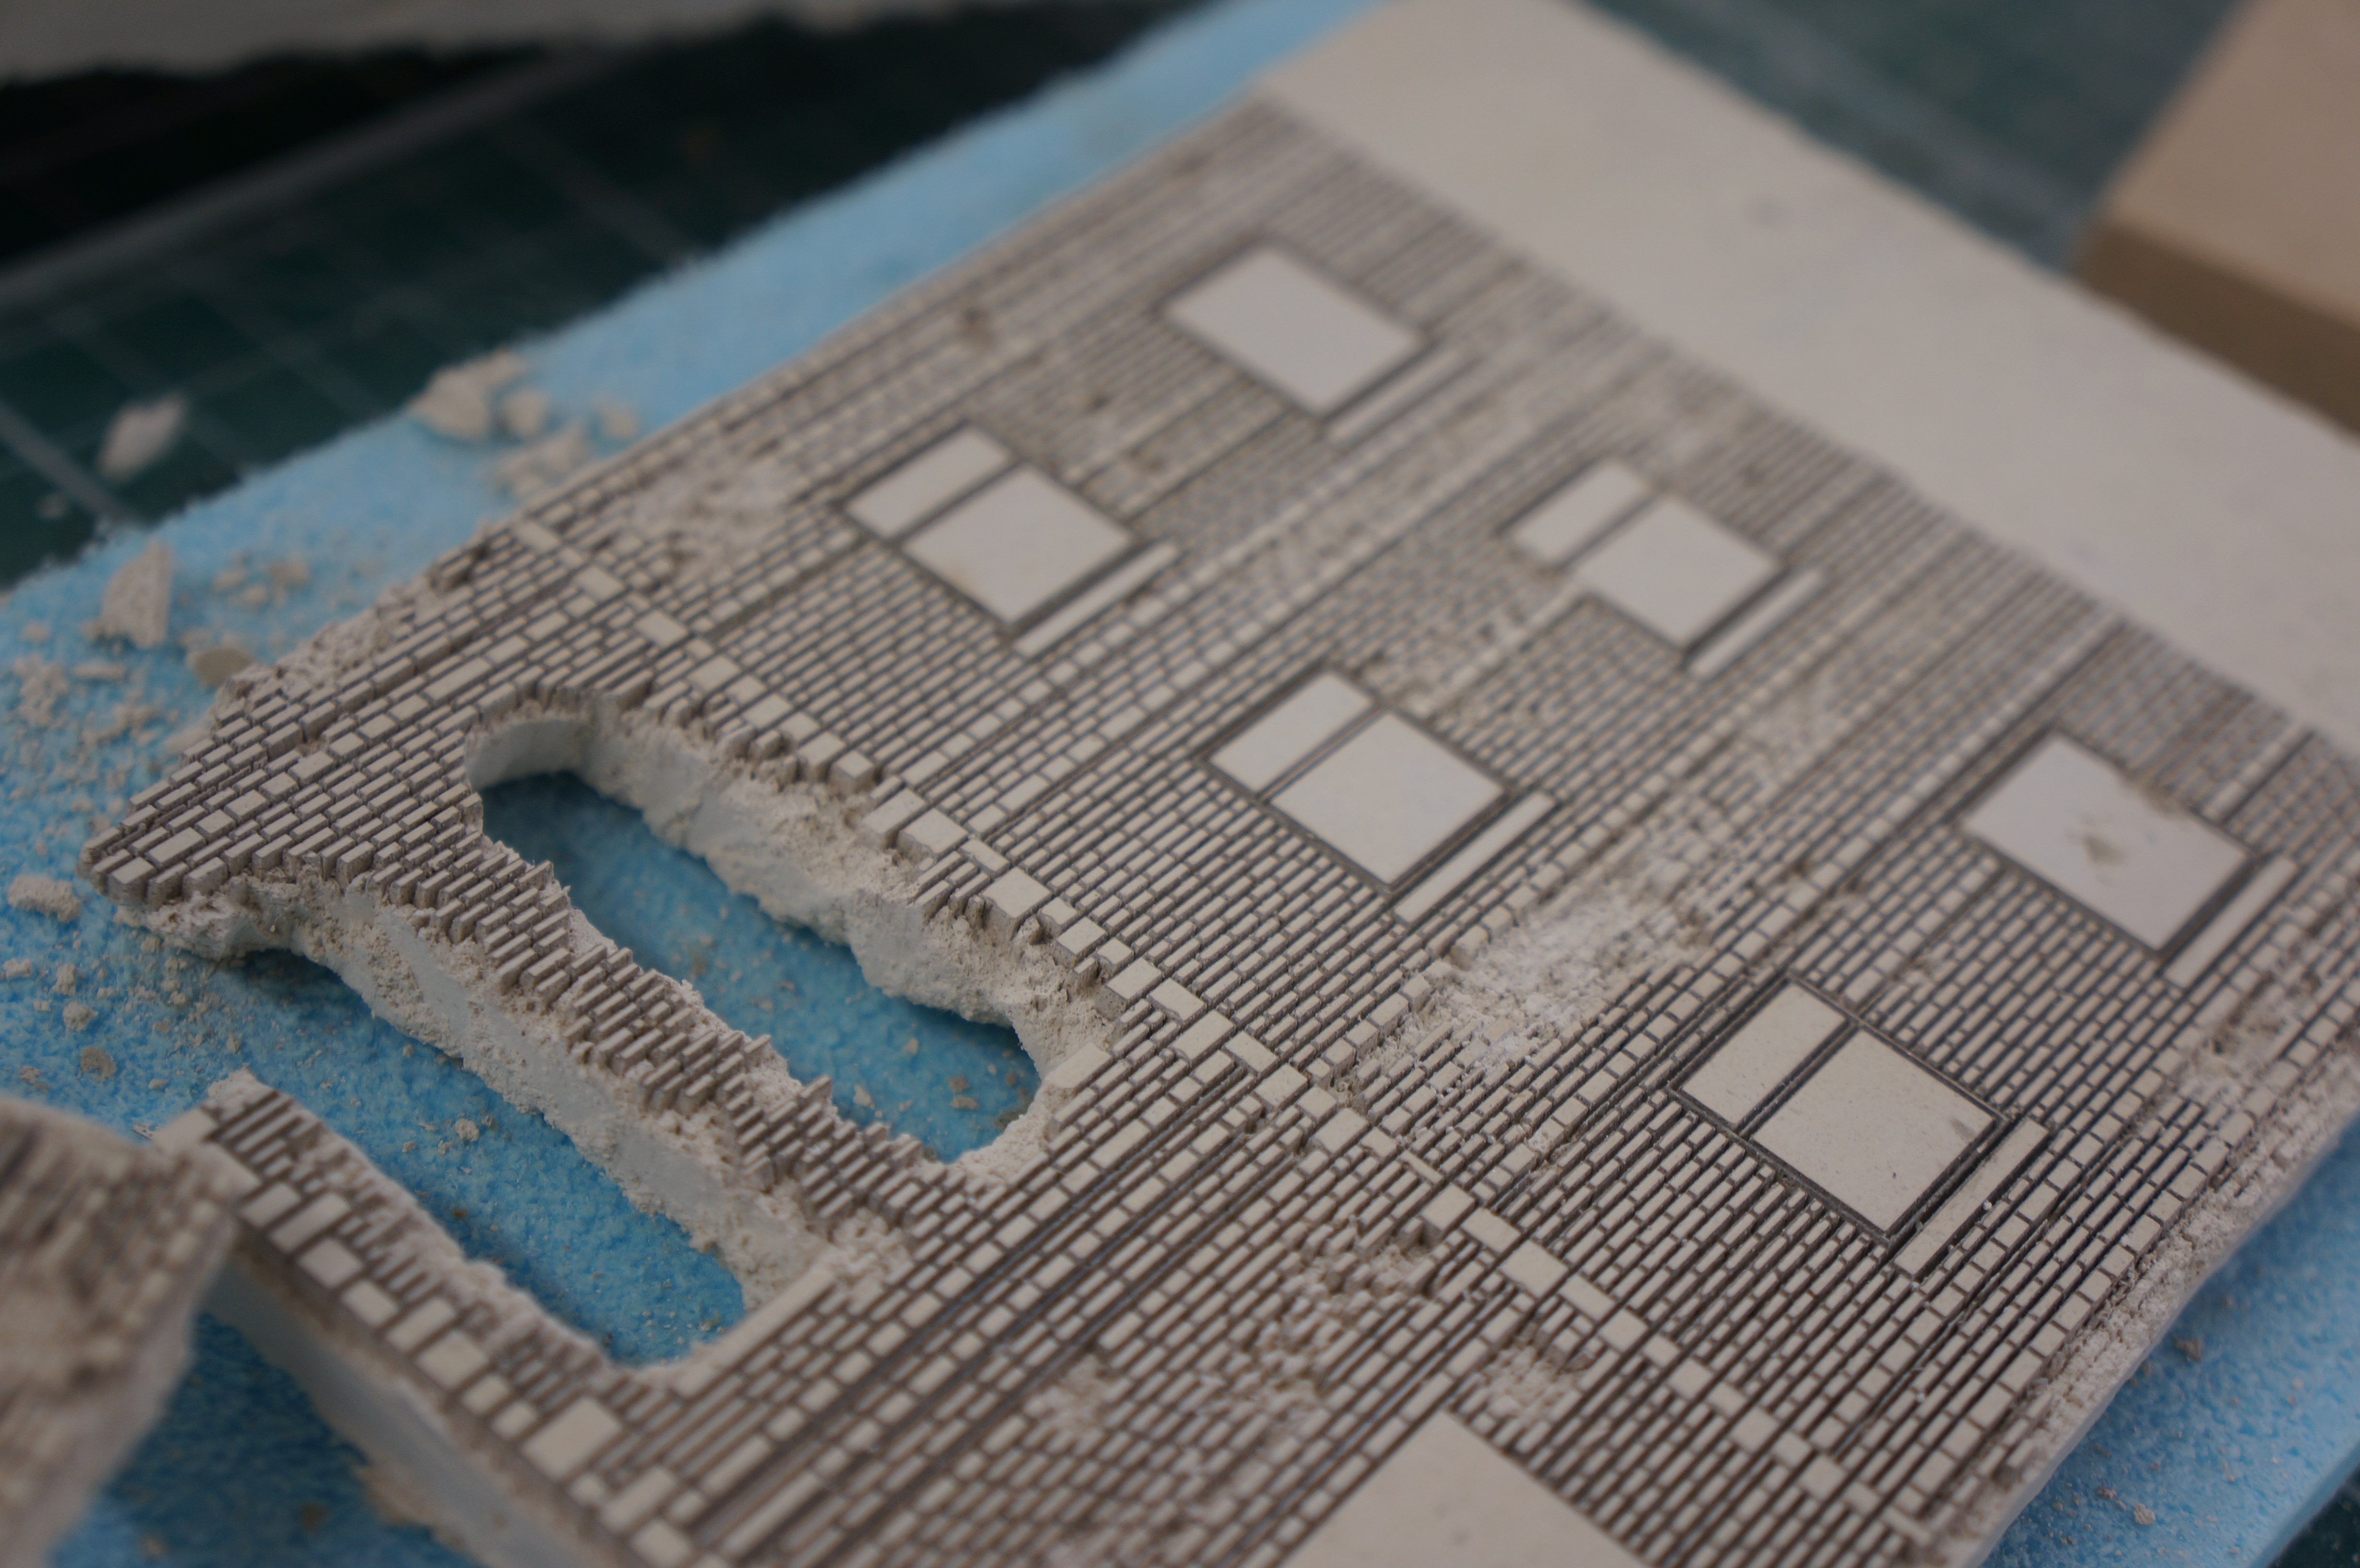
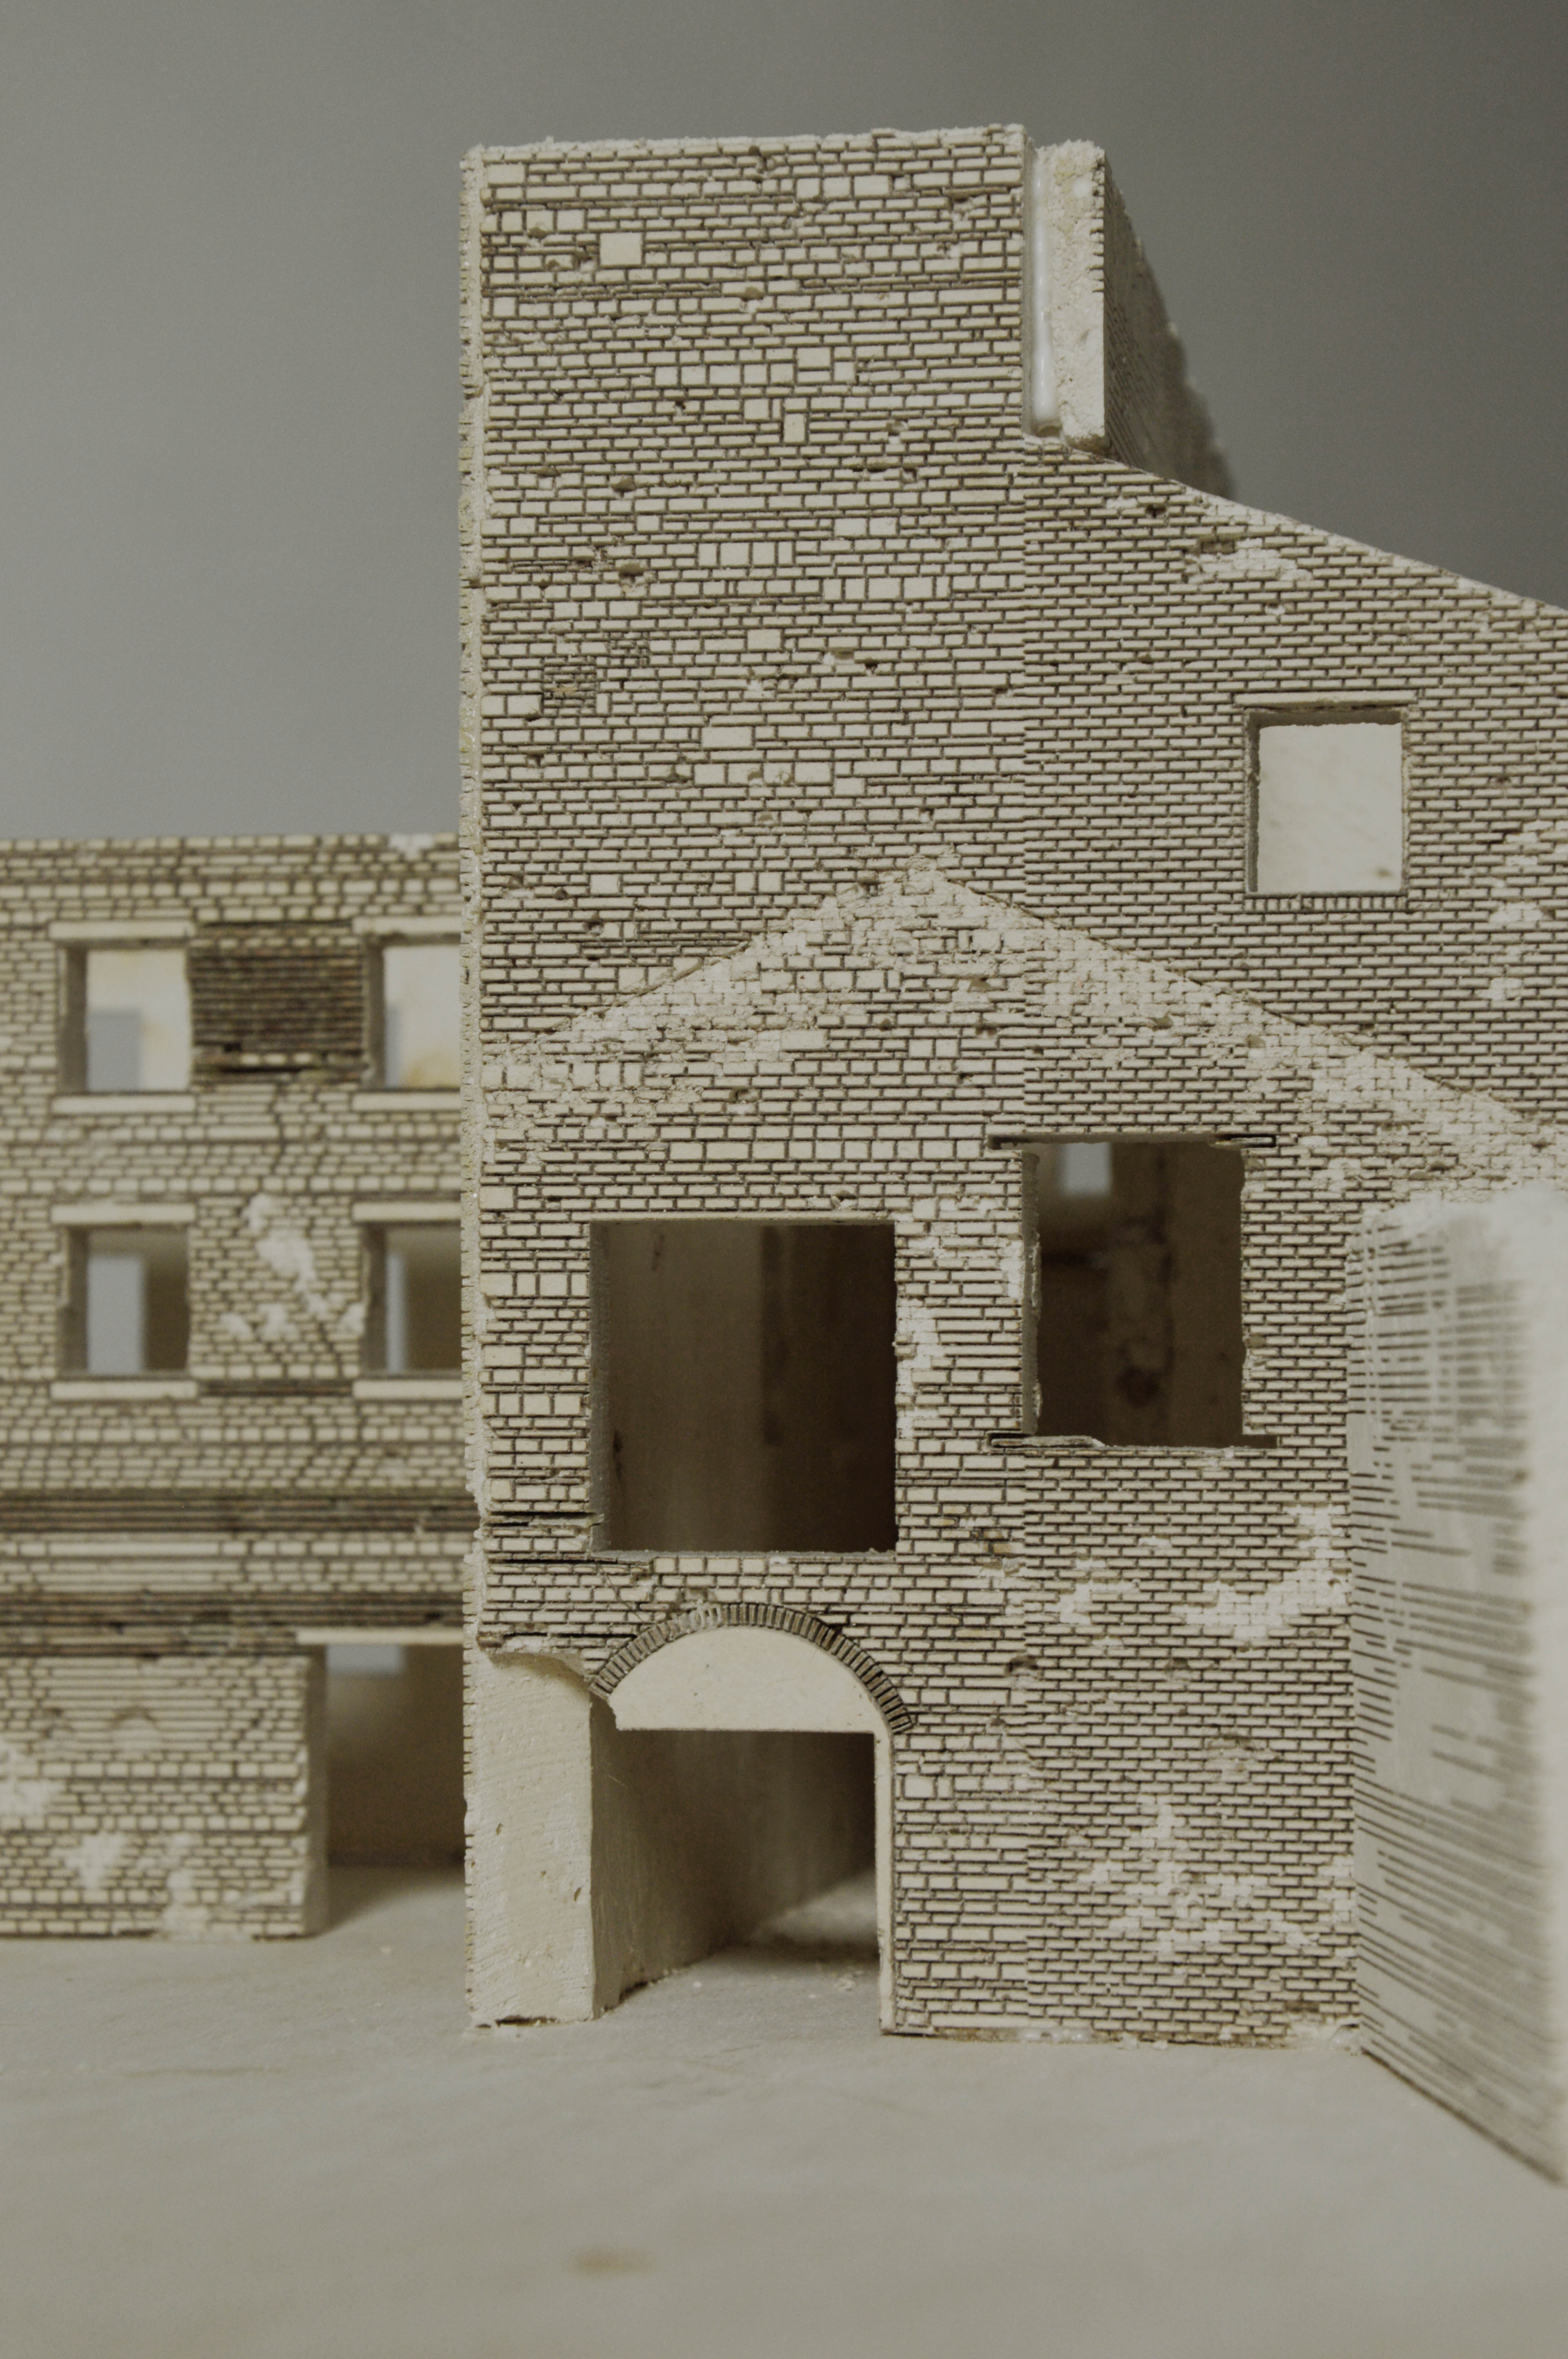
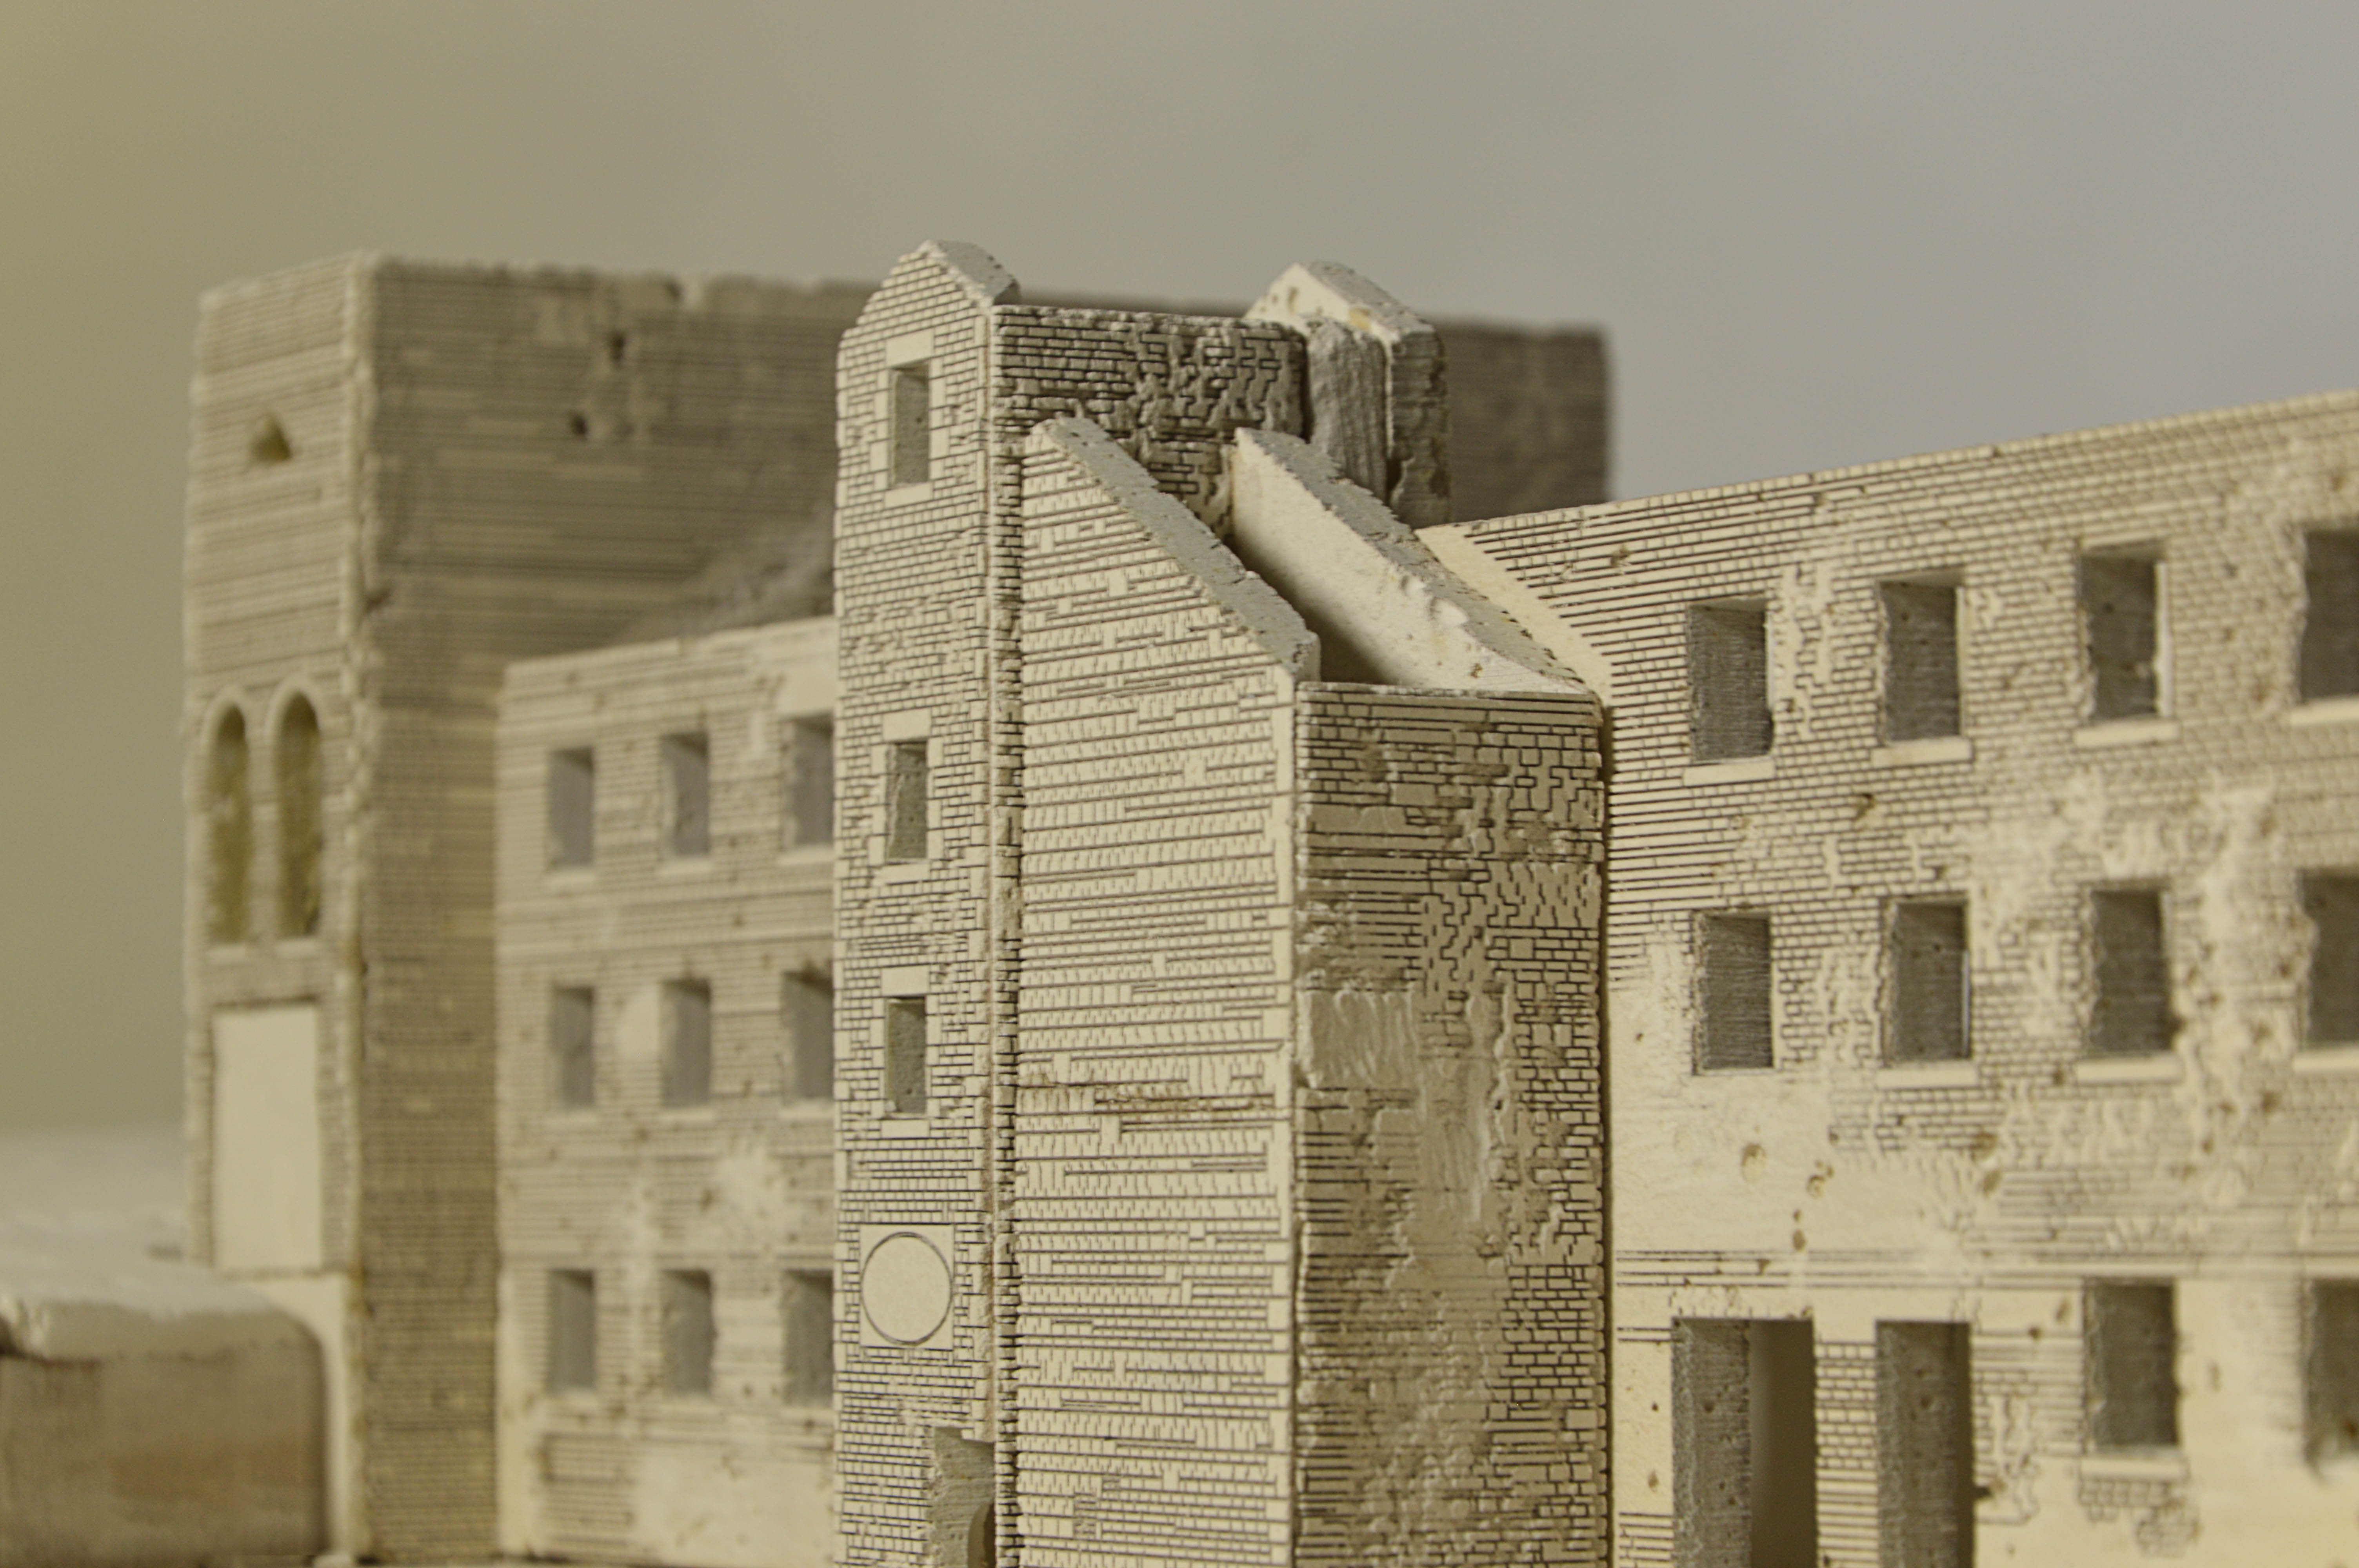
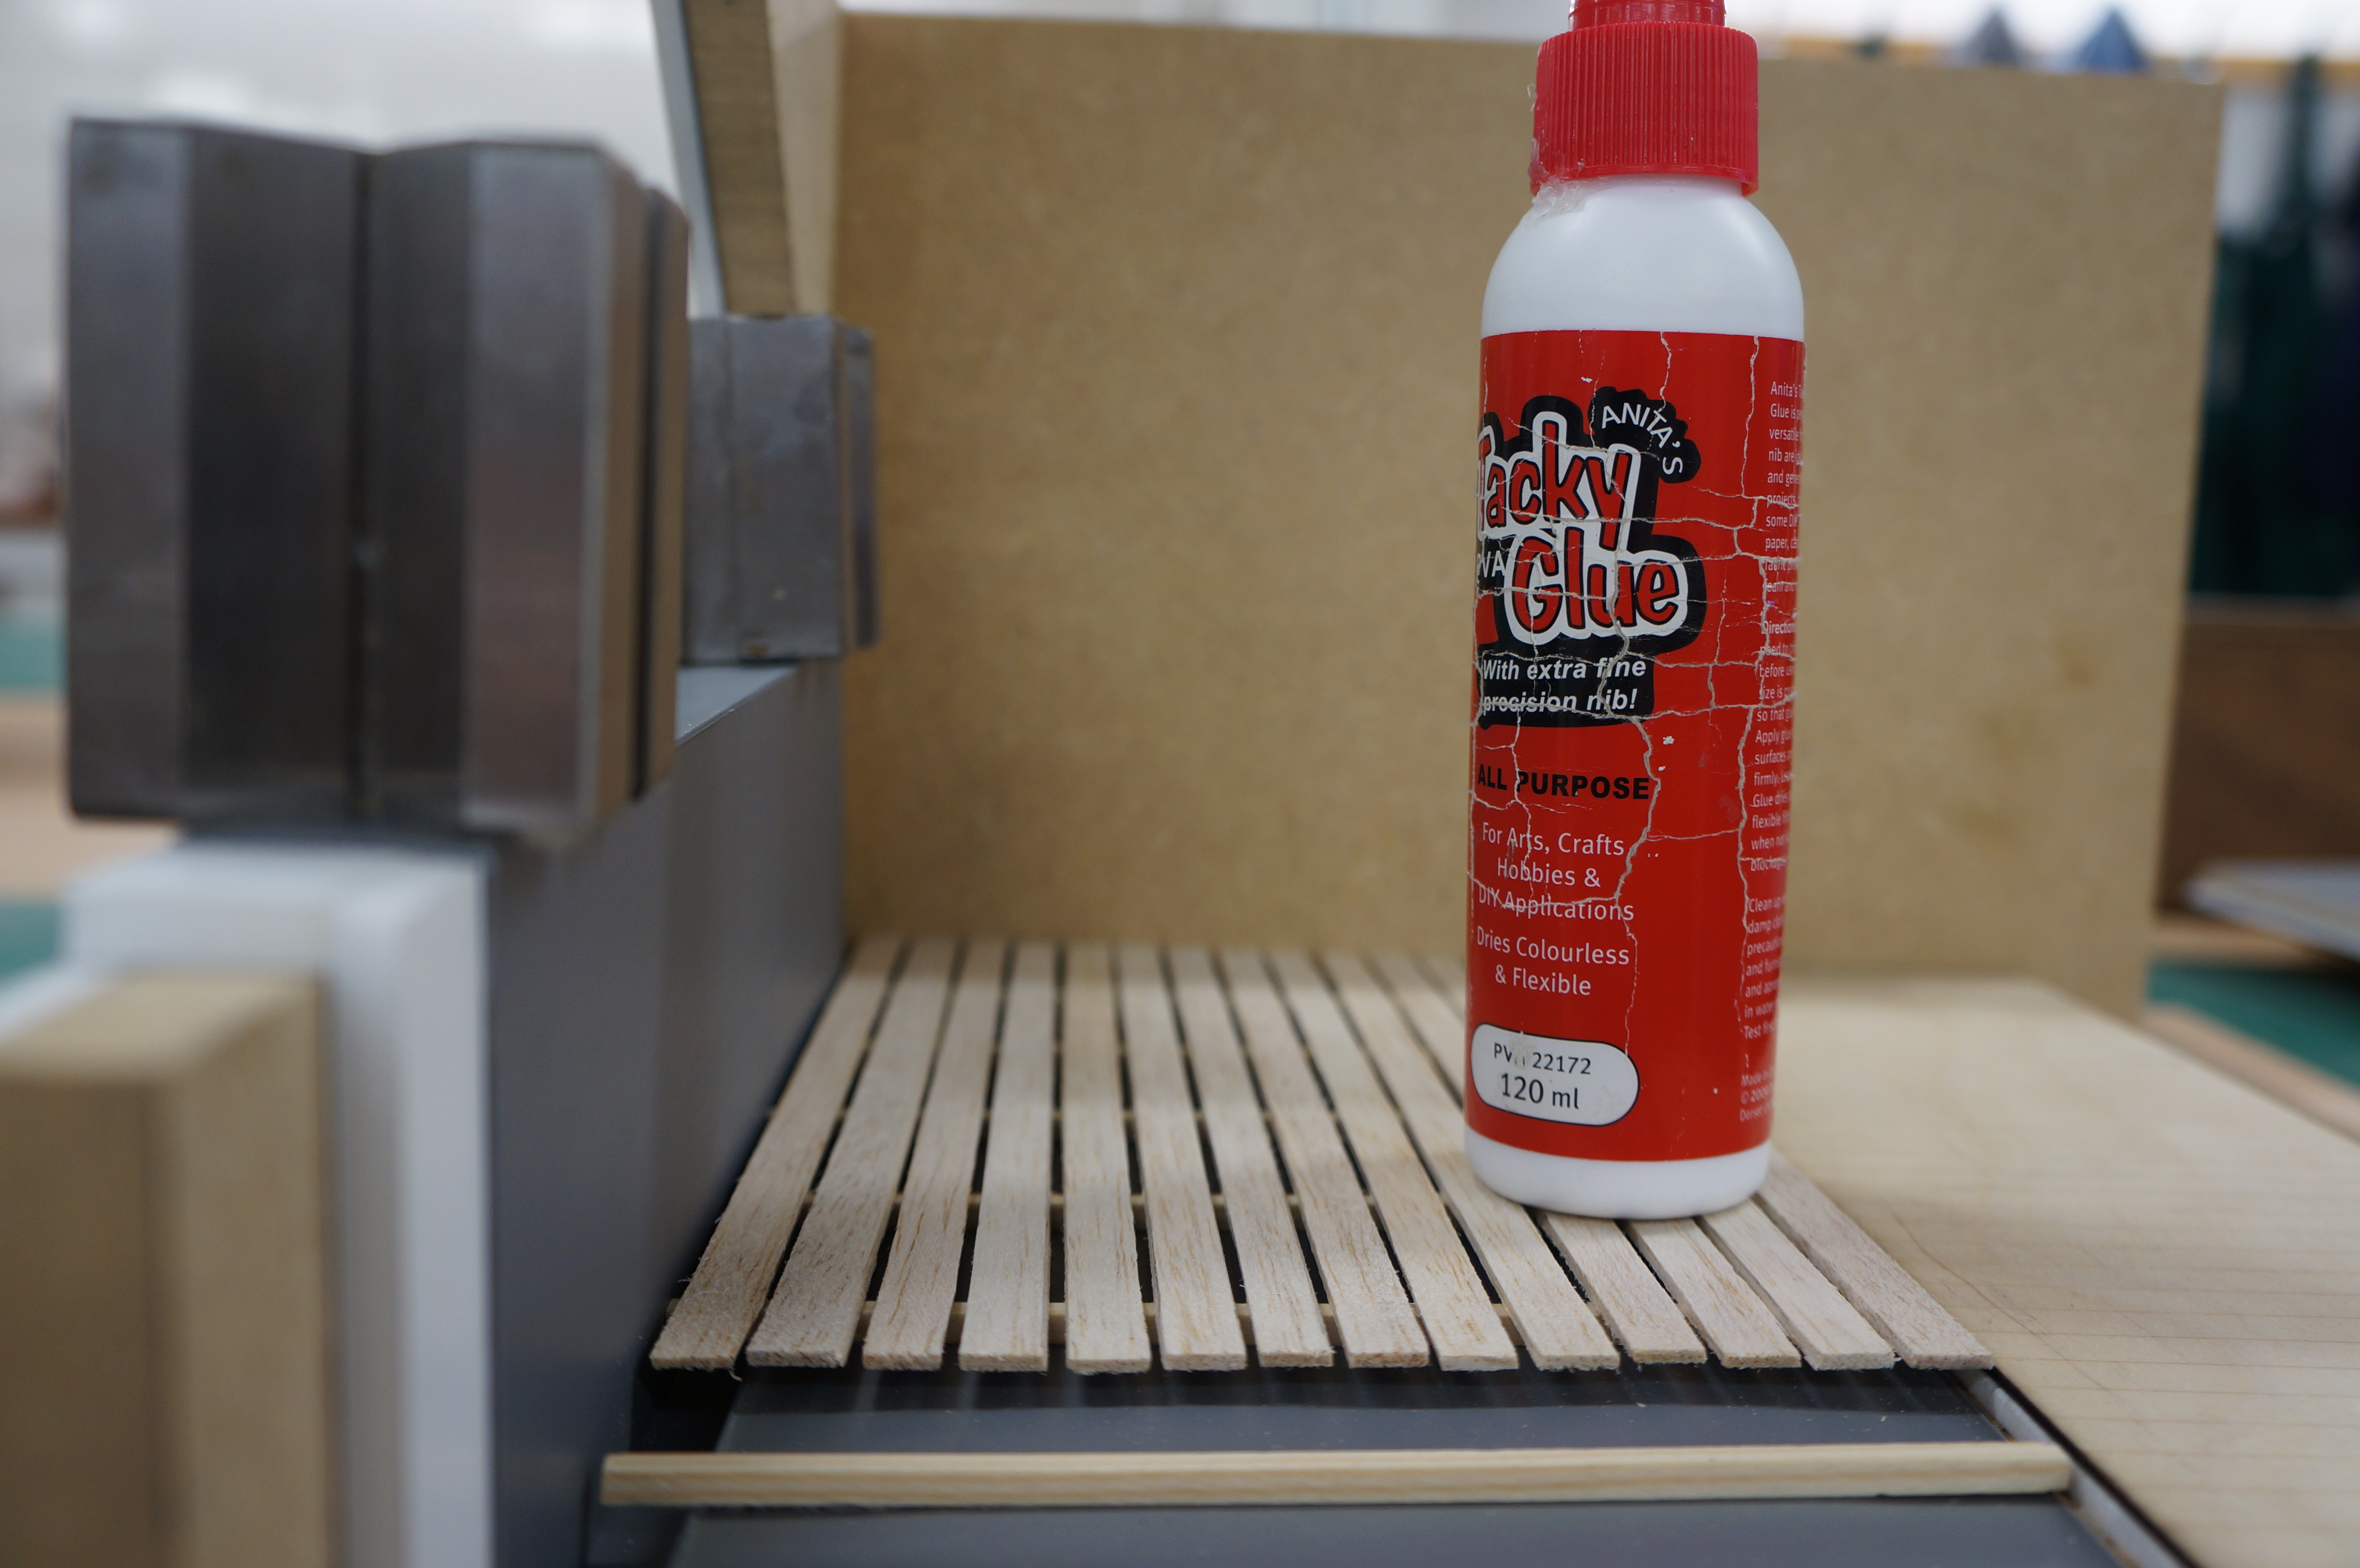
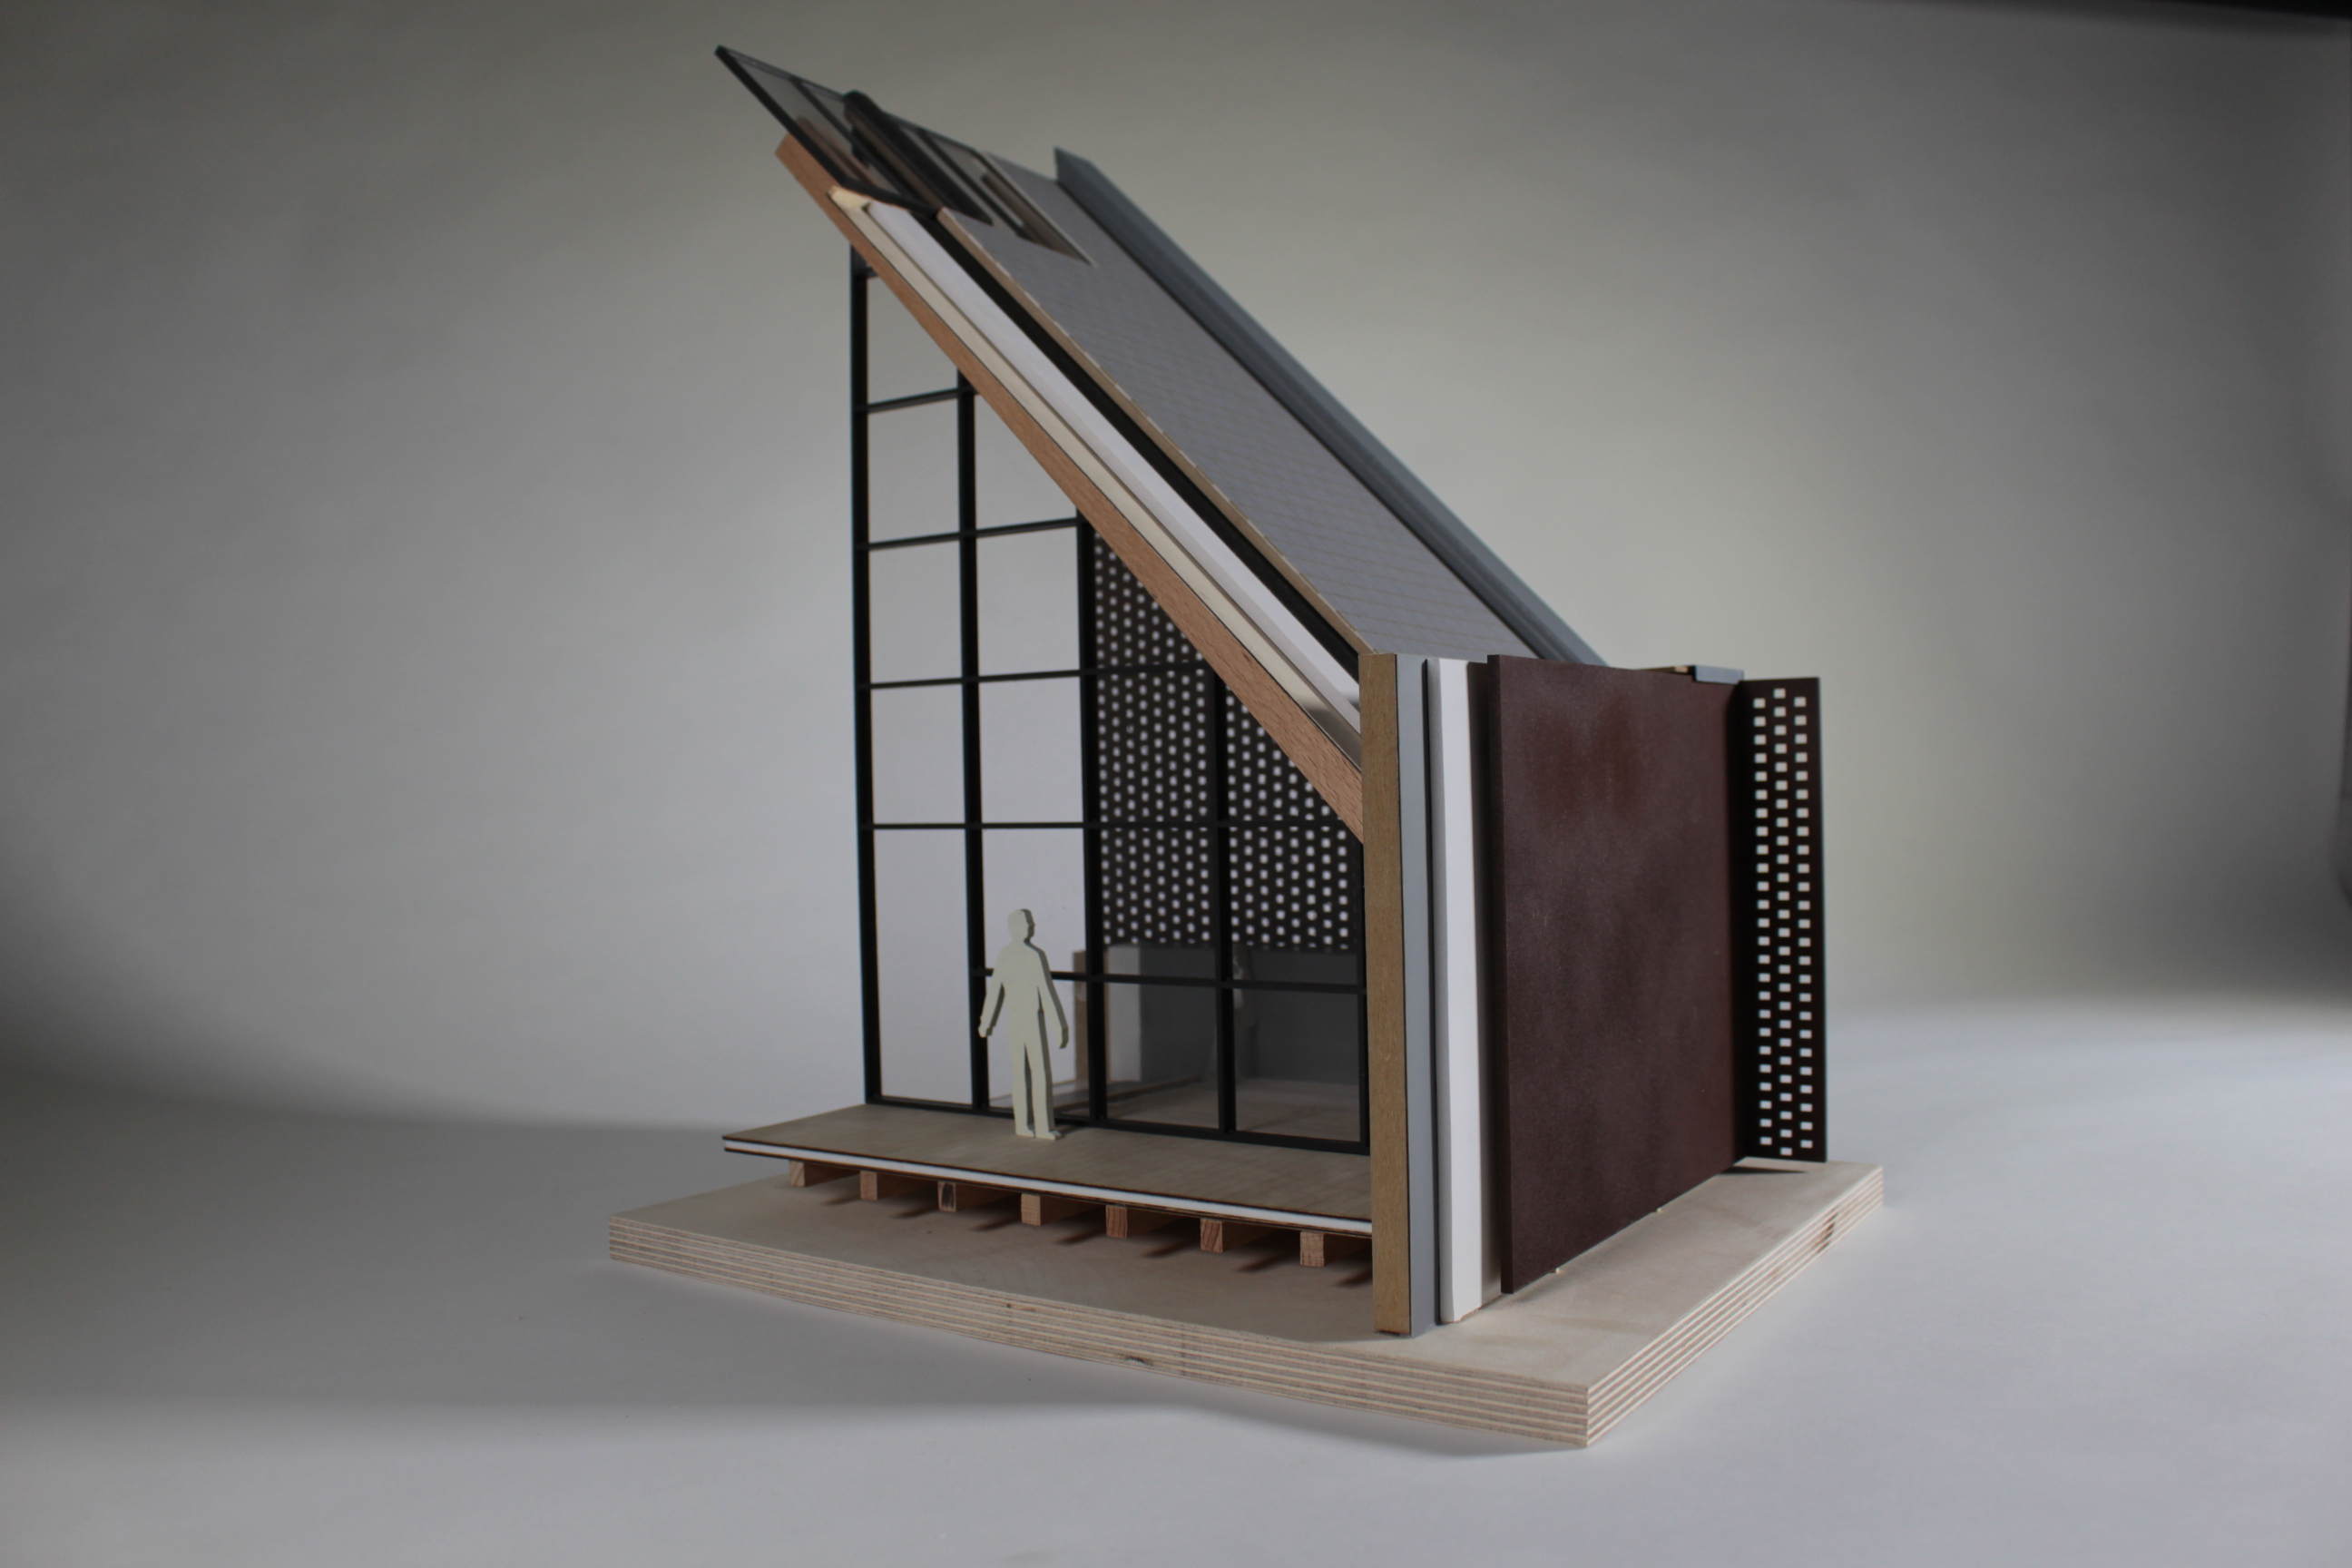
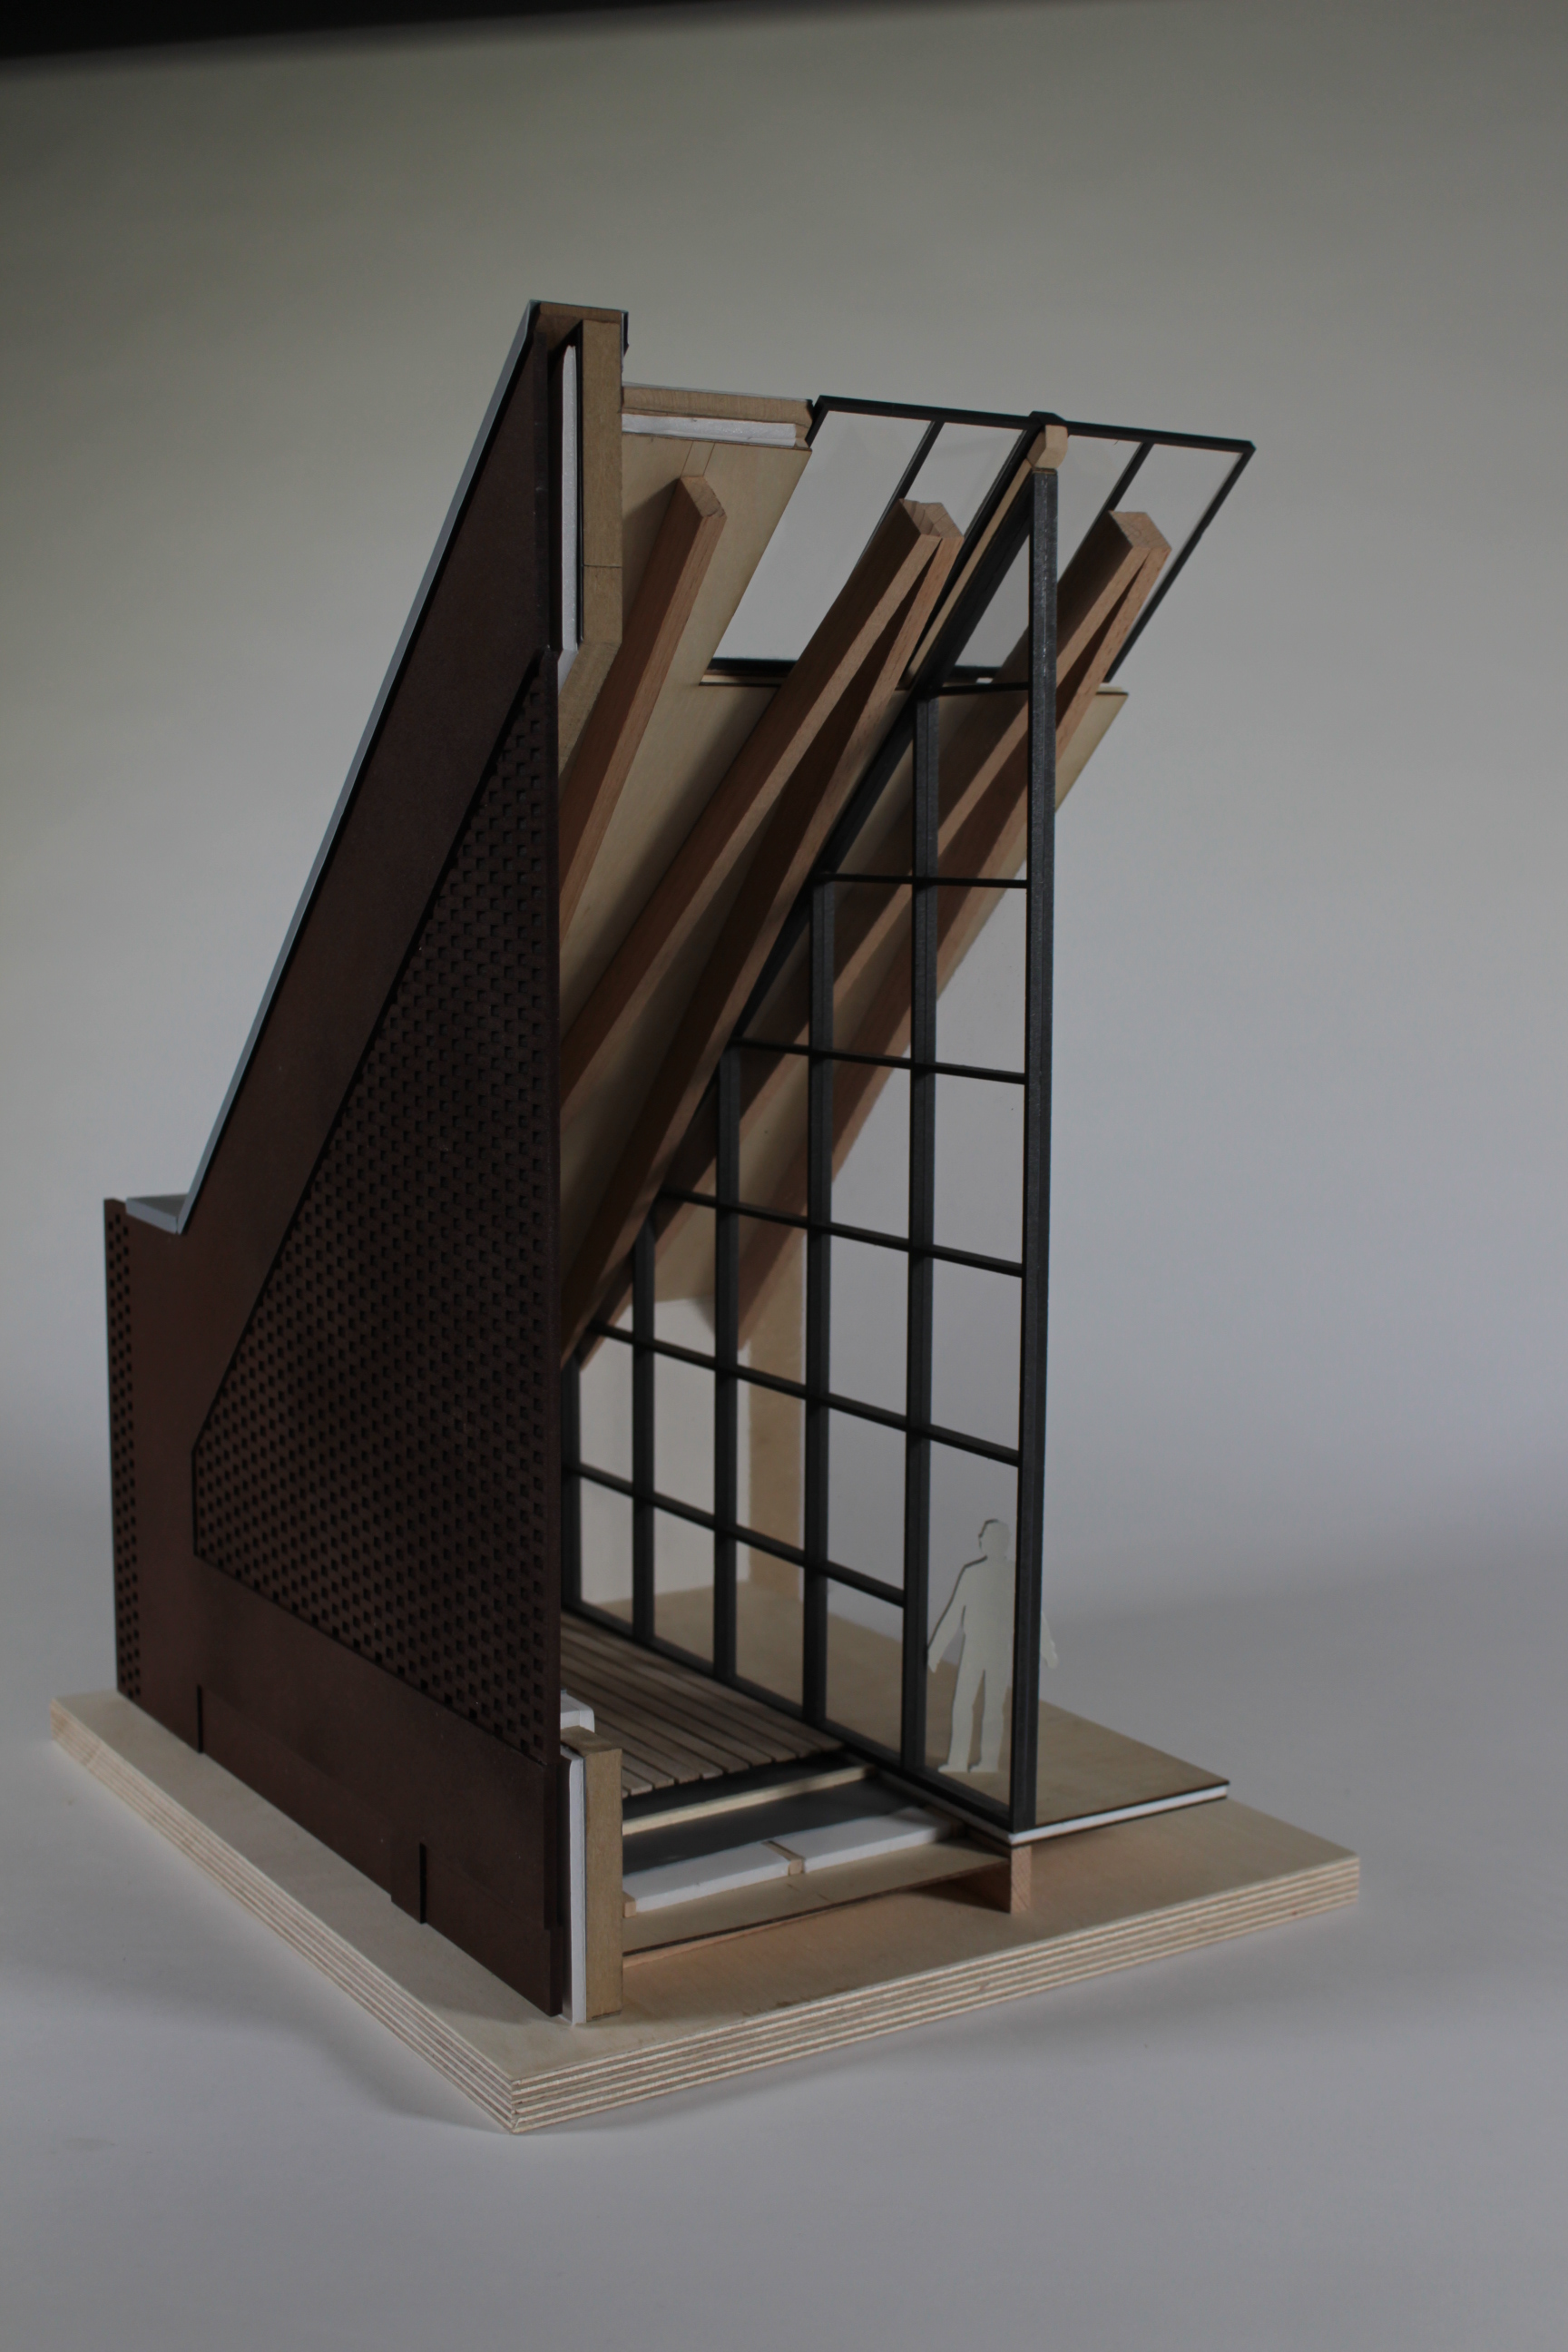
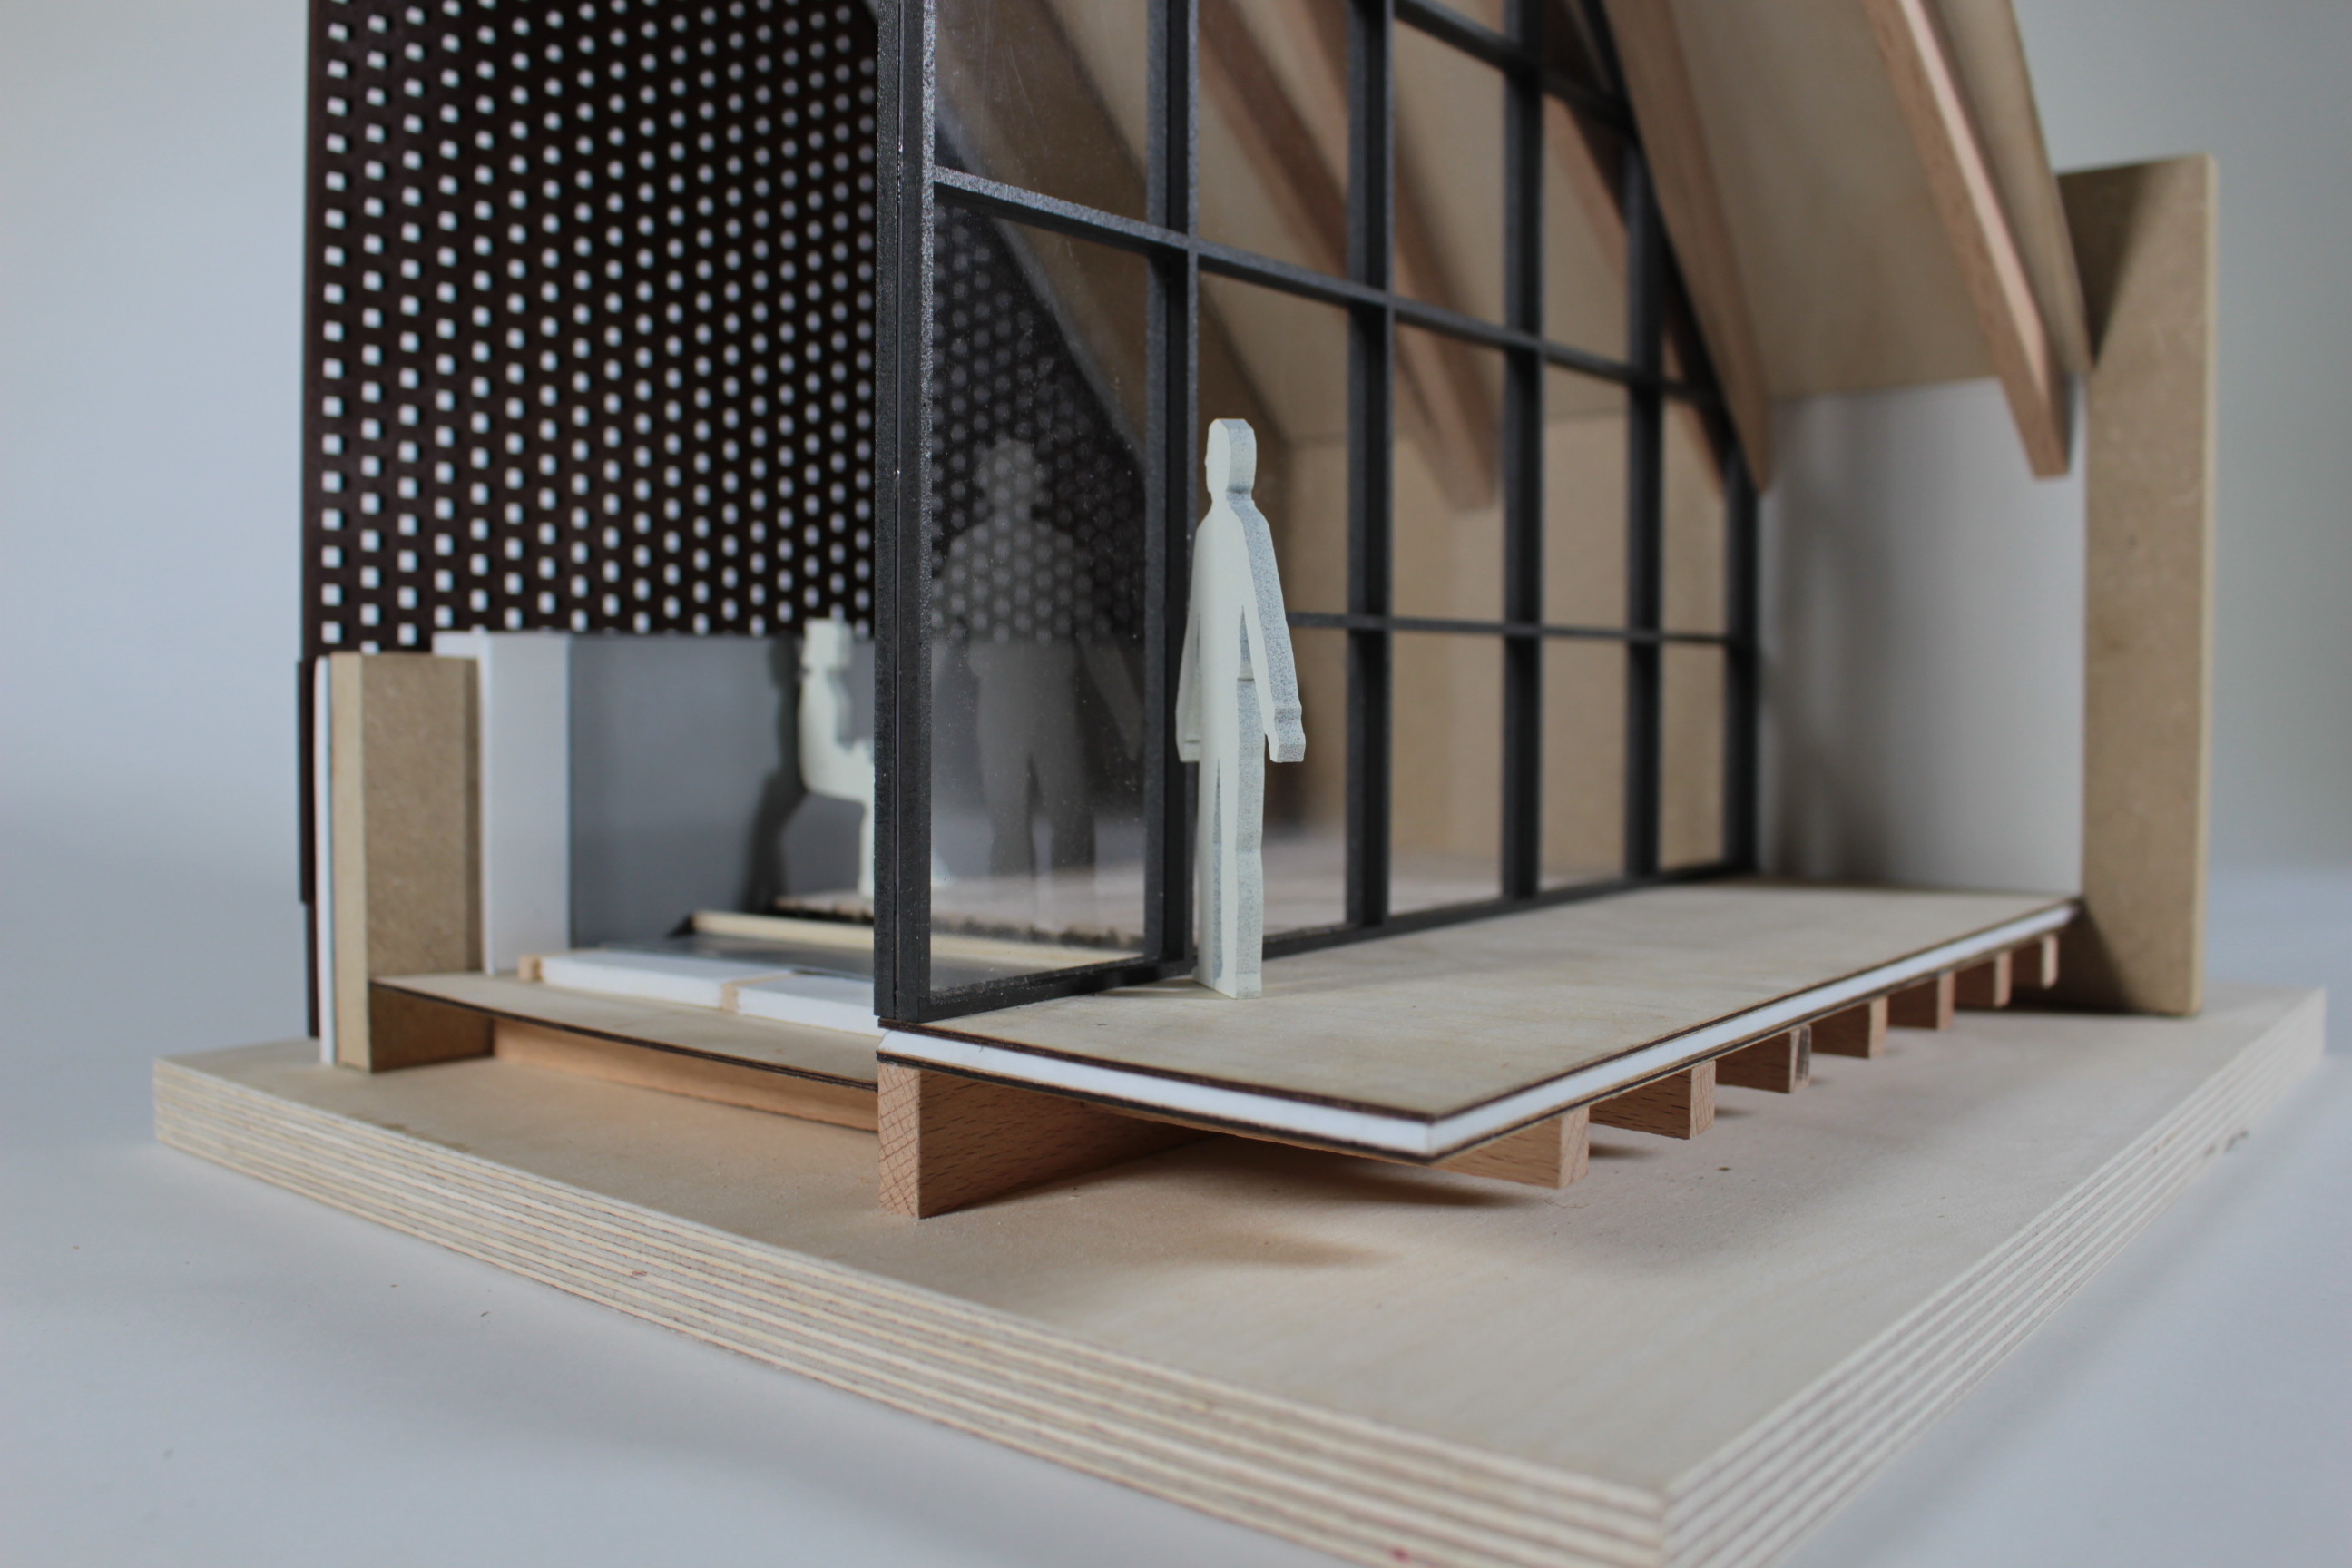
1.100 model (15)

1:50 Model

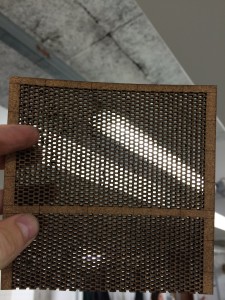
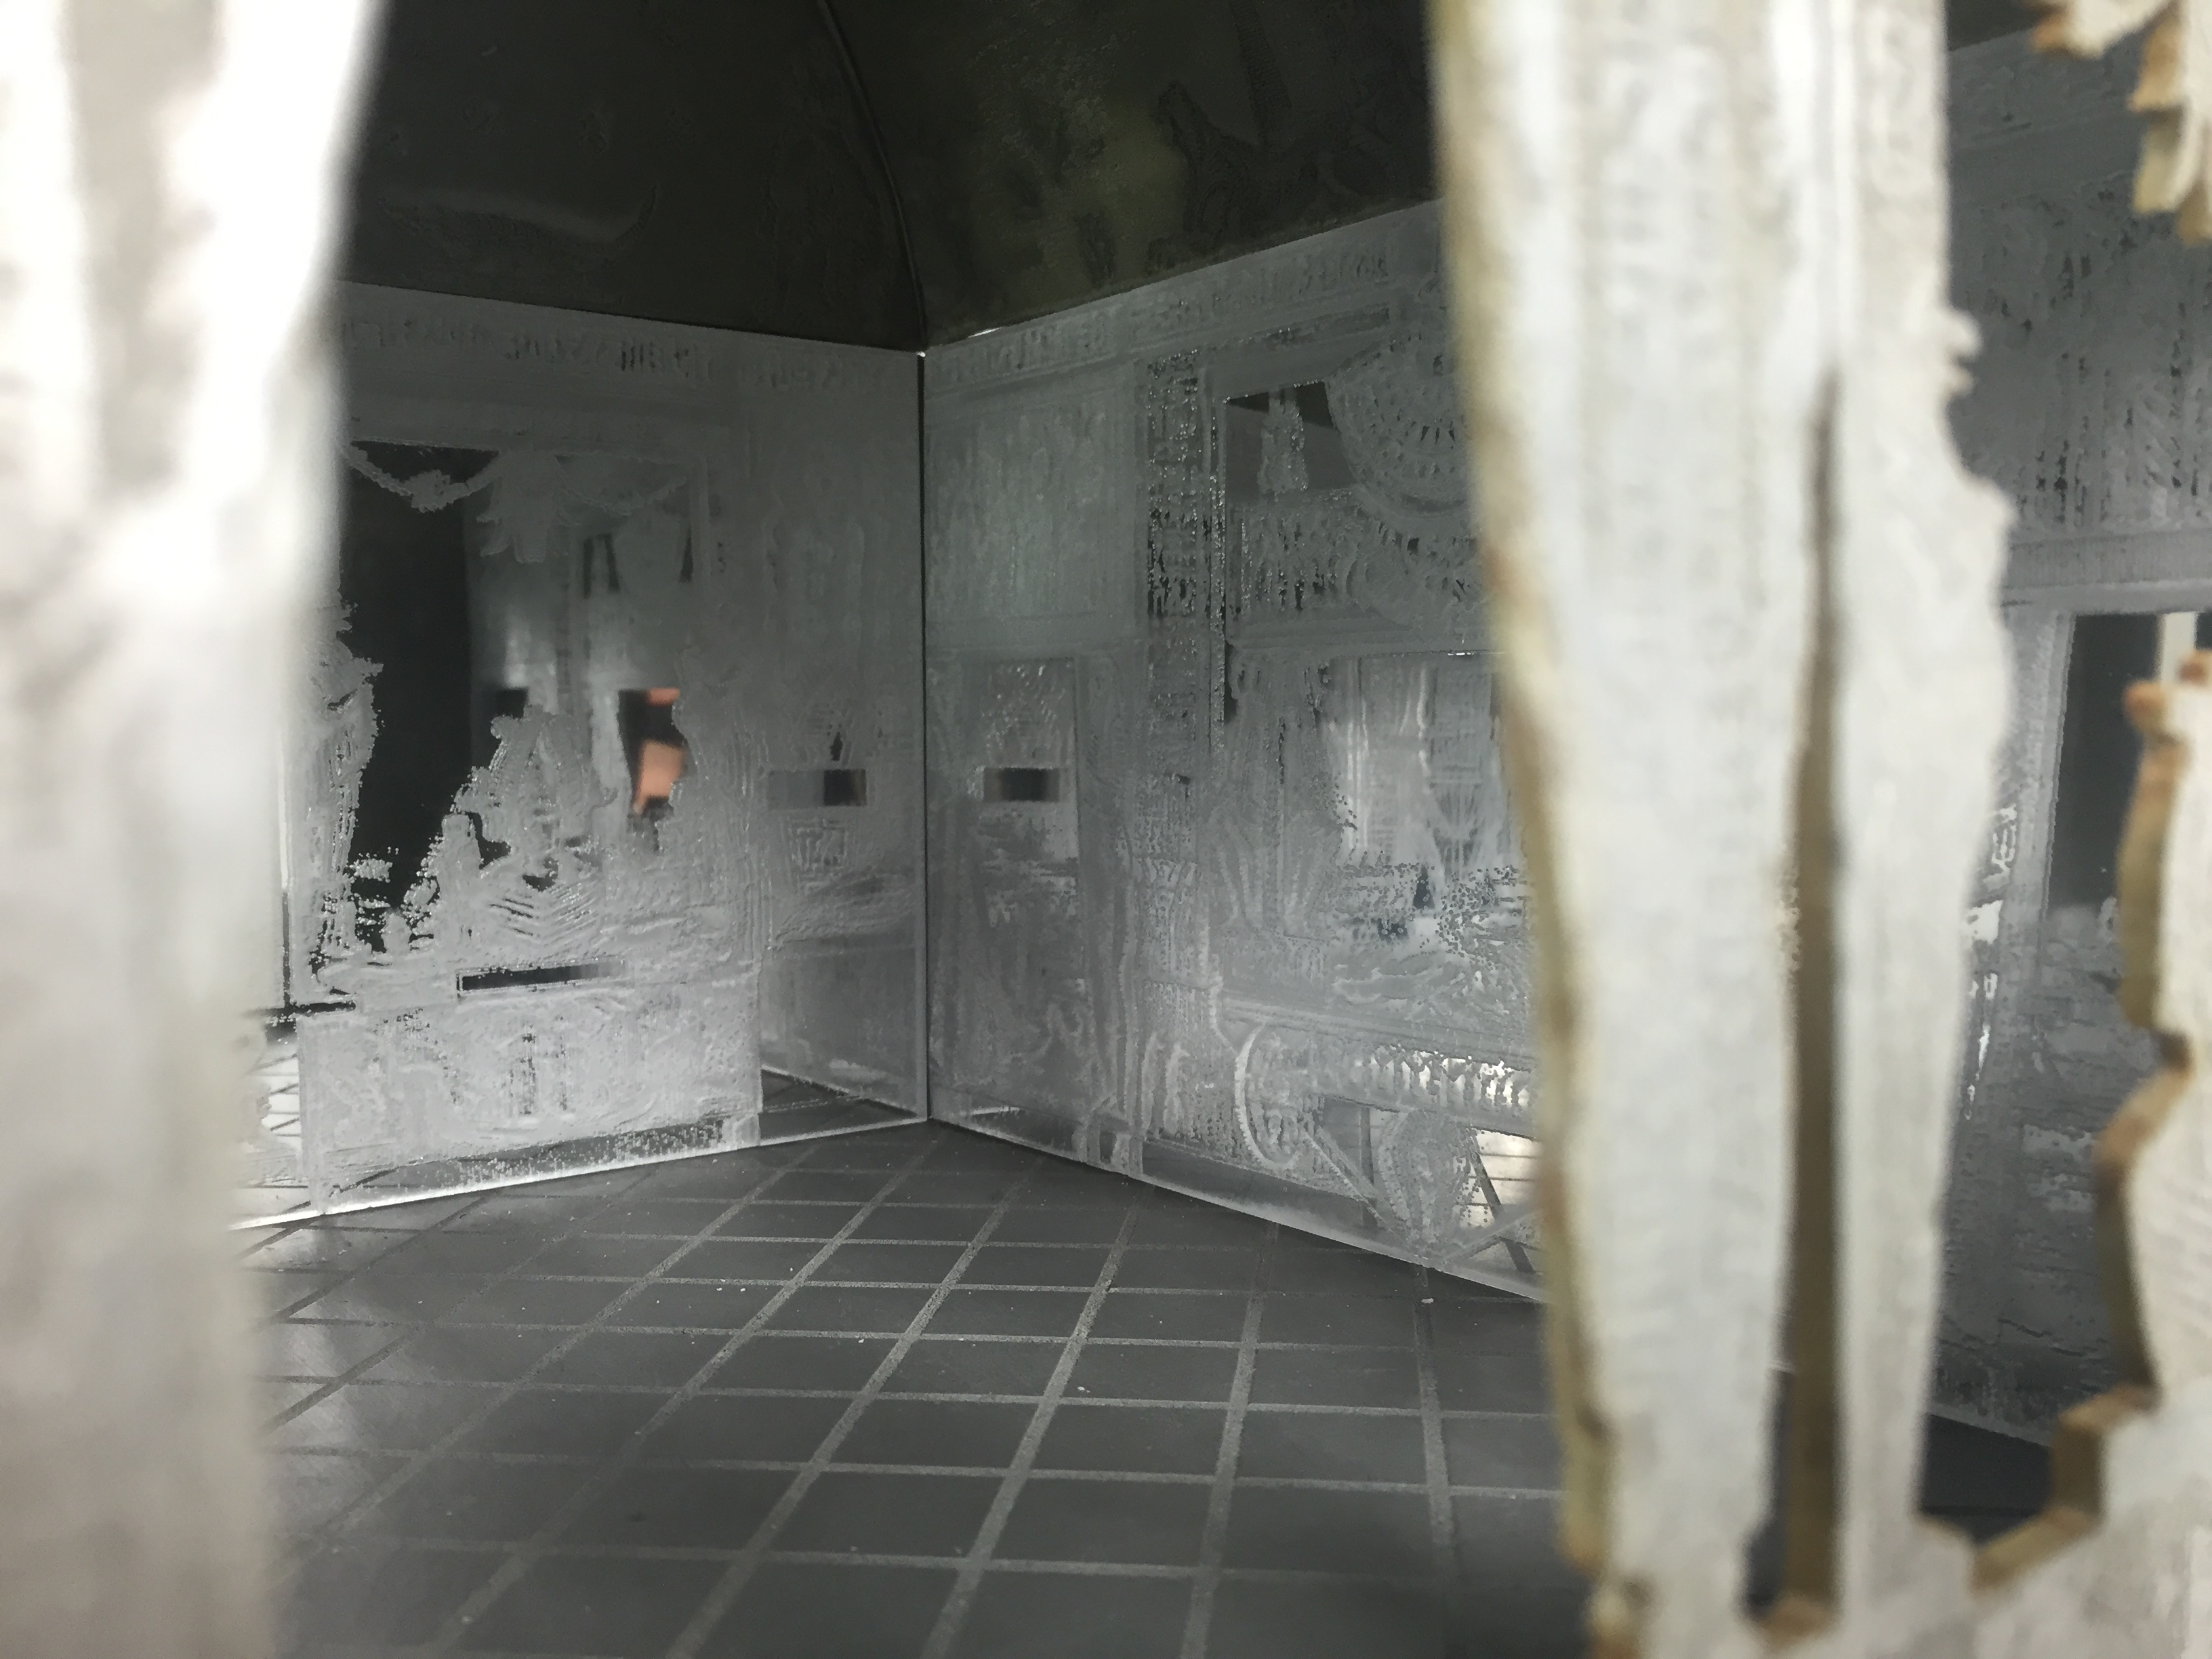
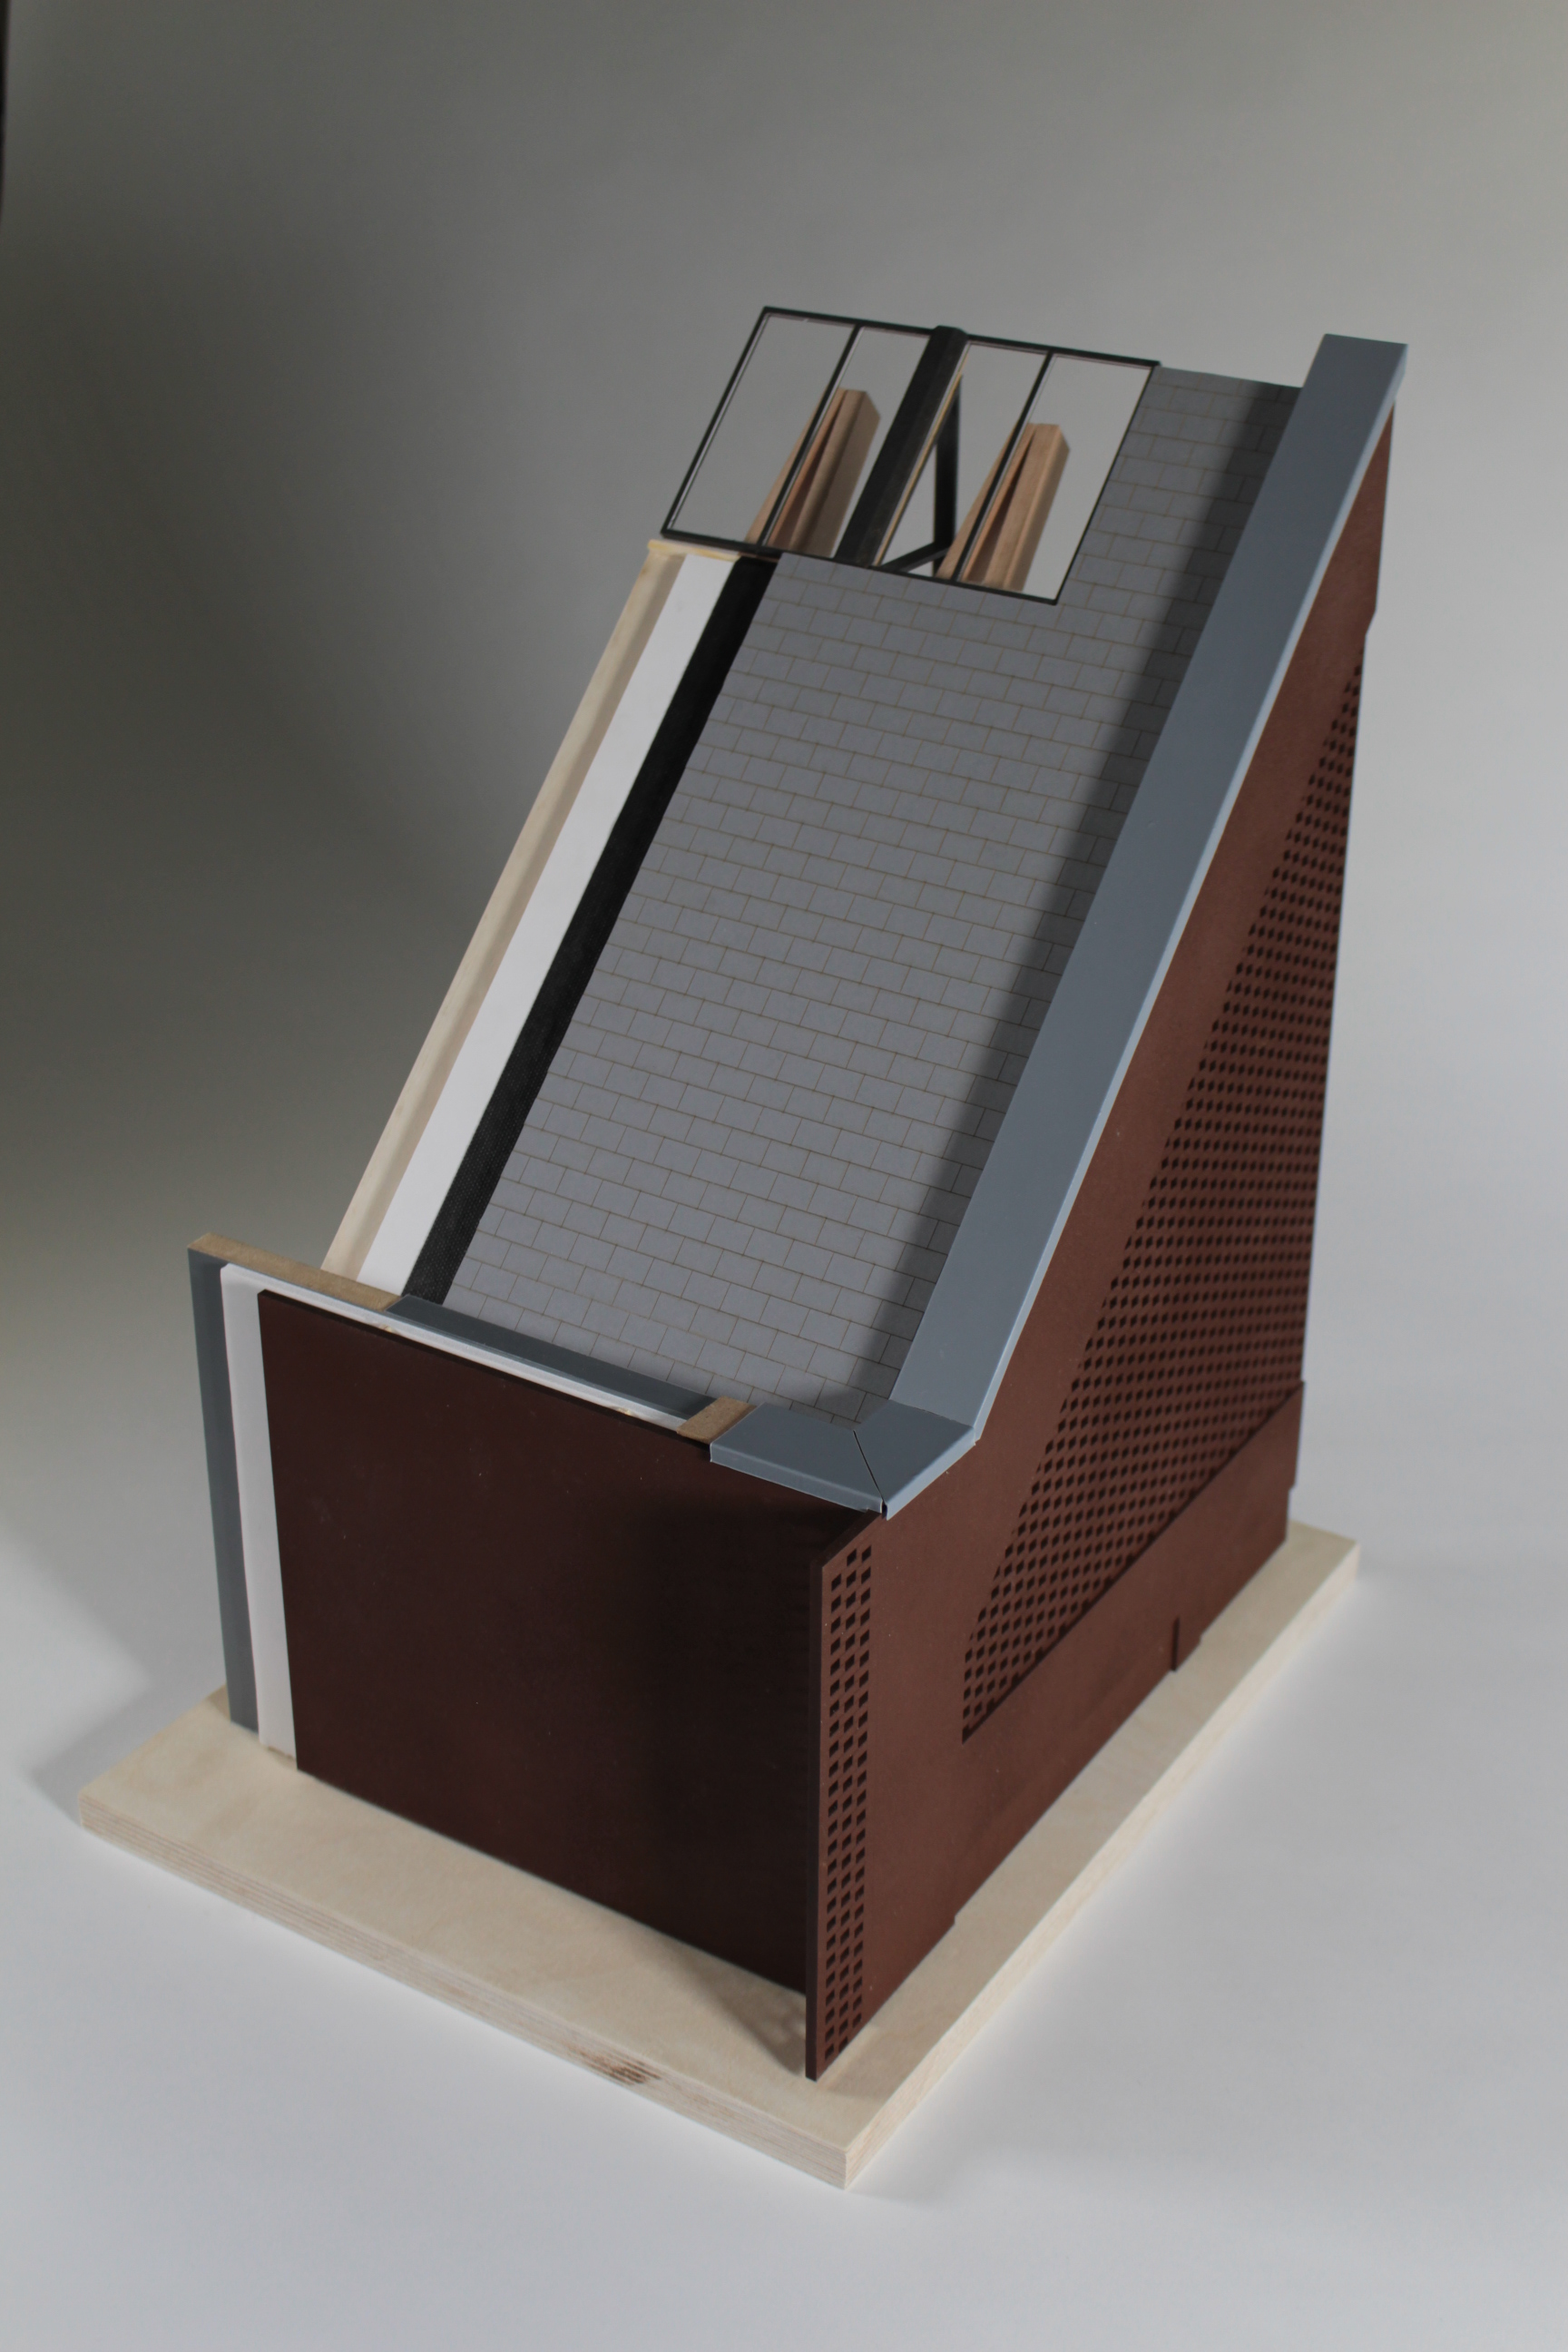
In order to gain a practical understanding of the atmosphere generated by the materials reprogrammed into southern elevation’s perforated brickwork facade,a scaled 1:50 model was constructed. The aim of the model was to investigate the internal light qualities predominantly, to ensure that the transitional space could not be deemed unwelcoming.

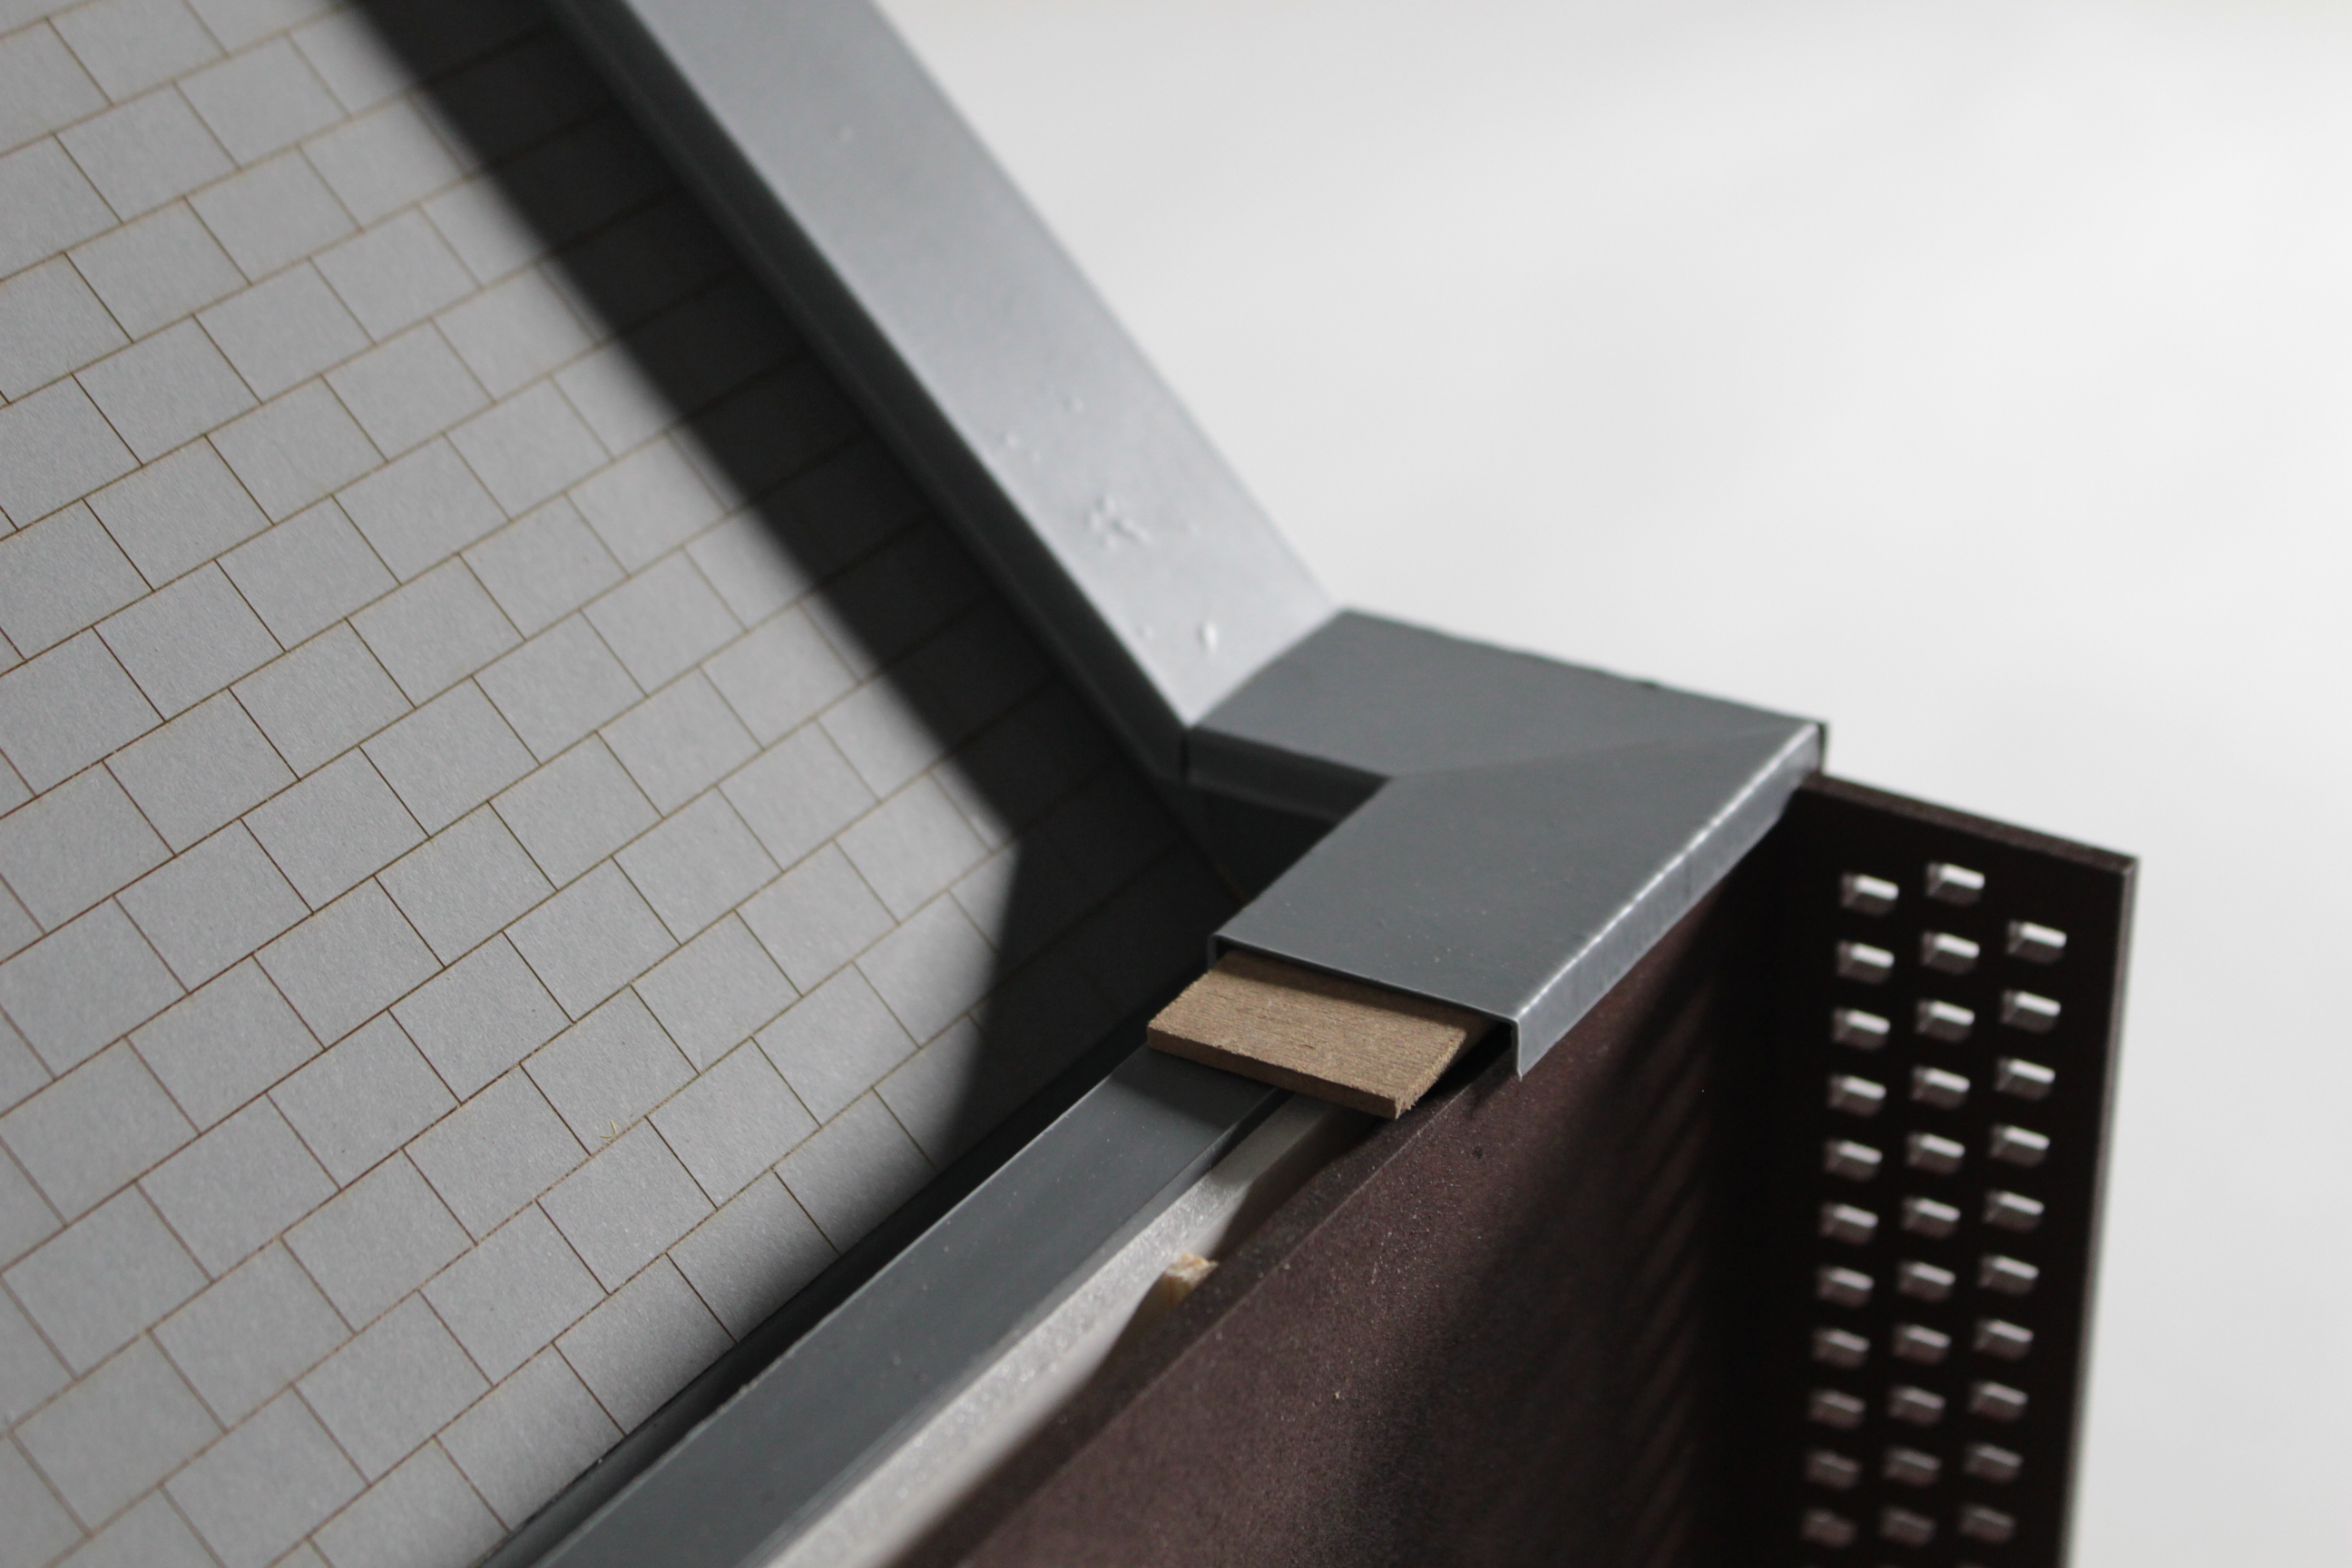
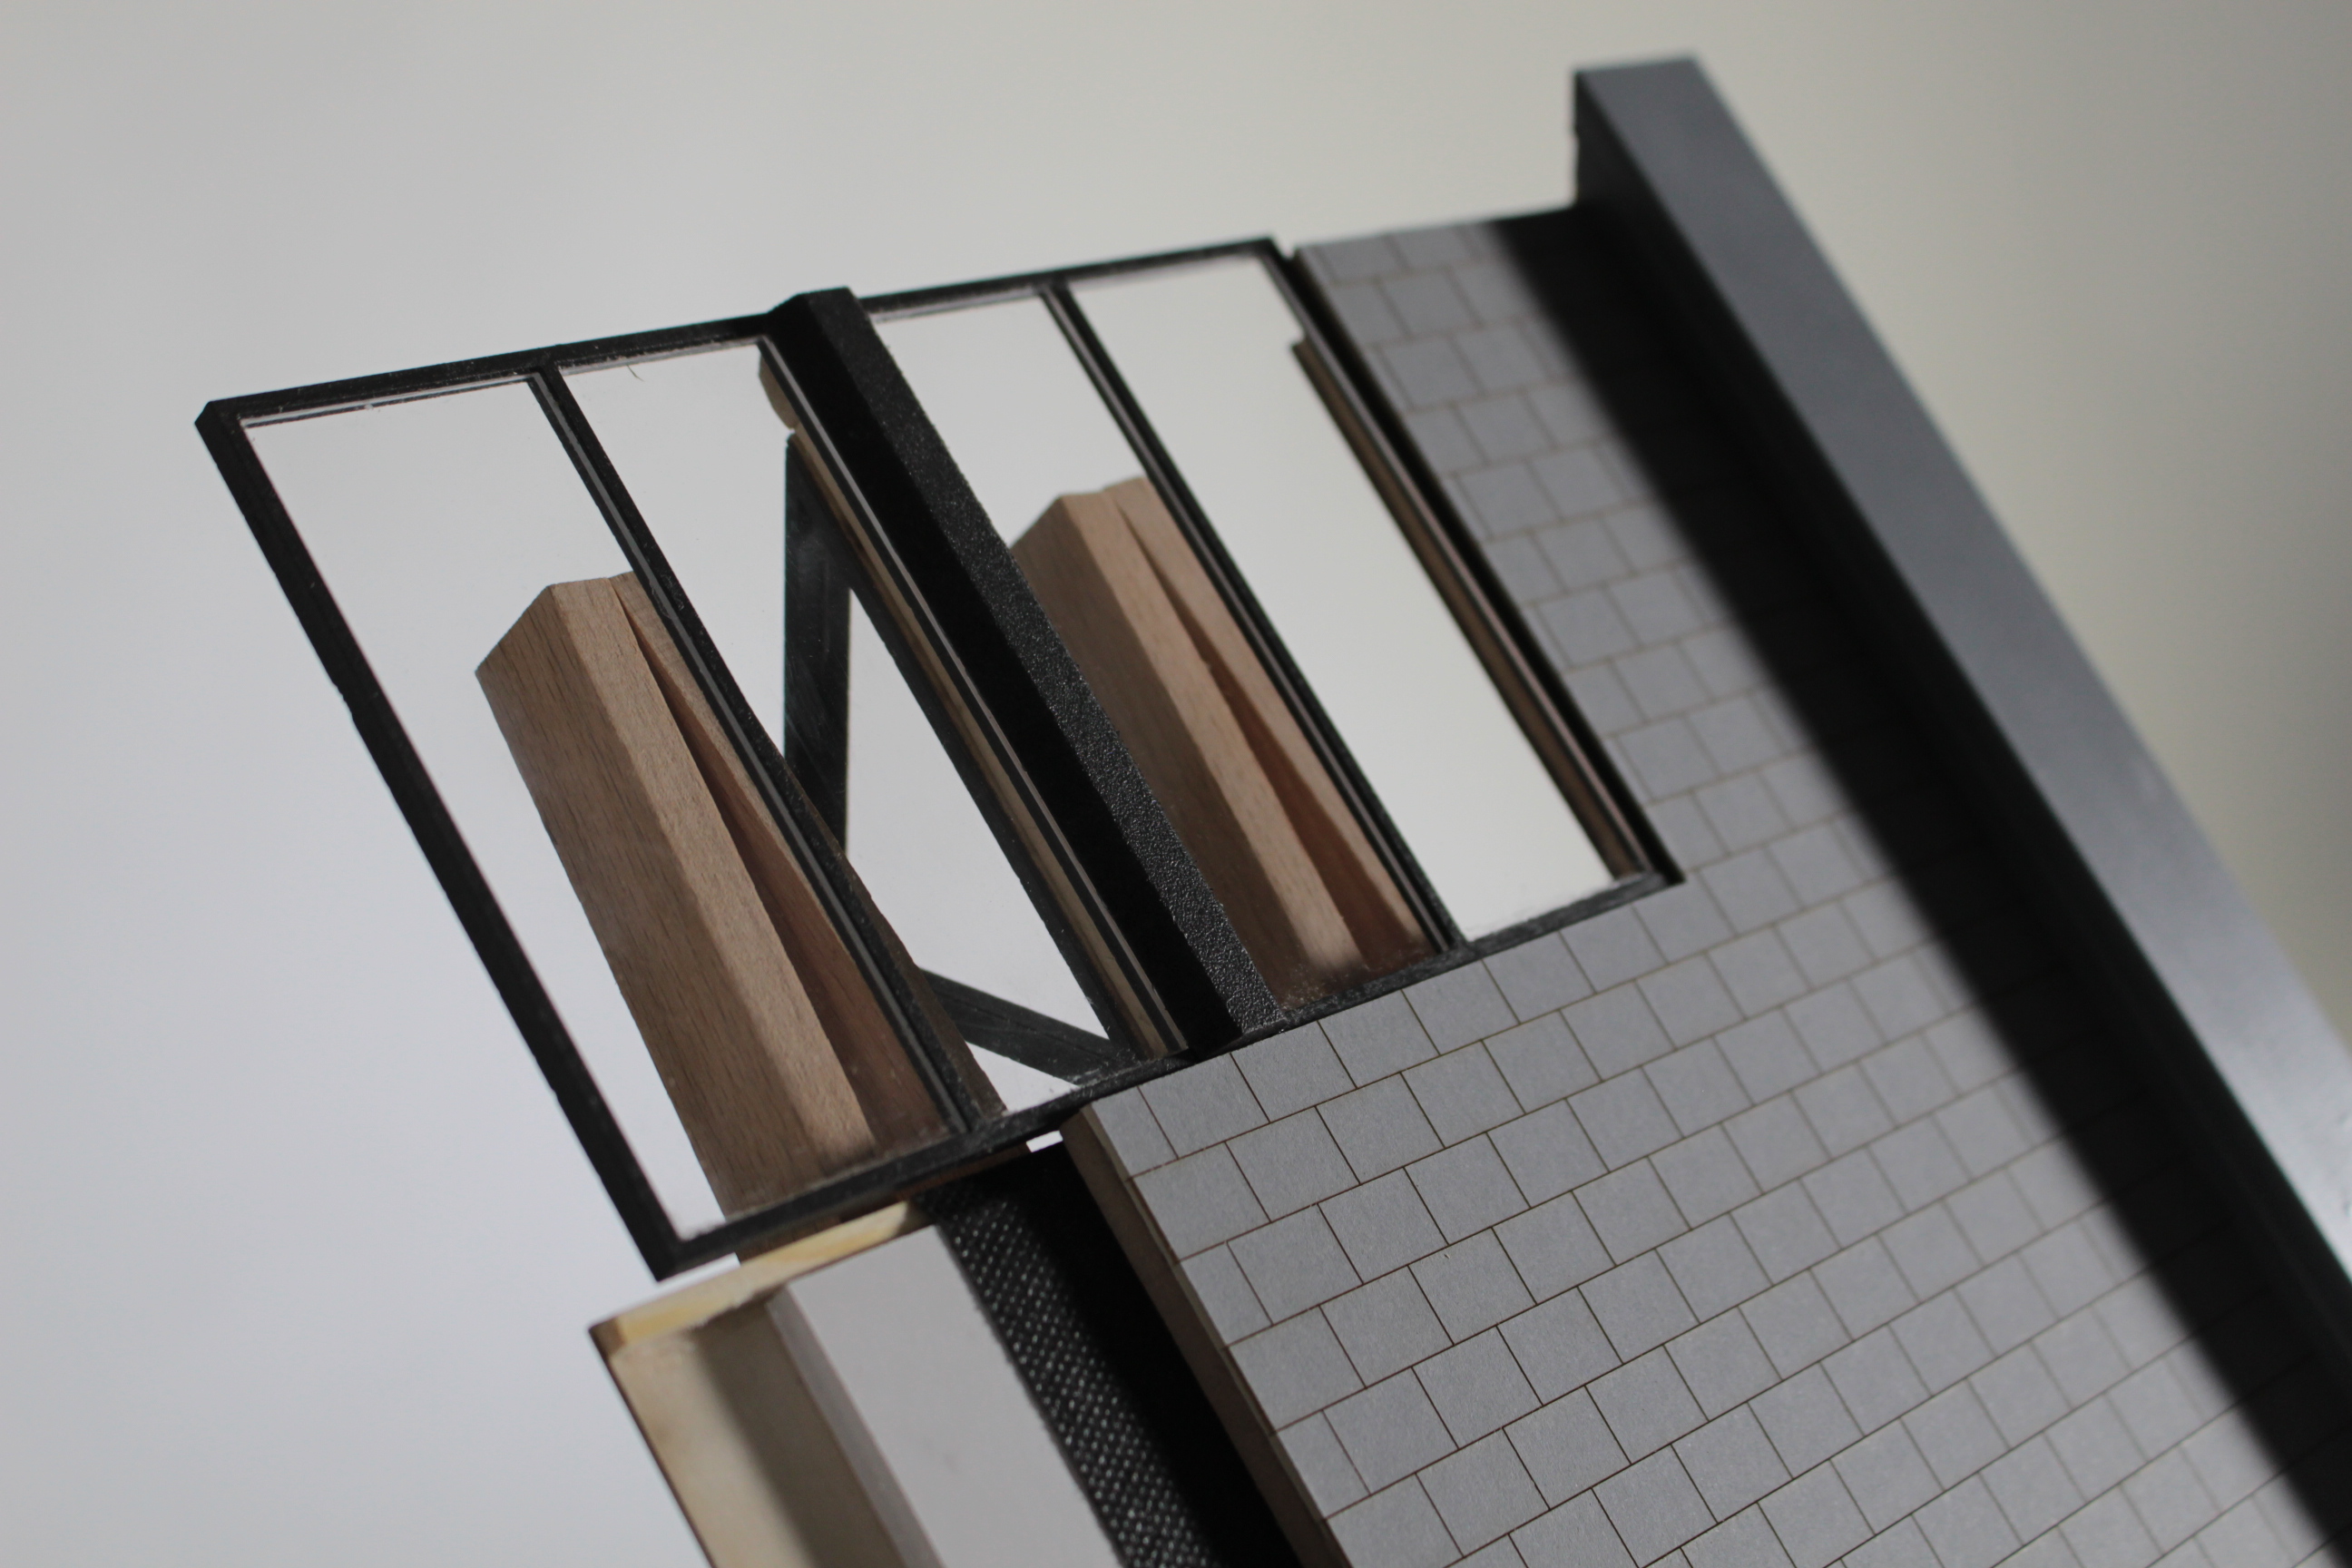
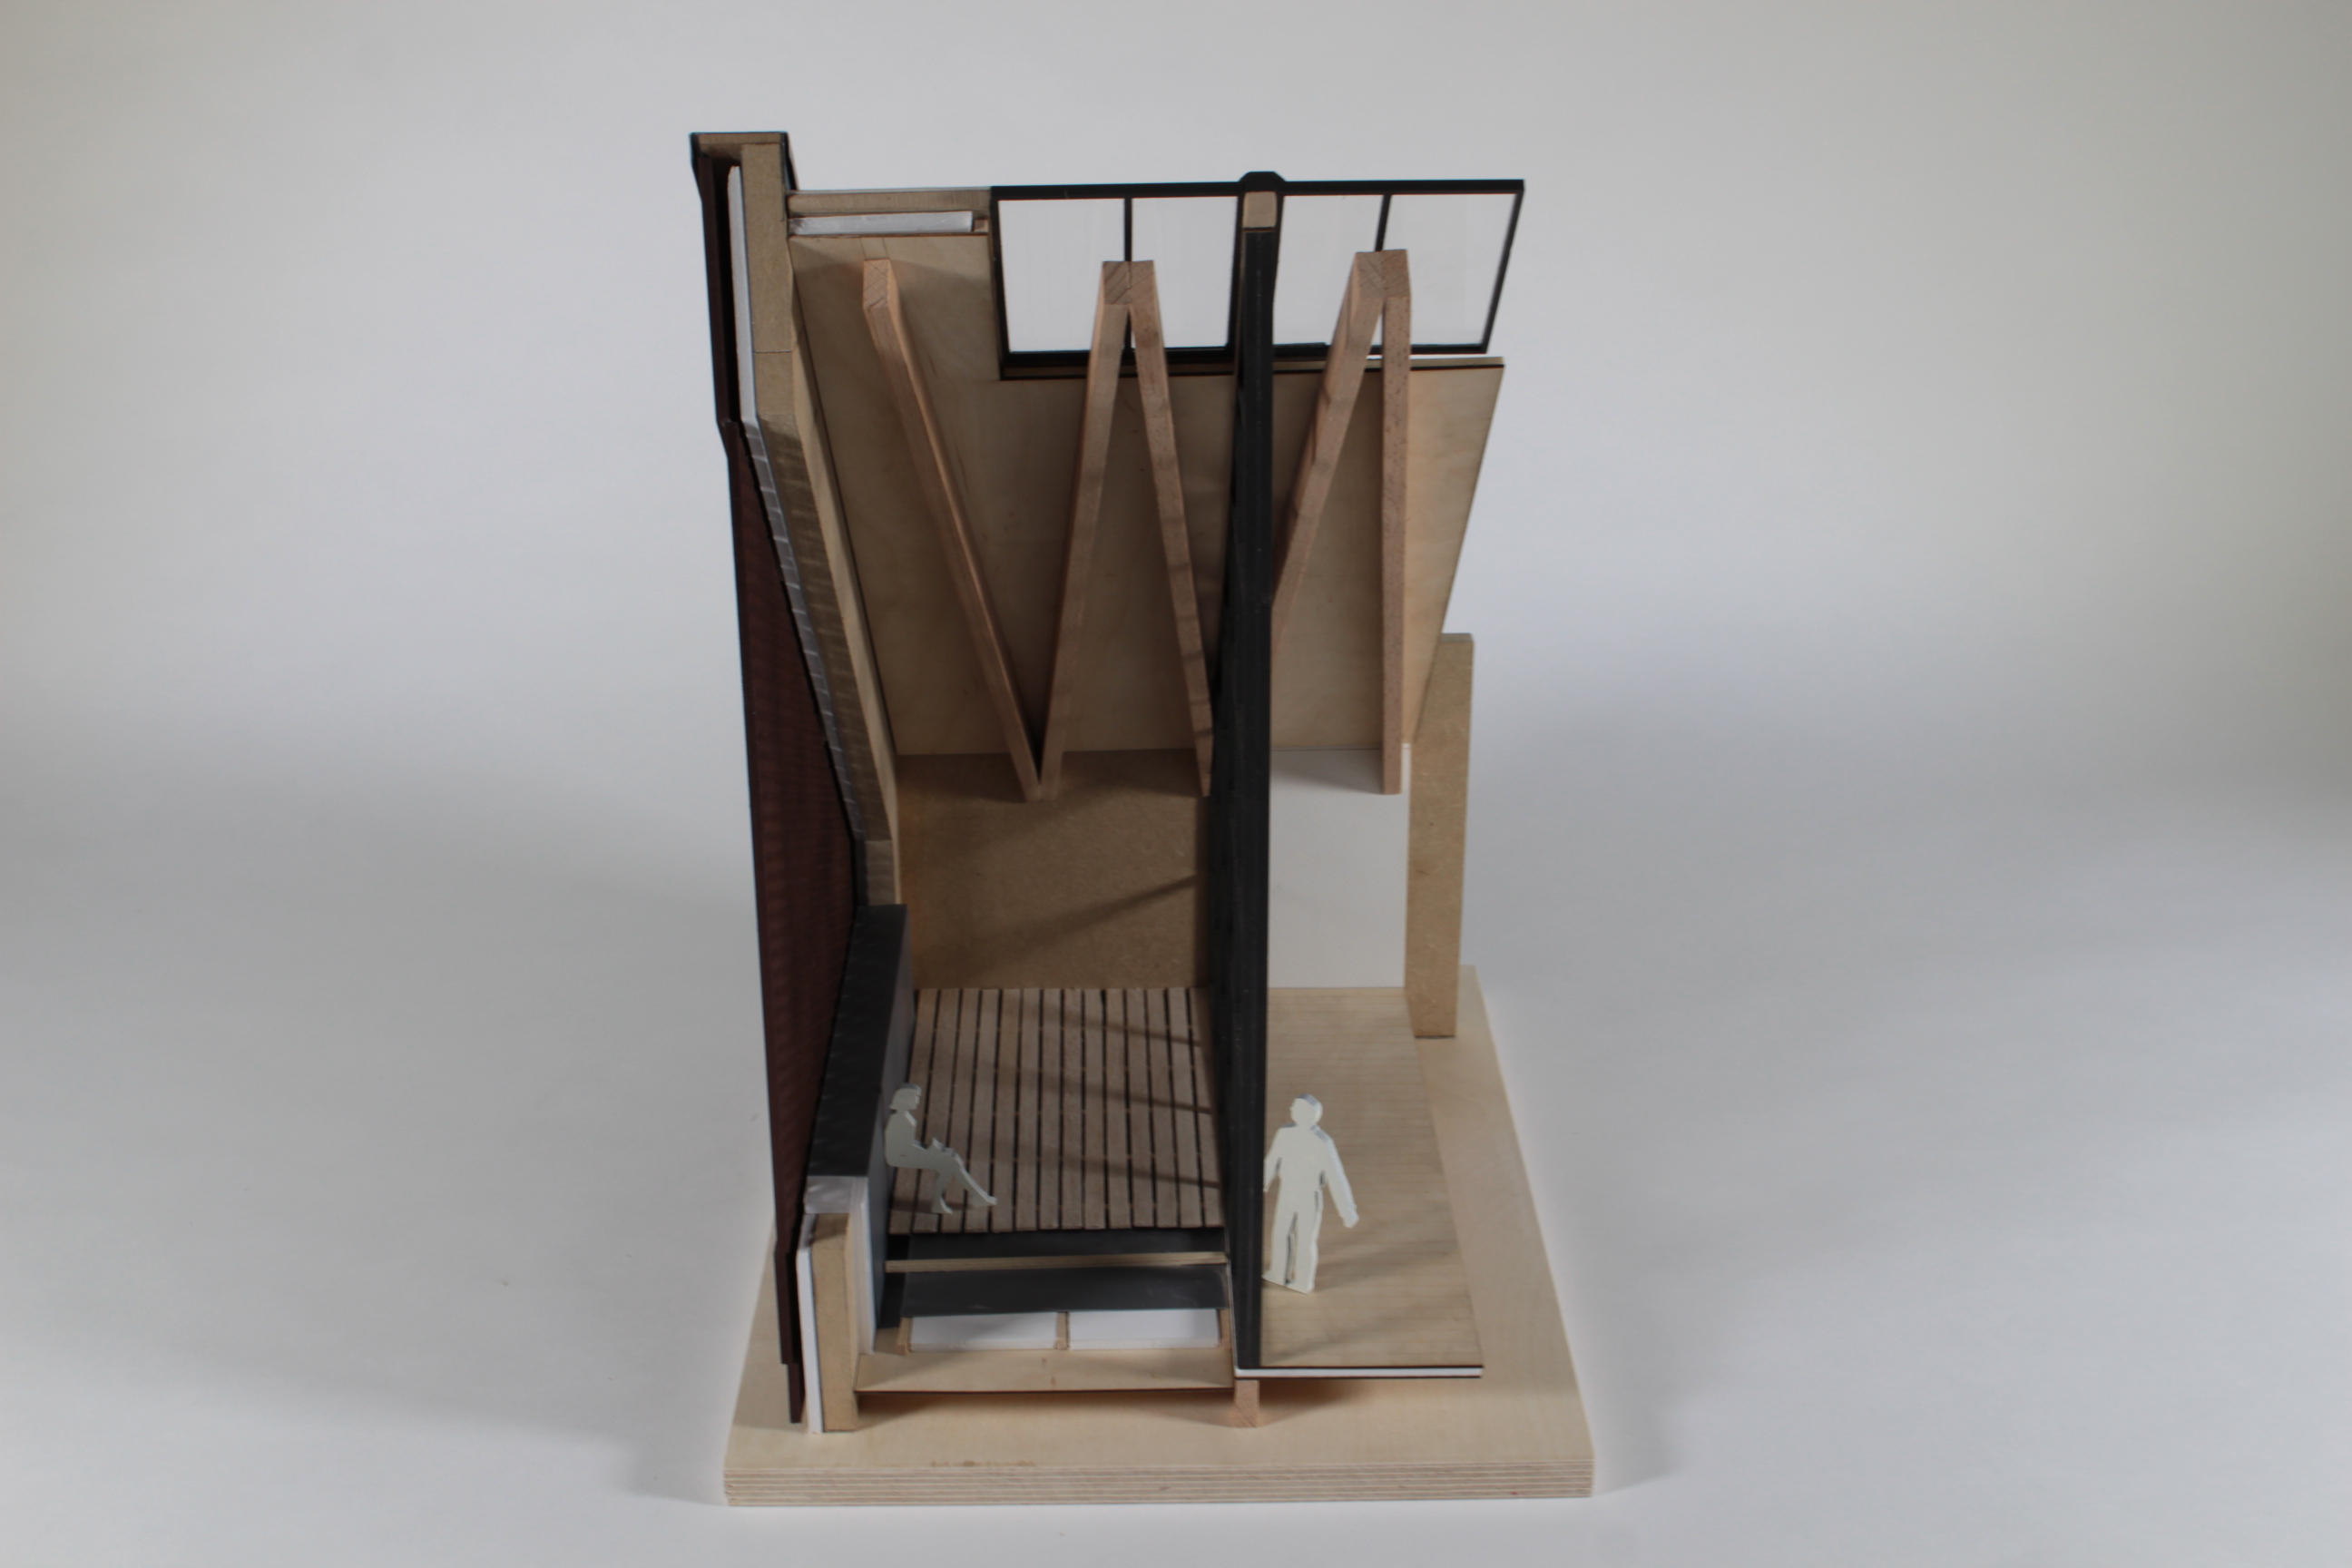
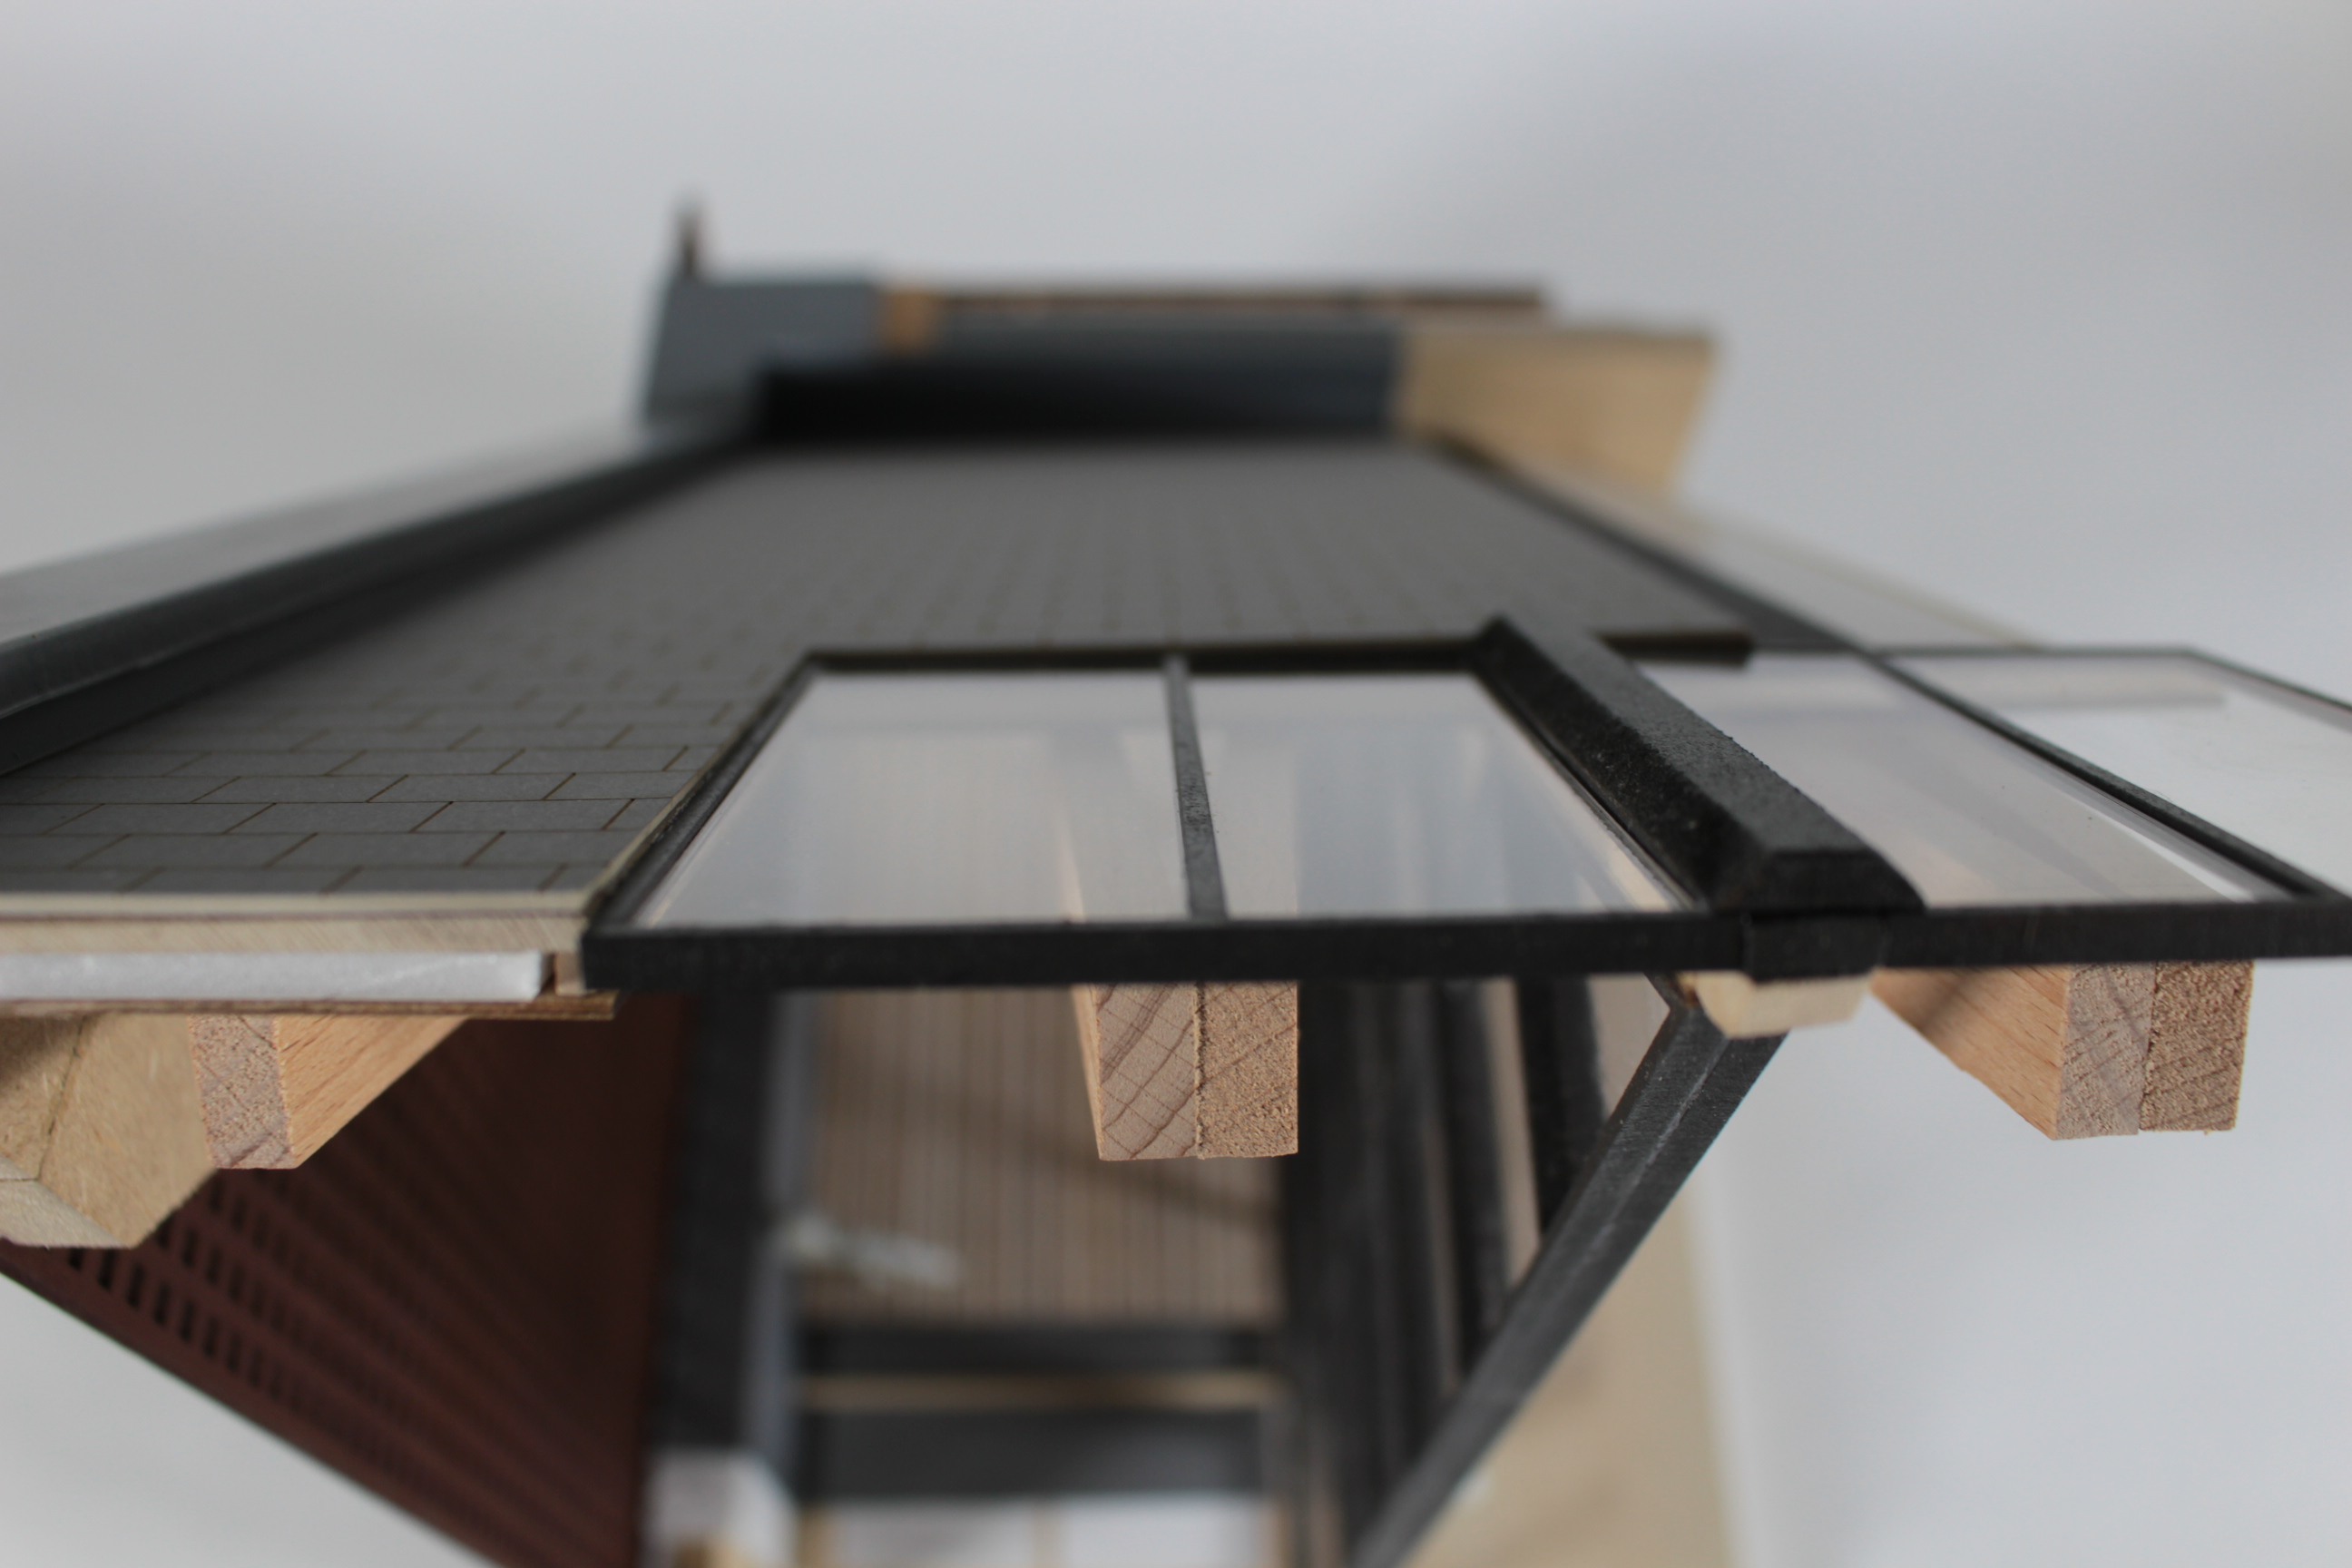
The model was also generated to create a built example of a key bay detail that repeats several times along that facade. The proportion between punctured brickwork and the actual structural masonry is key to enable the maximum introduction of natural light, while retaining structural integrity. The light qualities within the transitional spaces are key towards ensuring the success of the internal programme of the building – circulation spaces are there to offer relief in order to create a sense of separation between the Auction House and Galleries.

The large, double height spaces allow natural light to arrive from both the VSCs and punctured brick facade, allowing the central exhibition pieces to have their qualities maximised, as well as the space itself.
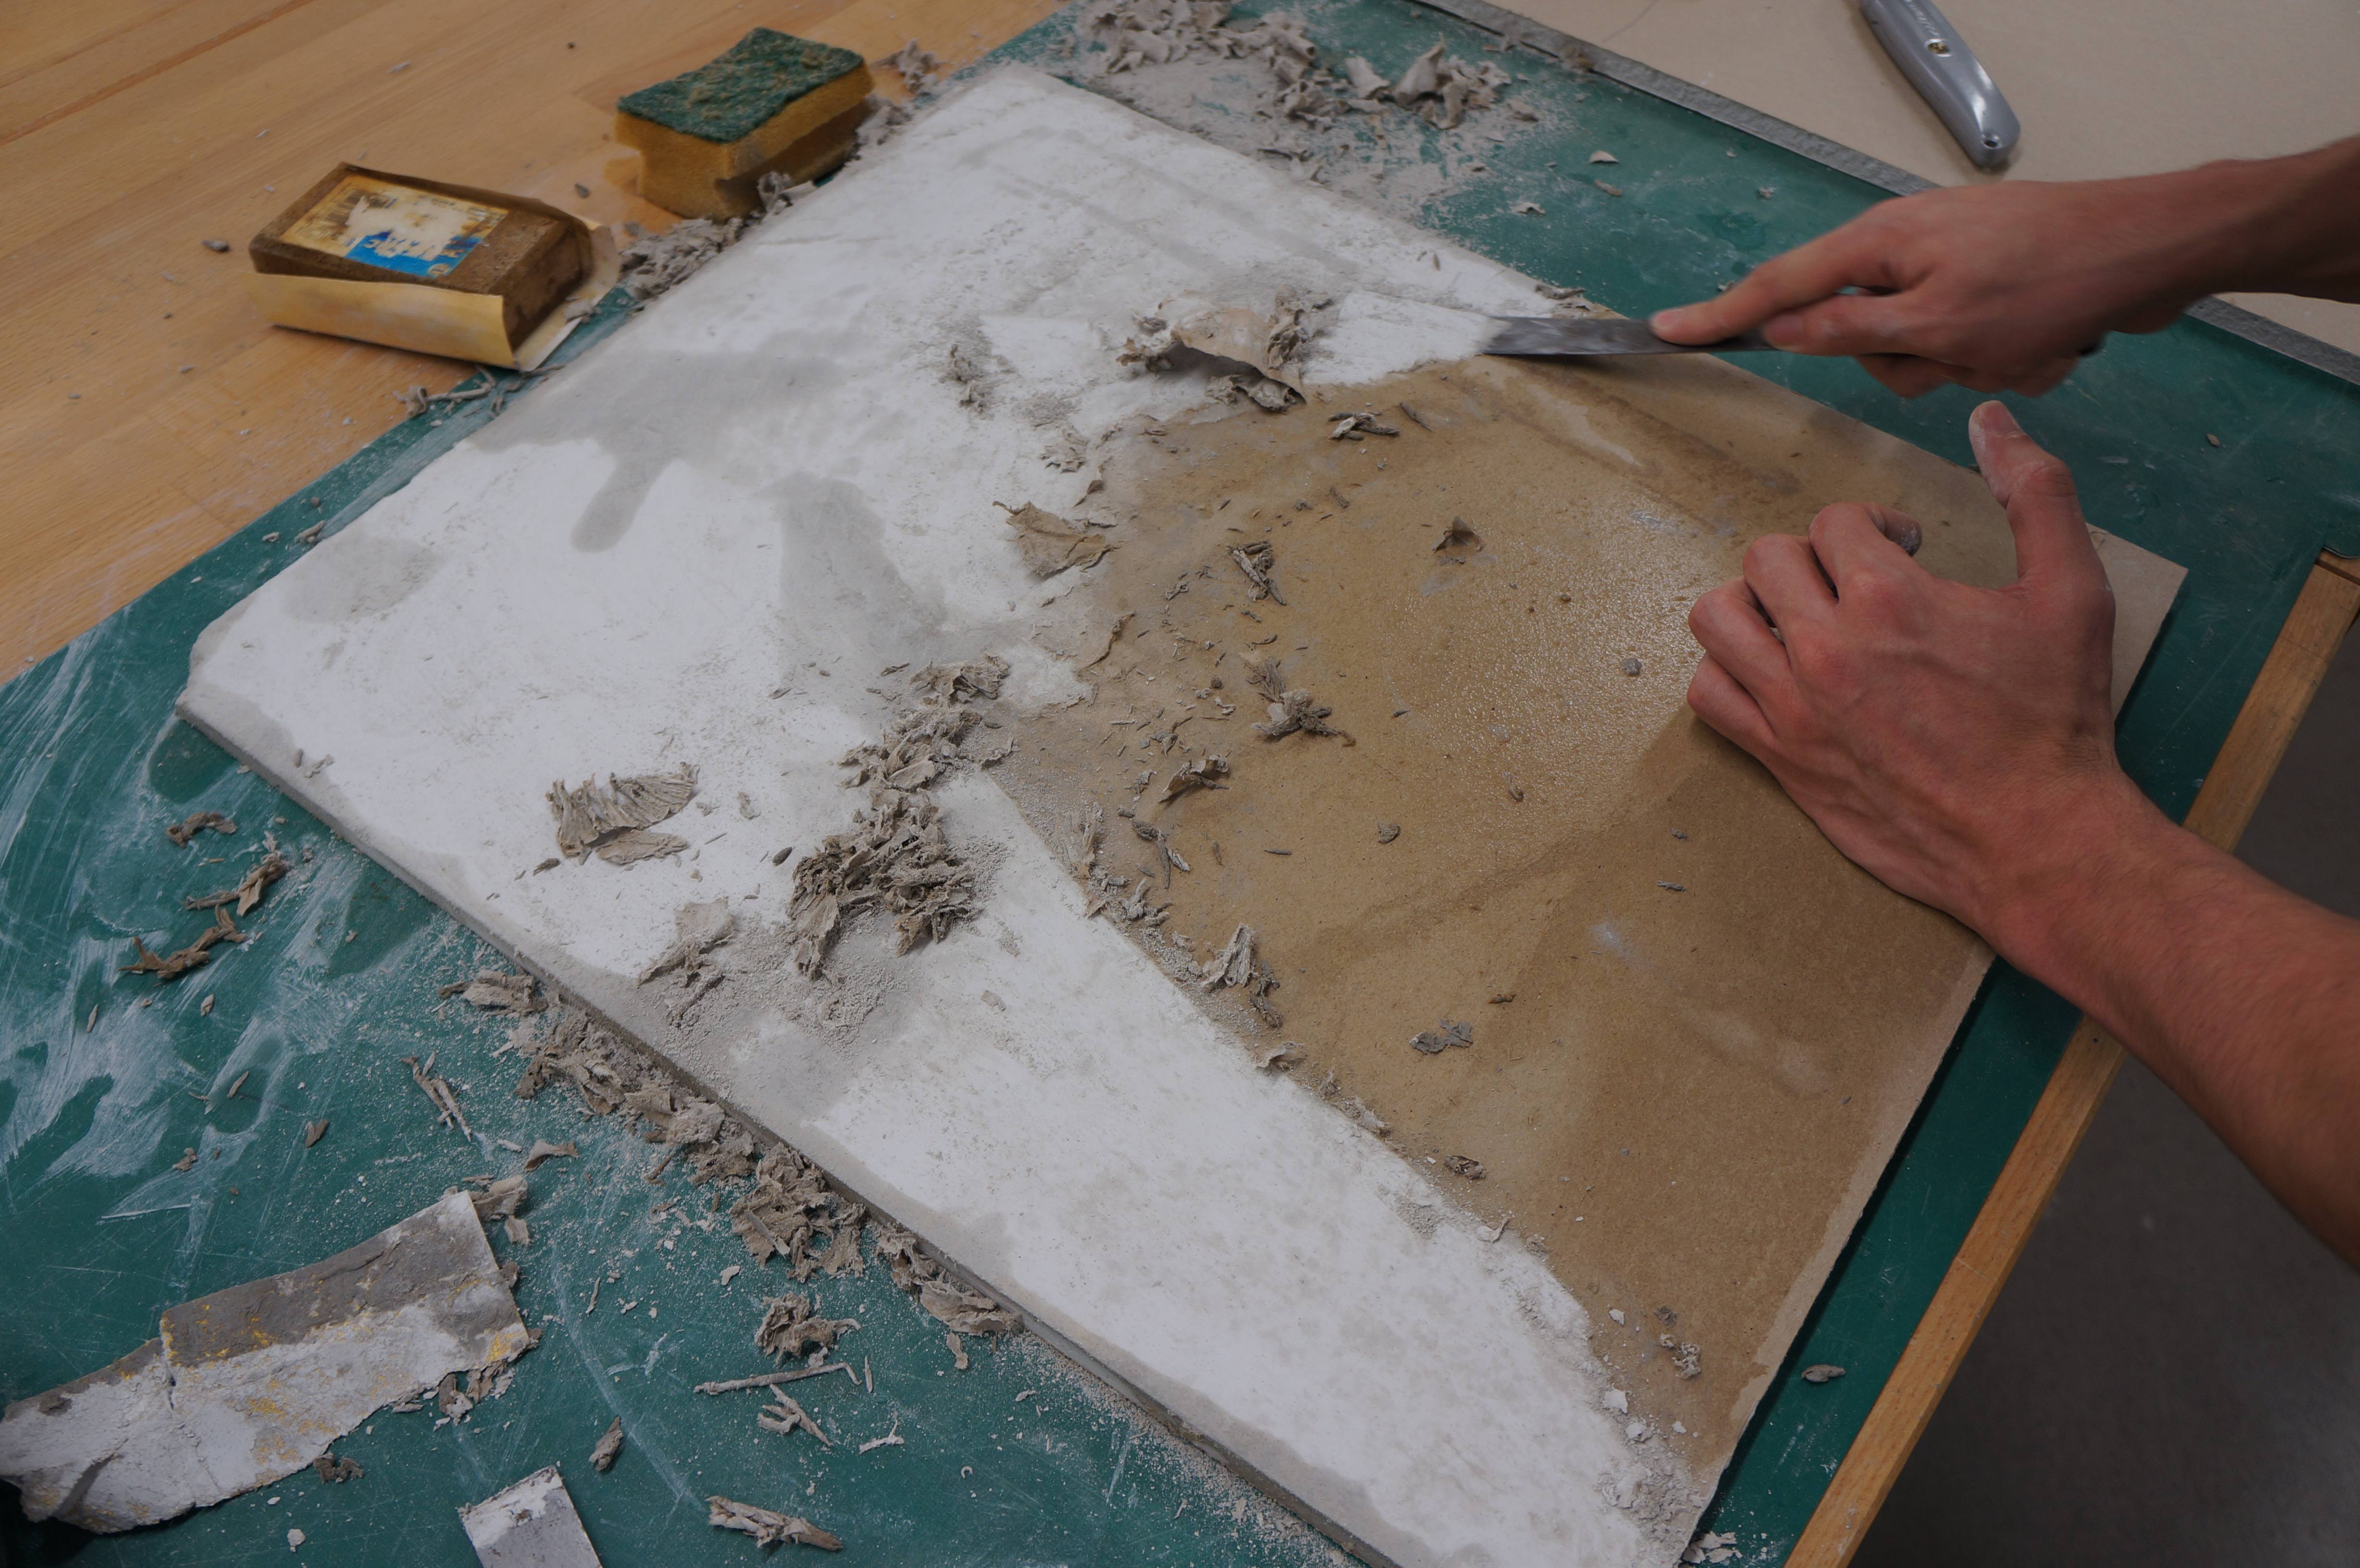
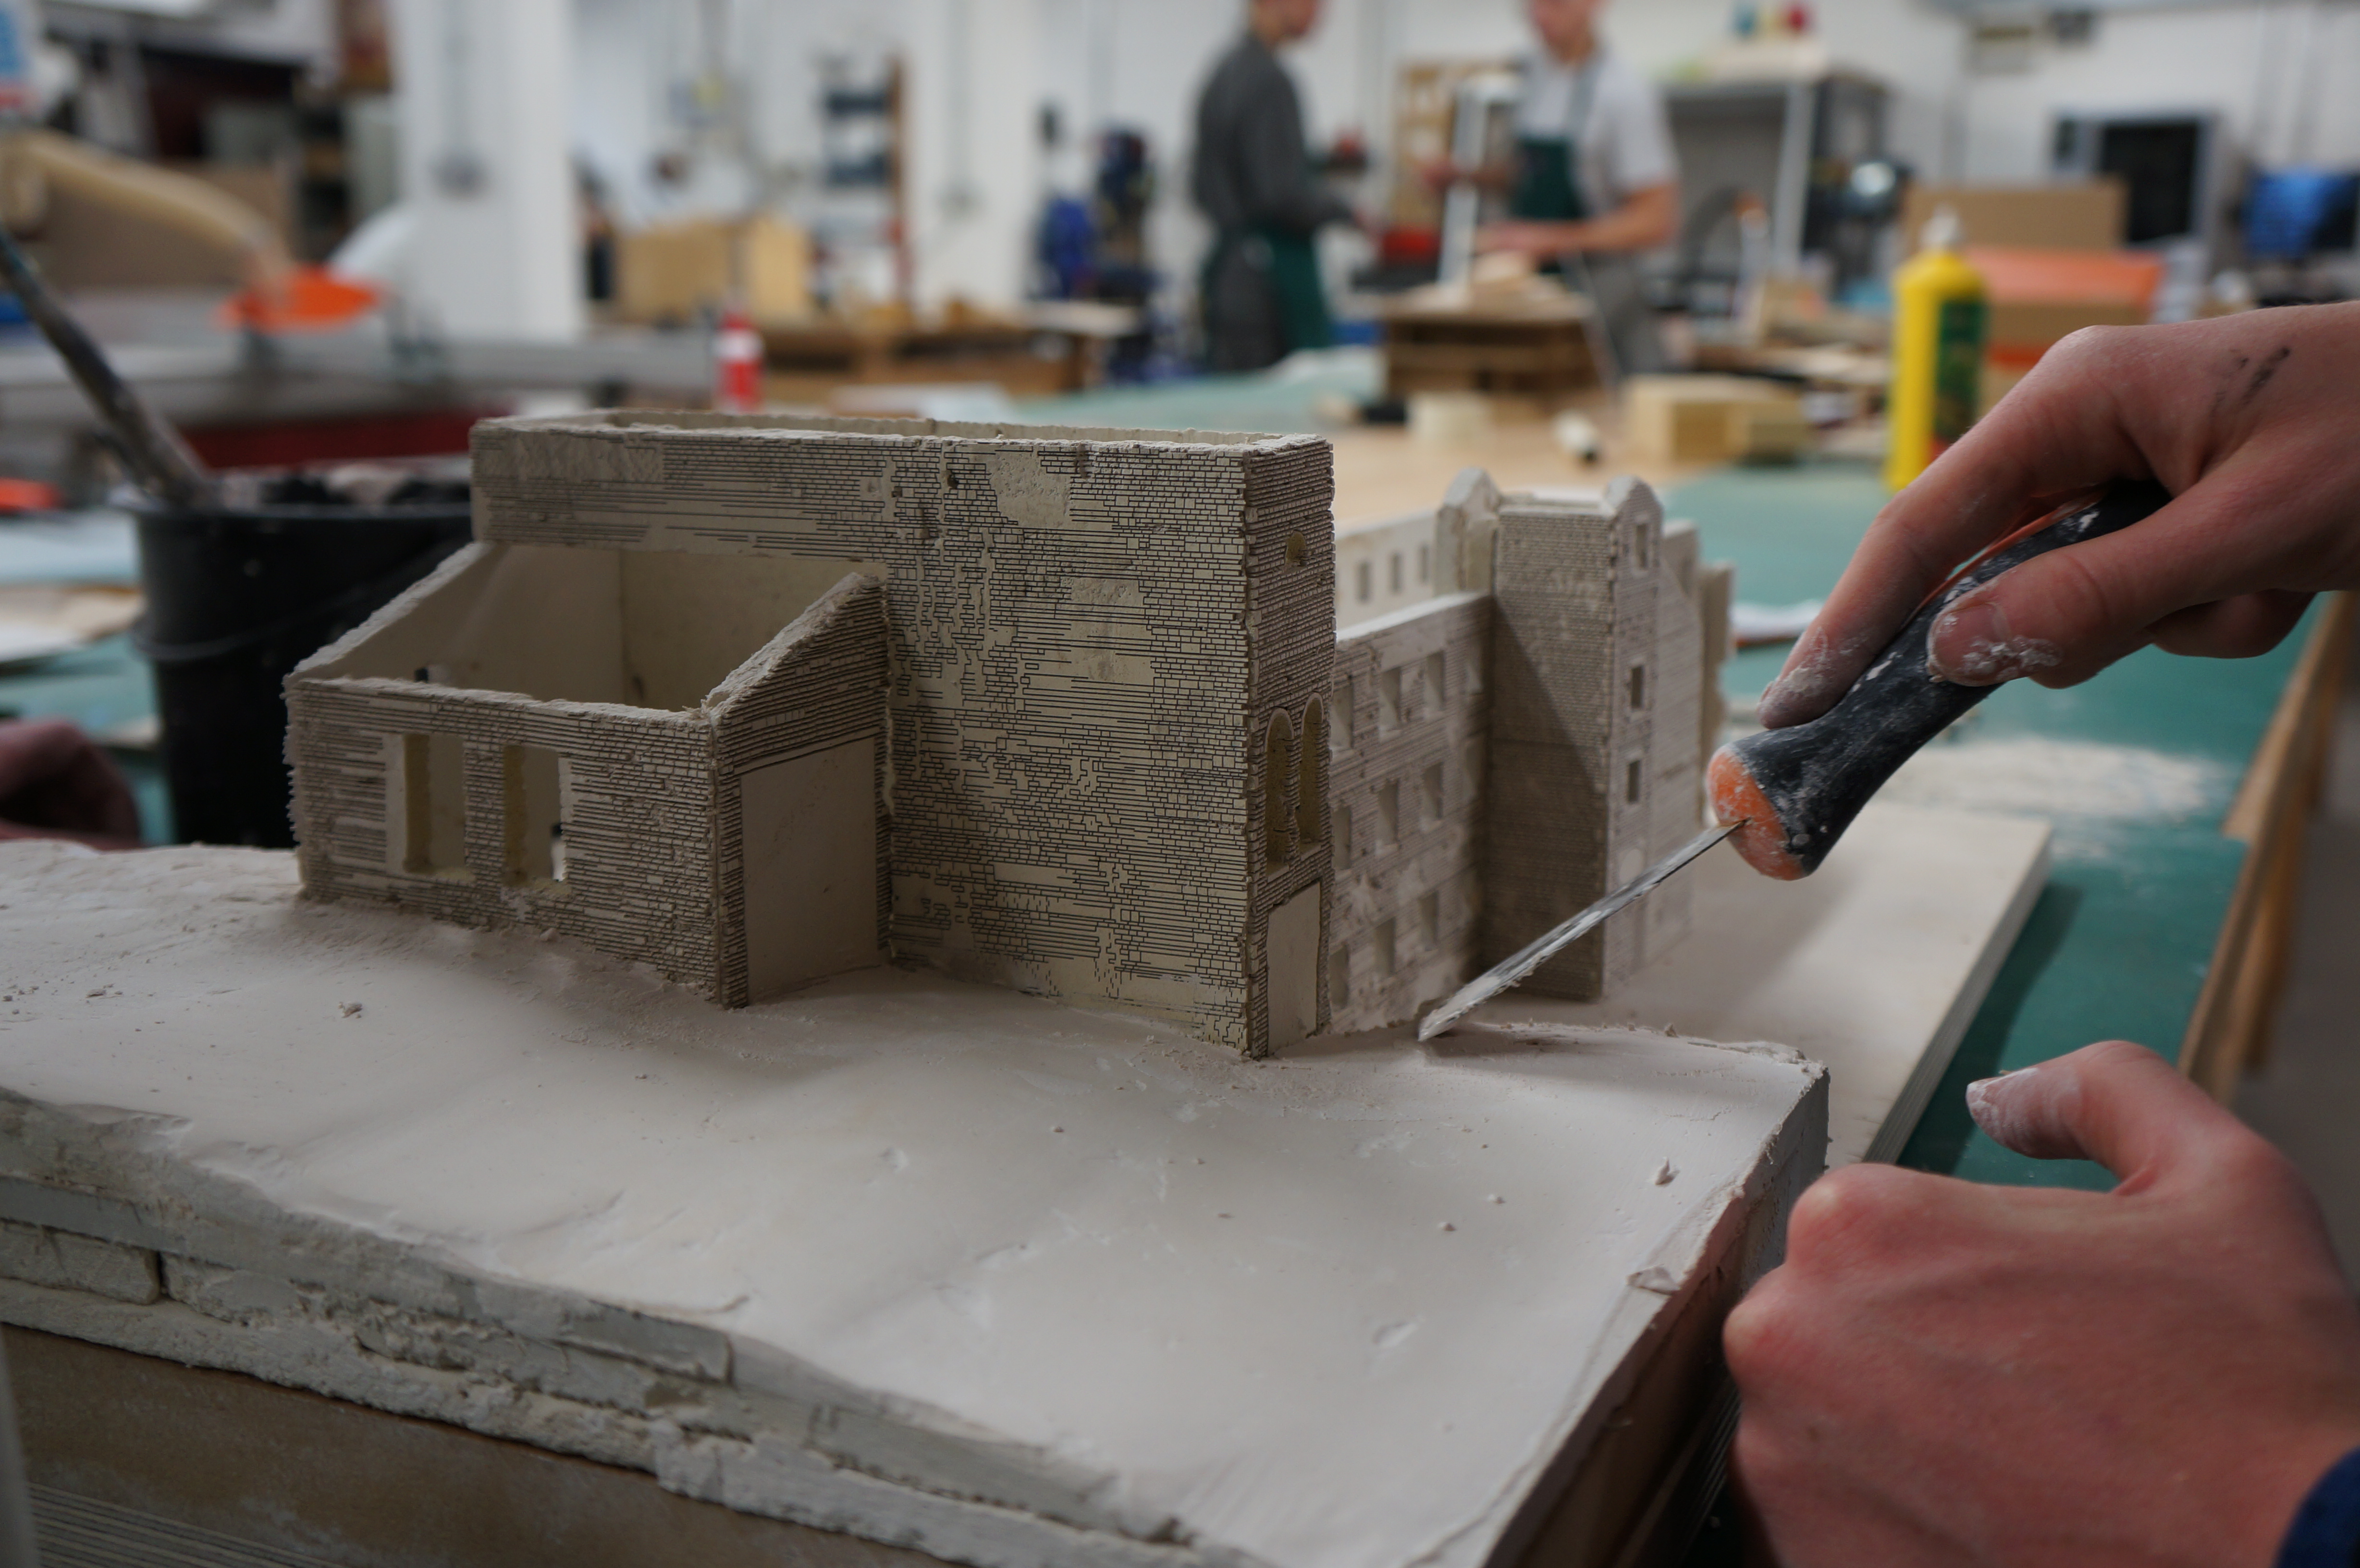
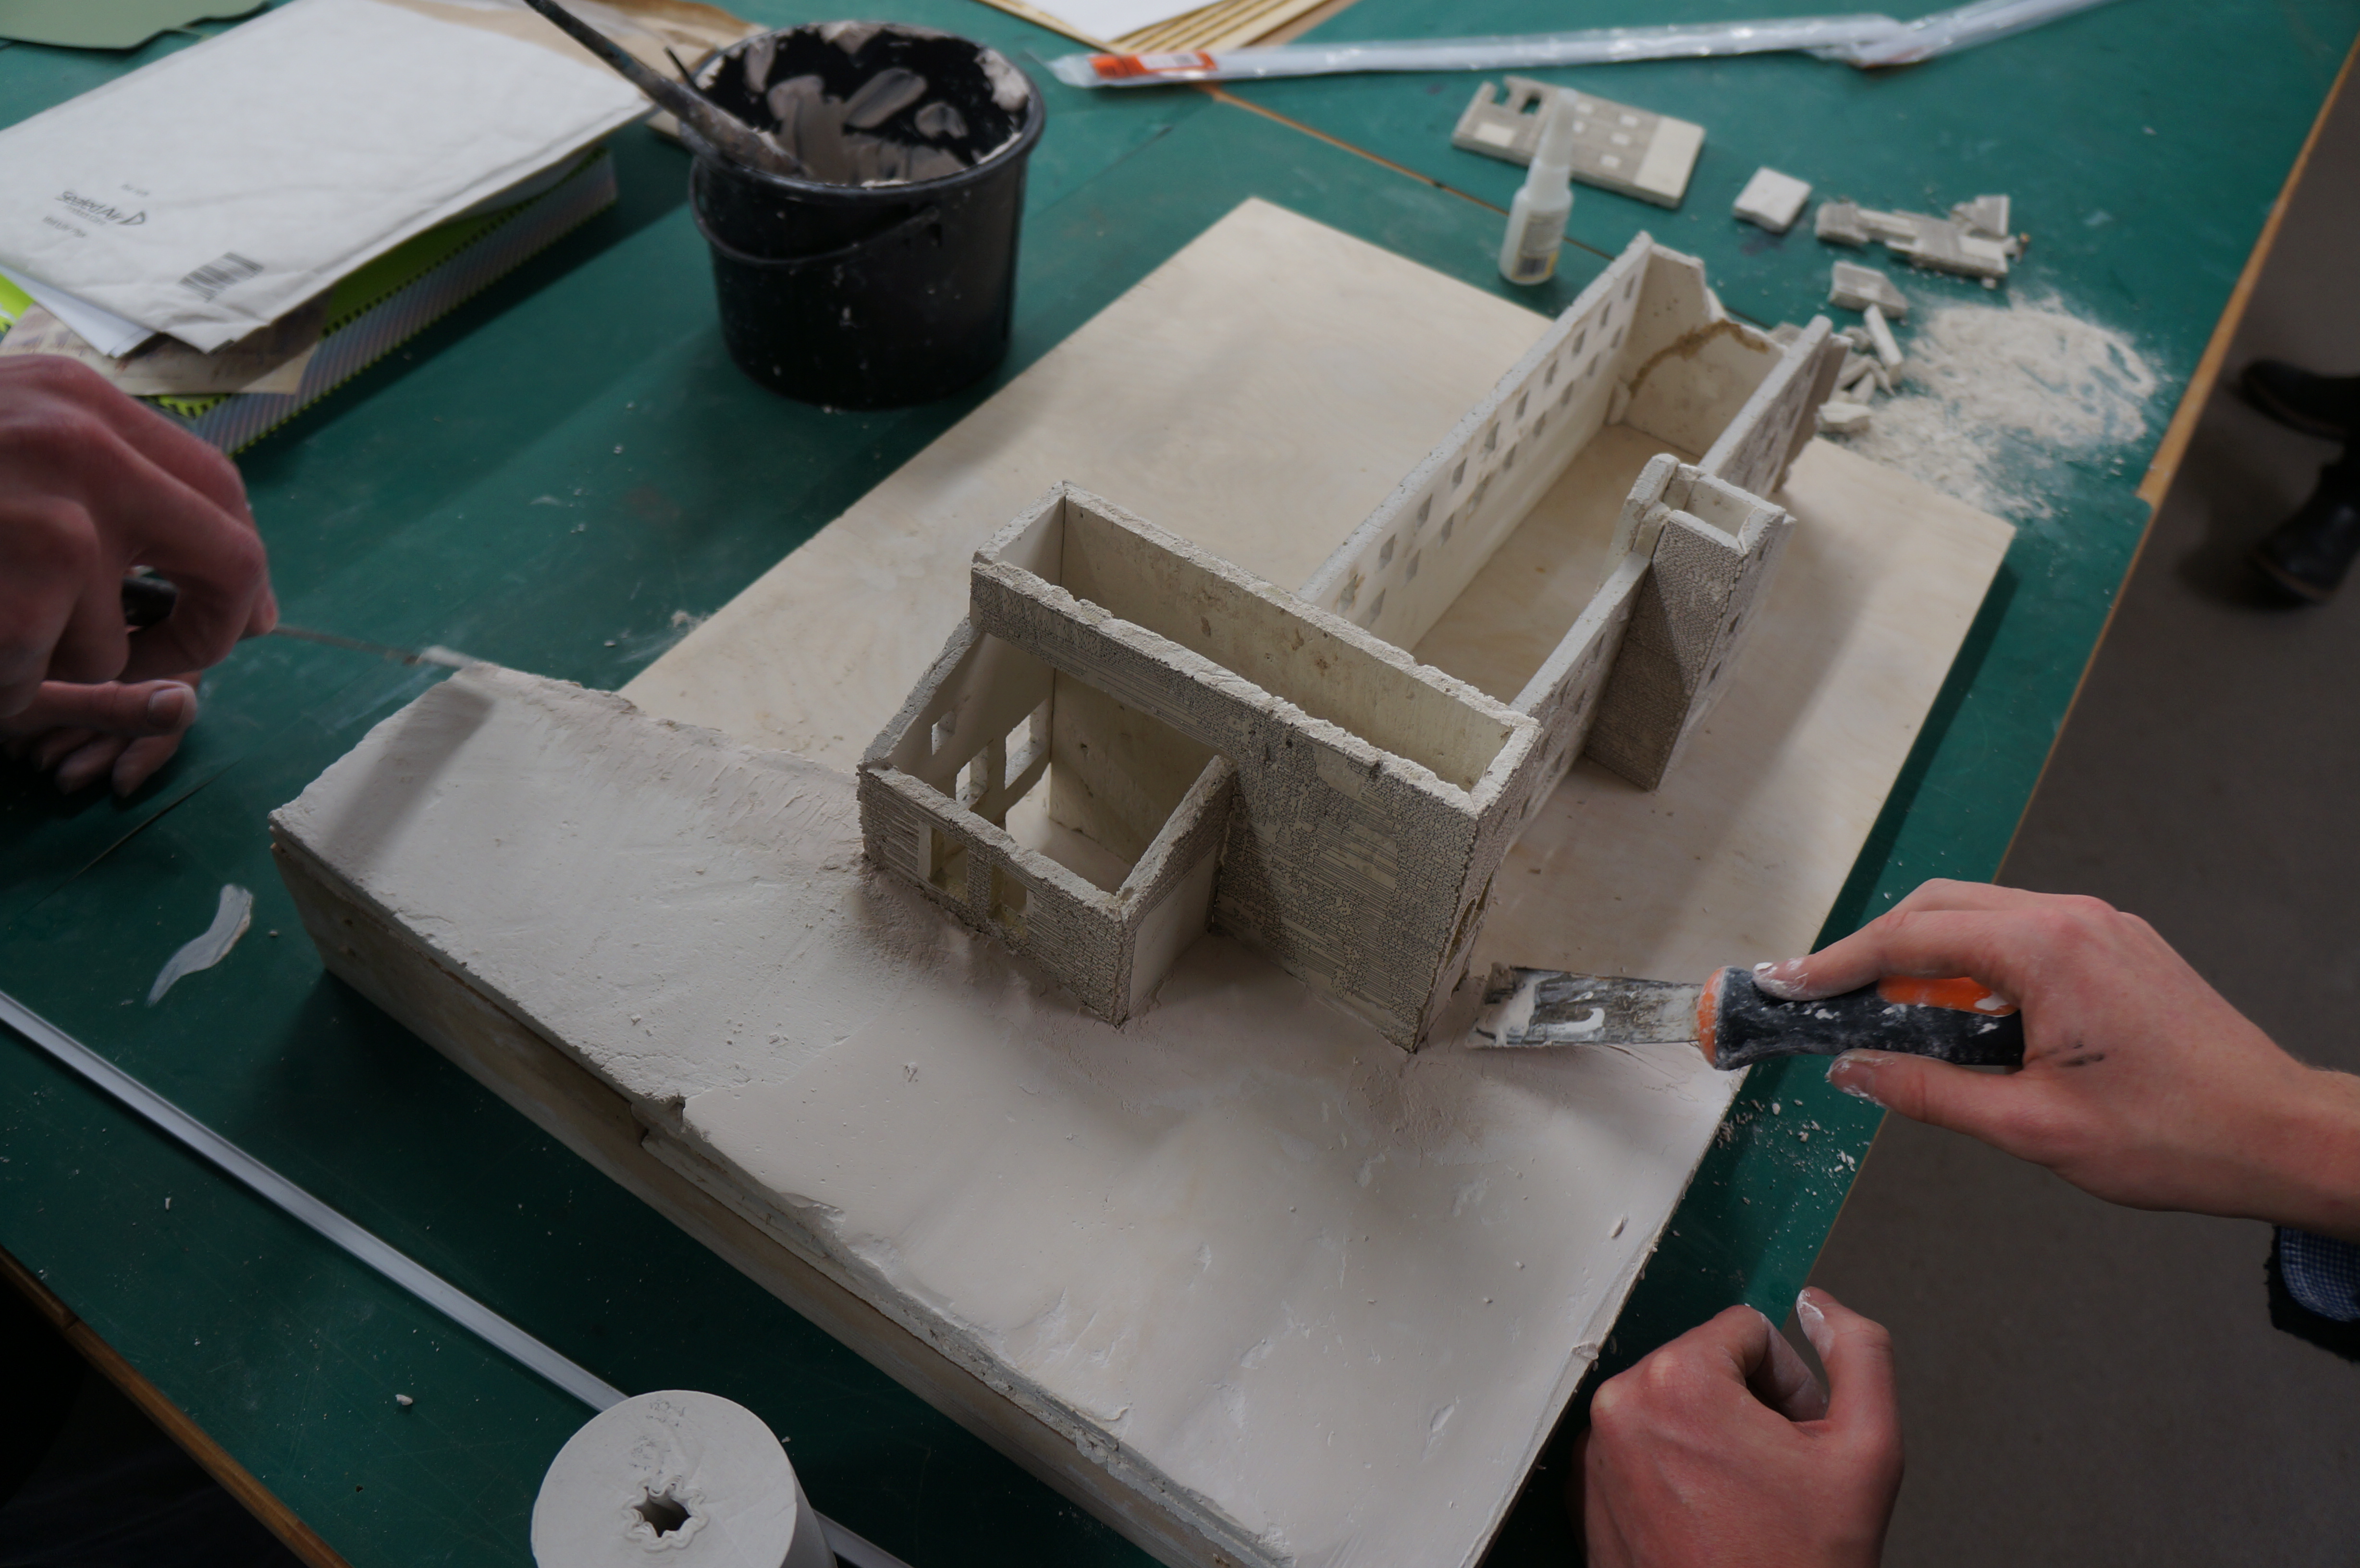
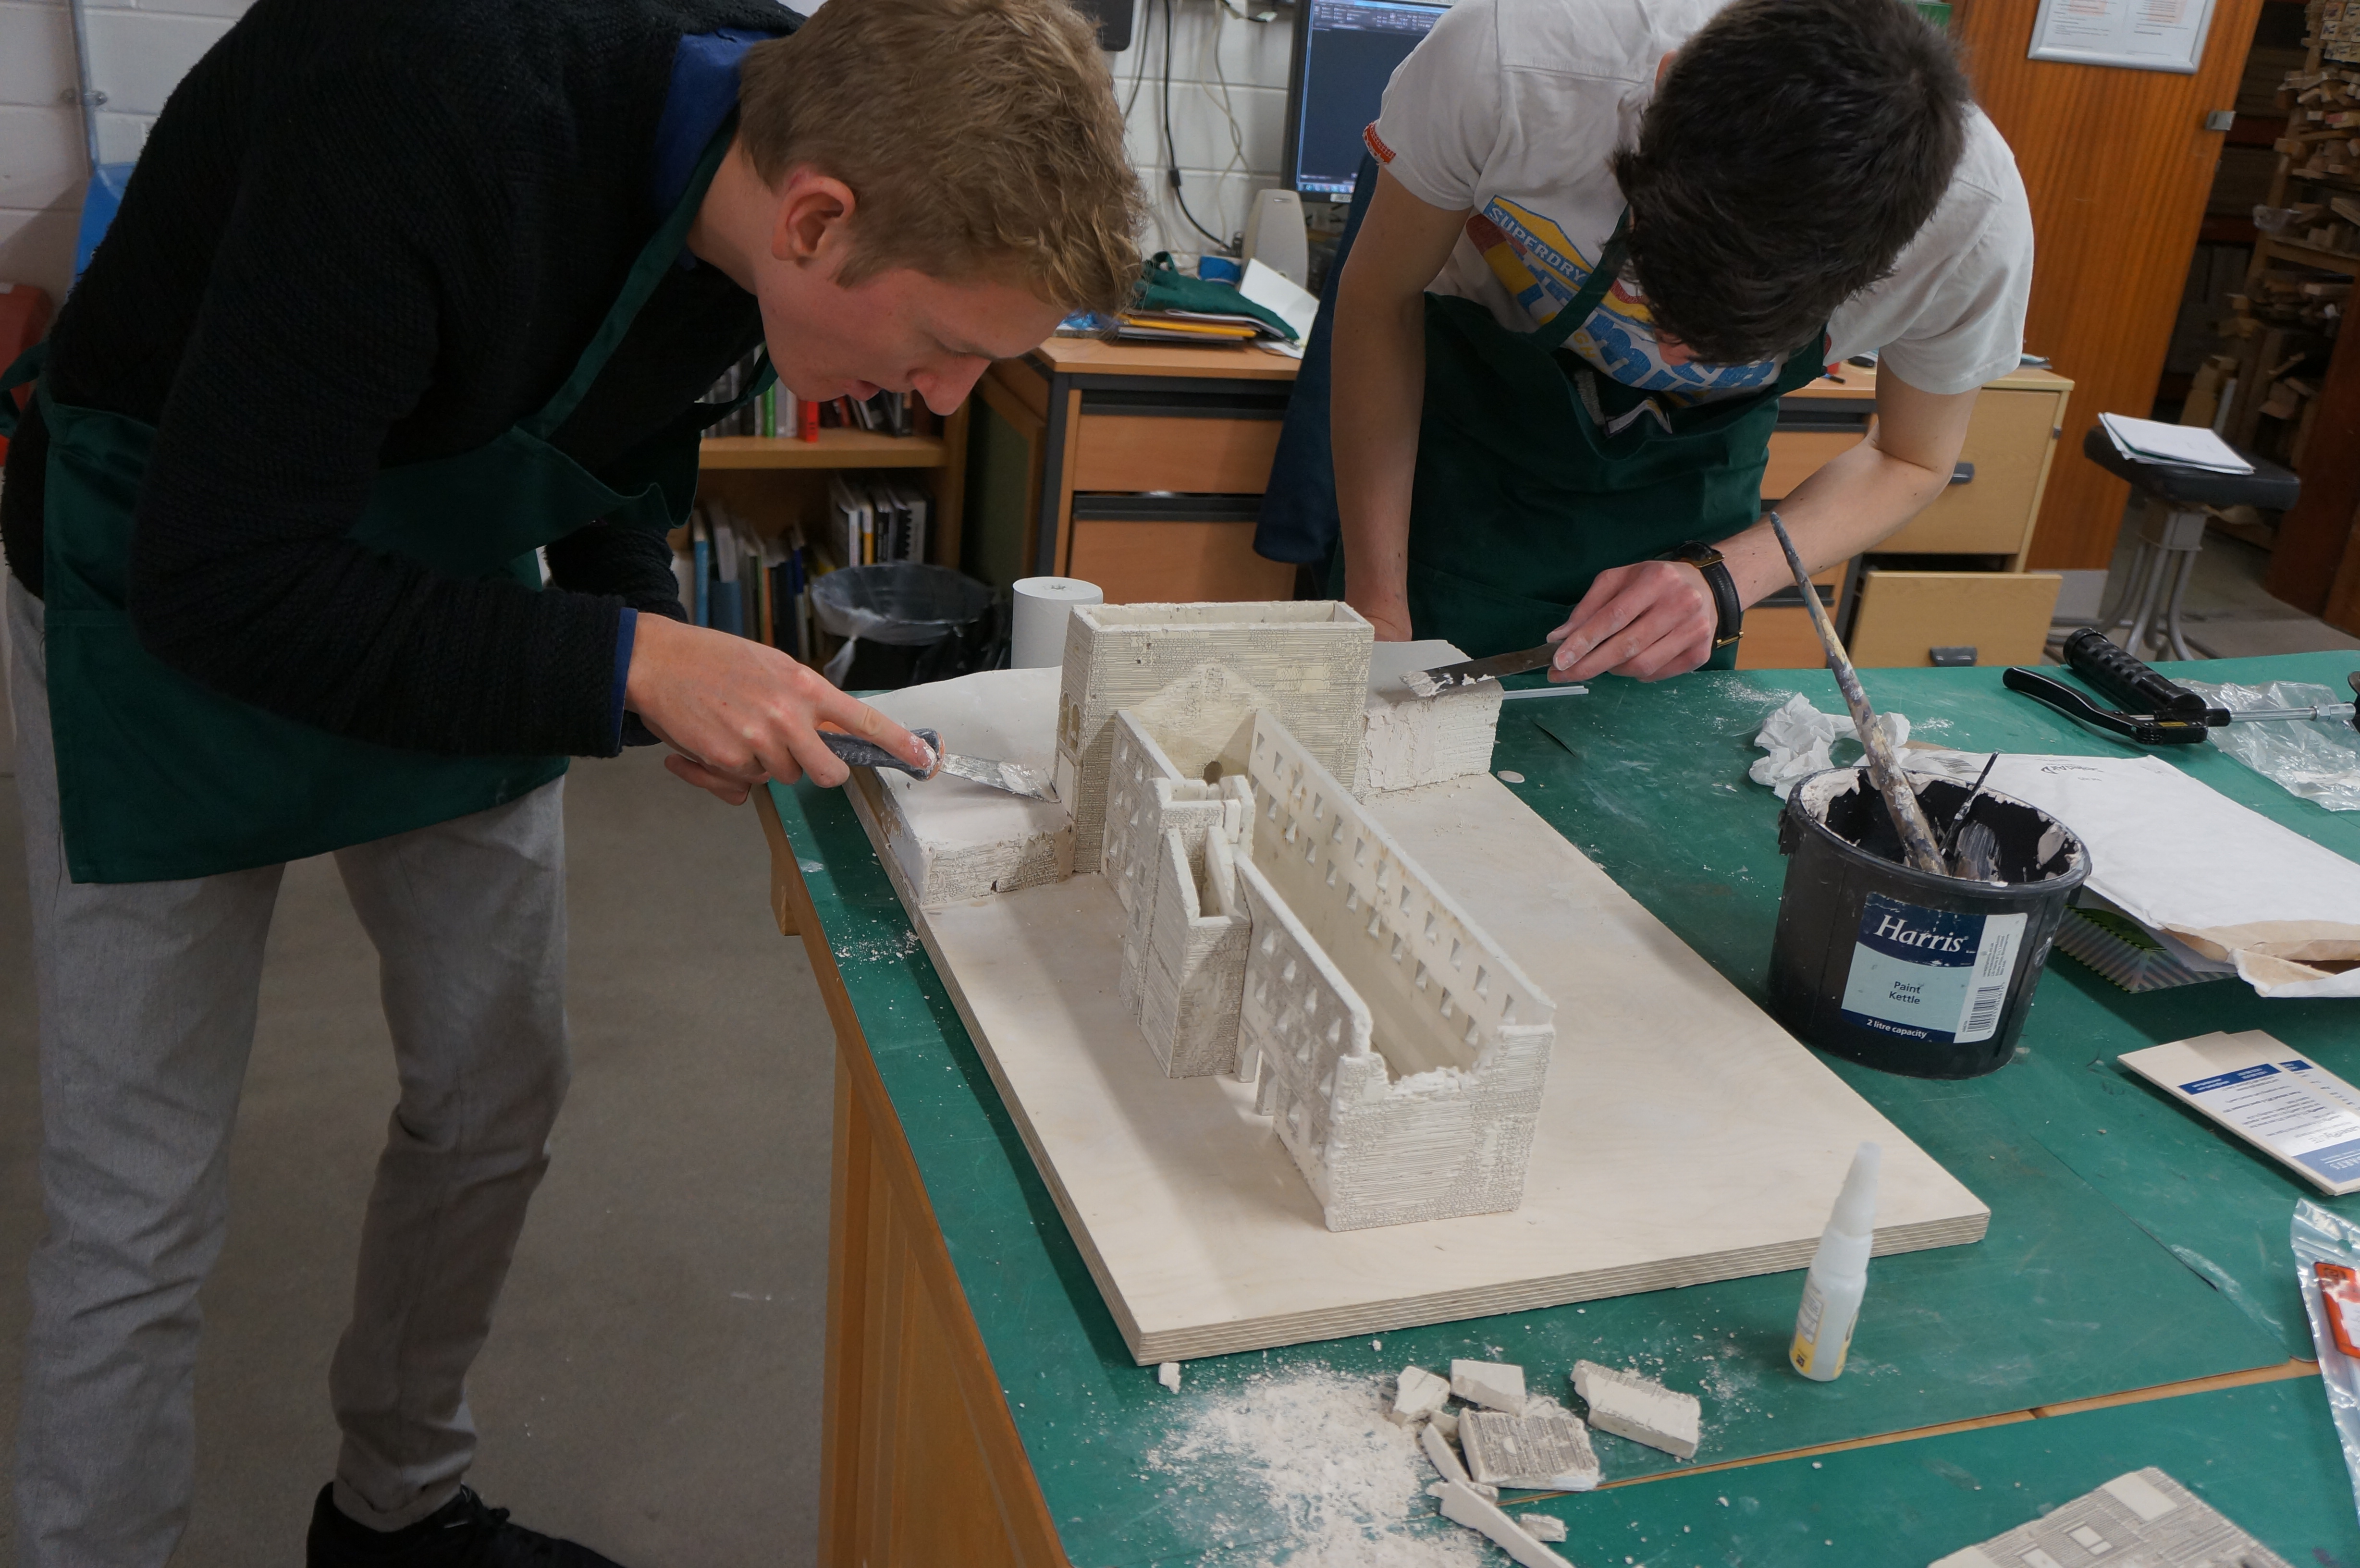
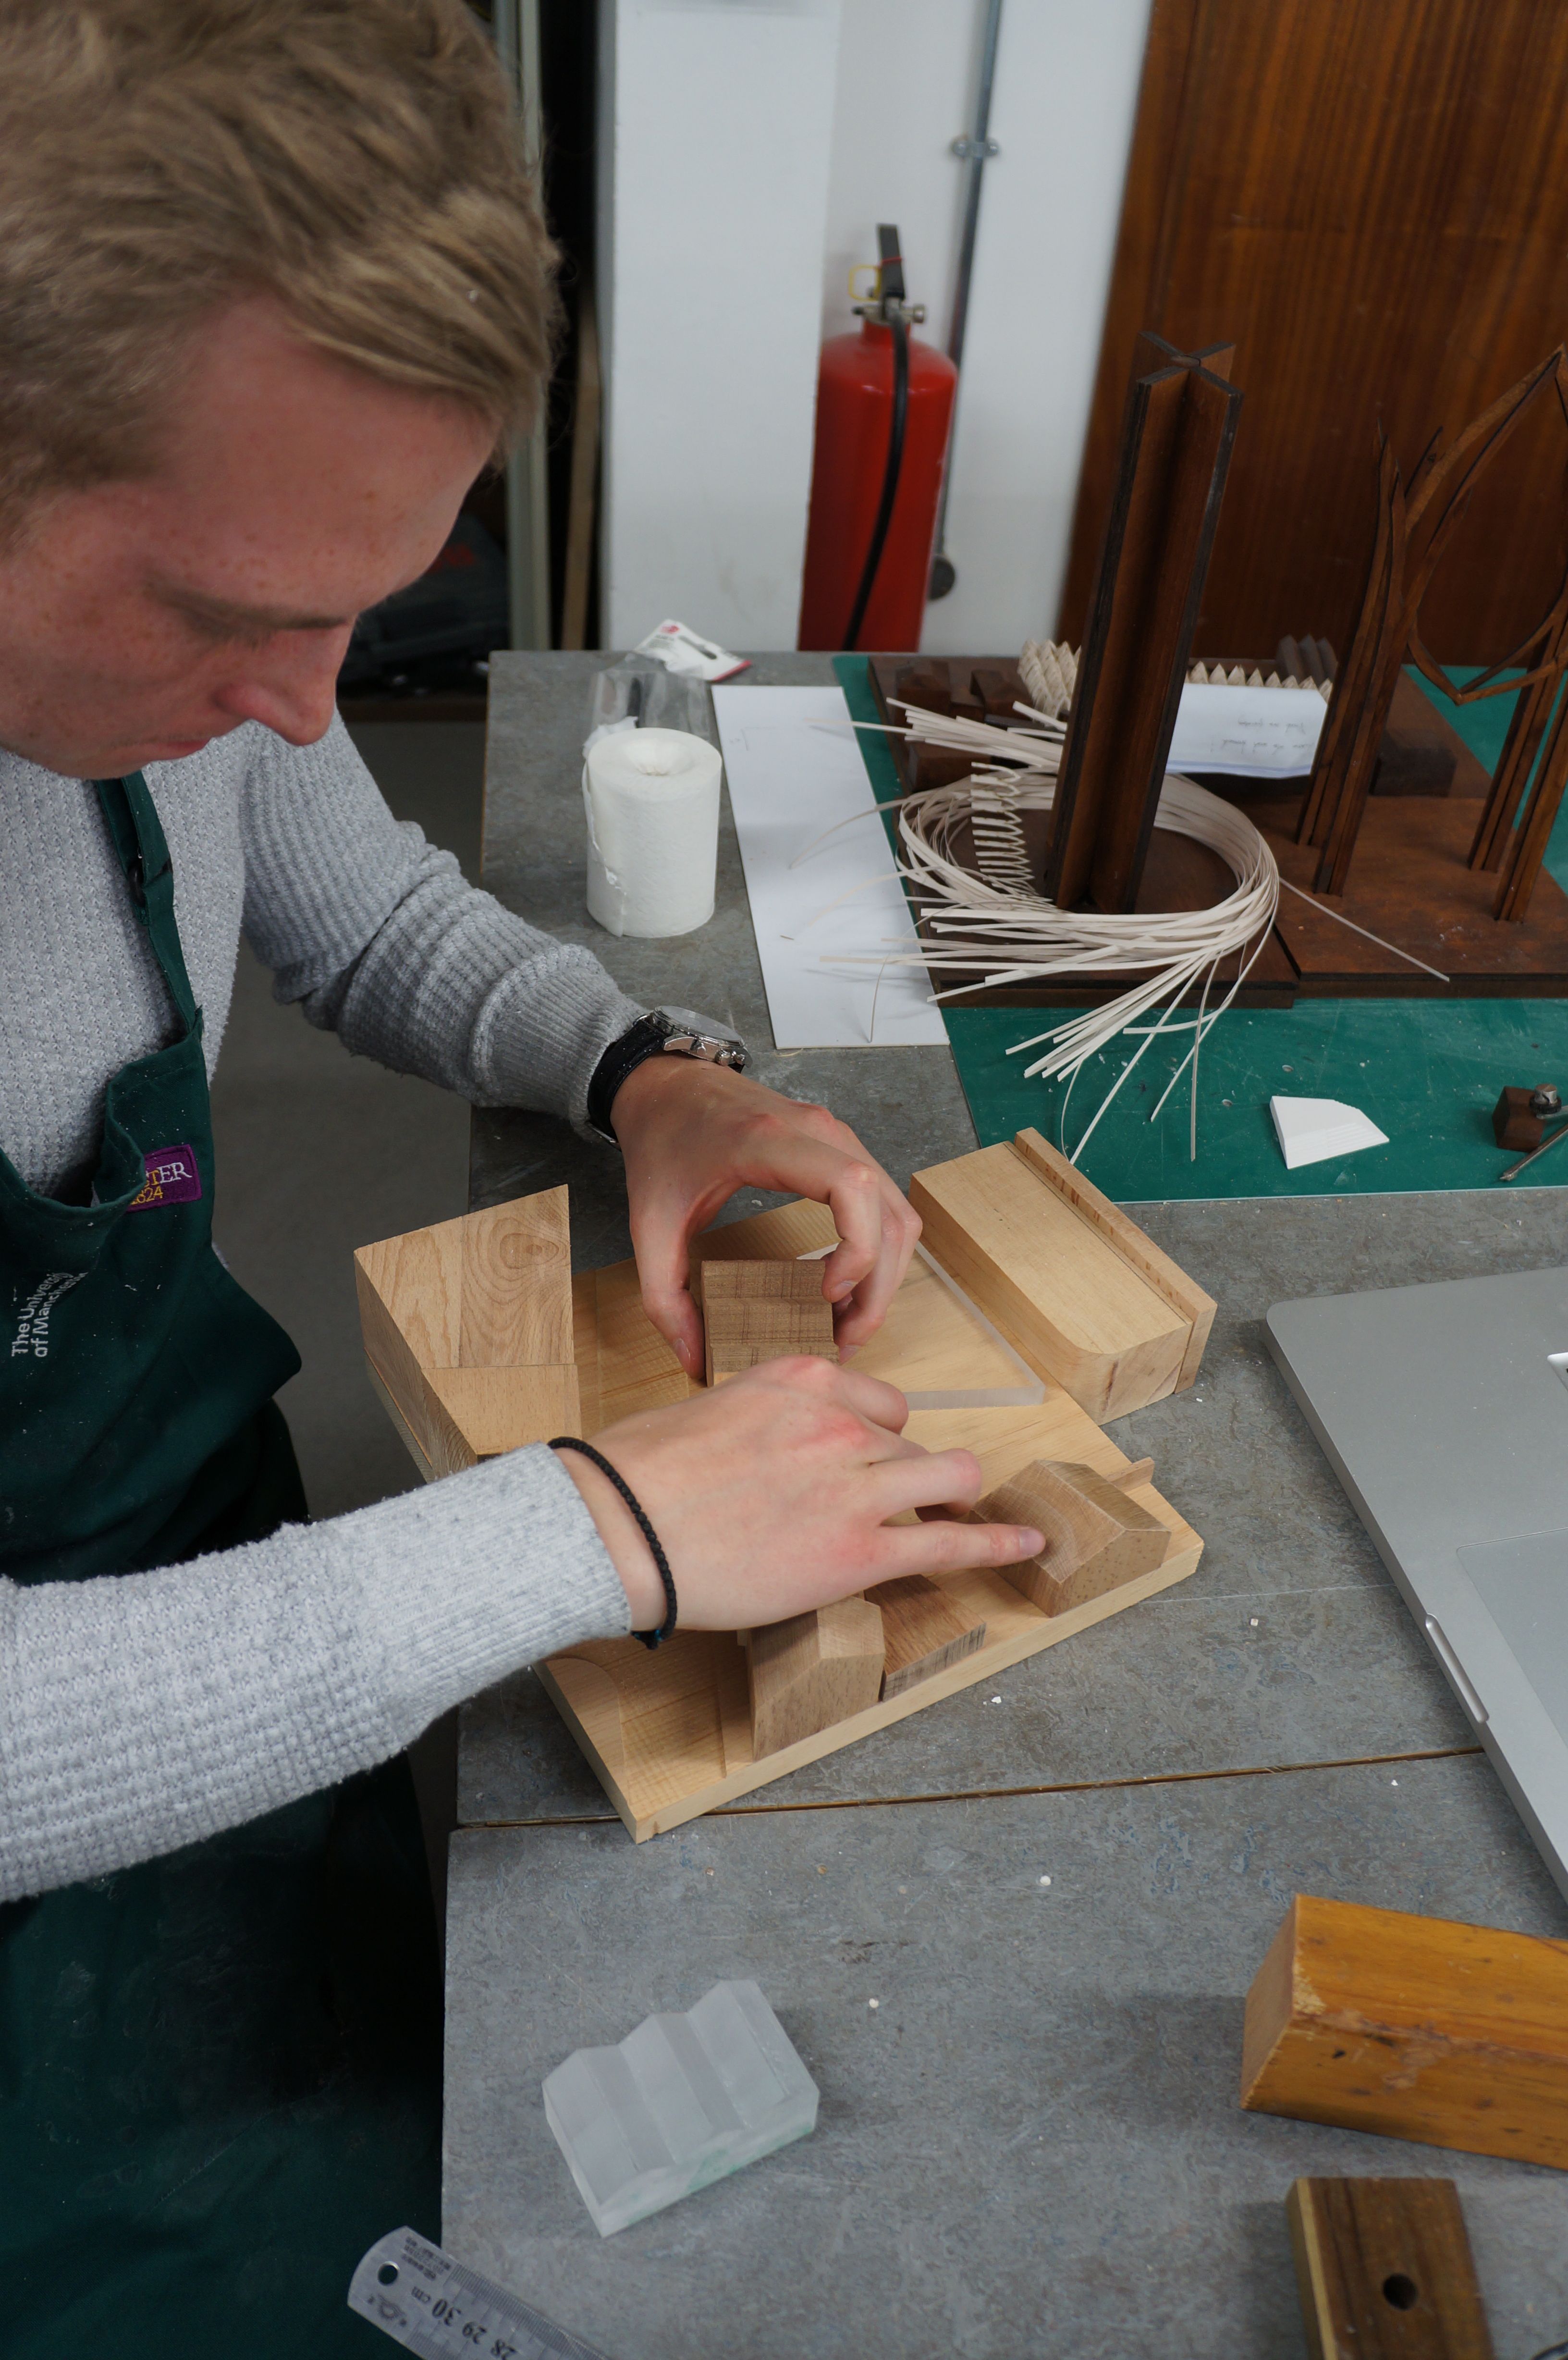
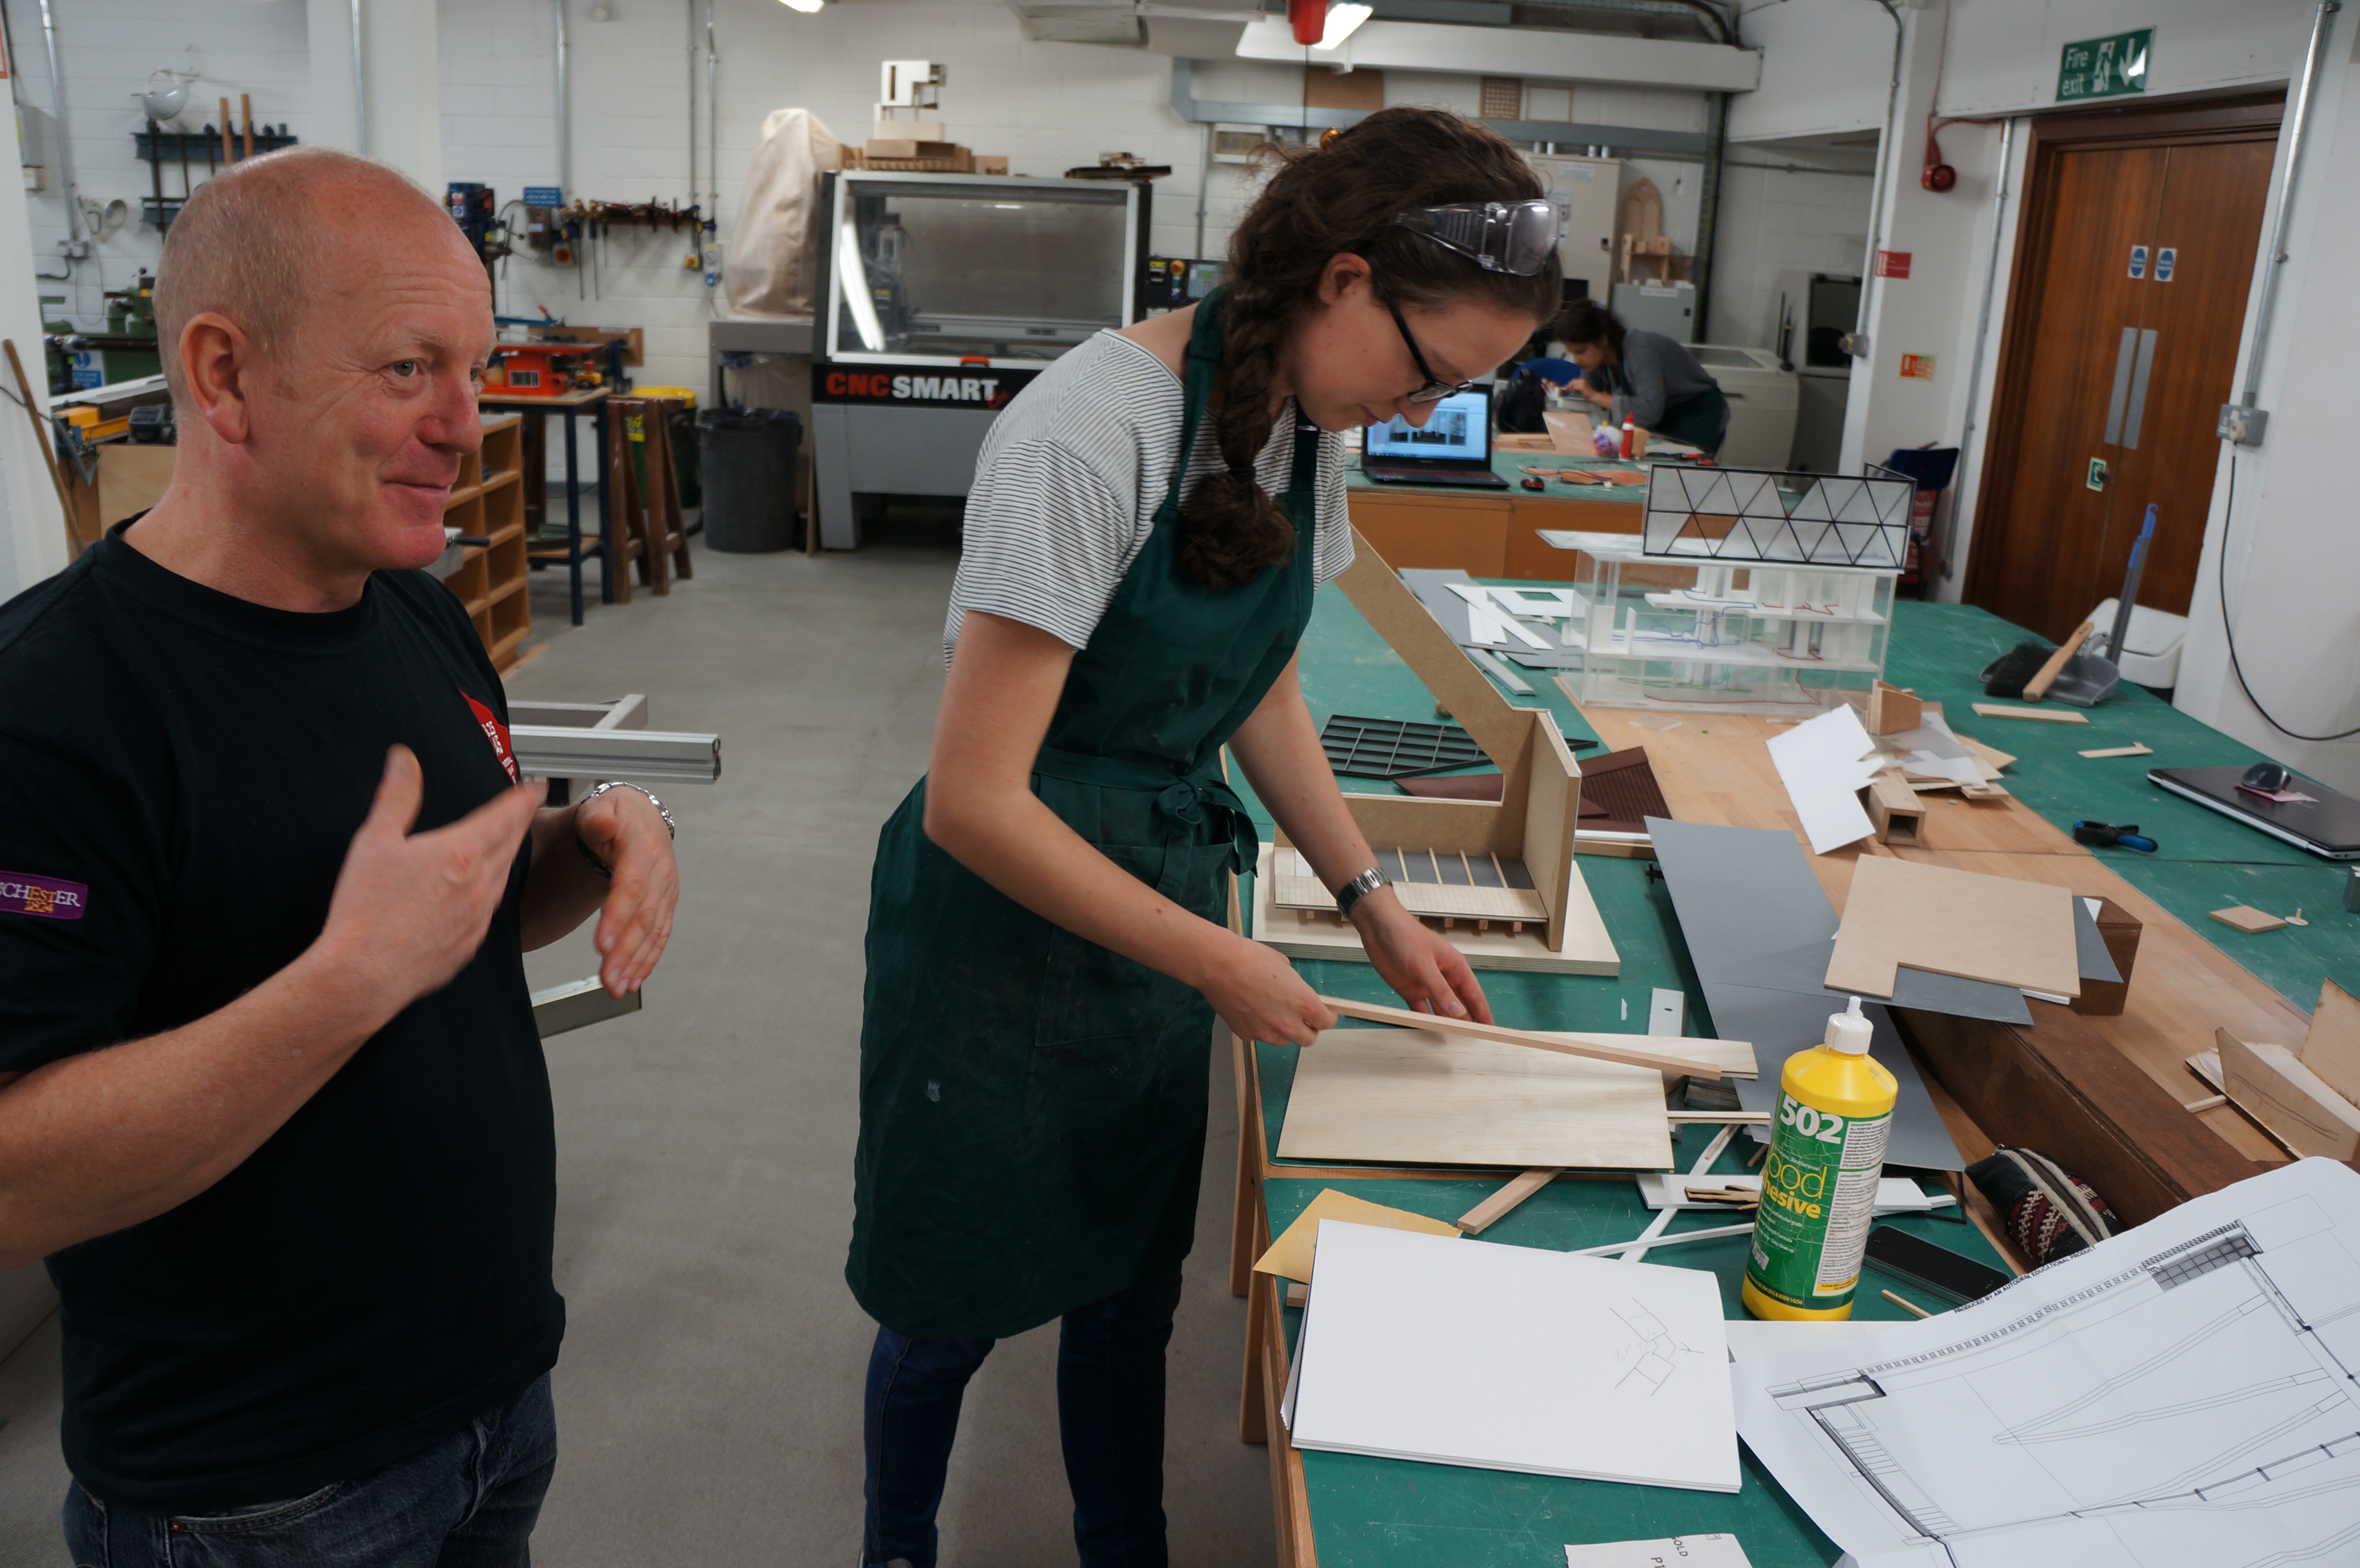
1.50 model (5)

Making the Models

It was key to establish distinguishing characteristics between each of the materials used, as the scheme revolves purely around material reclamation (both architecturally and programmatically) It was vital to represent materials under same semantic in the building specification, as the same material choice in the model – enabling an easy understanding of the intended material discourse: e.g. obvious differentiation between stonework, timber, masonry, etc.

I felt it was key not to oversaturate the models with materials, instead working with three or four strong materials that work complementary to each other provided end products that felt cohesive.

1.100 model (9)

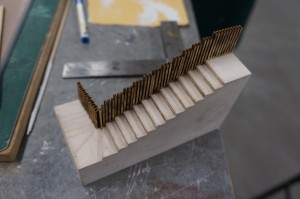
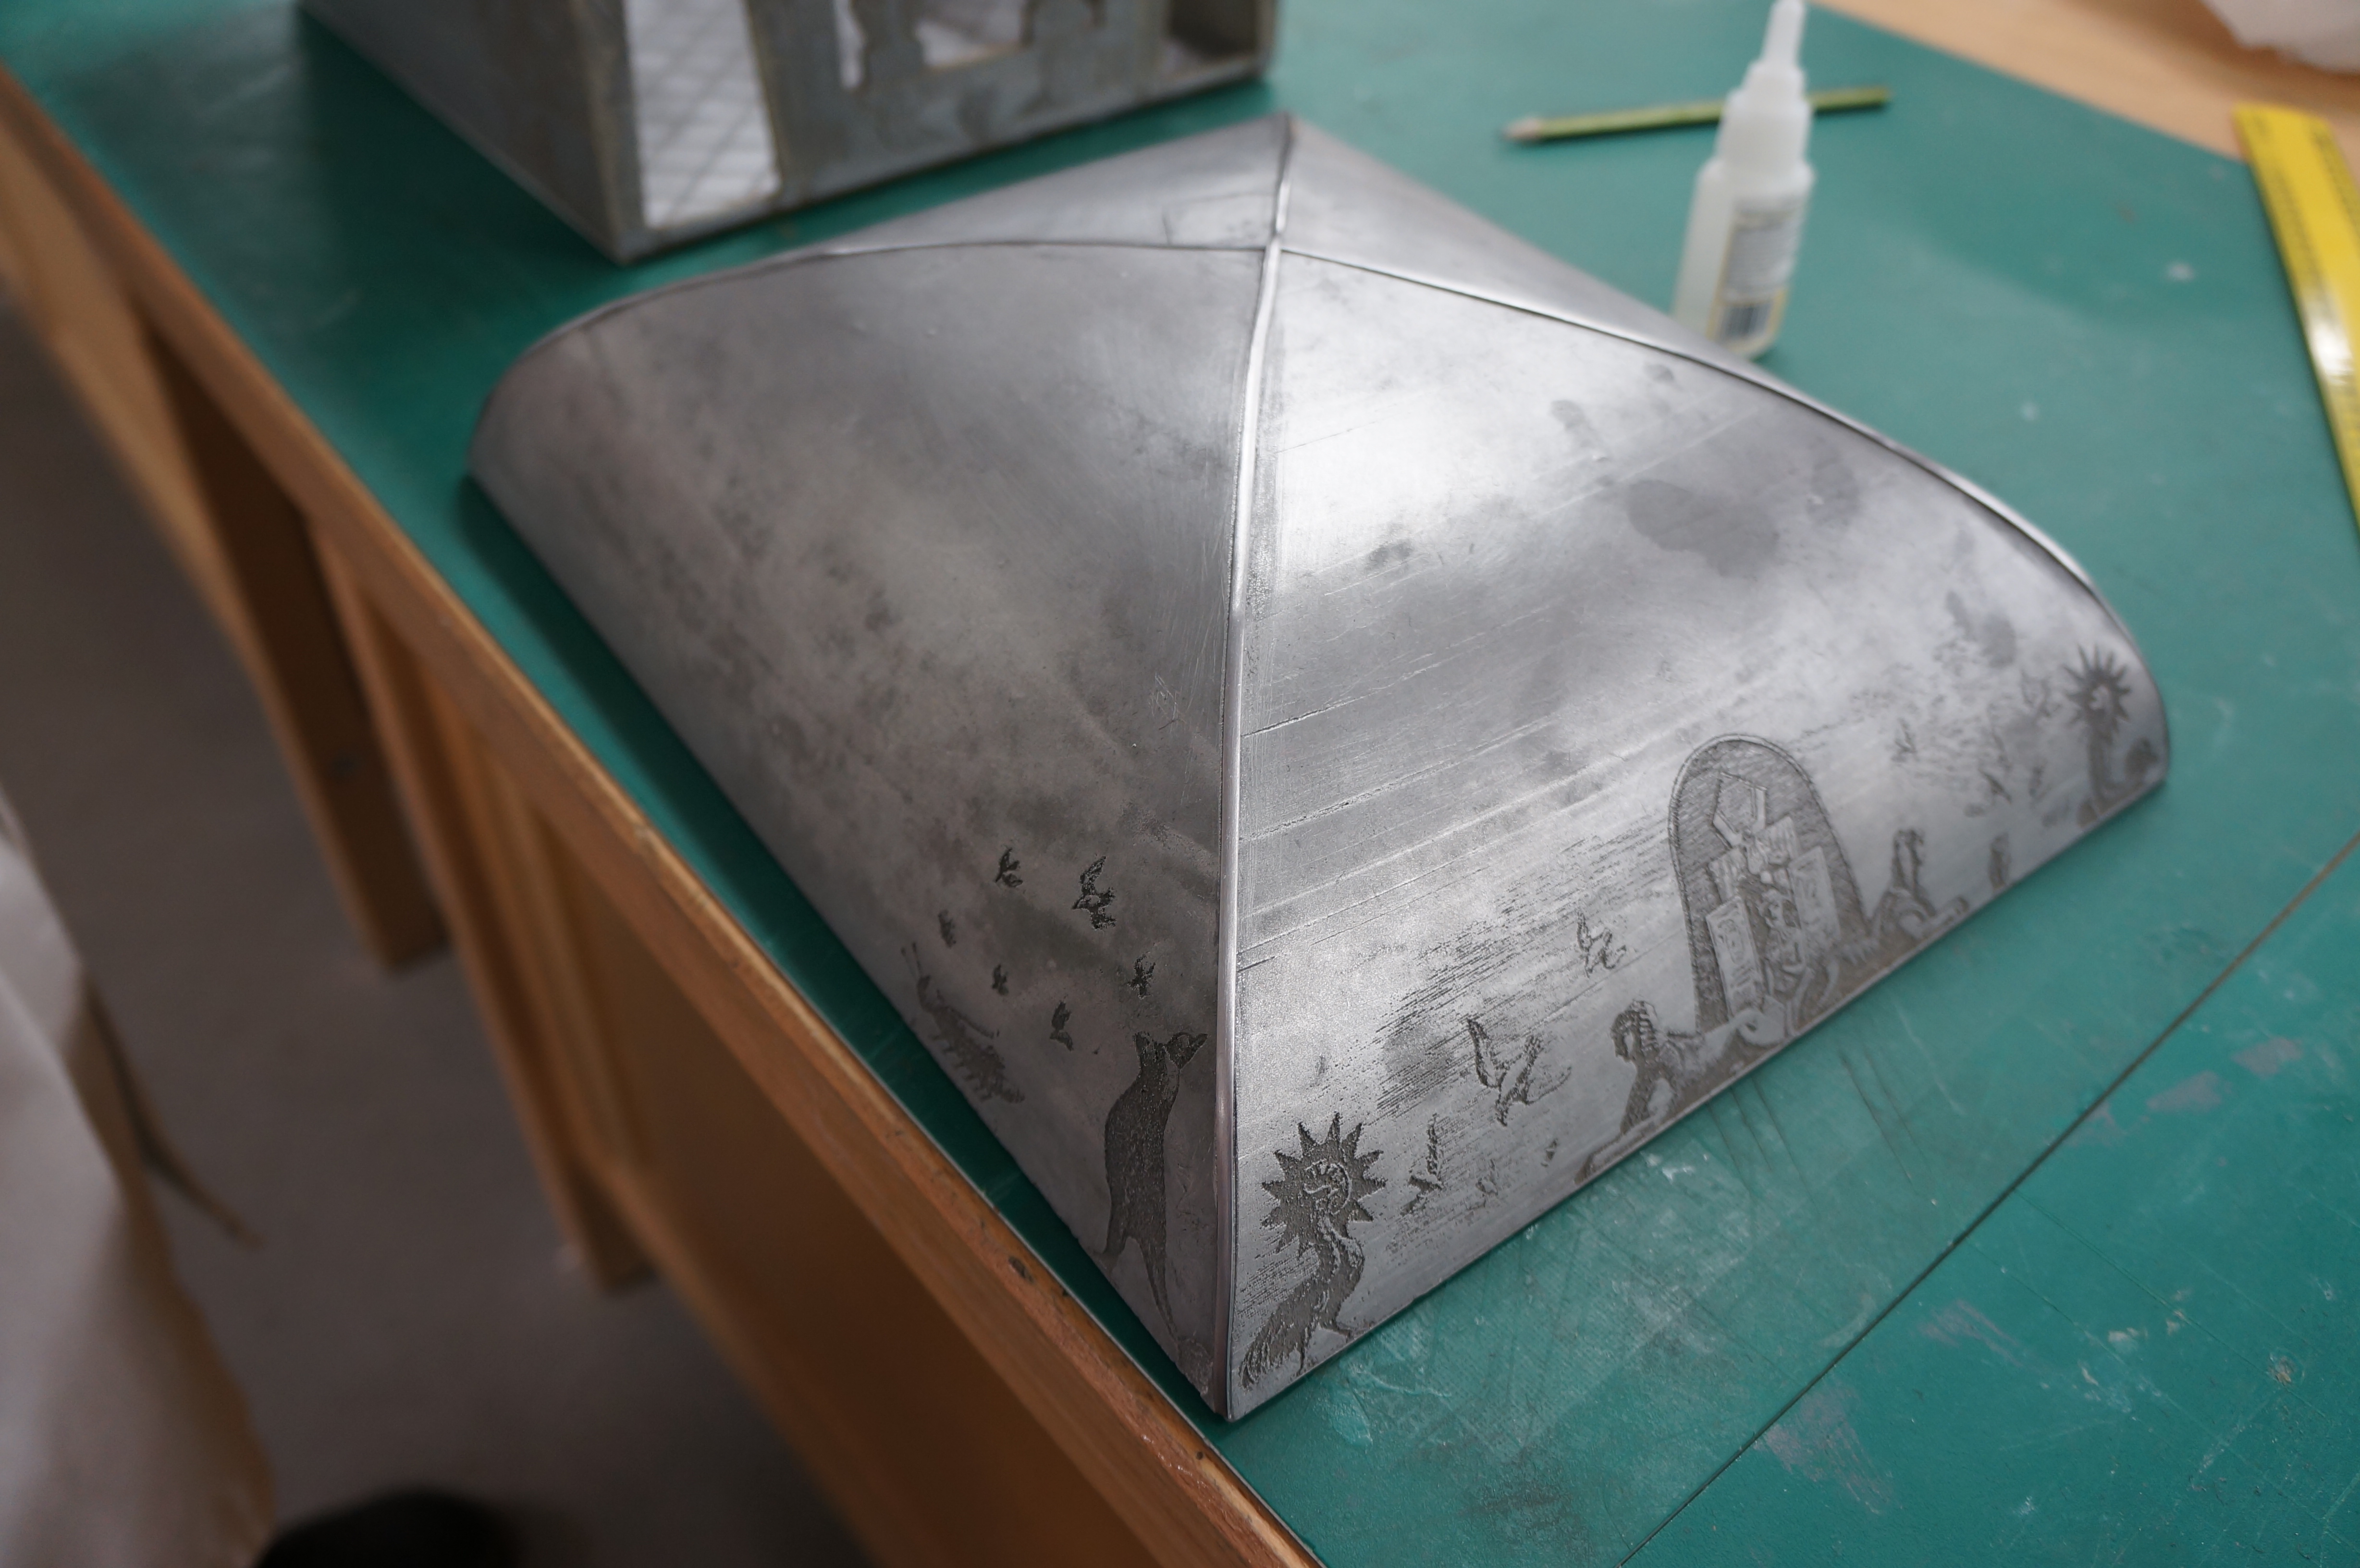
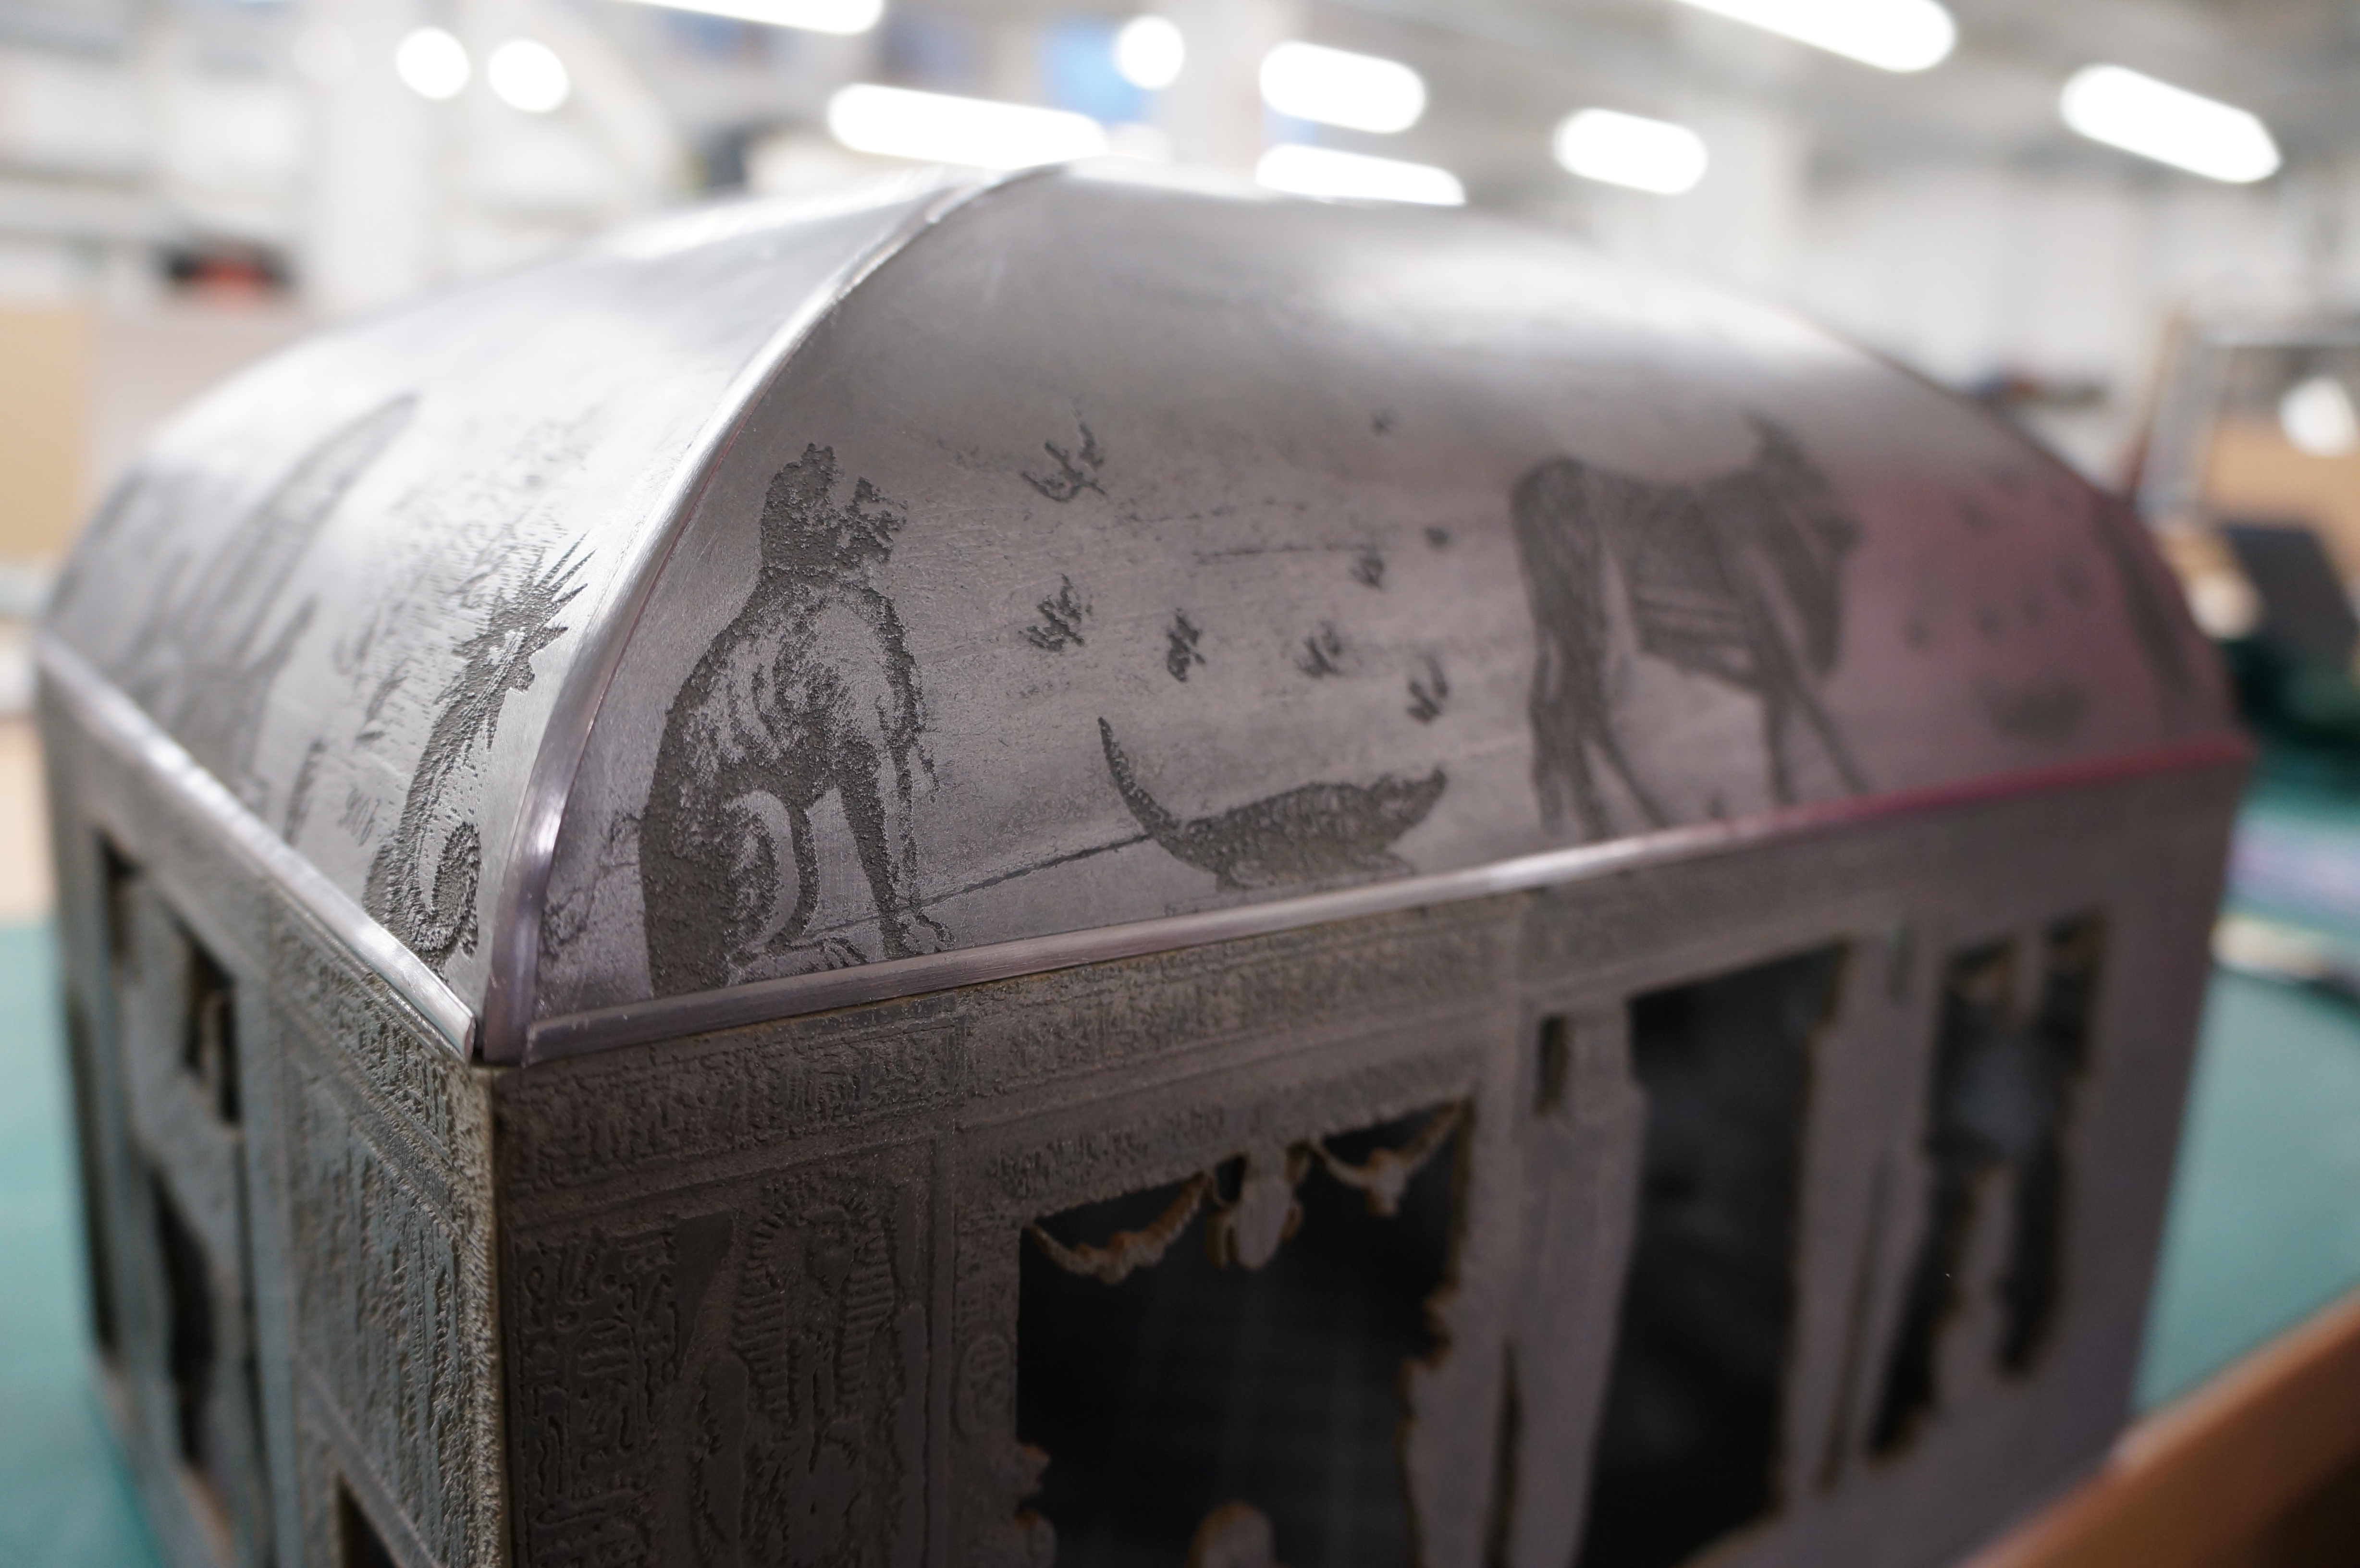
Within the 1:100 sectional model it was key to establish a strong juxtaposition of materials in order to depict what elements of the build are retained and newly interjected. This is attempted by utilising 3D printed elements to narrate the qualities of the proposed stonework bay, with the etched 3mm plywood representing part of the retained masonry bay.

1.100 model dan kempski (18)1.100 model dan kempski (12)1.100 model dan kempski (1)1.50 model (4)

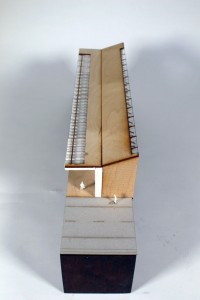
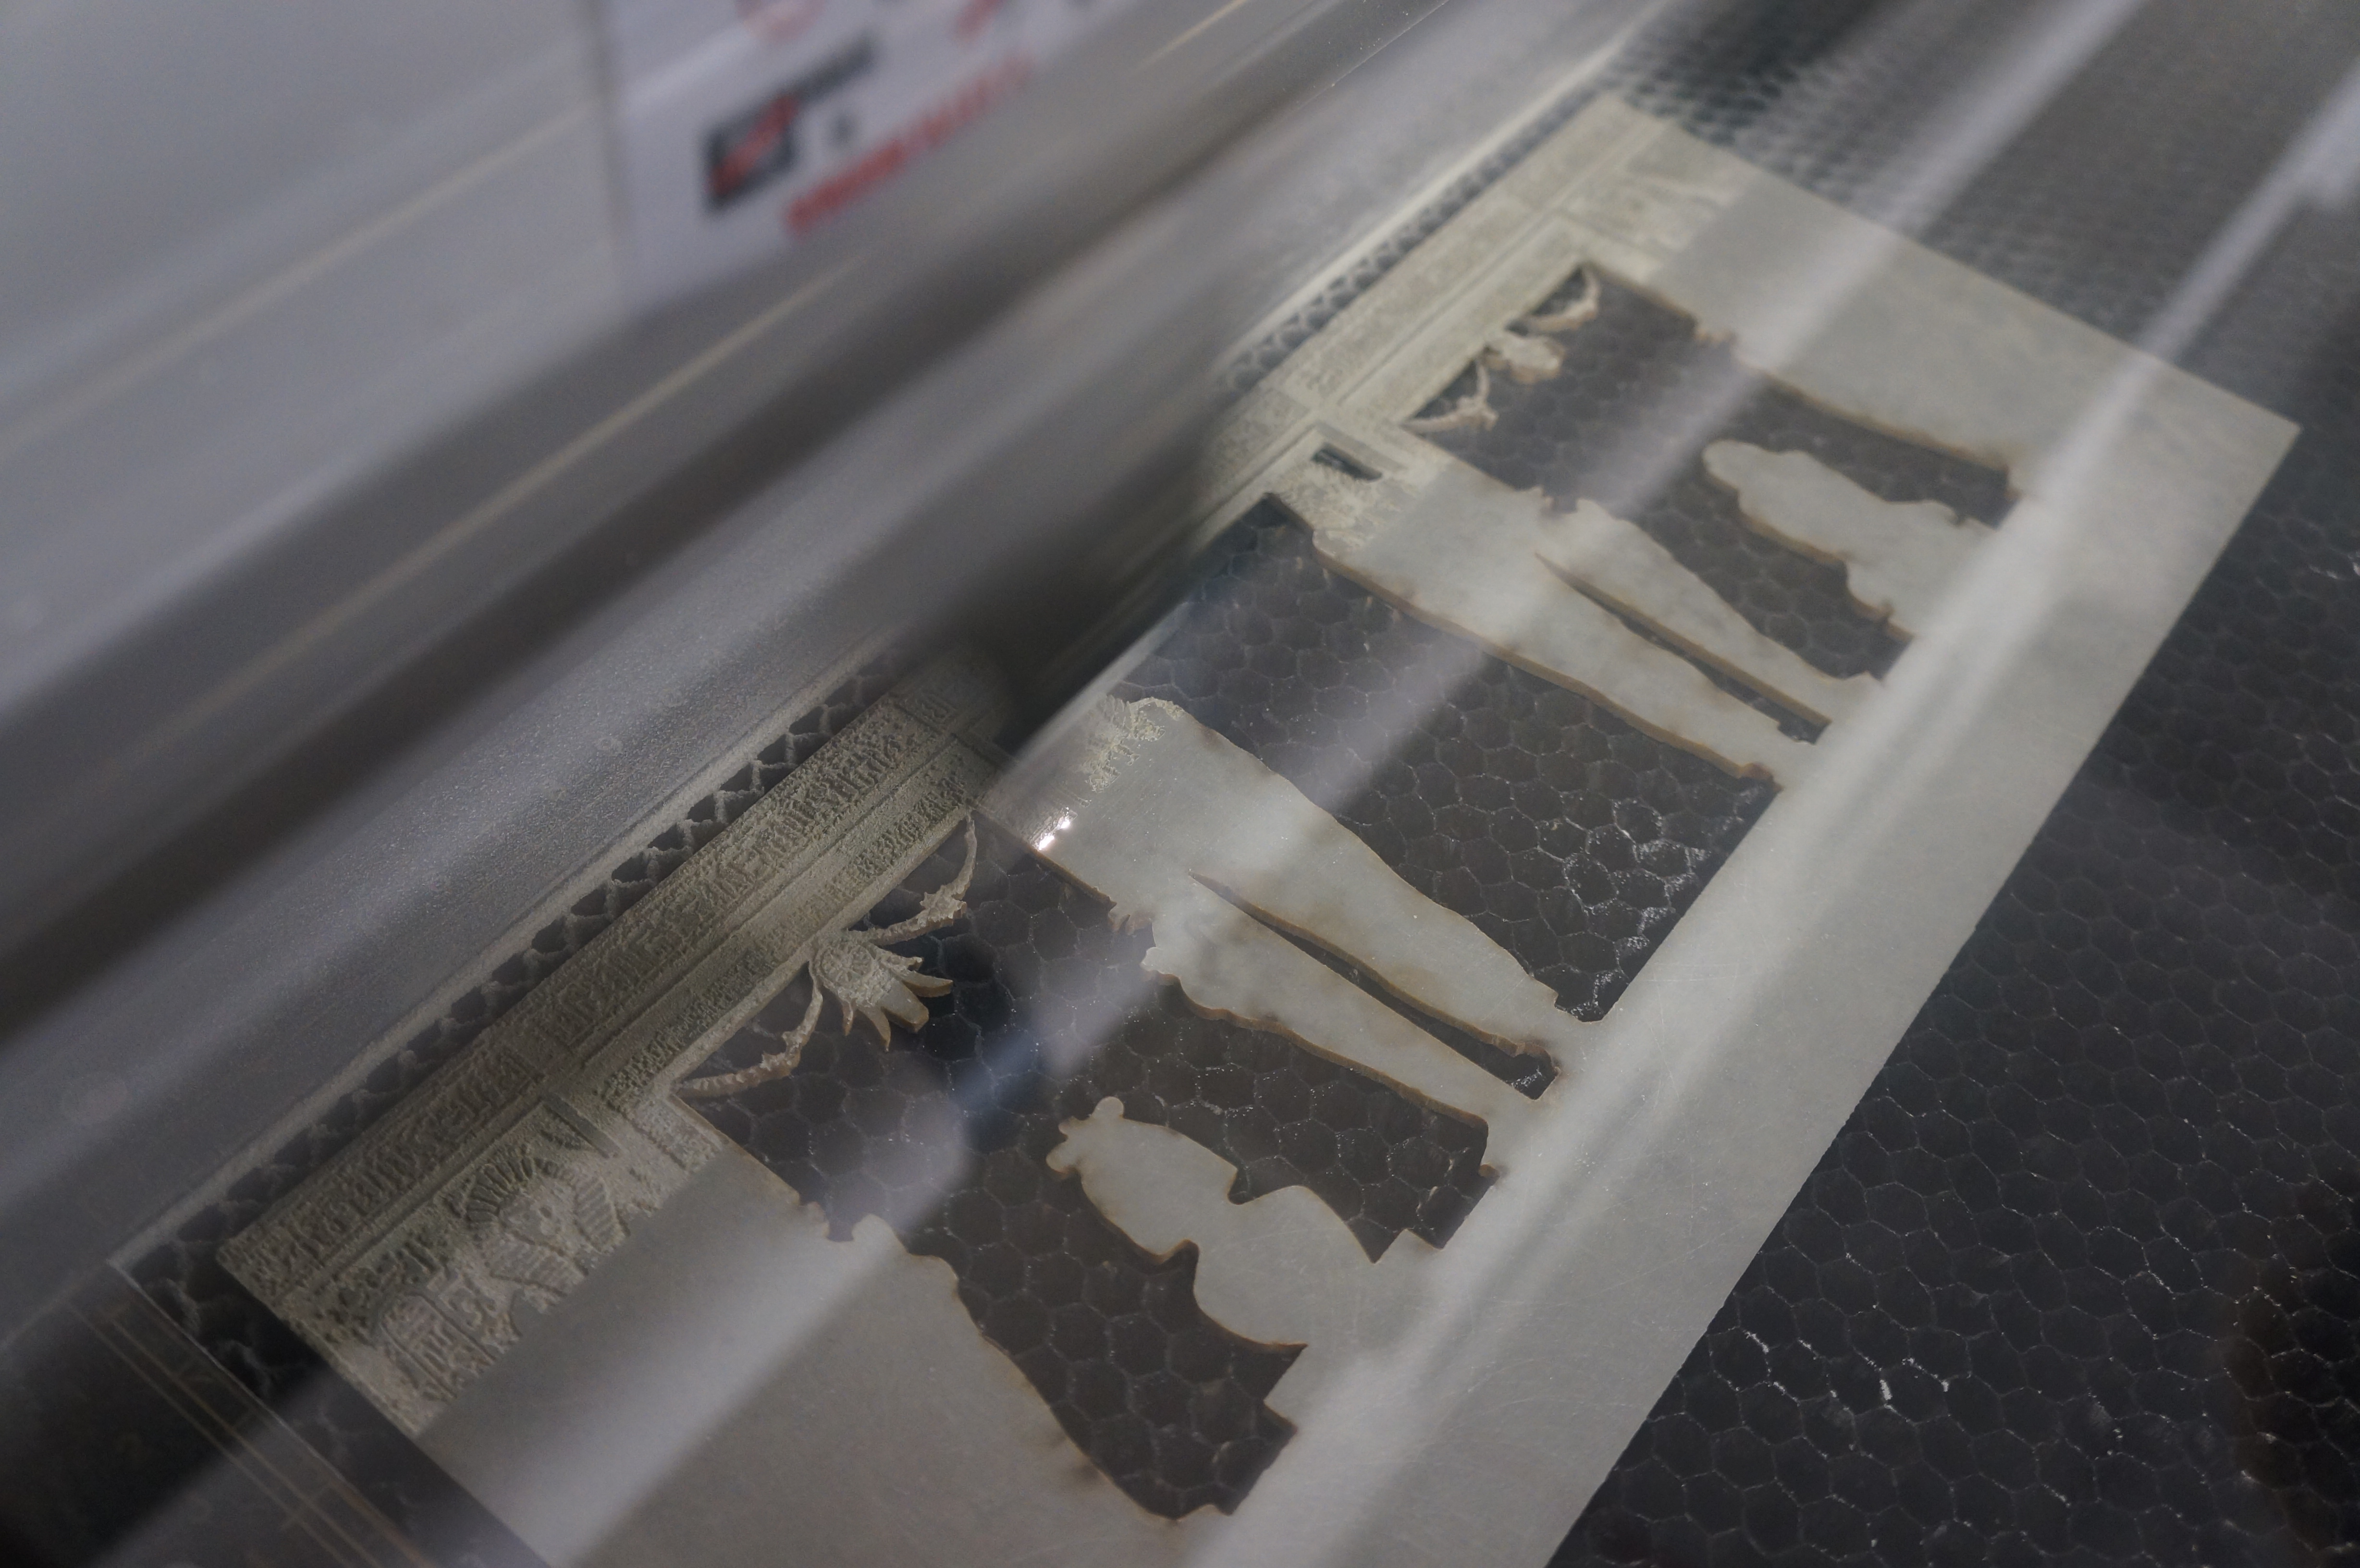
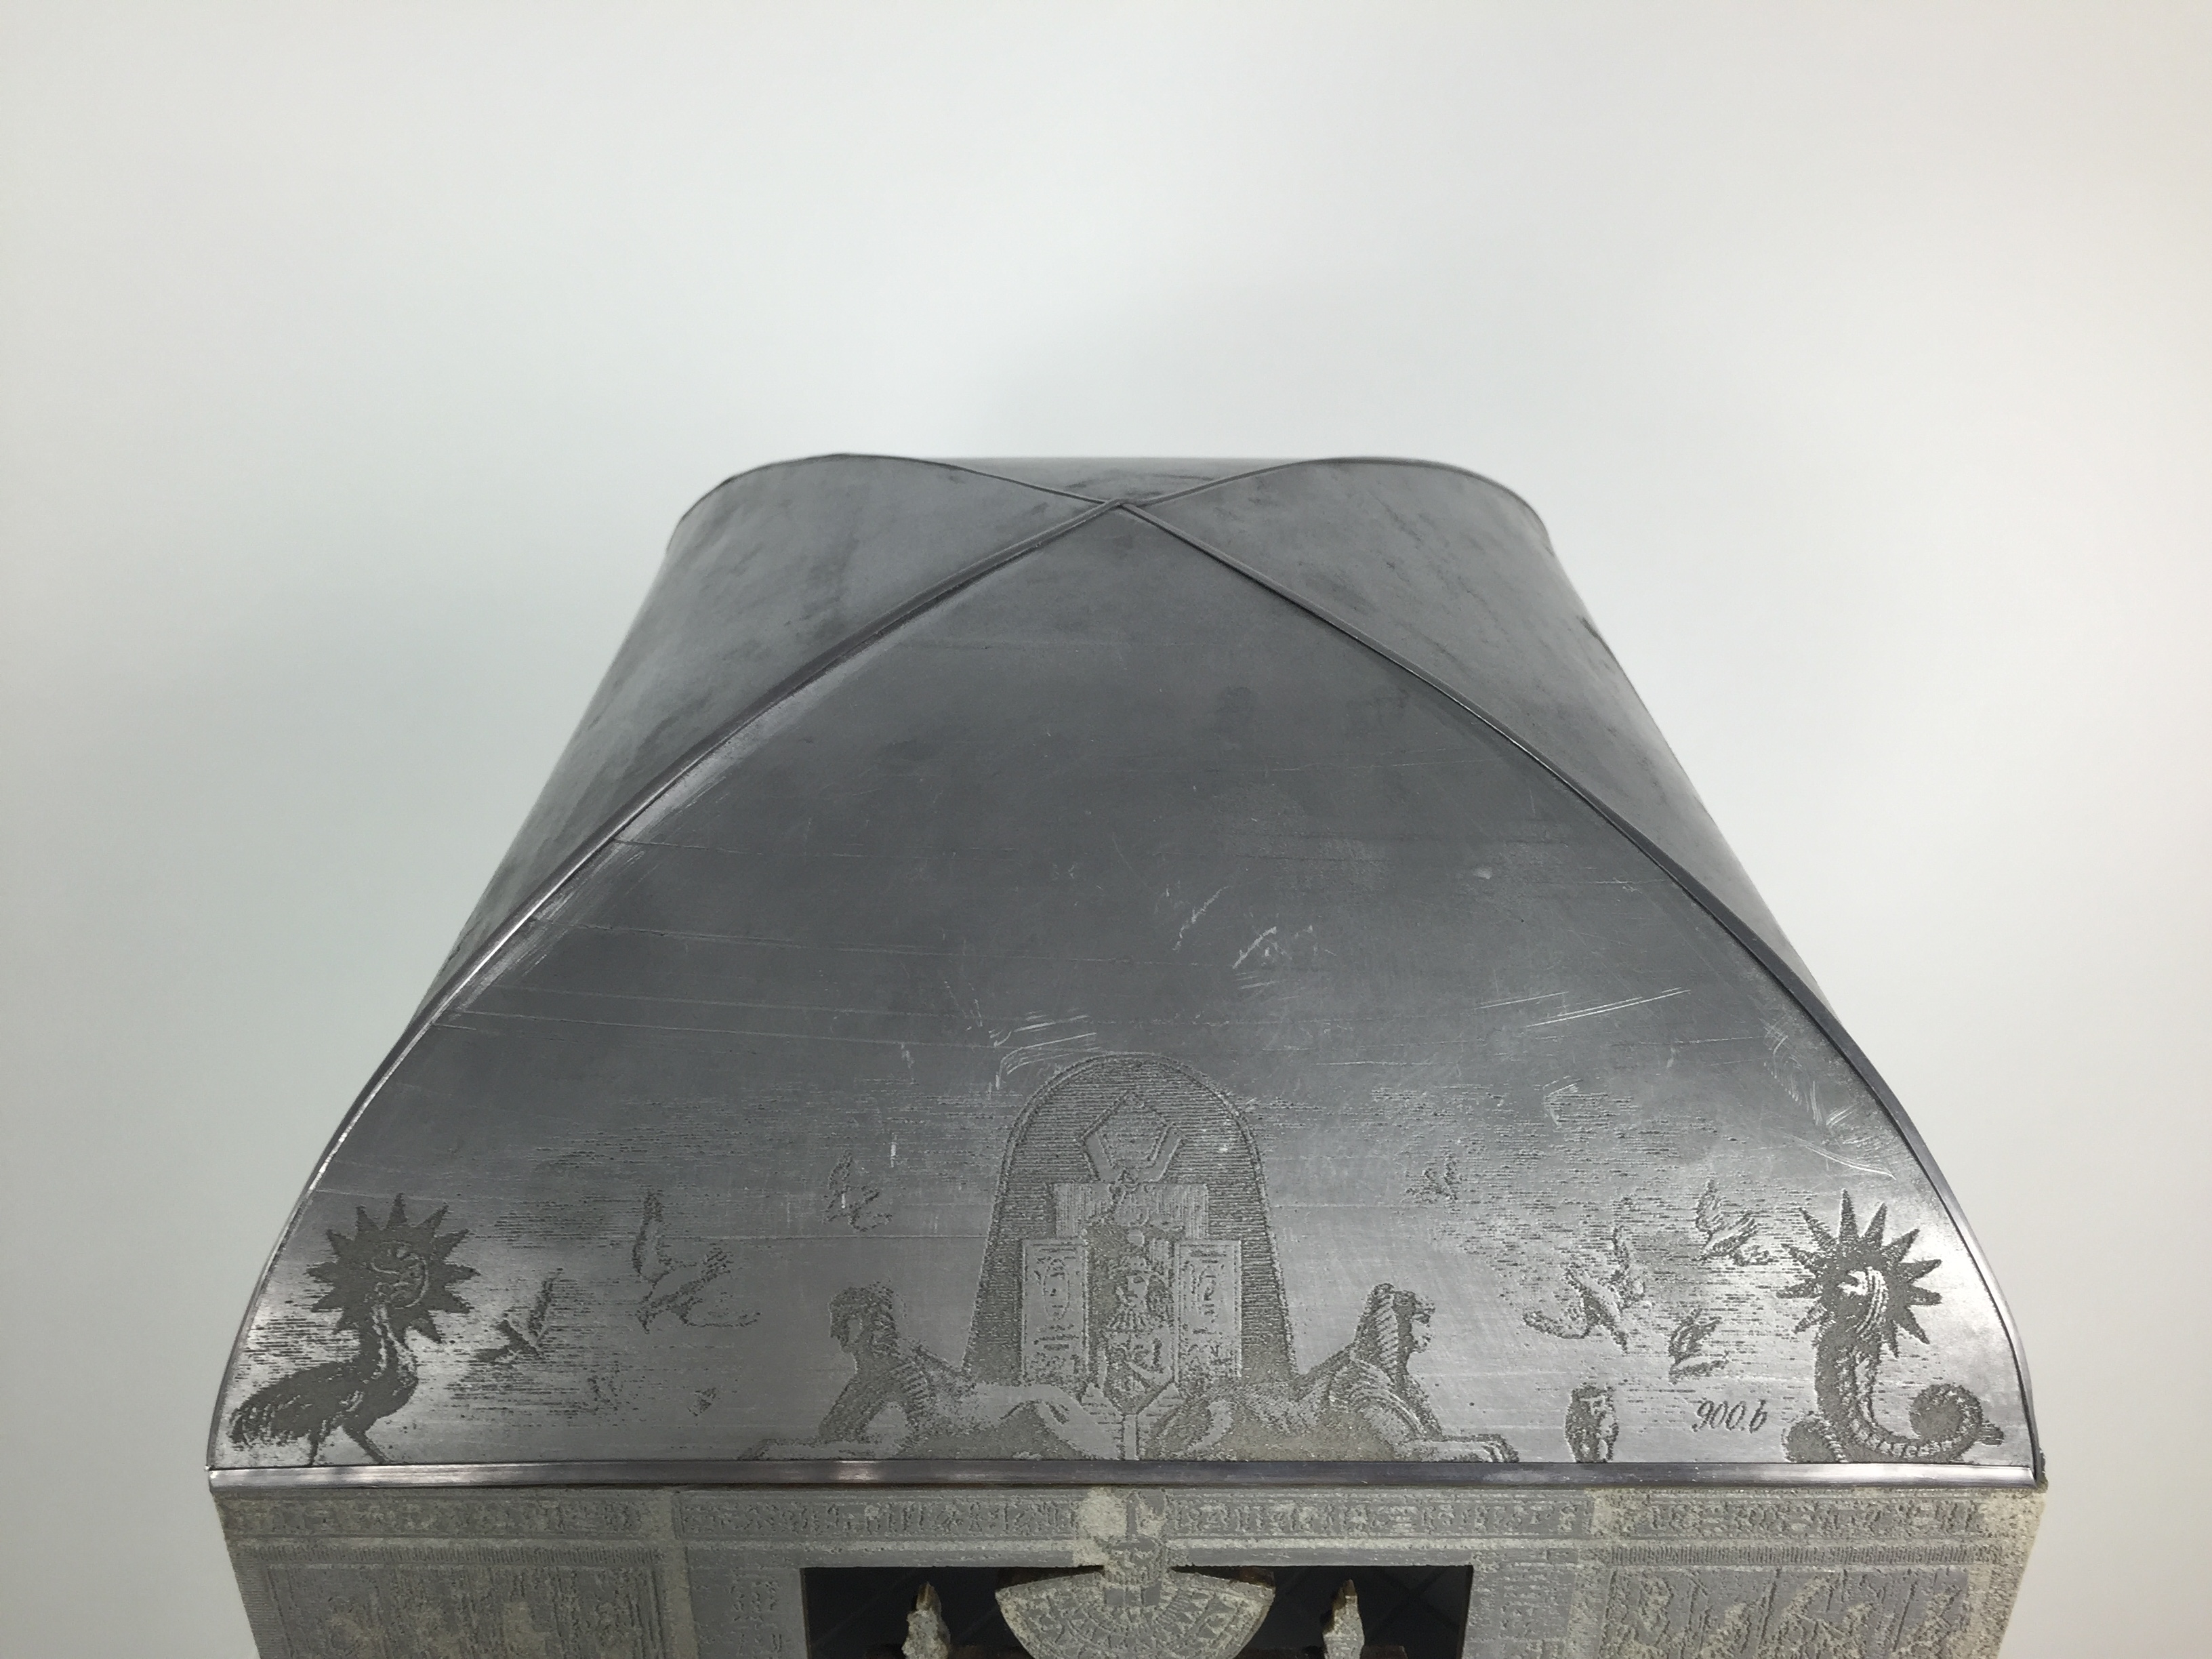
For the 1:50 bay study, 3mm cork board was used as the primary component to replicate the texture and ultimate aesthetic of the masonry – this was to ensure that minimal finishes had to be applied to the already delicate nature of the perforation post-cutting, providing the facade with a more natural demeanour.

1.50 model dan kempski (9)

DSC04456

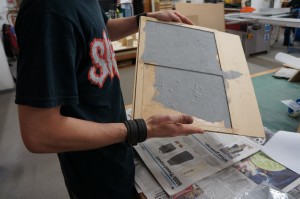
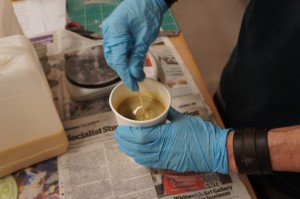
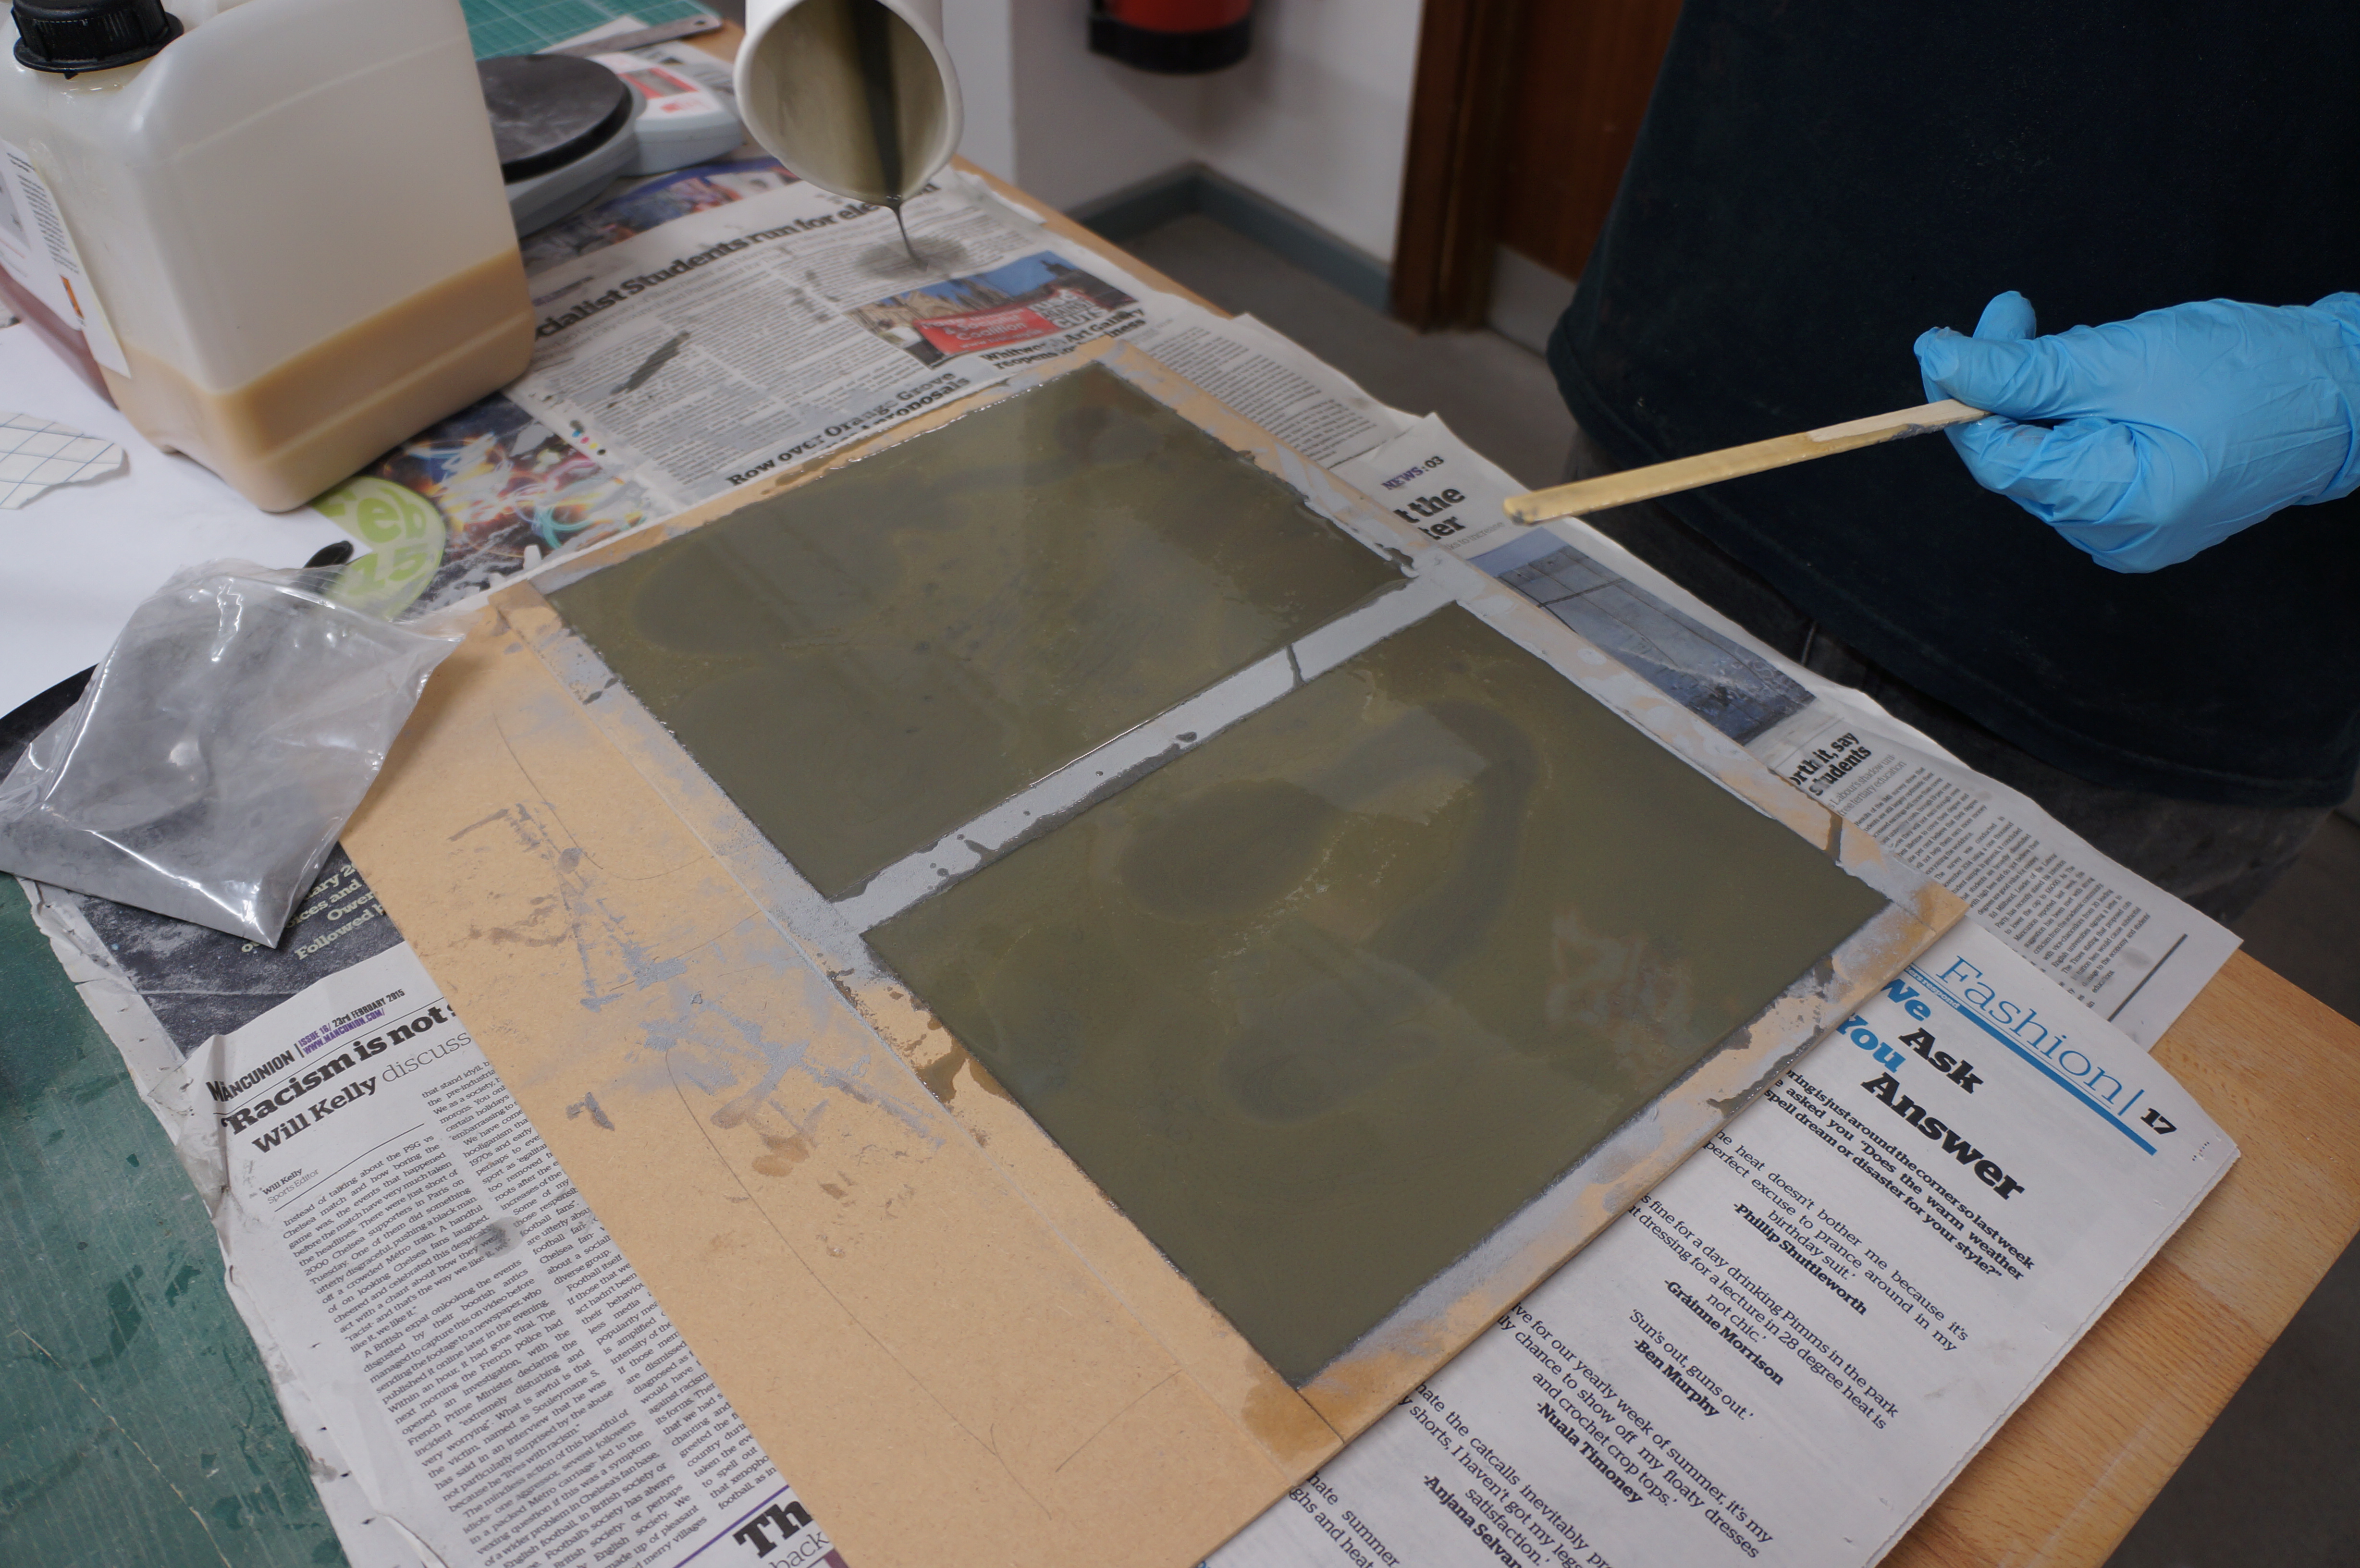
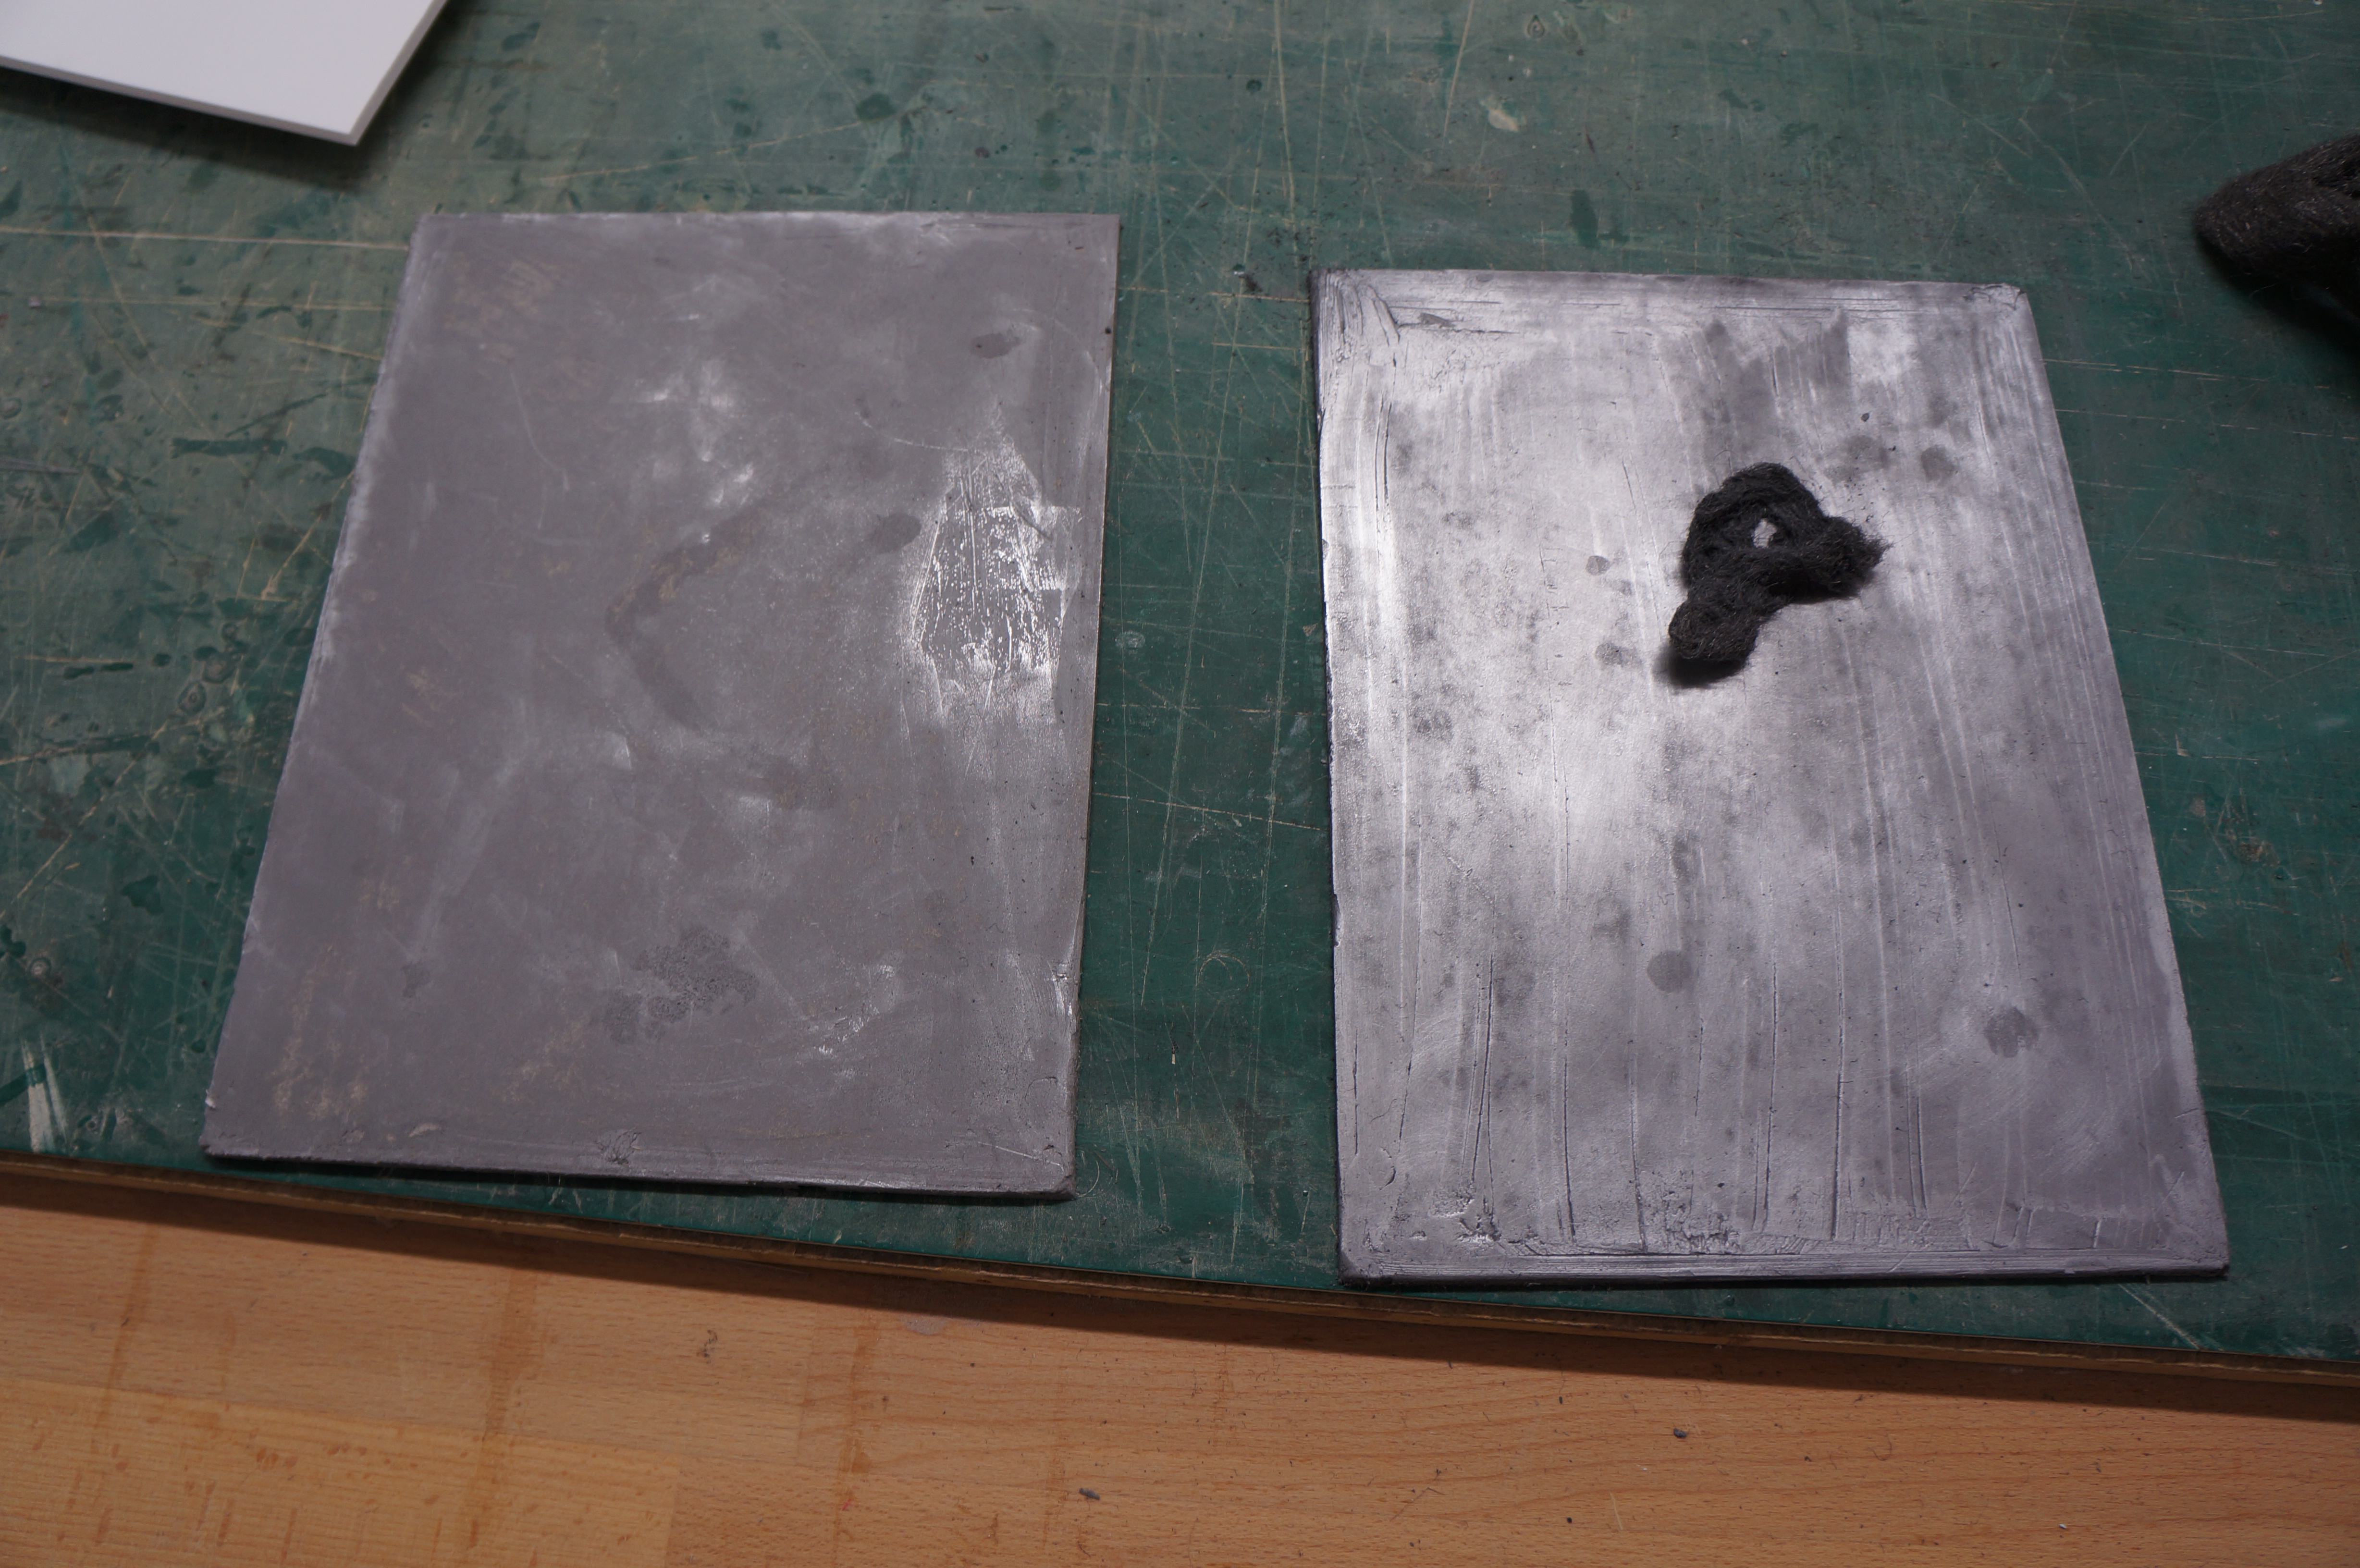
Plaster-casts were made in order to distinguish a level of material separation within the space – focusing primarily between what is stonework and what is masonry. Both materials are reused, as recognised within the programme of the build, and thus is was key to attempt to create a more textured, used finish – achieved by placing a larger build-up of petroleum jelly within the moulds, creating a more textured finish.

Through the process of making both of these models, I feel that a greater understanding has been generated towards the atmosphere created within a building through the interrelationship of materials used within. It is far too easy to remain focused upon the external qualities of a site – and have that overshadow the internal conditions.

Combining both digital fabrication and hand crafted elements provides the ability to work efficiently and precisely, without generating a too-clean portrayal of the scheme. Regardless of the desired atmosphere within the build, I feel it is key to always develop your model-making understanding and techniques; with many components that could be made incredibly easily by hand, are now subject to digital methods due to sake of ease.”

1.50 model dan kempski (12)

1.50 model dan kempski (11)

Colwyn Bay Conservatorium 1:250 Massing Model by Kristian James

DSC04477
Continuity 5th year student Kristian James produced this 1:250 massing model to outline the existing jumbled mass of buildings enclosing his site. The final model form was refined after careful consideration for the role of the model in his project. As the massing was an indication of form rather than a detailed representation, hand crafted block forms were chosen over detailed engraved or printed inserted models.
Kristian summarised the project:
“Using a range of recycled hardwood timbers, I built a 1:250 site massing model which conveyed the different elements of the project. The natural aesthetic  properties of the timber were used to subtly suggest a difference in the design but also retained the desired rustic effect.
With this in mind, the model was left in its raw state and the time spent on the model was used towards create a high quality finish.
 
The CNC machine was also used to remove the road path from the site base.
DSC04459
 
During the build of this model, I spent a lot of time building elements using hand tools, which although may have taken longer, provided a far more accurate finish.
Unlike most models I have made in the past, I did not laser cut any components and therefore each element was bespoke and done by hand.
Although far more stressful, it was very rewarding and resulted in a product that was far more beautiful than anything I had created before of this size.
 
I would summarise by saying that a good model in my opinion should integrate both modern and traditional techniques!”
Kristian James (16) Kristian James (19) Kristian James (24) Kristian James (31)

Mecanoo B.15 Modelmaking Awards

b15%20model%20making%20award-2

After many months of hard work from everyone at MSA the end of year show was officially opened at a private view event on Friday. We were pleased to include a new award recognising the use of modelmaking in students coursework.

Judging took place during Friday afternoon where we were joined by representatives from Mecanoo, Professor Tom Jefferies, Dr Ray Lucas to mark the short-listed work in person. From the outset it was clear this was going to be a difficult competition to win due to the high quality of the featured work.

DSC04511

Spending time to look at each piece in detail, the judges marked out of 50 based on our criteria.

DSC04513

The total scores caused a heated debate about the winners resulting in the decision to restructure our prizes from one to three winners for BA (Hons) as final scoring was so close.

Ernst ter Horst and Patrick Arends from Mecanoo noted that they were “inspired by the exceptional level of quality throughout and it’s important to stress these winners were all on a knife edge with scoring

The winner of the MArch prize was of “outstanding quality and creativity delivering a fascinating model of beguiling interest!” 

Winners were:

Overall BA (Hons) Winner – Paul Thornber


DSC04542

Highly Commended BA (Hons) 2nd Place – Sara Hammond

DSC04539

Highly Commended BA (Hons) 3rd Place – Thomas Smith

DSC04537

Winner of the MArch Prize - Hajir Alttahir

DSC04566

Individual descriptions of the winning projects written by the students can be found in the complete short list document available to view here.

DSC04593

We are thrilled with the response this award has had and are confident we can continue to recognise the great modelmaking work of our students with this as an annual award. As stated by Mecanoo we would like to repeat how close the scoring for this was and that every project picked was done so because of great quality and individual attitude to making which was believed to be fantastic so well done to everyone this year!

Good luck in your future careers!

Scott and Jim at B.15

‘Wood Street Mission’ 1:20 Section Model by Katie Williams

DSC04382

Year 6 MArch student Katie Williams wrote about her final major modelmaking project for us:


“The project is an extension to the existing building of the ‘Wood Street Mission’ charity, near Spinningfields. Due to it being an extension in a constrained site, the design had to respond to the existing ornate Victorian building, as well as create spaces for the existing and new programmes (and users) to connect. The extension aims to reflect and reinterpret the structural strategy of the existing building by using brickwork detailing on the facade, and a glulam frame internally to support floors and the roofs. Key details include recessed imprinted brickwork on the facade, large perforated brick openings and angled roof support beams. This 1:20 model is a section through a covered terrace area on the top floor of the four storey building. This space was chosen as it incorporates the key design details, as well as showing the terrace floor build-up, the internal floor, curtain glazing wall, the roof build-up and the parapet detail.
Where possible, materials were chosen that are a true representation of the actual construction. The glulam roof beams are cut from hardwood, and the internal roof finish is birch ply. Due to the angles involved in the roof, wood was easy to model with as it could be sanded and shaped. Most of the floor build-up was also done using realistic materials, such as foam board for insulation, and Styrene plastic for the waterproof membrane. The roof build-up is less accurate in terms of showing battens an cross-battens under the tiles, but the waterproof membrane is the actual tape used in construction. The brickwork facade and primary structural blockwork are represented in MDF. The facade brickwork was laser cut to show perforations and spray-painted in brown. The parapet cover is vacuum-formed grey Styrene plastic, which was then cut to fit over and around the top of the walls.
DSC04386
The construction of the model helped me to realise the construction issues that were not apparent in a 1:20 section drawing, for example the continuation of insulation on the inside of the terrace area.
DSC04397
When modelling the angled roof beams and working out the angles they should be sanded, it helped me understand the connections that I had previously struggled to model digitally. This was my first time using spray paint finishes and it makes a great difference to finish off laser-cut wood nicely.
On reflection, I can appreciate that in order to achieve the level of finish I am now happy with, the (whole) day spent planning the model was key.
If you fail to plan you plan to fail!
IMG_0246

This project is successful as it carefully balances necessary detail with material choices. The scale of 1:20 is perfect given the amount of layered detail Katie chose to show in her construction and the choice of this corner section was well considered as it shows a good selection of details and finishes that would expand throughout her whole design but are not necessarily required in their entirety to understand their application.

The success of this project is largely down to planning and material awareness. Rather than making the medium her binding constraint and only working around a particular tool, Katie rightly chose to dissect her model into components to help her understand its form as well as considering the most appropriate method of manufacture to represent each part.

It is clear is how well Katie understands the assembly of her building and the lessons learned in making this presentation model no doubt only strengthen that.

IMG_0248IMG_0250IMG_0251IMG_0252IMG_0265IMG_0269IMG_0273IMG_0279