New 3D printer: Fuse+30W SLS powder printer

We’re pleased to announce that after a successful bidding process last academic year we now have an exciting new type 3D Printer that uses selective laser sintering or SLS printing technology: The Fuse+ 30W.  

This type of 3D printing is a leading additive manufacturing technology that uses a high-powered laser to fuse small particles of powdered material together. The resulting fused powder forms your 3d print whilst the surrounding unfused powder is recycled back into the system. This circulation process is managed by the Fuse Sift station where excess powder is mixed with new before being added back into the printer as part of its own ecosystem. 

Our machine will exclusively use a grey powdered material called ‘Nylon 12’ which is known for its strength and durability, making it suitable for various applications in your model making projects.

The printable build area is 155mm(L) x 155mm(W) x 300mm(H).  

The process of creating SLS 3D parts first involves creating a suitable STL digital file that you will need to discuss with a member of B.15 staff. If accepted, your job will be priced up and added to the queue. Once your print has completed, the process requires a cool down period of around 6 hours before we can manually post-process it by removing all of the unfused powder.

Post-Processing – Cleaning excess powder from prints.

Depending on your design, you may have to contribute to this process. If this is the case or you would like to learn how it’s done, then we will provide instruction on how to do it.  

With this type of technology, it is more efficient and sustainable to group files together and because of this we will be trialling a workflow by running the machine once a week. This will initially be on a Thursday to run overnight and be ready to postprocess from Friday. If demand increases this will be extended to also include another day earlier in the week. Files need to be approved for this process no later than 1pm on Thursdays to have a chance of going on later that day. Post processing can be completed from Friday. 

Should you wish to find out more about this printer or about how it might be used as part of your project, drop in and speak to a member of B15 staff and we’ll happily discuss your project requirements.  

See you soon – Lara

‘Architecture and Media’ Project by 2nd year student Tom Cooper

The 2nd years ‘Architecture And…’ project for humanities requires a 3 minute video to be produced exploring architecture and a contrasting element.
My group choose Architecture and Media, as we thought showing this through a video is quite appropriate and the possibilities to explore this topic are vast and interesting to us, and hopefully others too.
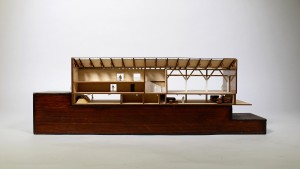
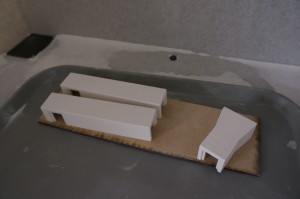
My group; myself, Paúl Cedillo, and Carl Fletcher all wanted to produce a compelling and interesting video, leading us to choose one of the forms of media to be the physical model. And with the Benzie/Chatham being our building of focus by choice, Paúl Cedillo made a 3D model of it on AutoCAD to be 3D printed using the powder printer.


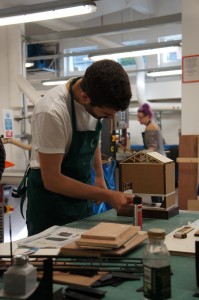
We choose this method as it provided us with the high detail we wanted in the tight and busy time frame we had. We first wanted a 1:250 scale model but realised the 3D printing bed restricted us, but not as much as the cost even with hollow interiors. However, 1:500 was too small of a scale as we would lose detail in the windows and more. We printed three test walls at 1:250, 1:350 and 1:500 to compare the quality, and this caused us to go for an unconventional 1:350 scale to achieve the detail and cost we were happy with. This print was then super glue covered for strength and attached to a laser cut MDF street base. –Tom Cooper, 2nd year BA (Hons) Architecture

‘Urban Mining: The St. Johns Quarter’ 1:100 & 1:50 Models by Daniel Kempski

5th Year MA student Daniel Kempski came to the workshop fairly late on in his project with a need to convey multiple aspects of his design proposals through model making. Having successfully completed his two projects and some valuble lessons learnt. Of particular note was the time consuming engraving and cutting of the cork elements. The results of this were fantastic but it should be noted that this can be very time consuming and therefore potentially costly in terms of laser cutting time. We asked if Daniel would write us a piece to accompany some images of his models – he responded in great detail!

We look forward to seeing some more of Daniels projects next year.

The full description of the project and the application of the models made with us is explained here:

“The culture of use:reuse within the construction industry is an emerging area of importance within the field – with firms being placed under increasing scrutiny to change their methods building demolition and deconstruction in order to evolve to meet the growing demands of waste management. It is key to address this issue parallel to the growing dereliction within our cities – with many buildings being demolished once being deemed unusable.

How this can be linked to programme arrives through the notion of an Urban Auction House: a place where individuals can bring their waste materials (arriving as deconstructed elements) and then be further sold to buyers who can make use of these products.

The scheme acts as a hub for all types of individuals within the construction industry. It tries to establish an even playing field for its users, with products being available at a reduced price due to their imperfect nature – enabling the customer to be able to purchase construction materials at a cheaper rate, seeking to reduce the current gap between small and large scale developers within the market.

The aim of the design is to maximise retention of the existing building (Albert Warehouse), while not constraining myself to remain within the existing structures parameters and potentially harming the programmatic outputs. I aimed to change and manipulate these aspects of the existing form that I felt did not fulfil its true architectural potential.

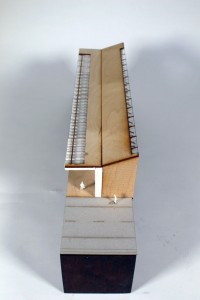
An entire new central bay is established between two existing segments of the build – enabling a more focused entrance point to be generated – recessed back from the roadside, with an element of grandeur created through the staggered, vaulted stonework.
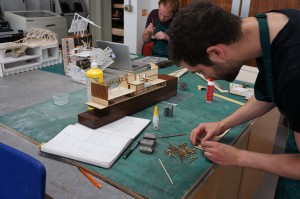
1.100 model (10)

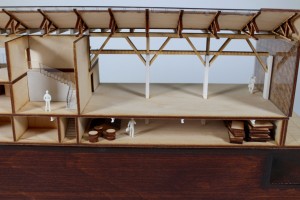
I feel it was key to investigate the building in two different scale models: a 1:100 Section through the scheme in order to understand the internal workings programmatically; and a 1:50 Bay Study to investigate the materiality and light qualities.

1:100 Model

One of the more demanding changes to the existing structure arrives in the form of the central bay being deconstructed and replaced by a primary structure primarily formed by reclaimed stonework sourced from Quay House (one of the four Urban Mines). It was vital to interject a new, more accessible entrance to the building for the main visitors entrance in order to establish a focal point for the east facade (for sake of both functionality and aesthetics).

Recessing the entrance away from the pavement provides a much needed forecourt, reinforcing this new change of threshold through vaulted stonework encapsulating the individual as they proceed to enter the Auction House.
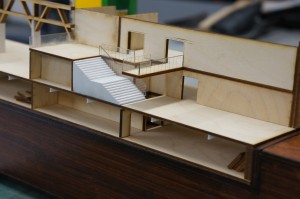
1.100 model (11)

The Auction Hall is embodied within a double-height space, overlooking the River Irwell – creating the sense of theatre to be instilled upon the individual, with grand, exposed structure and a resonating acoustic acting as key protagonists. A raised platform further enables individuals to spectate during the auctions.

In contrast, the Lower Ground Floor functions as a back-of-house storage and preparation area. The workers gather and move the materials during their journey within the Auction House.
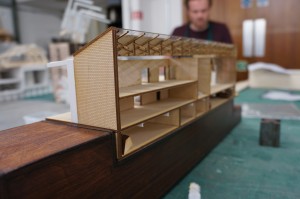
1.100 model (15)

1:50 Model

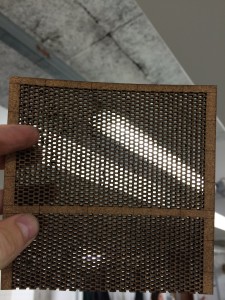
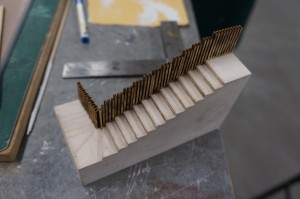
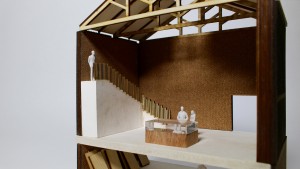
In order to gain a practical understanding of the atmosphere generated by the materials reprogrammed into southern elevation’s perforated brickwork facade,a scaled 1:50 model was constructed. The aim of the model was to investigate the internal light qualities predominantly, to ensure that the transitional space could not be deemed unwelcoming.

The model was also generated to create a built example of a key bay detail that repeats several times along that facade. The proportion between punctured brickwork and the actual structural masonry is key to enable the maximum introduction of natural light, while retaining structural integrity. The light qualities within the transitional spaces are key towards ensuring the success of the internal programme of the building – circulation spaces are there to offer relief in order to create a sense of separation between the Auction House and Galleries.

The large, double height spaces allow natural light to arrive from both the VSCs and punctured brick facade, allowing the central exhibition pieces to have their qualities maximised, as well as the space itself.
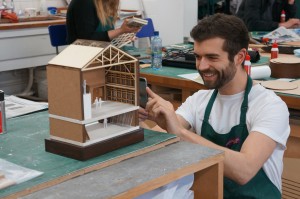
1.50 model (5)

Making the Models

It was key to establish distinguishing characteristics between each of the materials used, as the scheme revolves purely around material reclamation (both architecturally and programmatically) It was vital to represent materials under same semantic in the building specification, as the same material choice in the model – enabling an easy understanding of the intended material discourse: e.g. obvious differentiation between stonework, timber, masonry, etc.

I felt it was key not to oversaturate the models with materials, instead working with three or four strong materials that work complementary to each other provided end products that felt cohesive.
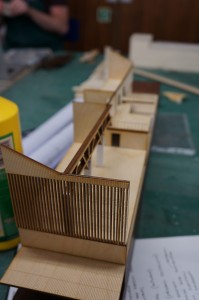
1.100 model (9)

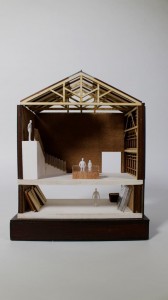
Within the 1:100 sectional model it was key to establish a strong juxtaposition of materials in order to depict what elements of the build are retained and newly interjected. This is attempted by utilising 3D printed elements to narrate the qualities of the proposed stonework bay, with the etched 3mm plywood representing part of the retained masonry bay.
1.100 model dan kempski (18)1.100 model dan kempski (12)1.100 model dan kempski (1)1.50 model (4)

For the 1:50 bay study, 3mm cork board was used as the primary component to replicate the texture and ultimate aesthetic of the masonry – this was to ensure that minimal finishes had to be applied to the already delicate nature of the perforation post-cutting, providing the facade with a more natural demeanour.
1.50 model dan kempski (9)

DSC04456

Plaster-casts were made in order to distinguish a level of material separation within the space – focusing primarily between what is stonework and what is masonry. Both materials are reused, as recognised within the programme of the build, and thus is was key to attempt to create a more textured, used finish – achieved by placing a larger build-up of petroleum jelly within the moulds, creating a more textured finish.

Through the process of making both of these models, I feel that a greater understanding has been generated towards the atmosphere created within a building through the interrelationship of materials used within. It is far too easy to remain focused upon the external qualities of a site – and have that overshadow the internal conditions.

Combining both digital fabrication and hand crafted elements provides the ability to work efficiently and precisely, without generating a too-clean portrayal of the scheme. Regardless of the desired atmosphere within the build, I feel it is key to always develop your model-making understanding and techniques; with many components that could be made incredibly easily by hand, are now subject to digital methods due to sake of ease.”
1.50 model dan kempski (12)

1.50 model dan kempski (11)

Gaudi: Architecture Ahead of its Time Exhibition, Vienna

Gaudi_Viena.jpg_1995623315During a recent trip to Vienna I was lucky to catch the last day of an exhibition of the works of Gaudi at the Architekturzentrum Wien. The exhibition consisted of examples of furniture design alongside descriptions, slide shows of the major works and of course models.

Gaudi Exhibition (15)Of particular interest to our cause were the plaster models showing details and sections through parts of his buildings. The quality of these pieces was stunning and the photographs I was able to take really don’t do them justice.

Gaudi Exhibition (4)We can take from them is inspiration and a demonstration of the sort of insights models of this type can give us into the form and construction of a building. From my best insights a would say that models have been cast in sections and fitted together afterwards due to the fragility and complex shape of certain details. This method of Modelmaking requires the main focus on planning with a conscious thought for the casting process at all times. Martial tolerance and shrinkage is a key factor in designing parts to a particular size for assembly after casting. Gaudi Exhibition (3)This facade section model of ‘La Pedrera’ in Barcelona shows the layers of supporting structure and outer form beautifully. In addition to the physical properties of the building demonstrated through the design, the shadows cast through window openings clear and defined giving accurate projections of how the interior space may change throughout the day. Gaudi Exhibition (2) Gaudi Exhibition (8) Part of the exhibition text explained the importance of models to any project Gaudi embarked on:

‘Gaudi put models before plans. For this reason he set up a workshop next to each of his buildings, where he studied and analysed, from as empirical and a craftsman’s point of view, the forms and structures that he later applied to his projects. This is what he called his “experimental method”, a method that is still in use in the Sagrada Familia Workshop although these days this process has been enhanced with the most advanced technological instruments.’ (Daniel Giralt-Miracle, Curator of the Exhibition)

Gaudi Exhibition (6)Due to our restricted casting capability in B.15 we will be focusing on the accurate production of the ‘master models’ in a manner suited for molding and casting at the Chatham casting facility. As with all projects, consult myself or Jim as early as possible to achieve the most effective results in your time frame. If the project is too difficult at a later stage a high quality finish will be harder to achieve so don’t hesitate to start on receiving your brief.Gaudi Exhibition (11)Also on display was this model 3D powder printed model of the entire Sagrada Familia (above). Producing a model of such complexity as a plaster cast would be achievable but in this case the powder printed method was chosen. Most likely due to the sophistication of each ‘spire’ component and it’s relationship to the next. Certainly for the conservation of time and as a retrospective piece this is very appropriate.  Gaudi Exhibition (17)The above prototype testing model or stereo-funicular model is a replica of that used by Gaudi to develop his design for the construction of the crypt of the Colonia Guell. Simple materials like lead weights, string and a frame were crucial aids to design in Gaudis workshops and demonstrate the value of simple methods of creation or problem solving through making.

I’m glad I was able to catch this exhibition and would recommend anyone to drop by the Architekturzentrum Wien (Vienna) if they are in the city. Although it has now finished you can view the exhibition page here.

Scott

‘Testing The Machines Of A Third Industrial Revolution’ Cross Section Presentation Model, Abhi Chauhan

Abhi (33)

This project was completed in the final weeks of the last academic year by 6th year MA Student Abhi Chauhan. The project is the follow on to the 1:100 section we featured several months back. What is particularly appropriate about the styling of this project is the subject matter or the site. Being a 3D Printing Manufacturing facility of the future means no better method of production that the technology in question. This is definitely something to consider when devoting yourself to a major project like this – for example, if you are building an eco-concious design then that ethic should carry through to your presentation and thus model construction. This project sticks to its purpose through and through.

Abhi has been since graduated and started a full time position at Grimshaws in London. We wish him all the best in his future career!

IMG_4753

This piece will be on display as part of our B.15:45 Exhibition so be sure to have a look in person.

Abhi has kindly written us this extensive account of the theory and construction methods he used in this stunning final piece. Enjoy!

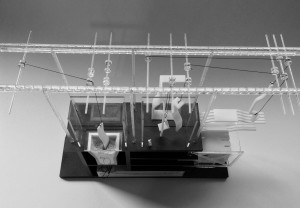
This model is a final exhibition 1:50 sectional model. The slice is located through a key component of the building scheme titled ‘The Machines Of A Third Industrial Revolution’ The model slice – in detail depicts the processes of 3d printing of 1:1 architectural components, to be tested on a stalled concrete frame bounding the site. The design of the facility is such that it sits into a trench in the ground and features a folded roof structure which integrates a 3d printed park at ground level with the industrial processes of the facility within. The scale of the facility has been designed to be oversized, to deal with the variety of large scales that are needed in the manufacture of components for the construction industry.

The model builds upon the 1:100 sectional model completed earlier this year, and takes on a similar aesthetic to that of a cross section through a large industrial machine hanging of the walls of the facility.

The model has been constructed with a variety of different techniques.

IMG_1003

The base has been CNC cut from x15 18mm mdf sheets layered and glued together. This method, although not the most cost effective meant that each layer of the base could be designed to incorporate slots and grooves within for housing of the various components that would eventually complete the model.

Abi (10)

2

The red structural parts forming the portal steel frame structure hung within the trench were all constructed in 3ds max and then 3d printed on the ABS printer. These parts were then spray-painted to get the final red finish seen. Other components that were printed, include some of the facade components, and the series of storage tanks and pipes to the right of the trench. This method of manufacture was chosen sue to the time constraints, the subject matter of the project, and the complex shape of some of the parts.

IMG_1016

The roof was also 3d printed and a shelling script in grasshopper gave the folded structure a thickness to make watertight for 3d printing. This part was the most challenging to construct and after a variety of failed tests the part was printed at Hobs due to their larger printer beds (up to 1500mm wide) which allowed for the part to be printed as one component. Finishing the roof are a series of card panels (depicting a metal skin) which were laser cut and engraved. These were bonded to the 3d printed structural roof frame using spray mount.

The material archives (in white) set into the base of the model were the last parts to be 3d printed on the model, and were done on the powder 3d printers. These constructs were notoriously fragile and once installed in the base had their edges and portions of their rebuilt in white pollyfilla.

The remaining components making up the model have been formed from either 2 or 3mm clear acyclic. For example the 3d printers on the -2 level have been laser cut form a mixture of 2 and 3mm acrylic and then assembled to snap fit and slot together to avoid gluing. This clear aesthetic was chosen for a variety of the model parts as can be seen.

Abhi Components

The landscaped elements including the cranes and gantry and the main internal staircase were all laser cut from 2mm mdf. These part were all spray painted to the final grey and black finish shown.

The facade skin (resembling an ETFE system) was vacuum formed over a 3d printed mould. The mould was designed with groves in it and as such were expressed in the final plastic shells.

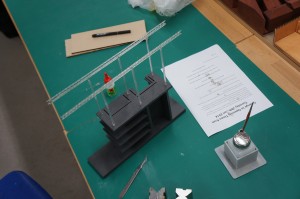
Before any parts were manufactured every part was modelled in 3d and then assembled to create a master digital model. (see image) Due to the large amount of parts on this model this was necessary to eliminate any unforeseen mistakes which would be harder to rectify once parts had already been cut.

IMG_1046

Each part of the model was treated as a mini project i.e. the main facade, the main stair case, the 3d printers on the ground floor, etc. Once these were all assembled and sprayed the whole model was put together like a giant jigsaw. Due to the fact that almost every part was digitally fabricated there were few tolerance errors during final assembly.

The model took approximately 3 weeks to translate from an actual section into model drawings and then 3 weeks to get all the parts cut and painted and a final week to assemble together.

Abhi (6) Abhi (49)

Abhi (55) Abhi (2) Abhi (66)


‘Lithification’ 1:200 site model, James Taylor-Foster

As part of the final major project for his 3rd year submission James decided to produce his completed concept for the former Odeon cinema site on Oxford Street in Manchester at 1:200 scale.

James described the project for us below:
This project is, fundamentally, a house for stone fragments in the heart of Manchesters civic centre. Combining gallery spaces with workshops for stonemasonry, the buildings programme hinges around a tripartite relationship between stone as symbol, material and object. The spaces which consolidate these three spatial threads create a communicative dialogue between street and threshold, node and surface, alongside person and occupation. Designed to activate encounters between the material fabric of the built environment, movement of people, and the intimate craft of stone carving, the scheme seeks to integrate with (rather than reconfigure) the symbolic fabric of the city. The scheme, heavily influenced by ritualised occupancy both human and non-human (such as the daily, repeated zenith of falling light), distills the principle elements of a building into a collection of interdependent, intangible relationships. Volume, void and light align to create moments of lateral swelling in which the interaction of people supersedes, yet elevates and accentuates, particular formal moves. Capturing these ideas in a model was a challenge. Using a lightly grained wood, jelutong, to mass the large volumes of space, 3D printed elements bring focus to two elements: the entrance loggia in the centre of the building and the facade that faces Oxford Street, a busy Mancunian thoroughfare. In using a modest palette of materials, focus is drawn to the relationship between these two key elements that activate the street and public space they face. All sat on a heavy mahogany base – elevated by a thin sheet of plywood which denotes the street kerb – this simple, diagrammatic, 1:200 model works alongside a collection of drawings to visualise a complex orchestration of space. (James Taylor-Foster 2014)

Due to the fragile nature of the powder printing material when used in thin volumes there were several breakages to smaller elements of the model. These were repaired using a mix of styrene strips and filler. Once repaired the whole model was reinforced by soaking it in superglue and finished with a coat of white paint. It is always worth remembering that the smaller details of designs are a potential break risk for 3D powder printing. If possible try not to produce components smaller that 2mm in size and thickness. You should always consider the removal process and how this will be successfully carried out given your design. See more of James’ work by clicking here.

Abhi Chauhan: ‘Testing the Machines of a Third Industrial Revolution’ 1:100 Site Section Model

6th Year MArch student Abhi Chauhan has recently completed several models as part of his Intimate Cities project. The earlier models were used to demonstrate initial concept ideas and helped influence design changes. In keeping with the subject matter of the proposed development Abhi has put heavy emphasis on digital manufacture.

Abhi gives us an over view of the project and how this model fit in to its development:

As part of the Intimate Cities Atelier this year we were concerned stalled construction sites in the city of Manchester. These sites are unique in that their infrastructural order has been partially installed and my primary aim is the reconnection of these sites back to the city context. Situated on the Potato Wharf stalled construction site, the final scheme looks at the idea of bringing around a Third Industrial Revolution, by looking at the research and testing of an advanced manufacturing technique (3d printing) and a new energy infrastructure, (hydrogen fuel cells).

 Realised as a masterplanning strategy the stalled concrete frame on the Potato Wharf site is used a ‘live’ test-bed for 3d printed architectural components, in addition to this the scheme engages with the redundant  transport infrastructure bounding the site and reinstates the canal and rail network as a distribution matrix for the transport of raw material. A reconfigurable 3d printed public park defines the edges of the new site in the overall strategy.

VISUAL LIGHT

The renders depict how the main 3d printing manufacturing hall and hydrogen exchange will look. The 3d printing facility is concerned with the research, manufacture and testing of 3d printed architectural components and as such the construction and detail is oversized to deal with a variety of different scales present on this project.

This first conceptual model depicts the main processes occurring in the 3d printing facility and follows the life-cycle of a 3d printed architectural component from its raw powdered state – stored in a material archive; to the printer beds; then for reconfiguration in a graveyard of failed components; and ultimately to its reverse engineering back to its raw powdered state.

The main frame was laser cut from 6mm MDF and designed to slot together. After spray painting grey to depict a raw concrete surface a series of powder printed material stores were fixed in place. It was decided to 3d print these stores due to their complex shape and the desired ‘layered’ construction aesthetic I was after.

The main machines in the model have all been constructed from separated components each laser cut from 2 and 3mm clear acrylic.

The 3d printed architectural components created in the facility were depicted by themselves being 3d printed. These parts were modelled in 3ds max and made ‘watertight’ ultimately for 3d printing on the ABS printer. (Abhi Chauhan May 2014)

Abi (2) Abi (5)Abi (6)

Abi (7)

One aspect of Abhi’s model work which is particularly successful is the appropriate use of different process. Having an understanding of the best suited method to achieve a desired outcome is key to an effective model. Without a clear aim as to what it is you are trying to convey many models have little practical use in conveying the key aspects of a design concept. This model of course naturally lends itself to 3d printing due to the subject matter.

IMG_0740 IMG_0744 IMG_0750 IMG_0752 IMG_0753 IMG_0757 IMG_0758

3D Powder Printed Venice Master Plan Site model, Lauren Green and Becky Prince

Laura Green and Becky Prince Y6 (4)Lauren and Becky decided to create their site master plan using 3D powder printed components on a laser cut plywood base. The completed model looks great and shows in detail all the shapes that make up the exiting structures their chosen site.

Laura Green and Becky Prince Y6 (2)For those eager to try 3D printing it may be worth noting that this is a fairly unorthodox approach to making a site model due to the cost implications. This batch of printing came to a total cost of £116. When combined with other material and machine use time the total cost of the model came to around £150. This is minimal compared to commercial model costs but cheaper approaches can be carried out if cost is a concern.Laura Green and Becky Prince YR6 (1)Despite these cost implications, the outcome is very successful and clearly conveys the level of detail sought for the project. The use of timber against black acrylic to represent waterways is a style often used by David Chipperfield Architects Models.

Extension to the Academy of Fine Arts, Venice, Benjamin Hale

This project seemed to go on forever but Ben got there in the end after much thought and perseverance! Ben described the project in his own words for us:

“The project centred around the concepts of subtractive architectural restoration, revealing existing elements on site and adding additional elements to solve architectural anomalies often found in historical cities such as this.  The models represent at differing scales how the site interacts with this new architecture as well as how my own building functioned within the new public spaces created by this subtraction. Many of the models are abstract forms of more sophisticated concepts yet the message remains concise as to what each model is trying to achieve by the way of simplifying the material pallet and not resorting to complicated methods. The models are also interchangeable as long as they are created at the same scale and can be reused to create new models later on or explain an idea in greater detail. Model making is an integral part of any designer’s toolbox and new techniques should be tested, however often you can find that a new take on a tried and tested method will result in unexpected outcomes that will further you design.”

This series of models certainly give a varied view of Bens proposed project which is exactly what you should be trying to achieve in your submissions. Models are there to convey different aspects of your design in the best possible way. Spending time to think about exactly what you want to show and how best to show it is time well spent as frustrating as it can be at times!

Also, as a side note to you all, unless you plan to take your array of models with you to interviews etc. then good photography is essential to document your work. We will be looking to a devoted photography area of the workshop in the coming months in time for the start of your new term in September.

Cross Sectional Bridge Model, East Croydon Pedestrian and Cycle Bridge, Charlie Kentish

CharlieKentish1

This 1:50 scale cross section model used laser cut cardboard for the supporting structure and 3D Powder Printing for the parametric roof design. The roof section was created digitally using Grasshopper. The project was commended by the Manchester Society of Architects in the design awards for 2012.

CharlieKentish5CharlieKentish3 CharlieKentish4