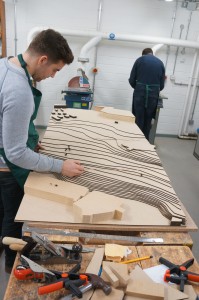
When casting with plaster you always have to contend with mould design, consistency of mixing the plaster and the eventual extraction from the mould. These factors can cause a fairly high fail rate if one or more are carried out incorrectly. One way we can get around the need to mould and cast slabs of plaster is to utilise a ready made substitute in the form of plasterboard. Pre-cast plaster board can be purchased readily and cheaply from most DIY stores. It provides a consistent slab of plaster that can be easily worked using hand tools or machine cutting.
In its bought state plasterboard has a layer of paper adhered to the outside which can be removed using a wet cloth. This is the most laborious aspect of using this material but is a small price to pay for the time and expense of trying to cast slabs from scratch.
 Once clean of paper the board should be left to thoroughly dry before being worked.
With this particular project slabs of plaster board were cut to size before being engraved with detailing on the laser cutter. This level of detail created a cast concrete imitation that would be very difficult to replicate from a cast piece.
 The main disadvantage of this engraved method is in its fragility. Once completed the engraved pieces have to be held with great care to avoid damaging the surface. One method of strengthening the pieces is to spray over a layer of clear lacquer. Even with this coverage the surface can easily be damaged so this process is really for aesthetic purposes and doesn’t lend itself to models that need to be handled.
To create the impression of a solid cast block the edges of each piece were mitred prior to being engraved. Mitering the edges made for an even more fragile edge that required filling with a quick drying Poly-filla which was then lightly blended with sand paper.
Lost Spaces – Nine Elms Cold Store
Initial experiments with this method were done by George Thomson, Jilly Clifford and Ayo Karim as part of the 5th year Lost Spaces workshop brief. Their project was focussed on the Nine Elms Cold Store.
“The choice of using a plasterboard method of construction was derived from our aim to have a scaled model which reflected the materiality of the Nine Elm’s cold store. The cold store was a prominent concrete landmark alongside the River Thames in the 1970’s with no apparent human scale; its only characteristic to the outside world was a repetitive façade detail wrapping the entirety of the building – something we successfully represented on the plasterboard model and by using the laser cutter.”
Bollington Mill Project – Continuity in Architecture
Following on from this project Continuity in Architecture students Robbie Stanton, Sam Stone and Jahan Ojaghi chose to experiment using the same method to represent a derelict Mill in Bollington.
Robbie Stanton explains the project:
“Our initial research into Bollington exposed the town’s rich industrial heritage and emphasised the hugely influential role cotton manufacture has played in defining physical environment and local history and culture. However, many mill structures – the powerful emblems of a rich, multi-faceted past – have been lost. As a consequence, the physical townscape seems disconnected from its socio-historical context. The installation proposes a recognition of the lost forms of Ingersley Vale Mill, one such site at risk of being demolished and forming a further void in Bollington’s continual identity. By artificially lighting the ‘ghost’ structure we aim to draw attention back to a lost icon, re-stitching the building into the wider industrial fabric of Bollington. Continuity in Architecture 5th years were running a competition for a live installation on our site. This project is one of the short-listed 6 and basically proposed artificially lighting the ghost forms of a derelict mill using electroluminescent wire. We chose to try laser etched plasterboard because we wanted a model which could appear highly textured and lends itself to the decaying qualities of a ruin. A combination of CAD and hand scratching / editing were used to get a varied result.”
In addition to the laser engraved plasterboards the group used polly-filla to marry the land mass of the site with the walls of the building.
The finished effect, as with the Nine Elmes Cold Cold Store Project is fantastic at capturing the rustic look of the building. It worth noting that this technique can be time consuming and the resulting pieces are very fragile so certainly don’t suit anything intended to be handled. 


