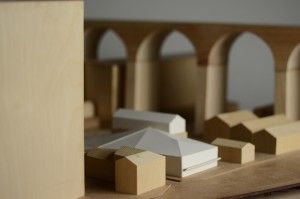
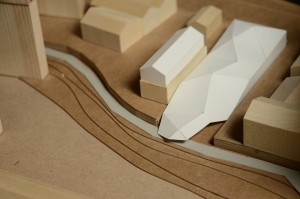
‘Retrofit’ Structural Study Model by Paul Thornber

Paul Thornber Structural Dteail (6)

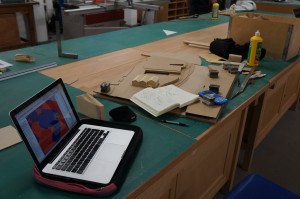
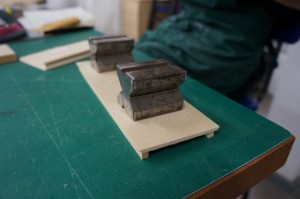
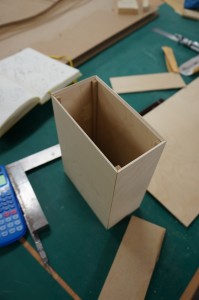
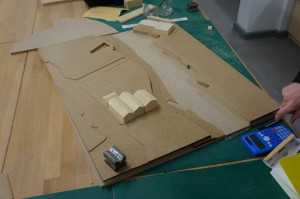
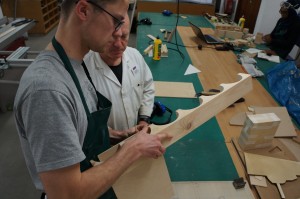
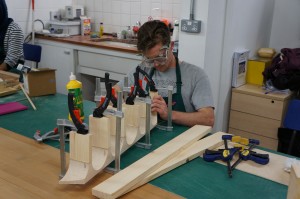
MSA Praxis student Paul Thornber produced this ‘rough and ready’ sketch model in just 6 hours and cost him the grand total of £0! Made entirely from waste scraps this model clearly conveys the structural arrangement of Pauls project without need for expense or time consuming methods. More importantly the process of planning, marking out and making the model has been a learning experience as Paul describes below:

“I intend to use the model to explore how structural decisions affect spatial conditions.
The model was used to help make decisions, in the development stages, regarding structure through experimentation.I was able to economise on structure through building at scale and assembling the model by hand.It also helped me prove that I understood how the buildings structural strategy worked.

Paul Thornber Structural Dteail (10)

Through making this model I have learnt how to form and develop the plan of a building through a process of experimentation in both 2D and 3D.
Quickly switching from plan to section to model and back again helped me rapidly develop ideas that worked both on paper and in 3D.

Paul Thornber Structural Dteail (56)

This model gave me an insight into the next stage of model making for the final output of the next project. I will now know what works and what doesn’t before starting a more refined version of this model.”

Paul Thornber Structural Dteail (40) Paul Thornber Structural Dteail (23) Paul Thornber Structural Dteail (12)

This is how the medium of modelmaking should be used in my opinion. By employing making as a tool to develop your ideas you are opening up yourself to technical processes, material constraints and lessons that can be directly transferred to your design decisions when working at to 1:1 scale design.

You can see more of Pauls work here: http://www.paulthornber.com/

Scott

1:1 ‘Green’ Facade detail by Alexandros Pavlides

As part of his ‘Sensory Markets’ project Alex Pavlides has created a 1:1 section of brick wall to display a possible facade detail providing an organic coat to existing brick walls in Manchester. 1.1 Facade Detail (1)The approach to recreating the brick wall was much like that of Polys Christofi’s project last year but focussed on a much smaller area for the detail. Bricks were made using plaster casts from vac-formed moulds before being painted to resemble red brick and then pointed like a full scale wall. 1.1 Facade Detail (6) Details of the intervention were made up using laser cut acrylic bases, abs tubing and threaded rob before being sprayed silver to represent the intended metal finish of the mountings. The detail mounts were then fixed to the ‘wall’ and mesh was added to the ends creating an elevated platform to encourage plant growth in front of the wall. The mesh was then secured using washers and bolts. 1.1 Facade Detail (8) Alex describes his approach to the project:

“I’ve tried [to] introduce an intervention that makes the alleys memorable to the people by making the alleys acting as “landmarks” in the city. The intervention is about applying moss on different surfaces in the alleyways and create architecture from moss. I designed an external skin of the brick walls made of steel wire mesh and the moss will be applied on the mesh at different points of the city. “

1.1 Facade Detail (15)Alex is currently working on getting moss to grow on the mesh to be displayed later in the year and we look forward to seeing the results! We will post an update of how he progresses.

Scott

Coexistence in Theory 3rd Year Mancunian Way Site Plan

3rd year Coexistence in Theory has been focussing on a stalled site located next to the Mancunian way in Manchester. The group will use this abandoned infrastructure to propose new interventions that will bridge the site bringing in to back into functional use.
3rd Year Site Model (1) 3rd Year Site Model (4) The group decided to represent a large portion of the Mancunian way which runs through the city along with building massing and defined roadways across the site. This was done by overlaying grey card board pieces to act as raised pavements creating contrast with the light coloured plywood base below which provides the road areas.

3rd Year Site Model (11) 3rd Year Site Model (7)The stalled site in question is represented in more detail due to its importance and comparative skeletal appearance to the rest of the buildings in the area. This was made using laser cut ply whilst the main massing of the rest of the model is made us of blocks of pine cut and sanded to shape.

3rd Year Site Model (13) 3rd Year Site Model (16) Group member Georgina Erotokritou described why the group are producing the model for their projects:

“It’s the easiest and most understandable way to explain ideas, space and arrangements in 3D space. Because this model covers a wider context it is easier for the viewer to see the entire picture and see how our buildings connect to the site.” 

The model is now being used as a stage to present the groups ideas as they develop throughout the year.

3rd Year Site Model (17)

6th Year Site Context Model, Granada, Spain

This 6th year group project took time to think about their options with this model of a site in Granada, Spain. Initially they had thought about producing their model using the laser cut ‘Stacking’ method which has become something of an epidemic of late in the workshop. I’ll be writing a piece on why we’d advise you steer clear of stacking components soon.

Thankfully with some deliberation it was decided that a much more effective and exploratory process of could take place saving a lot of material and laser cutting as well as yearning an effective learning curve in model making.

Taking some inspiration from our B.15:45 display the group decided to make their site context using Jelutong Block and offcuts. The only use of laser cutting was in the engraving of the base plan on 6mm Plywood. As with many site context models, this one will serve as a working model that will be used by individuals to display their work throughout the development of their ideas this year. With this in mind the consistent use of jelutong as a block massing material is quite suited and is aesthetically quite nice to look at.

The group divided their site into areas with each of the 5 team members taking responsibility for the production of a given set of buildings. This way the workload was split and progress of the model can be achieved to a good standard the time managed efficiently. Rather than spending days on the laser cutter effectively pressing ‘go’ then sticking pieces of a very easy (and bland) puzzle together this group have used their workshop time to improve their making skills and understanding of the form of their site by thinking about each and every building beyond its footprint shape on a Digimap file.

This process is much more useful to learning than simply laser cutting material for the sake of it I think they would all agree.

Scott

Stockport Site Massing Model by Finbar Charleson

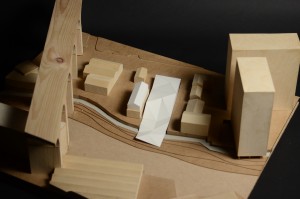
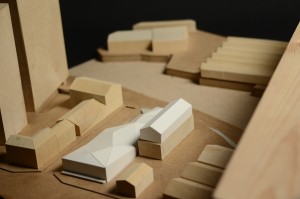
This project looks at a site sandwiched between exiting buildings and natural boundaries in Stockport centre. As with most of the projects I have seen Fin work on it’s great to see someone using a variety of media on their desk to inform the decisions in making and in turn use the results to influence their ideas.

As the site includes several large tower blocks it was decided to create the masses as hollow boxes to both save on material and weight of the completed model. The box sections seen here were carefully made up from planes of material – most of it scraps from other projects. 

Once again being concious of material use, Fin designed his contour base to be laser cut into steps with supports as opposed to entire sheets. This again saves material and overall weight. The process requires some minimal extra consideration when producing drawings but the savings are great and well worth the effort. Read more on this method of construction here.

To create the imposing and dominating viaduct feature which spans across the site Fin chose to use a solid mass created from pine. The arches were drawn out and rough cut on the bandsaw before being sanded smooth.  Legs for the viaduct were created as separate pieces with varied heights depending on their position across the contours. The legs were then clamped and glued over night.

Finbar gave us a few words reflecting on the project so far:

‘The model has helped to negotiate a complicated landscaping condition, in that the envelope links three different levels: water, ground and the 1st floor gardens, of a proposed Waste Water Treatment Plant in Stockport city centre. The context is modelled with traditional craft methods as I feel the site has a great sense of history, including the famous  Stockport Viaduct. It has helped to explore sensitive ways of repurposing existing warehouses I used Pepakura software to produce nets of meshes generated in Grasshopper for Rhinoceros, for the initial massing proposals.
The next step is to combine the spatial arrangements of the building with environmental analysis and try new massings on the same model.’

The completed model has a removable site section to allow different proposals to be inserted into context. Fin has already made several suggested forms from card as seen below. Finbar Stockport Model (15) Finbar Stockport Model (16)Finbar Stockport Model (18) Finbar Stockport Model (17)


Pangaea Stage Set for Manchester Academy by Peter Lee

Towards the end of the first semester 5th Year Student Peter Lee was approached by The University of Manchester to design and make a large scale set piece for the student run festival, Pangaea. The event was held at the Manchester Academy and runs across many venues in Manchester. Pete described the project for us:

 ‘The event’s theme was ‘Space Odyssey’ so designed a ‘wormhole’ with an elevated DJ booth as a focal point in the centre. Throughout the project I was working closely with Academy staff as the design had to both be both the right size for the room and mountable on the existing lighting rigs on the stage. 
For ease of fabrication decided to use 12 identical interlocking triangle frames to create a portal, which sits in front of an aluminium circle truss with fabric panels to give the appearance of depth. The design was also created in coordination with a projectionist, who required a scale model for testing visuals on. By mocking up the design physically at 1:10 it gave me a really good idea of the structural issues faced by hanging a 4m wooden portal and helped me to design a bracing system’

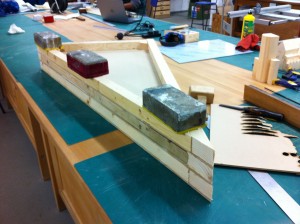
Pete Lee (2)The model was made using components that would eventually come to life as large scale versions looking virtually identical. A wooden frame was used to support a focal hub and fabric was then stretched to the back of the segmented aperture-like ring at the front of the piece.Pete Lee (5)Once the design has received approval for full size production Peter went about turning the concept model into a full scale design. The triangular sections were each cut out using the larger CNC cutter at MMU before being transported across to B.15 for additional pieces to be added.

Peter describes his reasoning for using CNC cut components for the full scale prop:

‘For the 1:1 build I found the CNC machine a really useful tool as it would have been nearly impossible to replicate twelve identical panels by hand – absolute precision was really important throughout the process as the projection maps only had a few cm tolerance for error. Although the digital methods I used were really basic (Sketchup) it was incredibly useful for working out the angles for the panel structure. 
Another really important part of the project was getting logistics spot on – was quite limited for time due to university commitments so efficient use of workshop time was crucial and greatly aided by digital design tools. The panels were prefabricated over a month before the event, which meant the assembly was pretty straightforward.

Due to the obvious weight difference in the full size version of the prop each component had to be well built to avoid any accidents. Each triangular section was reinforced with pine timber baton which was glued and screwed into place.

IMG_9988 IMG_9989

‘Good communication with other parties was also key as the success of the project was highly dependent on fittings in the Academy and the synchronisation with projections. Resolving issues far in advance meant the on-site build and event itself ran smoothly.’.

IMG_0143In place at the venue, the stage prop served as the focal point for the nights performers and was lit by constantly changing projections and light displays. The image below shows the piece on stage before the event began. The image below show the finished piece during the live event.10887278_461189607366949_5284888234544424655_o 10955797_461189257366984_3543354359810081653_o 1606453_461189224033654_1058877598167468098_oComparing Peter’s prototype to the completed piece shows very little structural difference and is yet another example of how a test model can serve to prove a design idea. Both the development and final versions of the project will make great additions to Peter’s portfolio with the two conveying his design thought and testing processes to a potential client or employer. You can see more of his work here.