‘Bearing Rome Across The Alps’ – A Brief History of Cork Modelling and its Contemporary Potential

Fig 1. Modern Cork Model of the Temple of Castor and Pollux ©Dieter Cöllen

There is very little published about the nearly lost art of cork modelling aside from a few fairly recent articles and research papers. Before being attributed to architectural forms in the 18th Century, carving with cork was a tradition associated with nativity scenes in southern Italy (Gillespie, 2017). The idea of modelling this way most likely came from a combination of convenience; cork being a common, lightweight and versatile material for quick fabrication, as much as any creative individuals desire to replicate and simply enjoy the tactile craft of making with it.

The refinement of this unusual but captivating form of modelling occurred during a great period of artistic and cultural exploration in Europe. During what could be described as the original ‘gap year’, eighteenth century grand touring took young people across the continent via the most notable and artistically rich cities. This was something of an exclusive privilege that required a significant wealth and strong will of curiosity for the unfamiliar. Everyday living requirements meant a need to be flexible in tastes both for practical and dietary comforts. On every level of perception the experience was sure to be eye opening for anyone willing to embark on such a journey.

Experiencing a new destination for the first time as a modern traveller, you would think it common place to see an abundance of stalls and shops stacked with keepsakes, often mass produced junk that are rife in tourist spots. At the time of the grand tours, this shameless ‘cashing-in’ trade was fledgling if non existent. Despite this, amongst the increasing number of visitors, there was a great desire to somehow record experiences of travelling which led to traditional and art’s and craft based methods or recording being adopted. Visitors fascinated by the large scale architecture and ruins of ancient Rome took time to draw, paint and carve what they saw in order to take some momentos home. This collective practice brought back a new vision, a blueprint of how the classical world could inform a modern British design.

As well as the grand tourists giving these crafts a go themselves there were some forward thinking artisan-entrepreneurs who began producing models to sell. According to Dieter Cöllen the originator of this method of making is commonly thought to have been Roman architect Agusto Rosa. Following his death came Antonio Chichi who produced probably the most famous cork models for sale to tourists in Italy (Cöllen, 2014). These miniature 3D sketches, copies of the classics in that moment, would then find their way back over the Alps towards Western Europe and beyond with many ending up in private collections to this day.

Cöllen, an artist and craftsman, has become the current go-to maker on the subject of cork modelling or ‘Phelloplastike’ – a work derived from the Greek word for cork. His works have gained attention around the world for their outstanding levels of accuracy and due to the specialist nature of the medium it is widely thought that his skills and experience are unparalleled in the field. Whilst these works are undoubtedly stunning pieces many have had the advantage of modern crafts tools which puts the skill behind the original 18th Century examples into perspective.

Fig 5. Richard Du Bourg Colosseum Model 1775 © Museums Victoria

Given the age of limited numbers of the surviving examples, careful conservation is essential to their preservation after many years in storage and a fluctuating relevance in society as they fell in and out of fashion. Conservator Sarah Babister states that cork models ‘were really popular at a certain time and were kept as tools to teach students. Then they fell out of fashion and a lot of them were disposed of.’ (Kate C. 2014). 

This helps to explain why there are so few examples surviving on public display. There has however been a recent recognition of the value of cork models which has led to a more conscious conservation of these pieces with the excellent reinstatement of the Soane model room and a fantastic Colosseum at Australia’s Museum Victoria.

This original 18th century model (Fig.5) was produced by British modelmaker Richard Du Bourg and thankfully spared the ‘no longer in vogue’ fate of so many of his other works. Richard Gillespie at Museum Victoria has written on the subject that stemmed from his intrigue of the Colosseum model that had sat unused in the museum stores for some 20 years. Having researched and discovered several other examples of Cork Colosseum models in European collections Gillespie concludes that separately these models had varied purposes. This is reflective of the wider, multifaceted use of modelmaking in architecture in contemporary practice.

“The [various] Colosseum models […] differed in purpose, combining to different degrees antiquarian interest, archaeological research and documentation, evocation of classical architecture and history, courtly collections, public exhibition and education, commercial opportunity – and artistic endeavour, for the carving of cork into extraordinary classical structures and architecture had a technical and aesthetic appeal for the modellers and their audiences” (Gillespie, 2016)

Using Cork Modelling Today

In current practice cork is still used on occasion by modelmakers but rarely as the sole building material as it was in the golden age of the grand tourist. Makers wanting to try their hand today can find cork in good art and craft stores in both thin sheet and block form. In sheet form it has proved popular and lends itself well to the 21st century workhorse of the workshop, the laser cutter. Over the last few years we have moved to encourage aspects of this classical method of making into some of our works here at B.15. Using files, scalpels and sandpaper it is easy and engaging to sculpt into pieces of cork often requiring the user to study the subject in greater detail than they might on passing, much like life drawing or sketching.

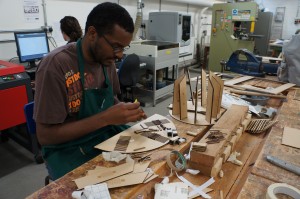
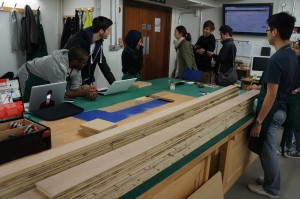
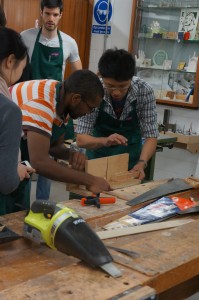
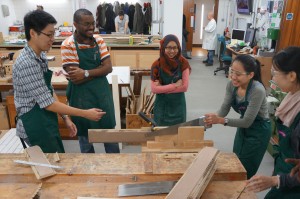
I recently ran a short workshop on sculpting in cork in association with the ‘What We Do Here’ film project at the European Cultural Centre in Venice during the 16th Architecture Biennale. The atelier symposium; ‘Joined Up Thinking’ presented different approaches to studying, recording and designing space. Students of MSA’s Platform Atelier were given blocks of cork with the task of recreating a detail chosen from their time exploring Venice. These sketch models allowed students to engage with the material, largely for the first time, and to think about their chosen subject in carefully considered stages due to the subtractive process.

Senior lecturer and head of Platform atelier Matt Ault explains the context of the task in his teaching:

“The ever increasing availability and access to computational power continues to expand our design capacity for conceptualising, developing, communicating and fabricating. The move towards digital craft and digital tectonics recognises the central role of materiality and materialisation in architectural design and allows the benefits of the digital to be informed by our own material understanding.

Active sketching techniques of drawing, modelling and making result in a deeper understanding of any idea under interrogation or critique.

Our recent use of the cork sketching technique in Venice is part of a design task that also comprises the complimentary techniques in modelling and fabrication: digitally exploring complex, fluid surface morphologies by defining associative geometries that can be manipulated on screen.  Design iterations can be quickly and cheaply made physical through manufacturing and assembling from paper or card with the digital plotter-cutter. Testing, evaluation and understanding of the material sketch model and its construction logic feeds back into the digital modelling to evolve the design.”

(Ault, 2019)
 

Despite its age as a modelling method, it was clear following this task that cork sculpting can still offer us a mode of thought that the most contemporary mediums often steer us away from. It provides a much needed tactility to students learning along with the opportunity to expand on unknown possibilities that result from “mistakes” made along the way. During the assignment the concentration in the room was palpable with everyone, tutors included absorbed in the task at hand whilst clearly enjoying the process.

The work produced, along with additional cork sketch models will be featured at the MSA end of year show presenting the cork sculpts as 3D sketches. I look forward to seeing more examples in the coming weeks.

Scott Miller 2019


References

Ault, M, 2019, Cork Task [E-Mail]

C. Kate, 2014. Cork Colosseum X-Ray [Online Article] Available From: http://museumvictoria.com.au/about/mv-blog/apr-2014/cork-colosseum-x-ray/ Accessed 01/12/2014

Coffin, S. D. 2014. Cork for More Than Wine, The Temple of Vesta, Tivoli [Online Article] http://www.cooperhewitt.org/2014/10/30/cork-for-more-than-wine-the-temple-of-vesta-tivoli/ Accessed 01/12/14

Collen, D. 2013. The Cork-Models [Online Article] Available from: http://www.coellen-cork.com/eng/antike/history.htm Accessed 01/12/2014

Fouskaris, J. 2006. Studio I – Music Stroll Garden [Online Article] Available From: http://www.jonfouskaris.com/portfolio/music-garden.html Accessed 01/12/2014

Gillespie, R. 2016. Journal of the Classical Association of Victoria, New Series, Volume 29, From ‘Trash’ to Treasure: Museum Victoria’s Colosseum Model Available from: https://classicsvic.files.wordpress.com/2018/05/gillespie.pdf Accessed 26/11/2018

Gillespie, R. 2017. Journal of the History of Collections vol. 29 no. 2 pp. 251–269, Richard Du Bourg’s ‘Classical Exhibition’ Available From: https://academic.oup.com/jhc/article-abstract/29/2/251/2503305

Mass, M. 2014. Rare Model Craft: In The Beginning There was The Cork [Online Article] Available From: http://www.spiegel.de/karriere/berufsleben/kork-modelle-von-antiken-bauwerken-dieter-coellen-baut-miniaturen-a-983770.html Accessed 01/12/2014

Images

Fig. 1: Coellen, D. 2013 Tempel des Castor und Pollux [Online Image] Available from:  http://www.spiegel.de/fotostrecke/dieter-coellen-baut-korkmodelle-von-antiken-bauwerken-fotostrecke-115570-8.html Accessed 01/12/2014

Fig. 2: Coellen, D. 2013 Natur pur (2) [Online Image] Available From: http://www.spiegel.de/fotostrecke/dieter-coellen-baut-korkmodelle-von-antiken-bauwerken-fotostrecke-115570-3 Accessed 01/12/2014

Fig 3. Sir John Soanes Museum, London, Model of the Roman circular Temple of Vesta at Tivoli, near Rome, by Giovanni Altieri [Online Image]Available From: http://collections.soane.org/object-mr2 Accessed 01/10/2018

Fig 4.  Sir John Soanes Museum, London, Model of the Temple of Zeus or Apollo (the so-called Temple of Neptune or Poseidon), Paestum Attributed to Domenico Padiglione c.1820 [Online Image]Available From: http://collections.soane.org/object-mr25  Accessed 01/10/2018

Fig 5. Museums Victoria Collections, Melbourne Australia, Model – Colosseum, Richard Du Bourg, London 1775 [Online Image] Available From: https://collections.museumvictoria.com.au/items/715107 Accessed 27/11/2018

Fig 6. Miller S. 2015, Cork Block and Sheet [Original Image]

Fig 7. Miller S. 2015, A cork sketch model by the author. [Original Image]

Figs 8 – 11. Miller S. 2018 ‘Grand Tour’ cork modelling task in Venice in association with the ECC [Original Images]

Sculpting in Plaster – CiA student Sam Stone

This years ‘Continuity in Architecture’ field trip took the group to on of the oldest cities in Western Europe, Lisbon, the capital city of Portugal. Sam Stone has spent a good portion of his first semester studies experimenting in the workshop and describes his thought and working process for us.


Whilst visiting the city of Lisbon the notion of it’s craft is almost tangible, from the decorative wrought iron verandas to the tessellated azulejo tiles, the manual, hand made implications of making the city are evident throughout it.What impressed me most was the ostentatious display of skill in the stonemasonry work of the manueline architecture in an area of Lisbon named Belém. It intrigued me to understand the depth of knowledge and skill needed to create such profound displays of craftsmanship.

sam-stone-13

My aim initially was to learn through making, as a direct response to my early research into the various crafts of Lisbon. I started with studies into the processes of stonemasonry (manueline style columns), mimicking the carving and chiseling of stone by using plaster as a more malleable material.Work started off tentatively and without prior experience of carving or sculpting I slowly tapped away at the block removing minimal material. After a while, confidence grew and I became more efficient, quicker and more clinical with my actions. Repetition meant a gradual understanding of the how the material breaks away, how hard to throw the hammer and which way to hold the chisel. What did take me six strikes, now took me one and material would come away precisely where intended, rather than too much or too little.

The resultant studies link back well to my interpretation of Lisbon as a crafted city, and I hope to transfer this knowledge into design/programme at a later stage.

dsc06869

My first three outputs are studies into manueline style architectural elements in stone, each work advancing in difficulty, starting with a simple twisted flute column to a decorative rope knot. I gained a partial understanding of what it means to me to be a craftsman; having a true understanding of material, knowledge and economy of technique and most evidently, much practice and repetition.

img_2684 img_2726

After gaining more confidence with the tools, the material and act of carving, I attempted to produce a concept model and 1:500 site model. I thought these early analytical studies and their method of production, along with site analysis could inform my approach to design later on.

sam-stone-3

The concept model outlines my approach to design decisions on the site. The block is cast stone plaster with the landscape of the site ‘excavated’ by foam formwork. Protruding perspex rods under the lateral void describe the transient nature of the road that divides both sides of the site. A mahogany piece rests on the stepped landscape as an indicator of ‘place’ I wish to create in the void.

img_2661

The 1:500 site model was carved out topography from a casted block of pigmented plaster. The excavated, subtracted nature of the landscape suited this method of modelling. Faster methods could include using the CNC machine to mechanically remove material, or making an accurate mold. However, through manually carving away to reveal the site I grasped a deeper understanding of the varied topography and stepped character of the sloped landscape of the site. It also enabled me to interrogate the landscape closer.

dsc06880

dsc06950carved plaster topo 3

If I was to offer advice to anyone wanting to experiment with modelmaking in a similar way I’d say spend time to learn the particular craft or method, its great to learn a new skill and you could find out something unique about your abilities.

Don’t rush it, at times modelling requires close attention and care, mistakes can be difficult to amend (especially in painted plaster!). As always don’t hurry modelling, if you think the model making method could help inform your design decisions later, it’s worth being patient.

– Sam Stone Jan 2017

DSC06977all 5

It’s great that Sam decided to approach his studies in this ‘hands on’ way and especially that he took the time to really improve his understanding of the material. The commitment of time is always a big issue to working this way but in marrying his practical trial and error approach to making Sam has been able to balance other study commitments against the making craft he clearly enjoys.

– Scott

Low-Melt Metal Detail Casting by Jana Kefurtova

Jana explained her project for us:

The 1:10 detail fabrication was my first-ever casting exercise and definitely one of the most exciting tasks I have been involved in throughout my architecture course. It required a lot of preparation and careful planning of each step, but I was extremely happy with the outcome and I would repeat it if I had a chance. The key to success was to understand the casting process and plan the whole procedure beforehand.

Firstly, I modelled the hinge in SketchUp and tweaked it several times to make sure it was water-tight for 3D printing. After it was printed, I added an additional layer of acrylic to increase its thickness in certain areas, which was necessary for creating the mould. This step could have been avoided, had I known better how the mould was to be created. As I learned, it is definitely worth carefully checking your 3D model with the staff before printing. You do not want to 3D print repeatedly due to the relatively high cost of the process and unavailability of the printers during busy deadline times.

Next step was a fabrication of the mould, which was to be as tight as possible in order to save the material (silicone). When pouring the silicone, I did not mix it well enough with the activating agent, which caused it not to dry properly overnight. Luckily, it was still possible to save the mould by additionally mixing more activating agent into, and the whole mould came out really well in the end.

The putrid pouring was probably the simplest step of the whole process, however, there were still lessons to be learned. The mould has to be fixed together very tightly with clamps, as the hot metal is unexpectedly expansive and it will push your two halves of the mould apart. I repeated the casting itself twice, as the first piece was not perfect. This did not require any additional material as the first cast was simply melted.

The metal hinge was then integrated into a sectional model of a timber door to show its function. This was another part of the model-making task, which took almost as much time as the casting itself. One of the unique aspects of this exercise was that apart from the putrid and silicone, I only used scrap material from the workshop: acrylic, timber, plywood and MDF. This significantly reduced the price and proved that almost every piece of material that a student disposes in the workshop can be used further by someone else.

Working with metal left me being amazed by its strength and heaviness combined with plasticity and the ability to be shaped into very fine details. It might seem like a challenging material to handle, but it is in fact incredibly fun and fascinating one. I would recommend casting to anyone who wishes to add something bold and unique to their project.

– Jana Kefurtova 2016

Designing the Mould

When it comes to successful casting the work is all in the design of the mould. There are many considerations to have that require some reverse engineering in your mind before being able to pour the first cast correctly. In this case as Jana was creating her cast detail from scratch she had to first make the detail the the correct scale in order to have the mould be created around it. This was done using a combination of an ABS 3D print and some laser cut elements.

Due to the final cast being in metal a suitable silicone for high temperature casting is essential.

Here are some key considerations when designing a mould:

  • The mould should always be designed to use a minimum of casting material (in this case the expensive heat-resistant silicone) to ensure you are getting the most from it without having to overspend.
  • How are you going to pour material into the mould?
  • The mould must also consider the cast removal – Will the cast piece come out in one? Does the mould have to consist of multiple parts? If so how can we effectively locate these parts to ensure an accurate cast?

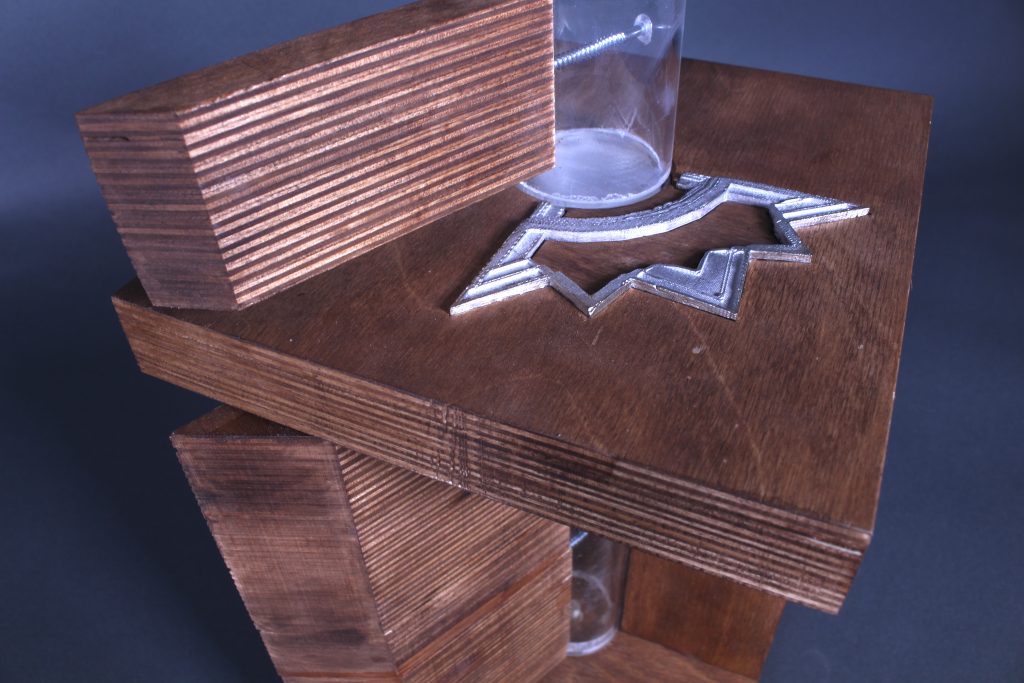
Metal Casting Jana Kefurtova (4)In Jana’s case it was decided that the mould could be created in two parts. In order to do this the master model had to be suspended in the middle of the mould casing to allow the first half to be poured. The support piece that was used to suspend the piece would also serve as the pour hole once the mould was ready to be used. In addition to the overall shape of the mould casing Jana also added two location ‘lugs’ which would allow the mould to fit together exactly. These lugs were in place until the first half of the mould had cured before being removed to allow the second half to create the positive part of the lug.

Before pouring the second half of the mould it is important to add a release barrier to prevent the two halves sticking together. In this case a spray wax coating was used but there are several products available for the job. Metal Casting Jana Kefurtova (5) Metal Casting Jana Kefurtova (9) After the second half is cured the mould can be taken from the casing and any overlaps in the pour can be hand trimmed and removed ready for casting.Metal Casting Jana Kefurtova (10) Low Melt Metal Casting

Once the mould has been trimmed and cleaned of any foreign matter you are ready to cast. To ensure the cast is easily removed from the mould it is necessary to lightly dust the mould halves with talc.

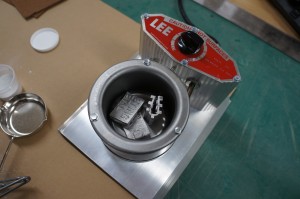
Metal Casting Jana Kefurtova (12)Suitable casting metal can then be broken up and melted using a melting pot. All equipment and elements used are specifically for casting purposes and you should always be sure the products are suitable for the job you are attempting.

ALWAYS WEAR HEAT RESISTANT GLOVES WHEN WORKING WITH HOT METAL AND EQUIPMENT!Metal Casting Jana Kefurtova (13)

Once the metal is completely molten in the melting pot it is then time to fill the mould using a suitable ladle. In this case it was necessary to have an extra pair of hands to support the mould whilst pouring.

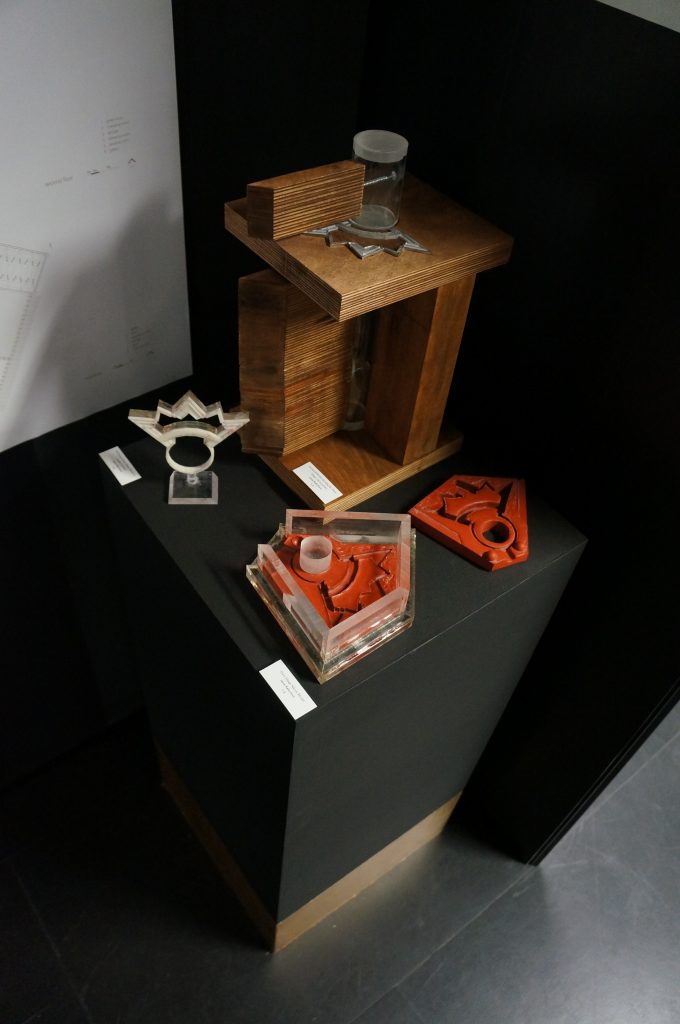
Pouring in one smooth action will help to get the best quality cast. In this case it was necessary to pour three times to fill the mould. This is not idea but due to the working time with the molten metal the cast was crisp and consistent after a second attempt. (A key benefit of this material is that any failed attempts to cast can simply be broken up and re-melted to be recast meaning little waste material) Metal Casting Jana Kefurtova (17) Allowing around 15 minutes to cool is important so as not to distort the metal when trying to remove it from the mould in a soft state. Metal Casting Jana Kefurtova (20)The competed cast piece was then hand finished before being added to Jana’s functioning detail model. The moulds made for this project and the resulting detail model are currently on display as part of B.15:ARCHITYPES on the first floor of our building.

Metal Casting Jana Kefurtova (21) Metal Casting Jana Kefurtova (23)All equipment and material used here is available from 4D with your student discounts.

3-5

dsc06068

1:1 ‘Green’ Facade detail by Alexandros Pavlides

As part of his ‘Sensory Markets’ project Alex Pavlides has created a 1:1 section of brick wall to display a possible facade detail providing an organic coat to existing brick walls in Manchester. 1.1 Facade Detail (1)The approach to recreating the brick wall was much like that of Polys Christofi’s project last year but focussed on a much smaller area for the detail. Bricks were made using plaster casts from vac-formed moulds before being painted to resemble red brick and then pointed like a full scale wall. 1.1 Facade Detail (6) Details of the intervention were made up using laser cut acrylic bases, abs tubing and threaded rob before being sprayed silver to represent the intended metal finish of the mountings. The detail mounts were then fixed to the ‘wall’ and mesh was added to the ends creating an elevated platform to encourage plant growth in front of the wall. The mesh was then secured using washers and bolts. 1.1 Facade Detail (8) Alex describes his approach to the project:

“I’ve tried [to] introduce an intervention that makes the alleys memorable to the people by making the alleys acting as “landmarks” in the city. The intervention is about applying moss on different surfaces in the alleyways and create architecture from moss. I designed an external skin of the brick walls made of steel wire mesh and the moss will be applied on the mesh at different points of the city. “

1.1 Facade Detail (15)Alex is currently working on getting moss to grow on the mesh to be displayed later in the year and we look forward to seeing the results! We will post an update of how he progresses.

Scott

Venice Plaster Detail Model, Becky Prince

Made using an MDF mold this detail model aimed to demonstrate the window detail Becky was focussing on at her site. The mold proved to be the most time consuming aspect of the model but turned out successfully. It is always worth spending longer on mold design to ensure a good cast.


The mold was made using MDF which can absorb moisture from the plaster mix and therefore needs to be well sealed before pouring. Becky used Vaselene to act as barrier and release agent for the cast.

The internal void was made by using blue foam to allow for contracting of the cast as it cured and then be removed. This too was well coated in Vaselene to aid removal.

Once cured the MDF was unscrewed and removed before cutting out the internal blue foam. Additional window details were added using initially laser cut and then modified components.


The Peak Pavilion Project

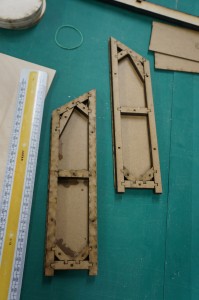
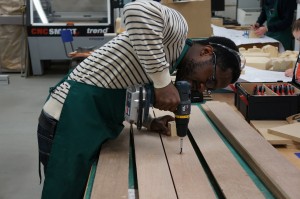
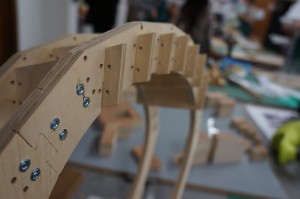
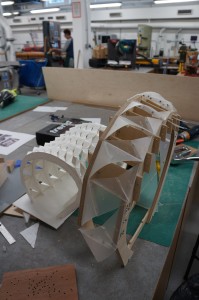
This project consists of 8 ‘peaks’ which each point toward a significant battle of the first world war. Each peak will feature poetry written by patients at who stayed at Dunham Massey during its use as a hospital for wounded soldiers coming back from the front.  As with the other ongoing pavilion projects, this concept began in physical form as a sketch model.  Structural details were designed and refined through a series of test models. This example shows the internal frame construction to support each pillar in the circle.

After test models were made at small scale the group went on to make some details at 1:1 to test assembly and strength in reality. This section below shows how the framework inside each panel would be fixed. These kind of 1:1 details are great design theory tests and offer as close an insight as possible to the finished look without building the full structure.

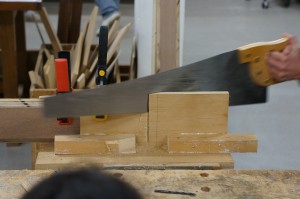
Making components for this project, much like the concrete mould construction on one of the other pavilions required the mass production of specifically angled cuts using our circular saw.Due to the acute angle required for the top ends of each piece we were unable to cut the required angle using machines. In order to achieve the correct angle the group used a custom made mitre jig and hand saw to cut the correct angle at the end of each component. This proved to be a hand saw learning curve for most of the group after falling into the common misconception about using a hand saw – small fast movements will reduce the effectiveness of your cutting. Taking time to get used to using the main length of the saws teeth and allowing the saw to do the hard work always proves much more effective and less exhausting! 
The panels for each peak will be assembled using screws into pre-drilled holes (below) which will be plugged to make them less obvious. The main panels of each peak will be cut using a large CNC bed at FAB LAB Manchester. As with the other pavilion project developments, we will keep you up to date as things progress.

3rd Year Structural Detail Models

Designing a building requires attention to every detail. This attention must take into account the limits of construction materials and how they can be managed an assembled in reality.

The only way to do this well is to have a good understanding of construction and material mechanics. Structural detail study models allow us to focus on specific junctions of framework and often bring potential problems with assembly to our attention.

Whilst it is very important that you, as an architect in training, have a thorough understanding of building materials. These models should not focus too much on the 1:1 ‘real world’ materials. Your area of study is in understanding how components interact or don’t interact with each other in terms of their physical shape. Testing material strengths, weaknesses and compatibility for a particular role requires much more in depth study and often more space than our workshop can provide.

The models shown on this post are made to mimic real materials to reduce weight and construction restrictions whilst still conveying their assembly effectively.

Structural Detail Models, Year 2 BA Architecture

DSC01345Last week 2nd year students were given the task of further refining their designs for structural elements. By taking their initial ideas to the next stage they came up against many more problems to solve in particular how joining replicated components would work in practice as they made seven identical units to work with one another towards supporting a structure or forming a building form. DSC01314 DSC01315 DSC01317 DSC01325DSC01319In many cases designs will test the limits of the machines available anda degree of initiative will be required to solve the problem. In Georgia Govan’s case the angle she required for her components to fit together was too sharp to be machined and the profile nature of the laser cutter meant she had to use a ‘Jig’ to get the job done. This side of a task can often be time consuming and should not be underestimated. A lot of thought is required to design an effective jig but it’s worth the effort and the learning curve you will go through.
DSC01310

DSC01323 DSC01335Marco Wan had an interesting approach to creating the curved planes for his design. This process is called ‘glulam’ and as the name hints at, involves laminating sheets together with layers of glue and material whilst clamped in a given shape. This produced a very strong formed shape that can and is used for many 1:1 building applications. Very nice to see a student employing this technique in their model development.

DSC01326 DSC01327 DSC01339DSC01331DSC01329DSC01357DSC01322DSC01333

DSC01312DSC01338DSC01341DSC01344DSC01342DSC01350DSC01347DSC01352DSC01349DSC01353 DSC01320DSC01355 DSC01356DSC01359 DSC01362

Structural Detail Model by Andra Calin

2nd year student Andra Calin has been developing a structural concept model that is expanding on a sketch model inspired by the form of a bird. Initially Andra produced a paper model of her idea which loosely defined what the structure would look like. For this next model she has increased its scale and added more detail. This kind of model will raise questions regarding connection detail and overall practicality of the structure.

2nd Year Andra Calin (1)

DSC01267

DSC01274

For me its these intermediate types of development model that are the most fun to construct as they help clearly define details that can be replicated or improved upon and I hope to see more of these in the coming weeks as these ideas progress! Scott

DSC01269 DSC01273

Garden Pavilions Continued – Learning Curves and Problem Solving

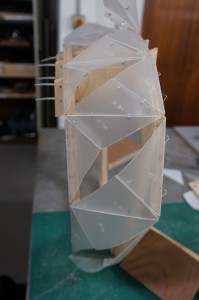
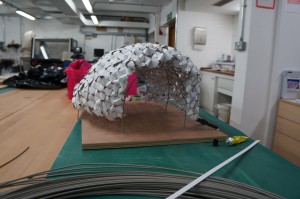
Development of the 6th year pavilion projects is continuing at pace down in the workshop. Test models often bring assembly issues to the surface which Alexander Valakh, Lorena Chan and Nancy Chan have been finding with their concepts. This is exactly why these models play a vital role in design development.  Here Alex has created his outer skin from laser cut polypropylene plastic sheet fixed with pop rivets. This has proved tricky and mid way through assembly it became clear that a more uniform stapled fixing would have been more effective. Lorena and Nancy have spent the last few days fixing components for this concept together. The original concept was to have a smooth curved structure forming the tunnel walkway. As the components were fixed the group found that the curve was un-uniform due to the varying strain between components. Whilst this isn’t exactly how the concept was drawn it has still proved an interesting experiment and may still be taken to the next stage.

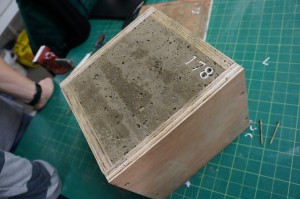
Pavilion Project (4)The concrete cast (below) has also had some teething problems with the cast numbers not turning out as refined as the group would have liked. This process will require more thought if it is to be taken forward. The group has found that their choice of aggregate or quantity used may be to blame for the irregular casting around the number details. One thing is for sure it wont be going too far given its weight despite having a polystyrene block inside to reduce the material used!