Sculpting in Plaster – CiA student Sam Stone

This years ‘Continuity in Architecture’ field trip took the group to on of the oldest cities in Western Europe, Lisbon, the capital city of Portugal. Sam Stone has spent a good portion of his first semester studies experimenting in the workshop and describes his thought and working process for us.


Whilst visiting the city of Lisbon the notion of it’s craft is almost tangible, from the decorative wrought iron verandas to the tessellated azulejo tiles, the manual, hand made implications of making the city are evident throughout it.What impressed me most was the ostentatious display of skill in the stonemasonry work of the manueline architecture in an area of Lisbon named Belém. It intrigued me to understand the depth of knowledge and skill needed to create such profound displays of craftsmanship.

sam-stone-13

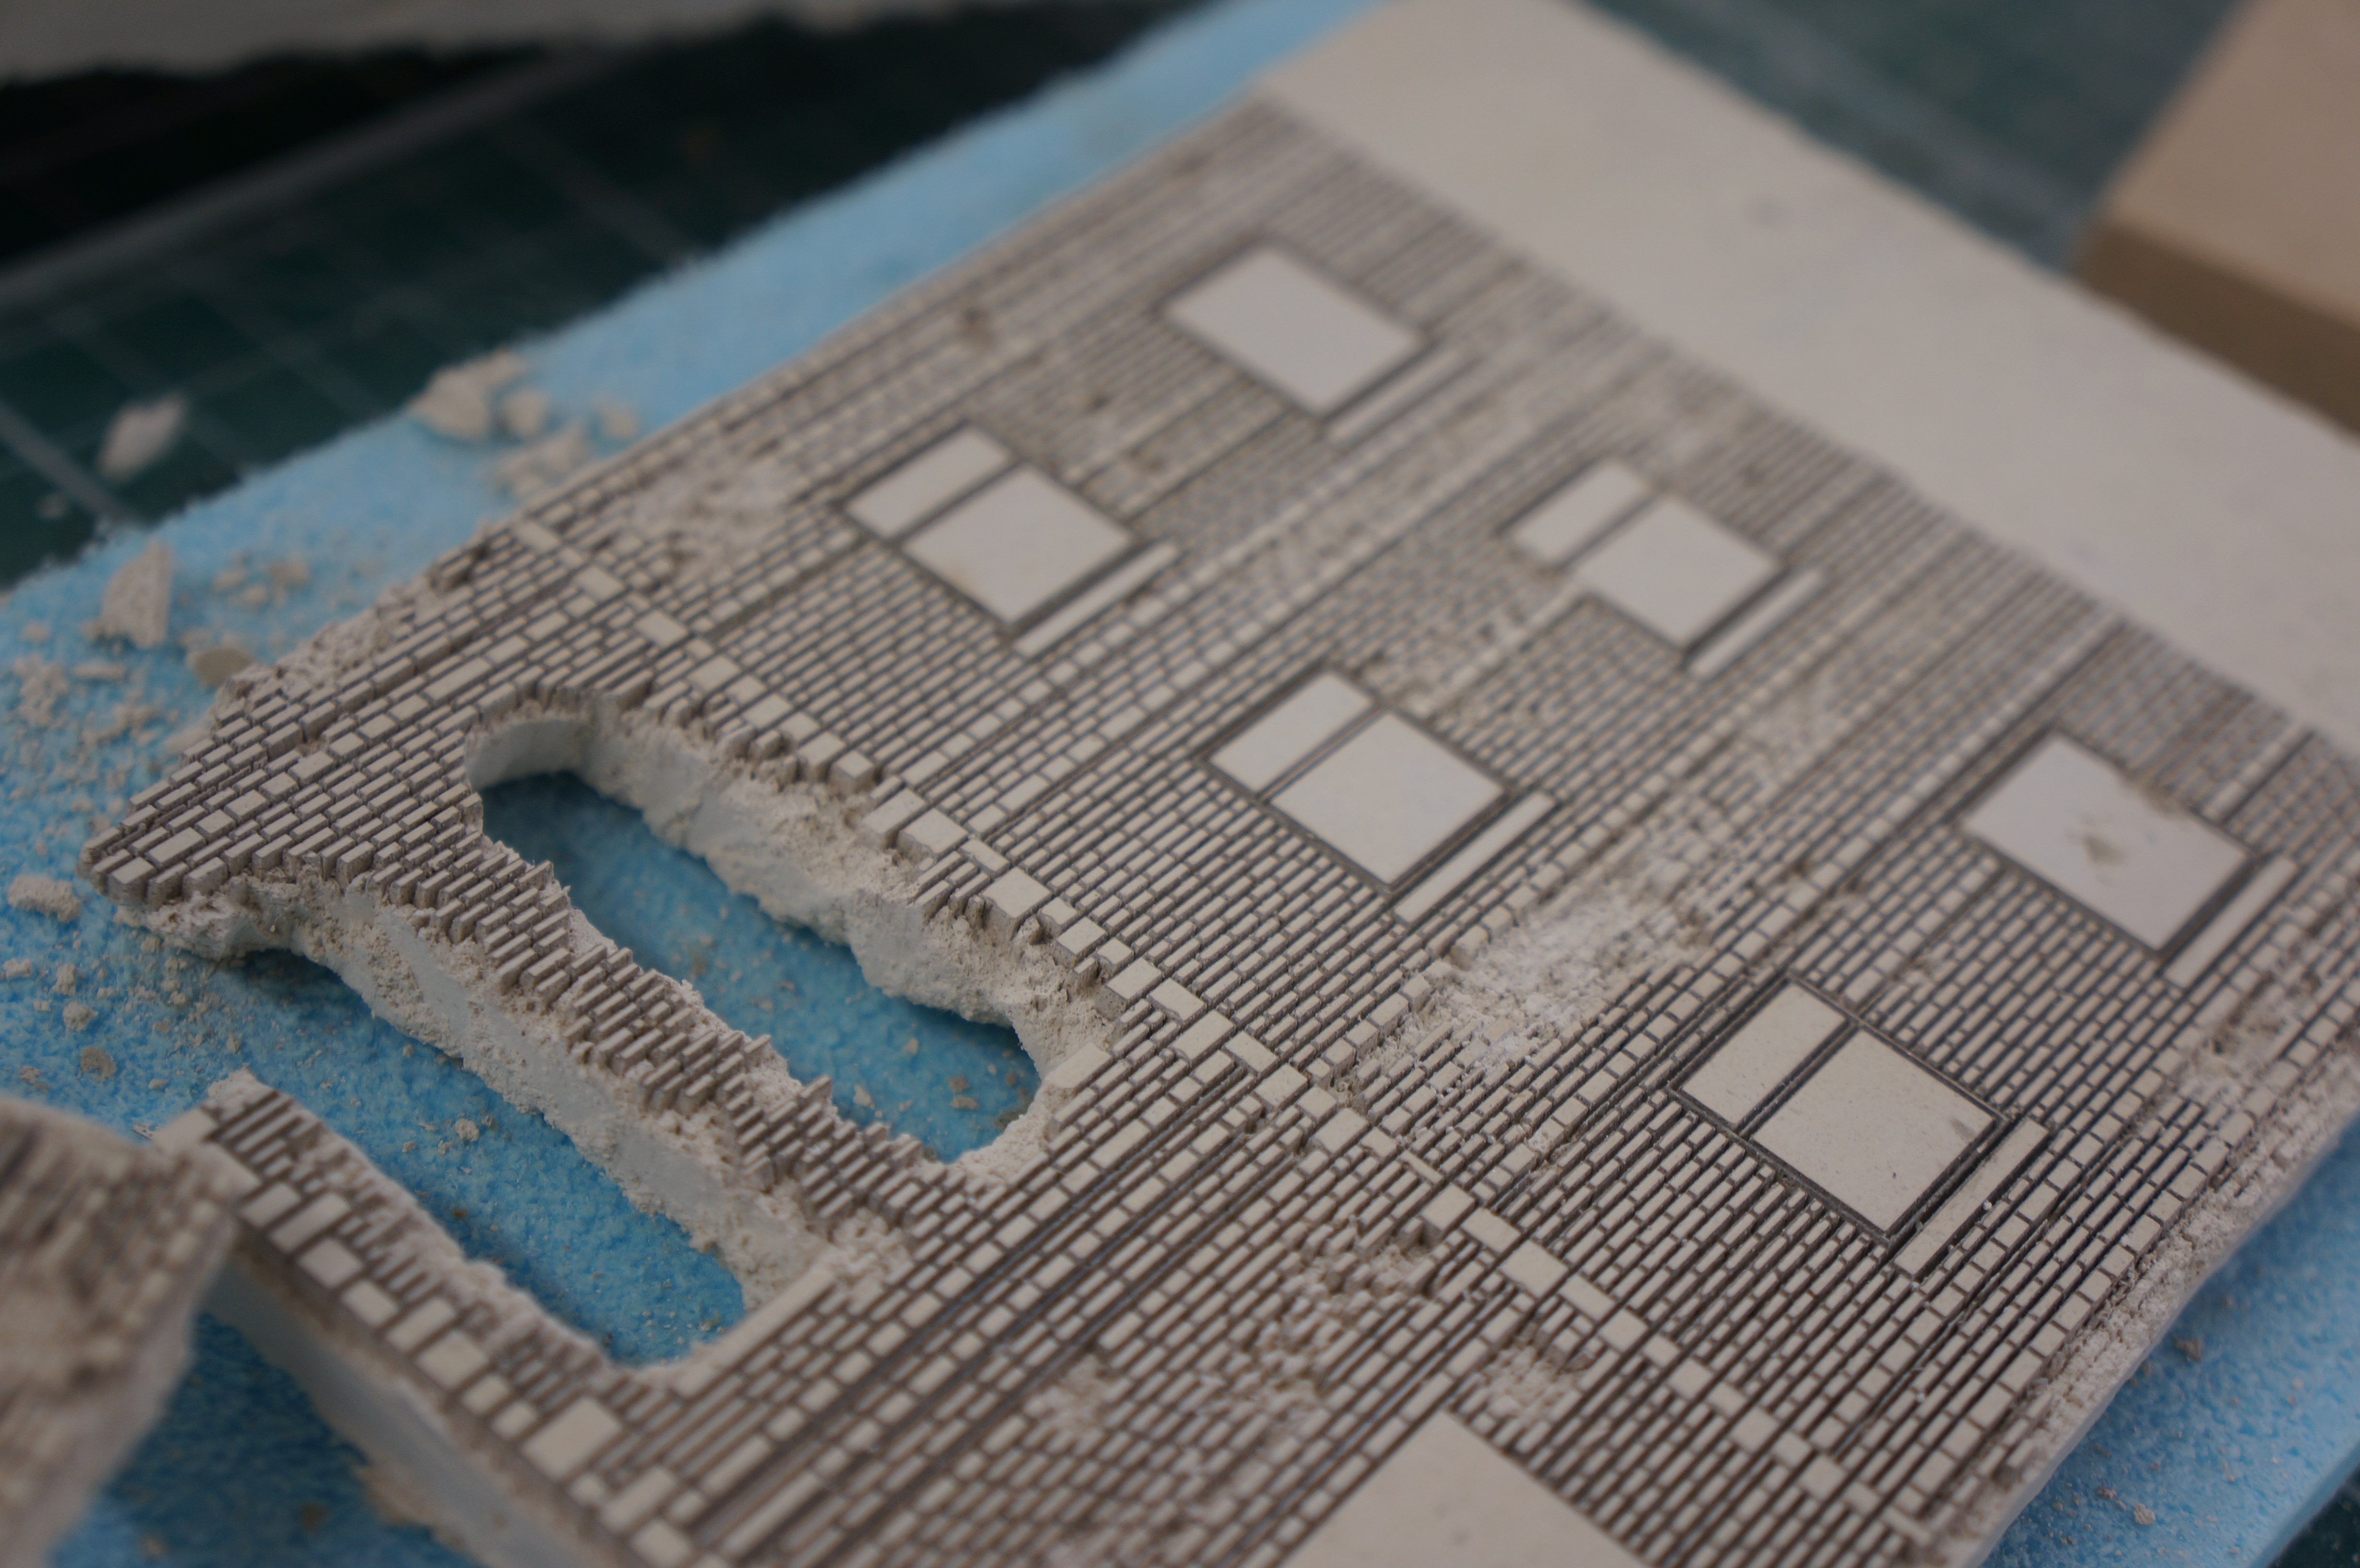
My aim initially was to learn through making, as a direct response to my early research into the various crafts of Lisbon. I started with studies into the processes of stonemasonry (manueline style columns), mimicking the carving and chiseling of stone by using plaster as a more malleable material.Work started off tentatively and without prior experience of carving or sculpting I slowly tapped away at the block removing minimal material. After a while, confidence grew and I became more efficient, quicker and more clinical with my actions. Repetition meant a gradual understanding of the how the material breaks away, how hard to throw the hammer and which way to hold the chisel. What did take me six strikes, now took me one and material would come away precisely where intended, rather than too much or too little.

The resultant studies link back well to my interpretation of Lisbon as a crafted city, and I hope to transfer this knowledge into design/programme at a later stage.

dsc06869

My first three outputs are studies into manueline style architectural elements in stone, each work advancing in difficulty, starting with a simple twisted flute column to a decorative rope knot. I gained a partial understanding of what it means to me to be a craftsman; having a true understanding of material, knowledge and economy of technique and most evidently, much practice and repetition.

img_2684 img_2726

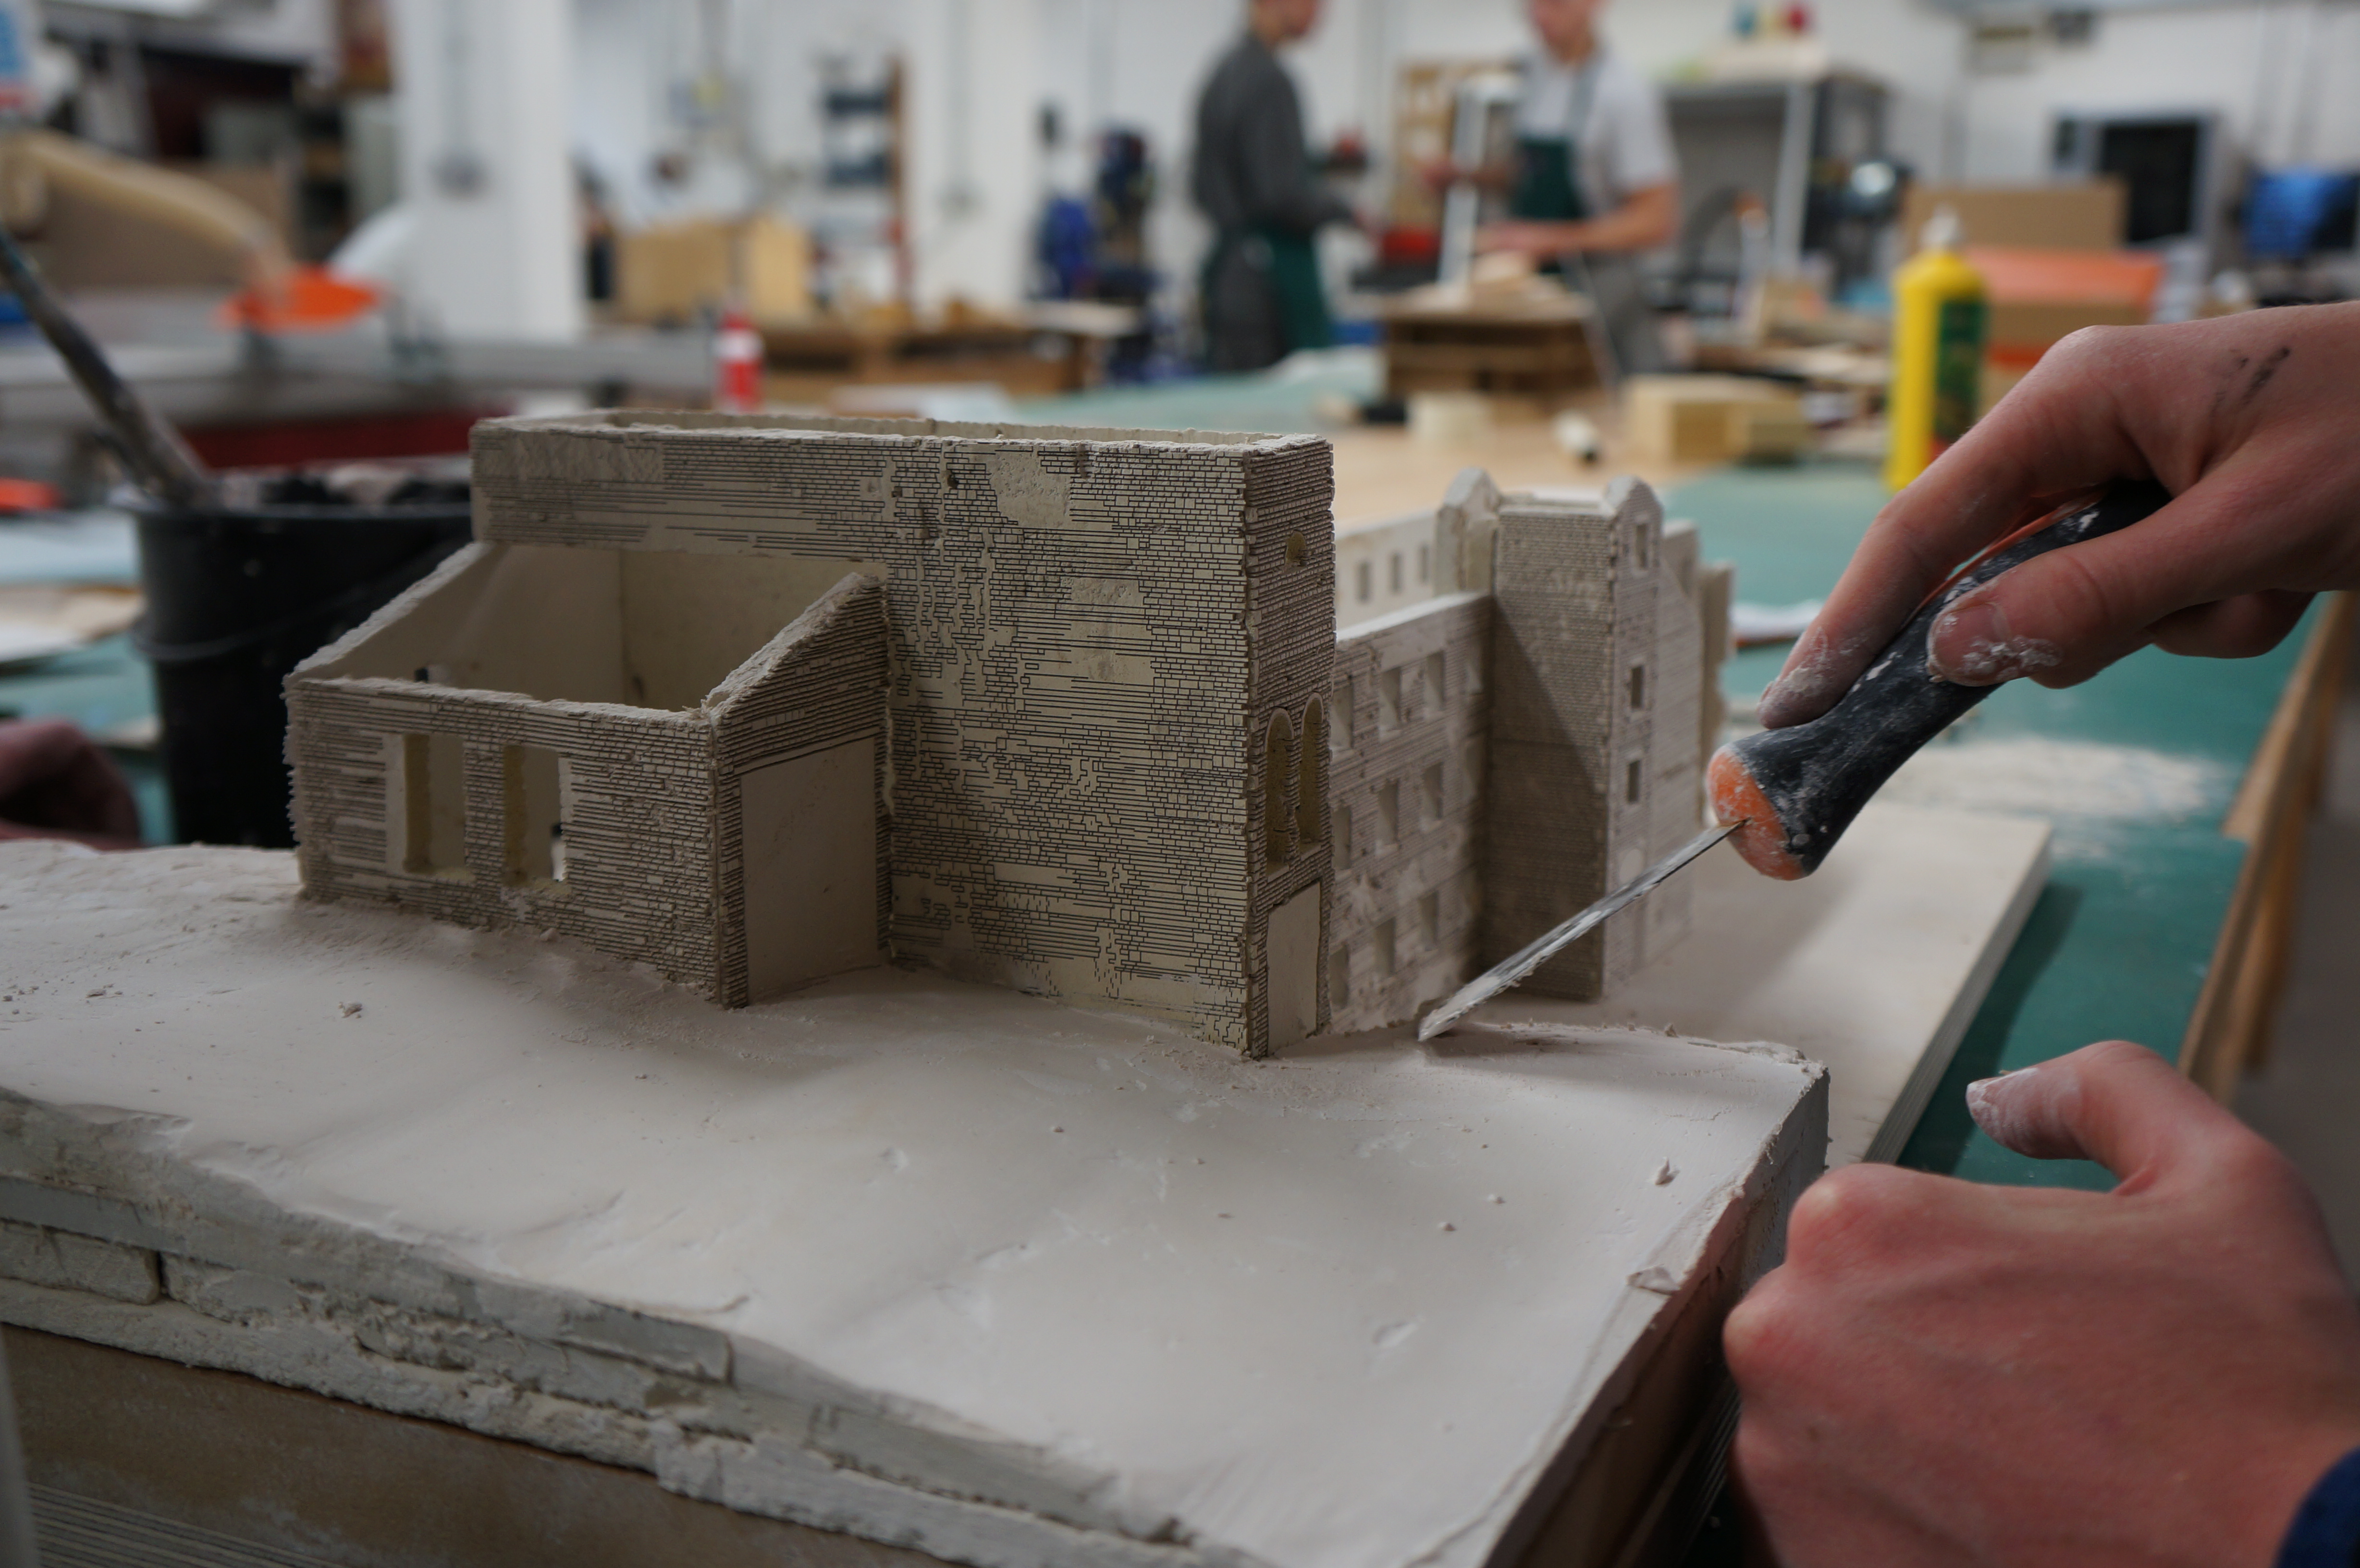
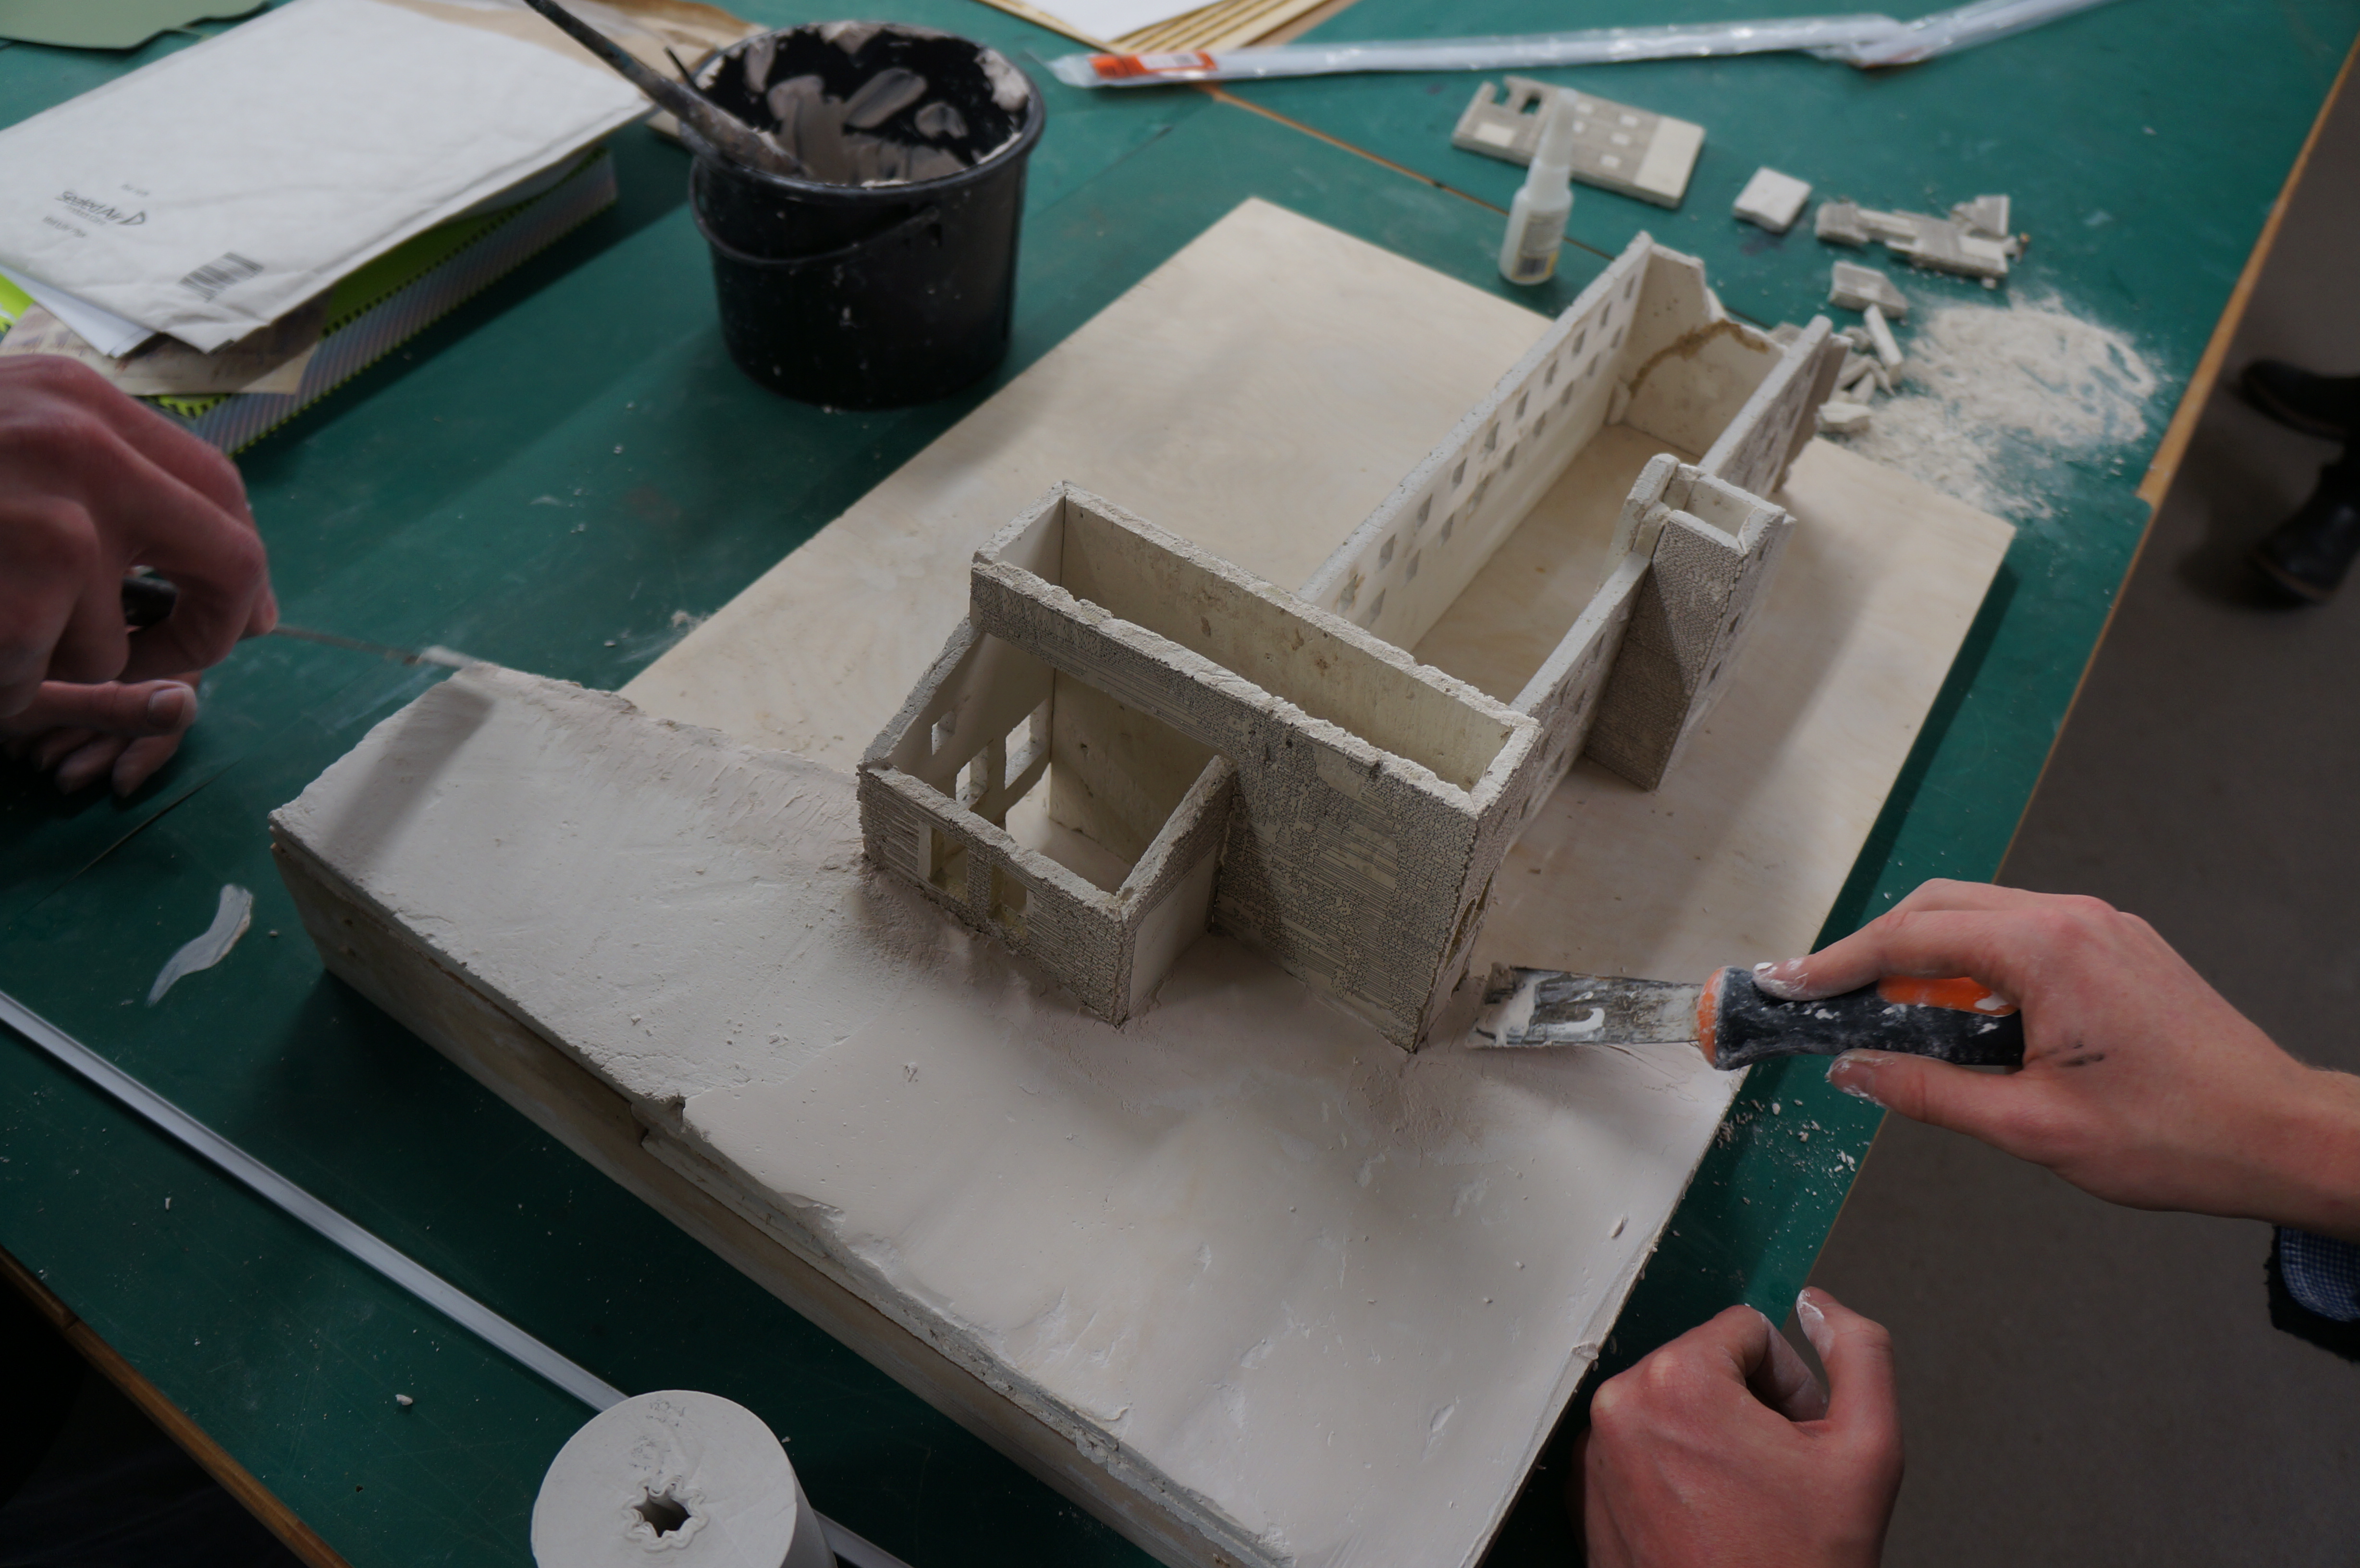
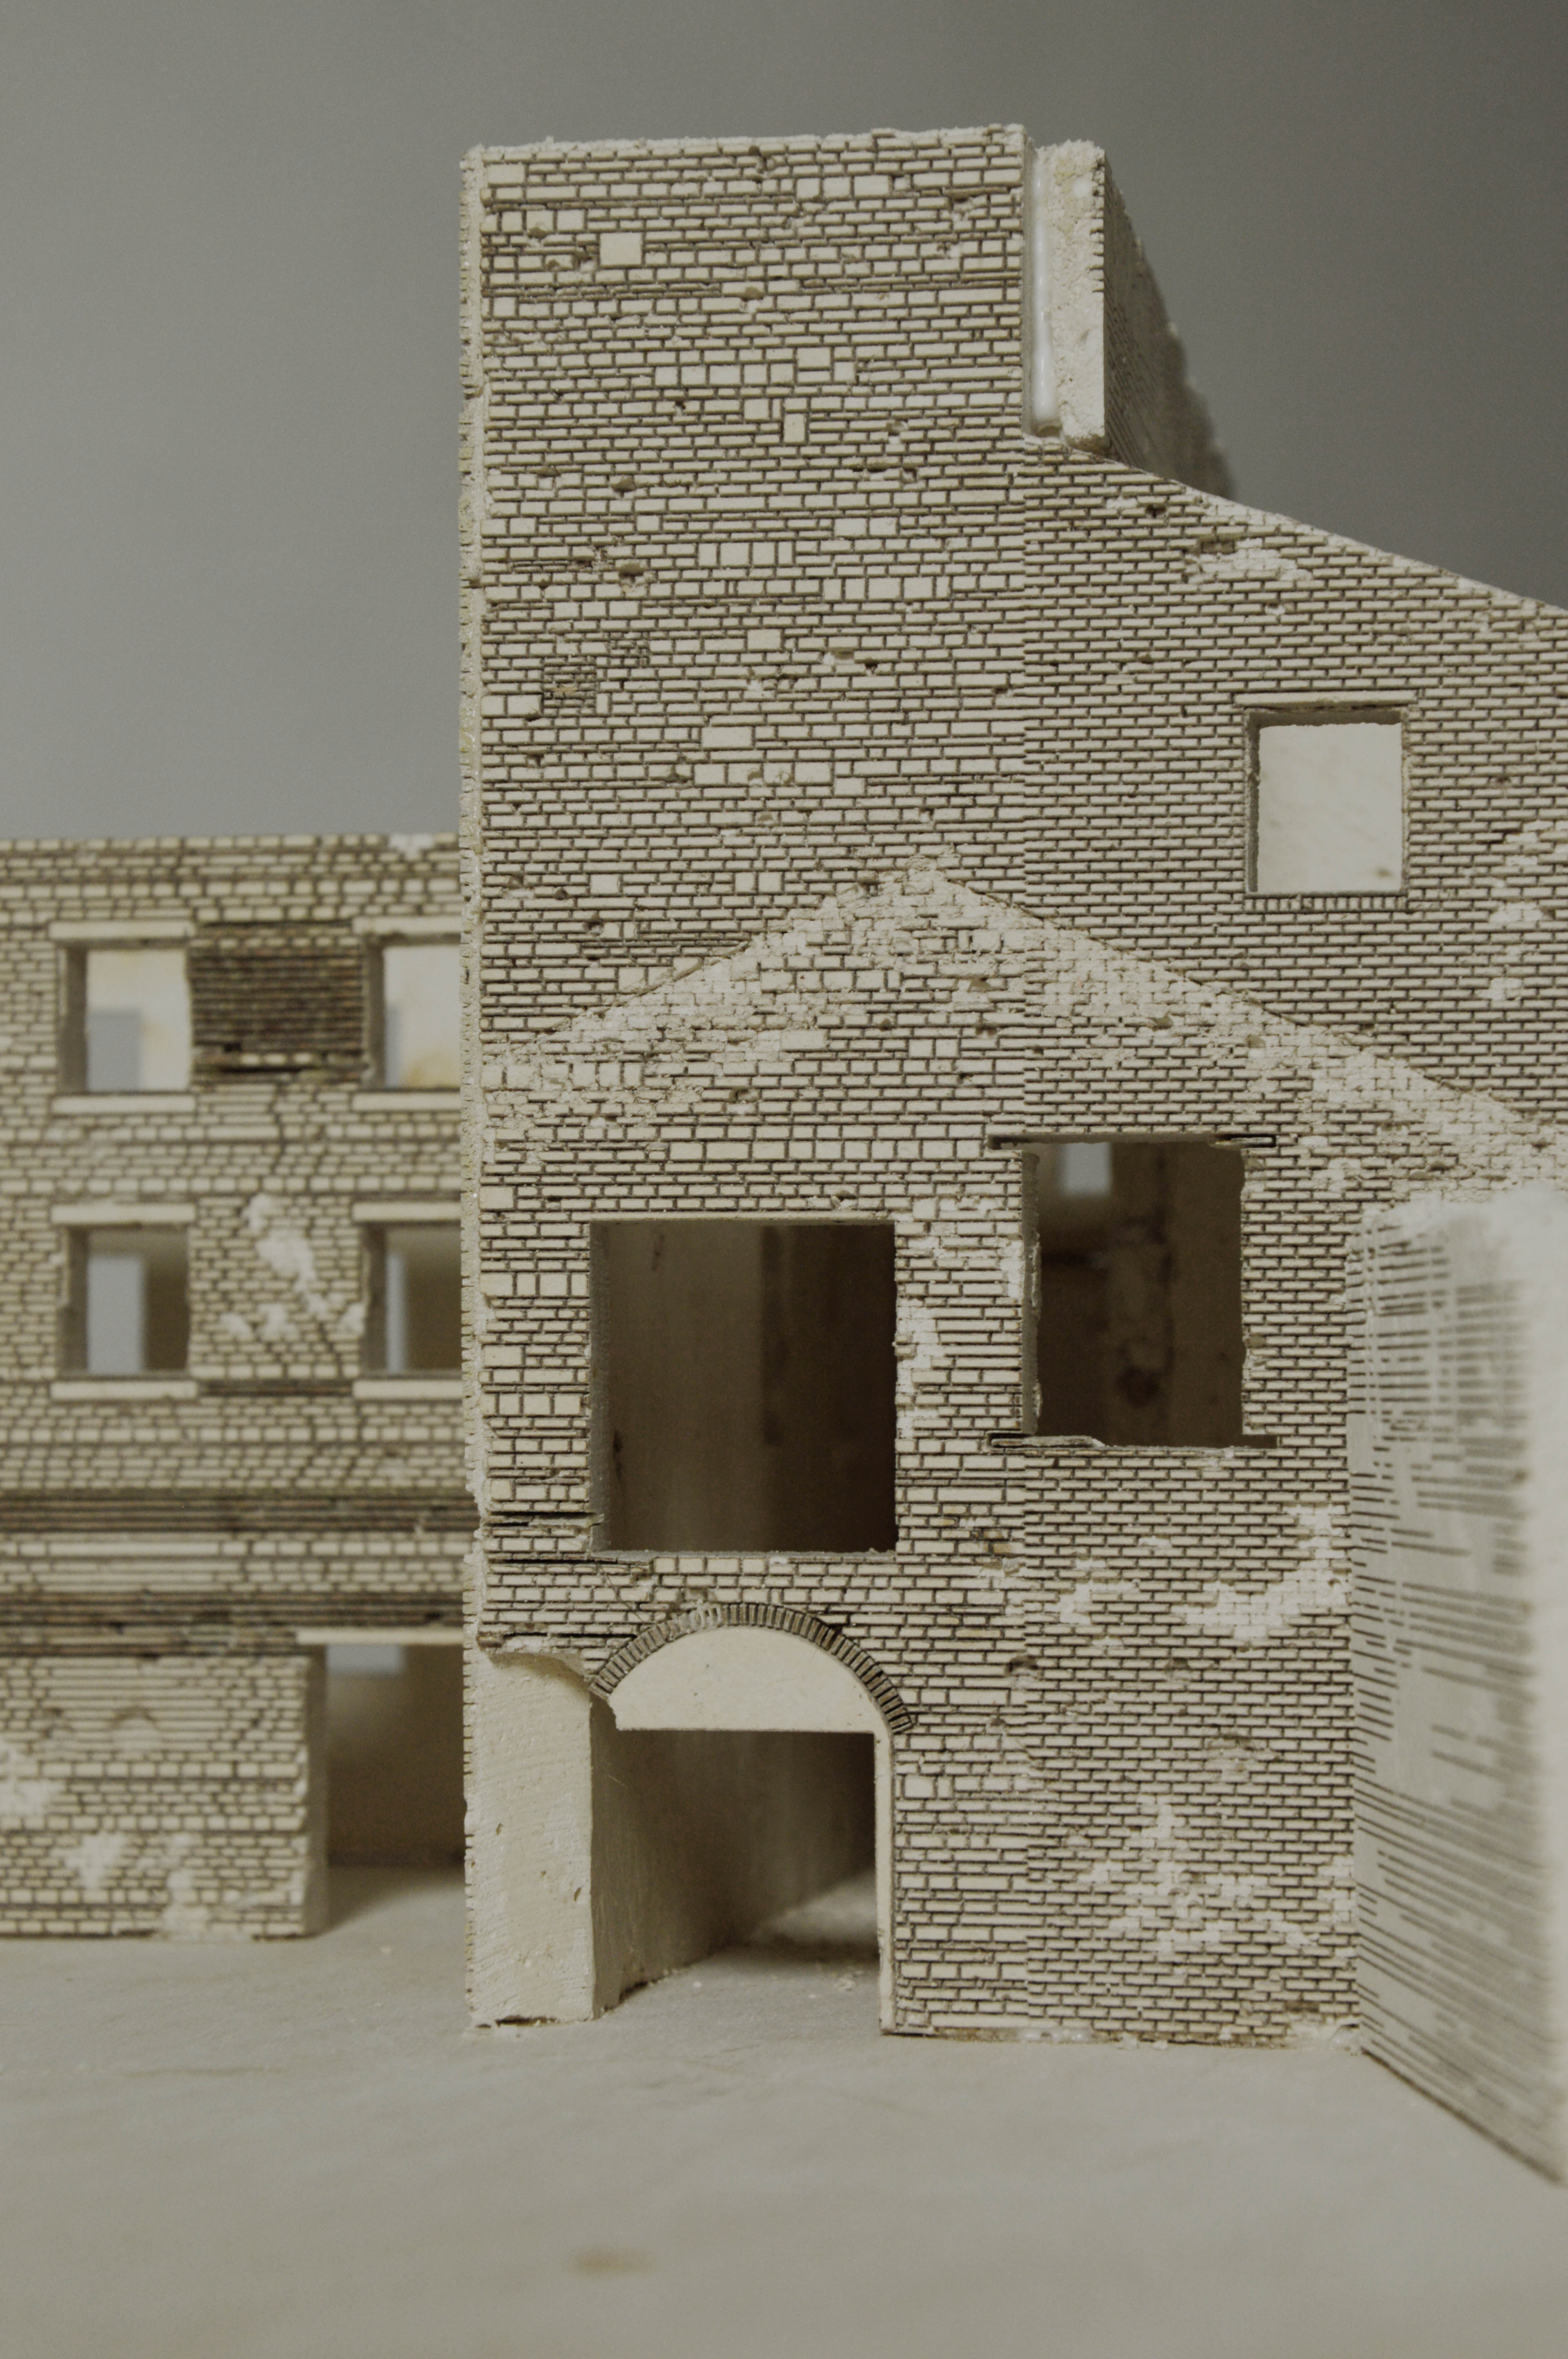
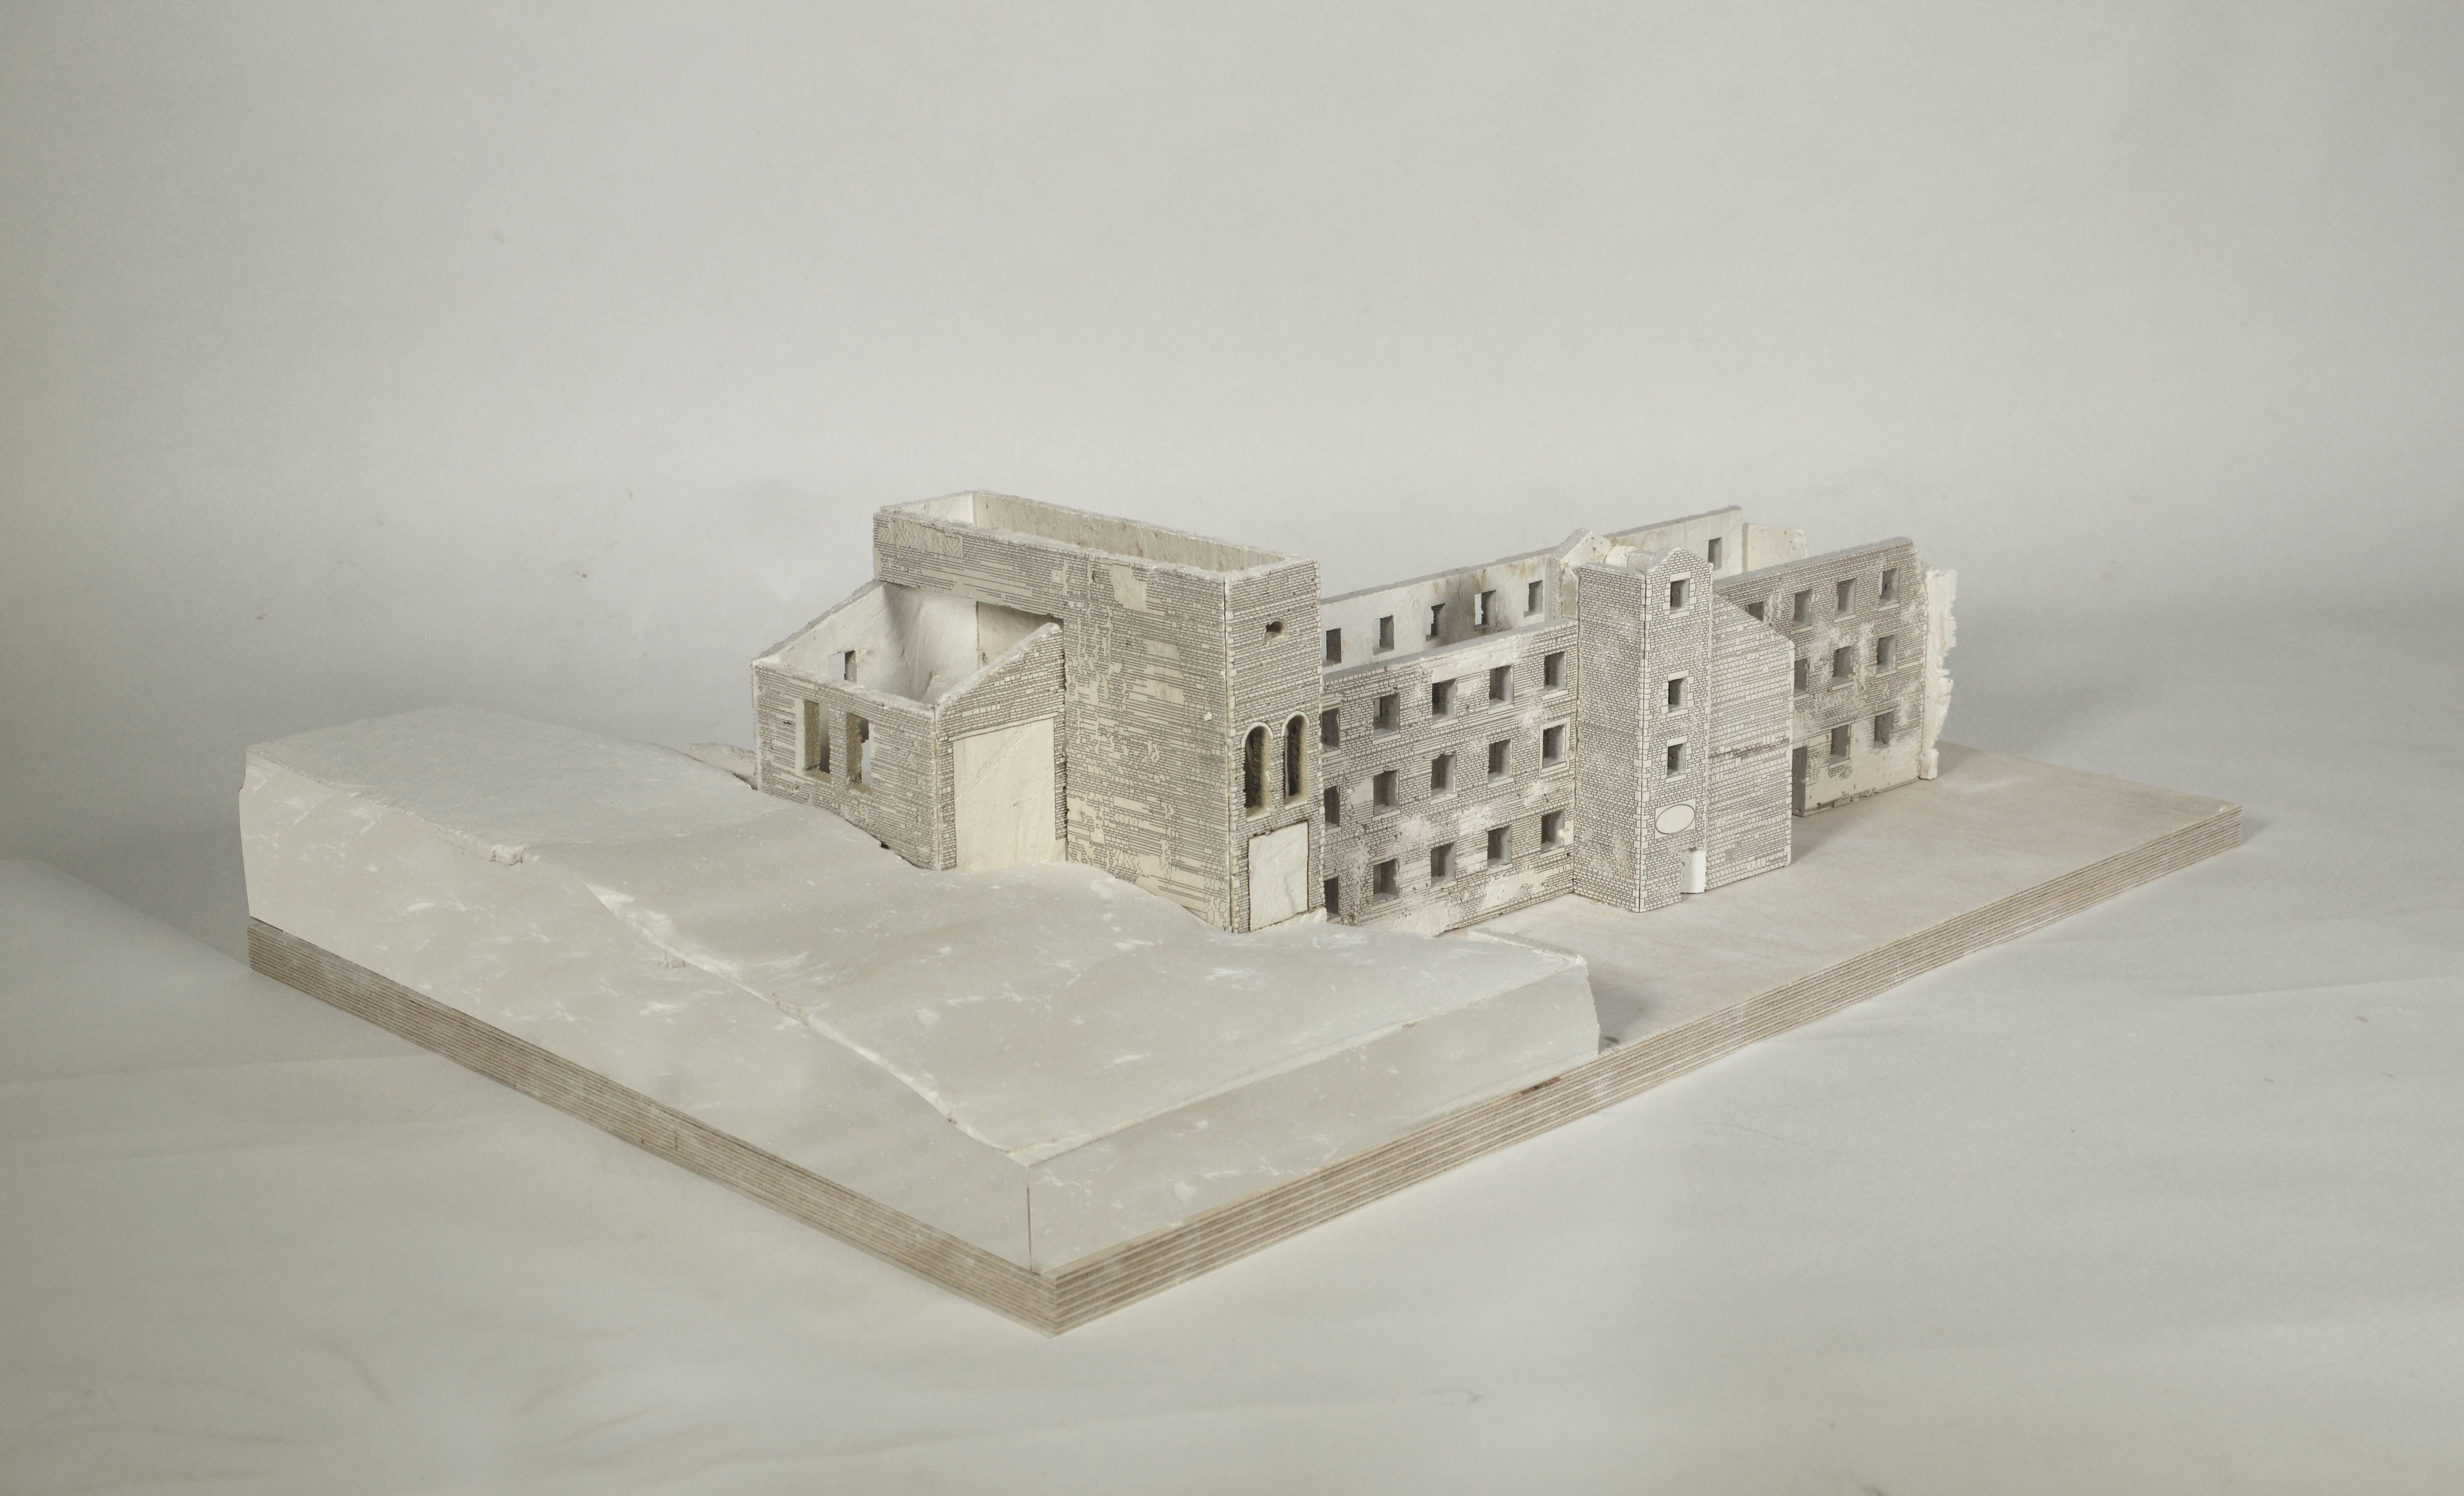
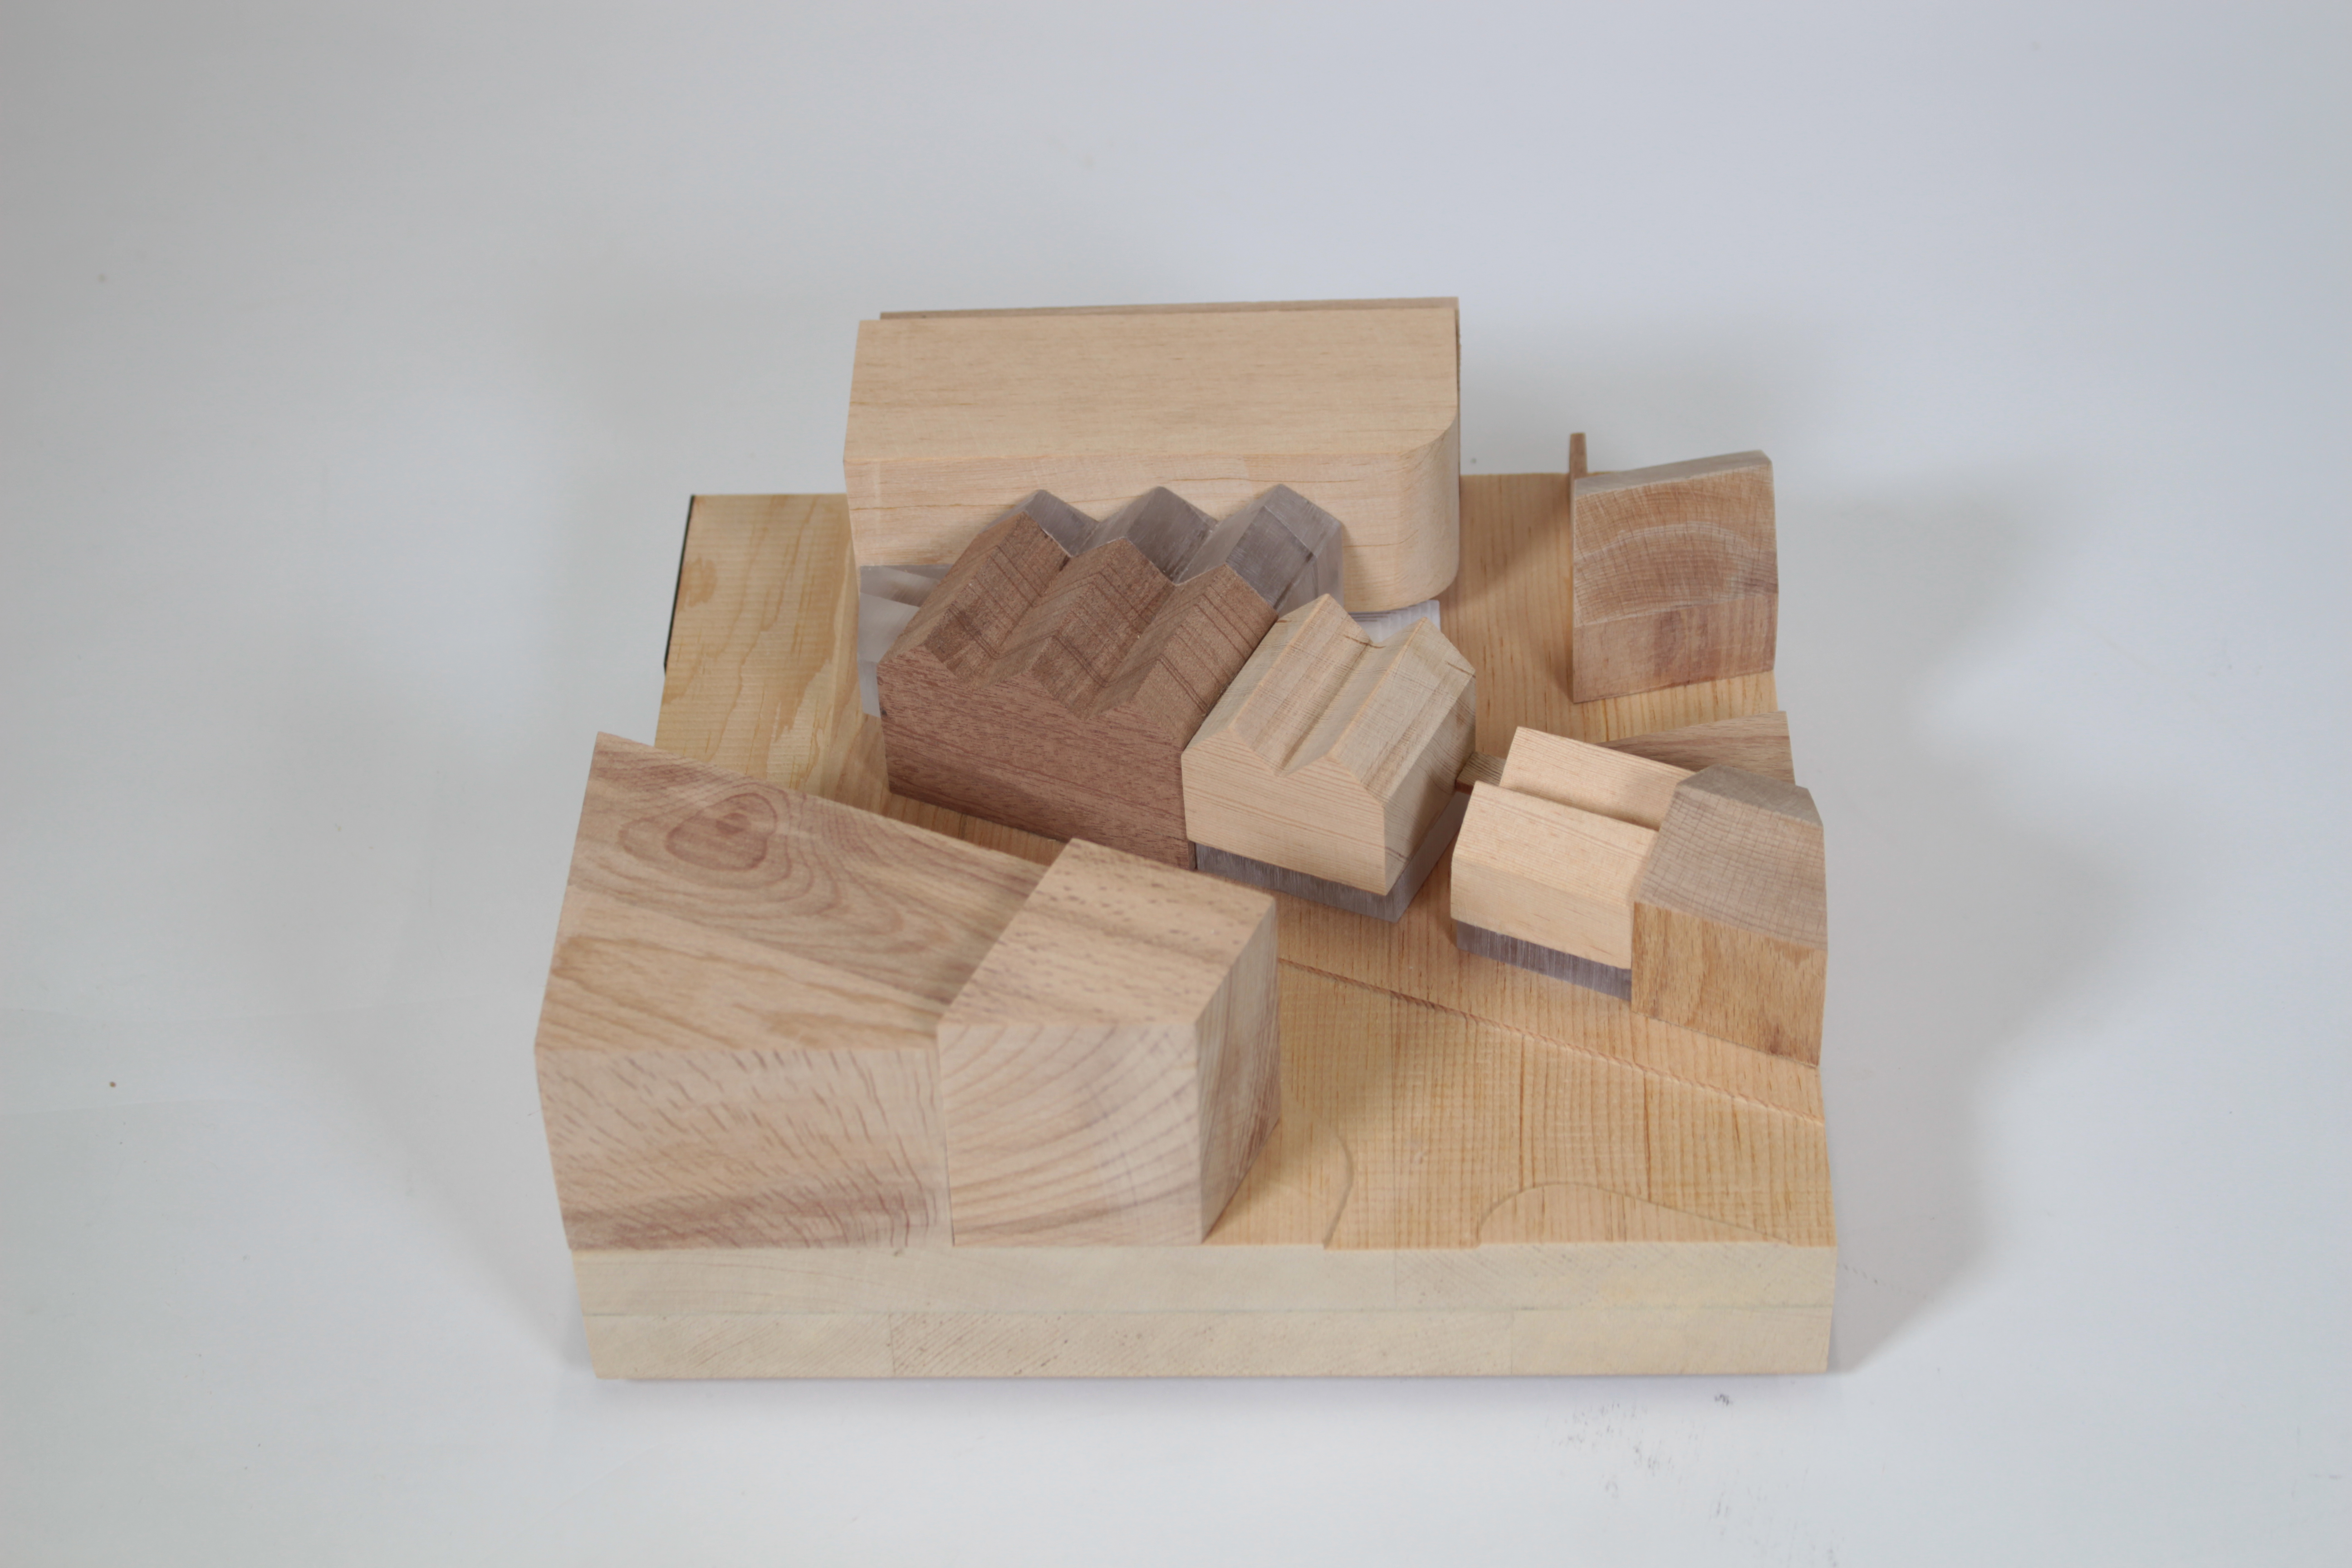
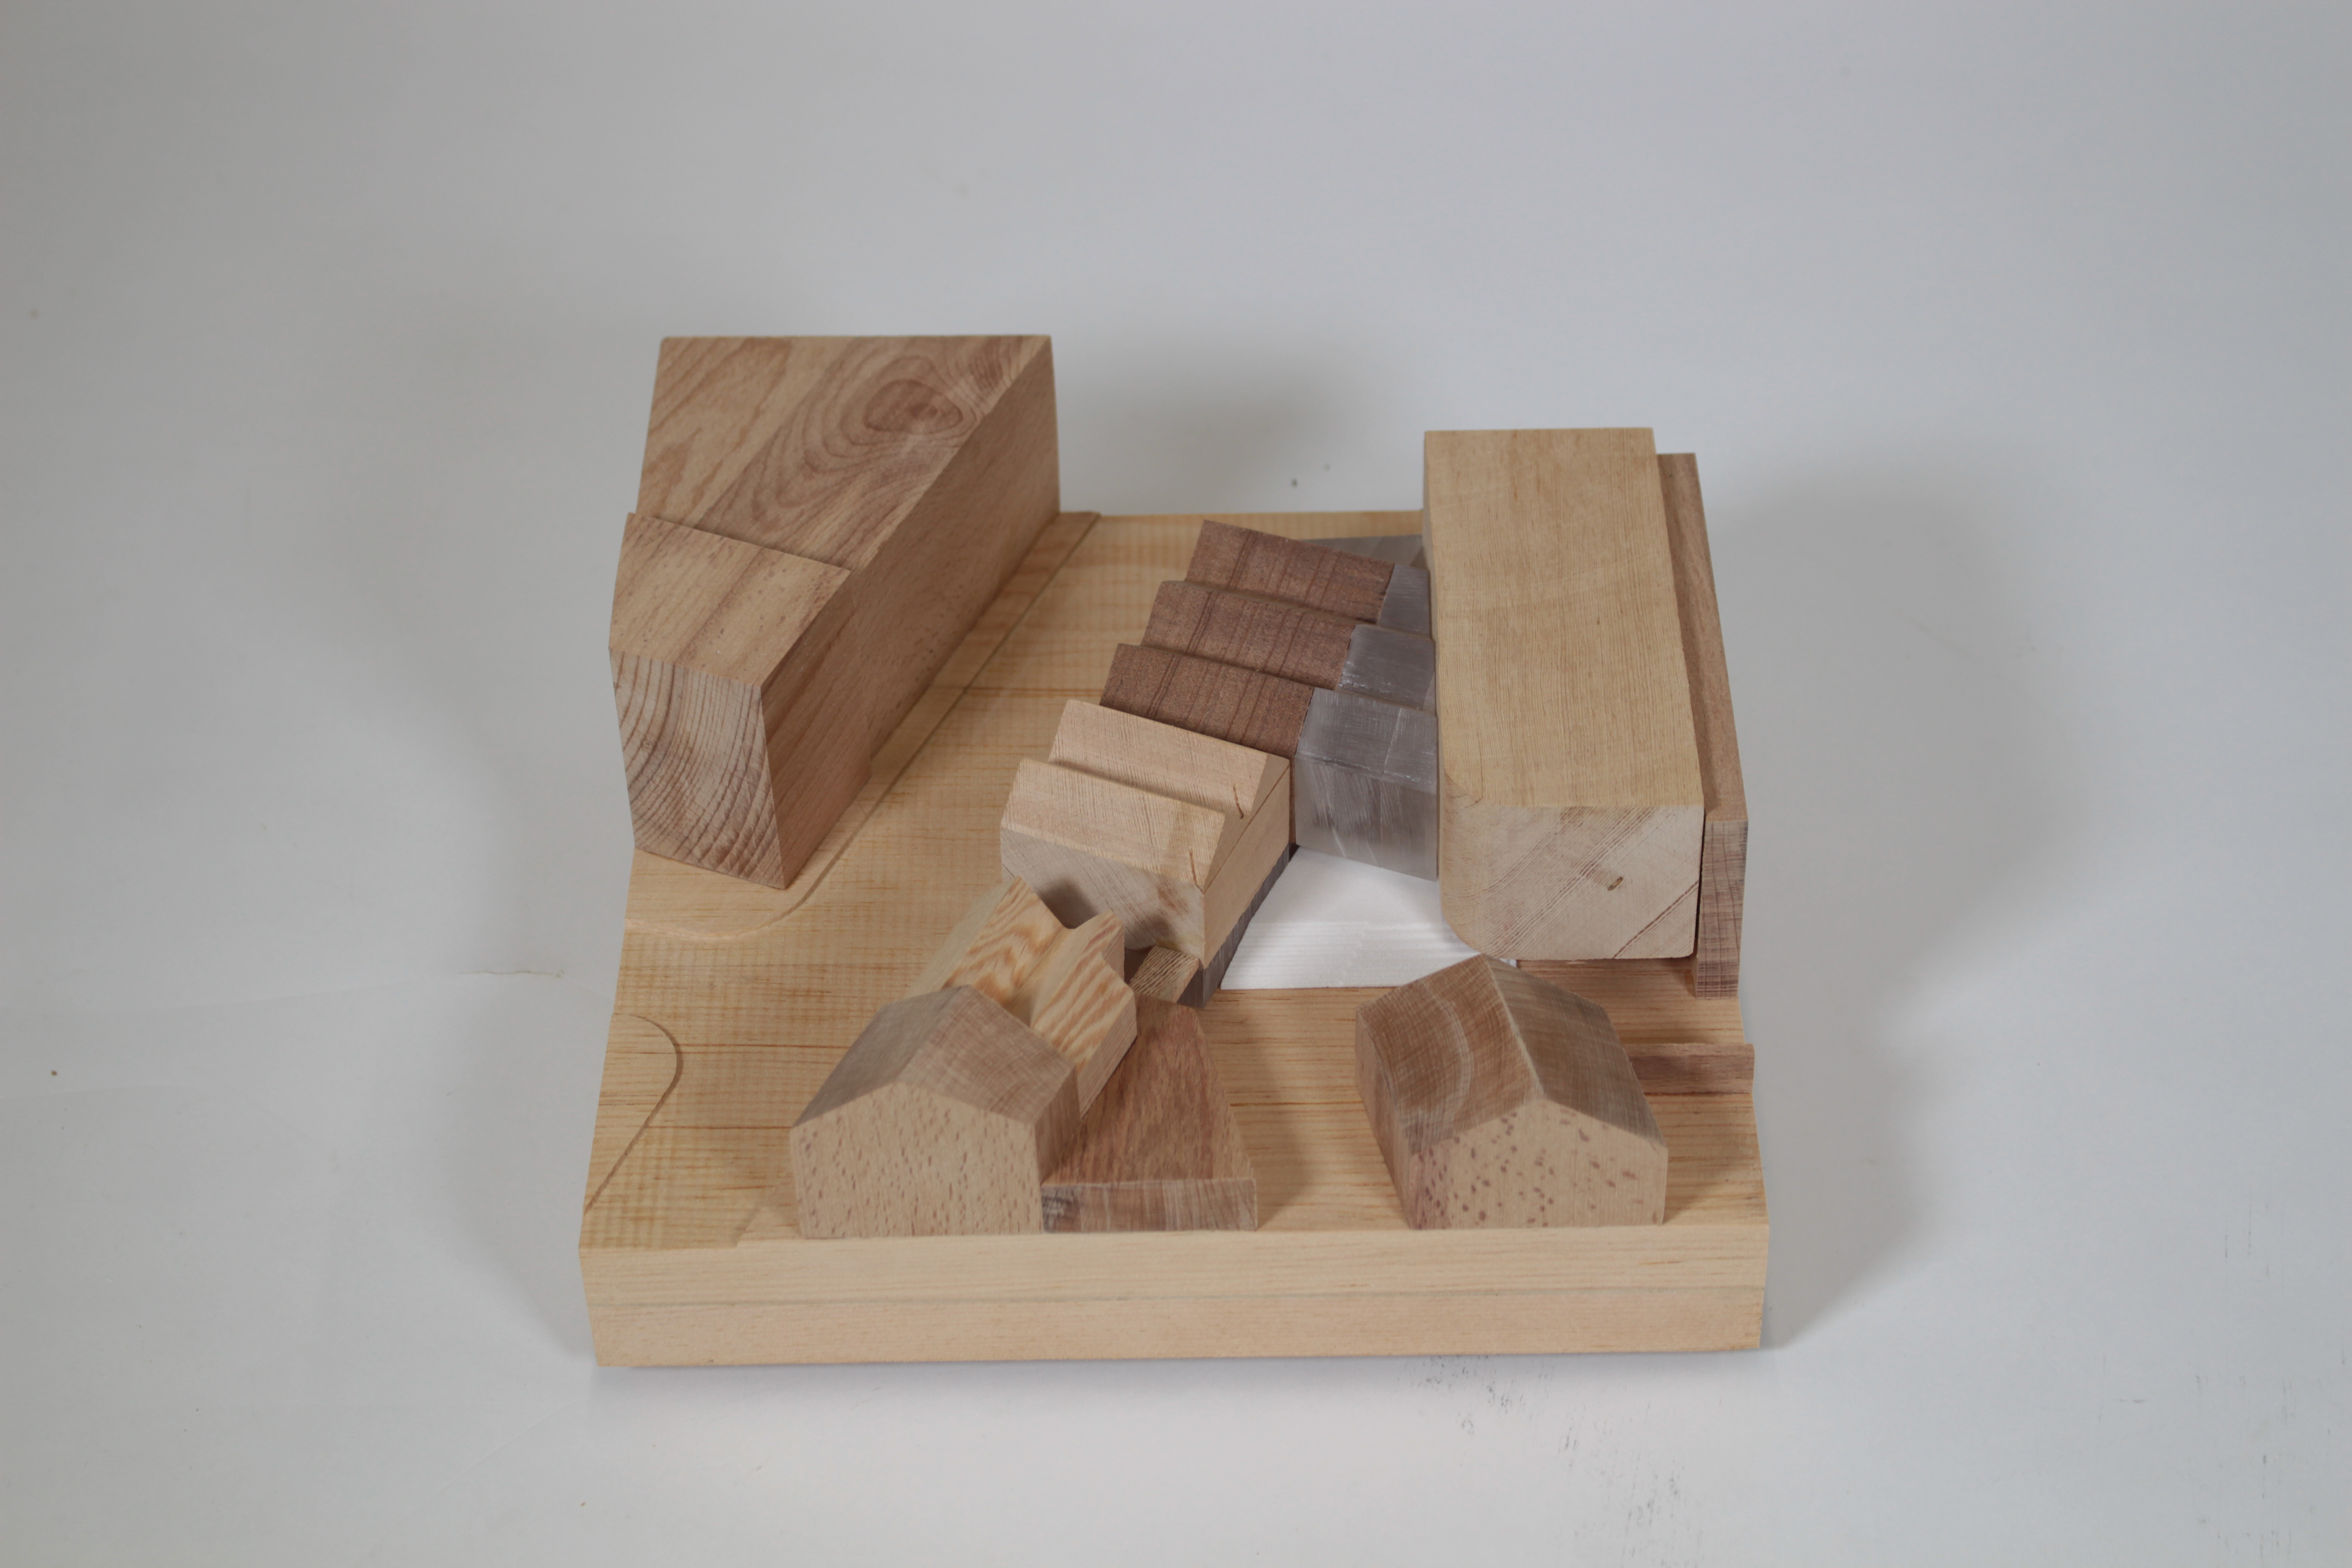
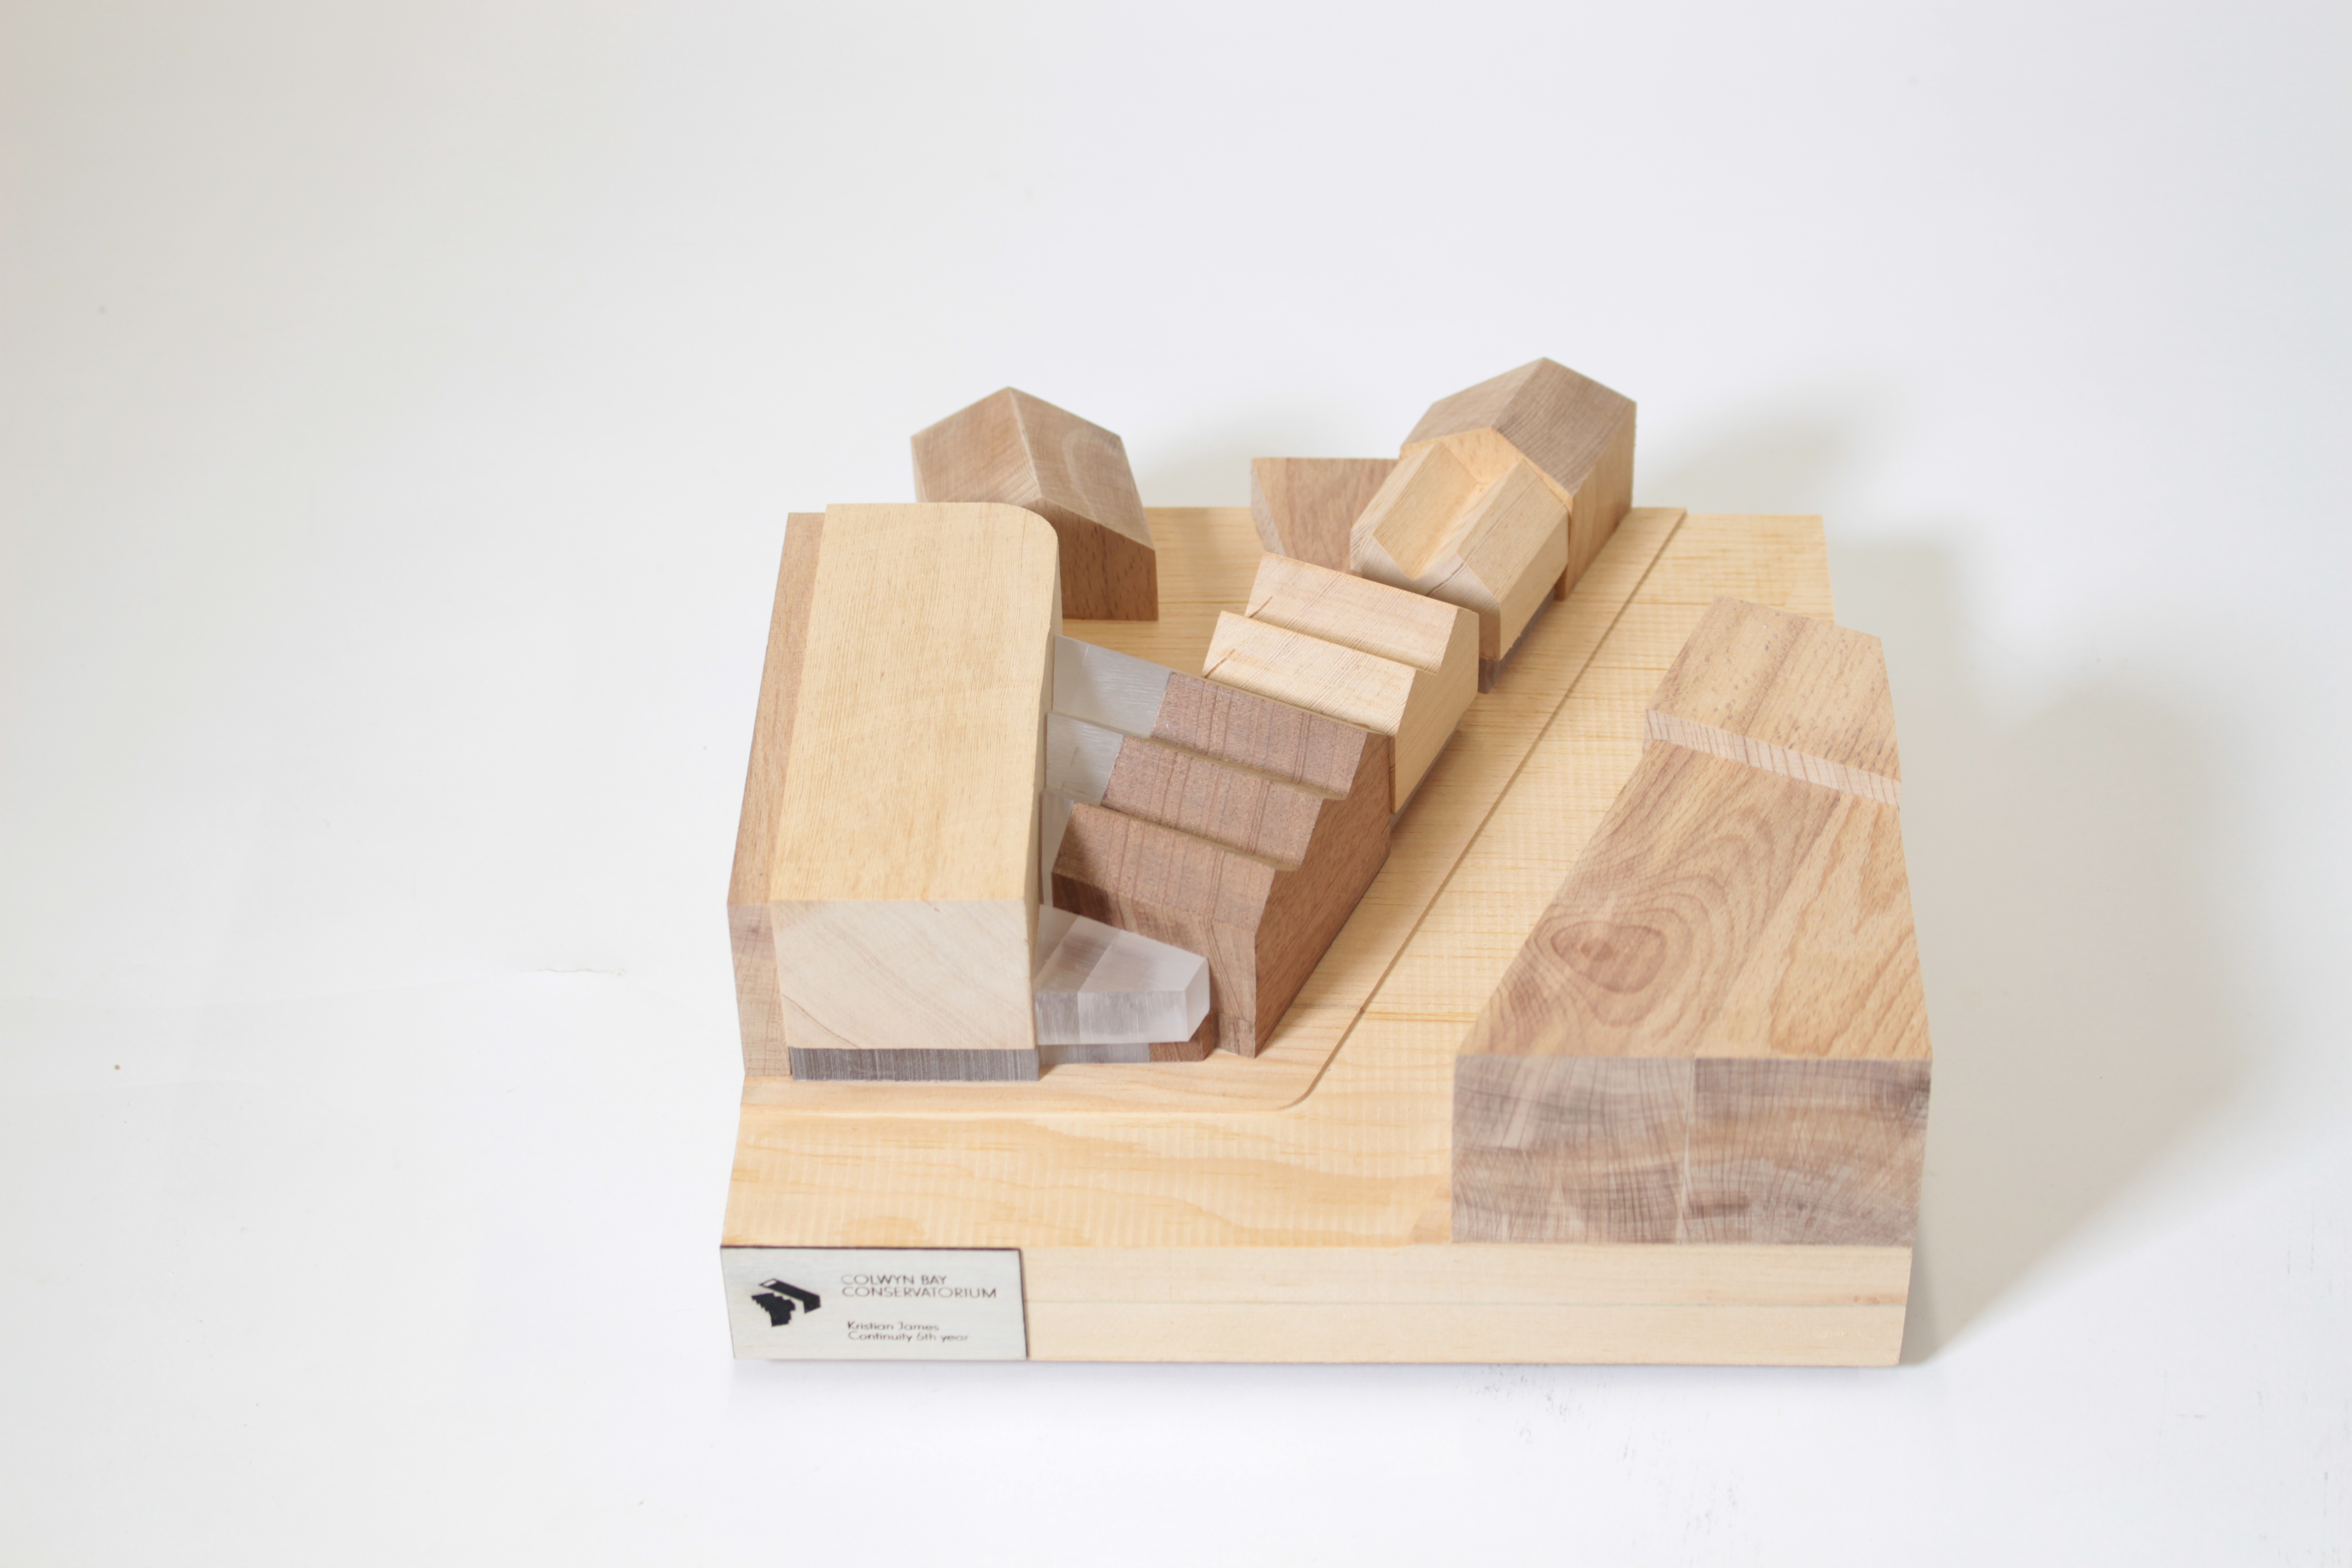
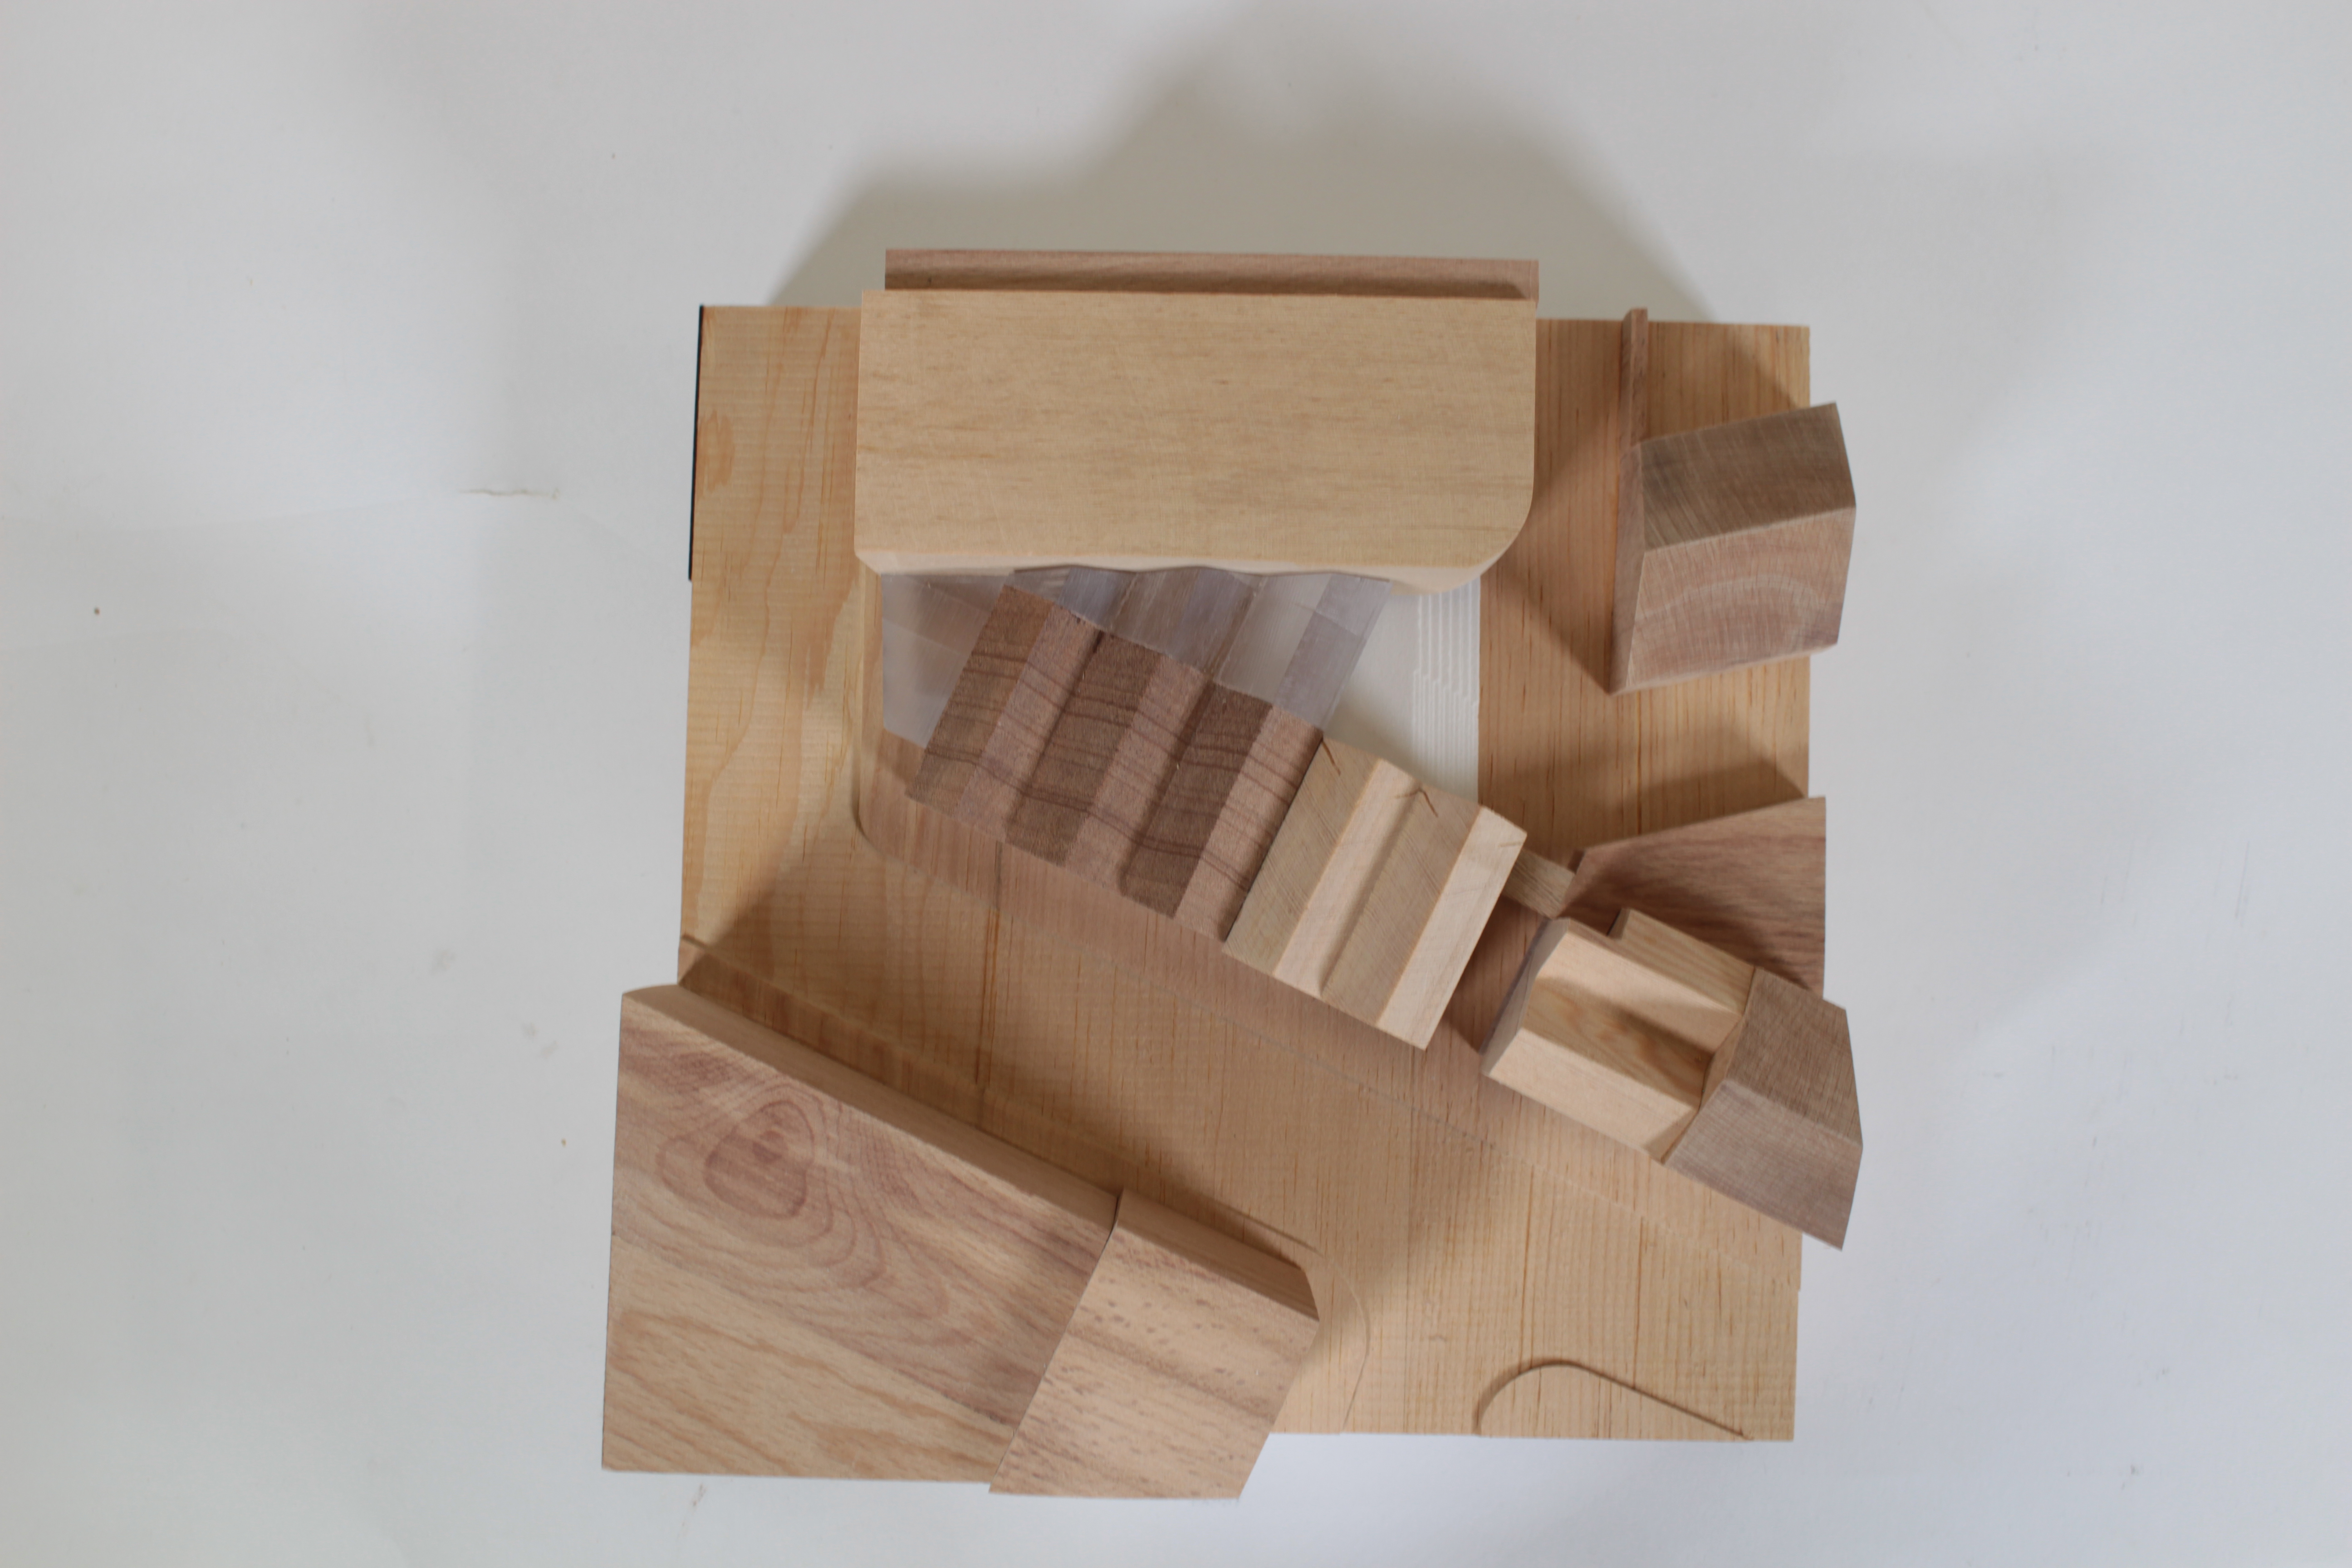
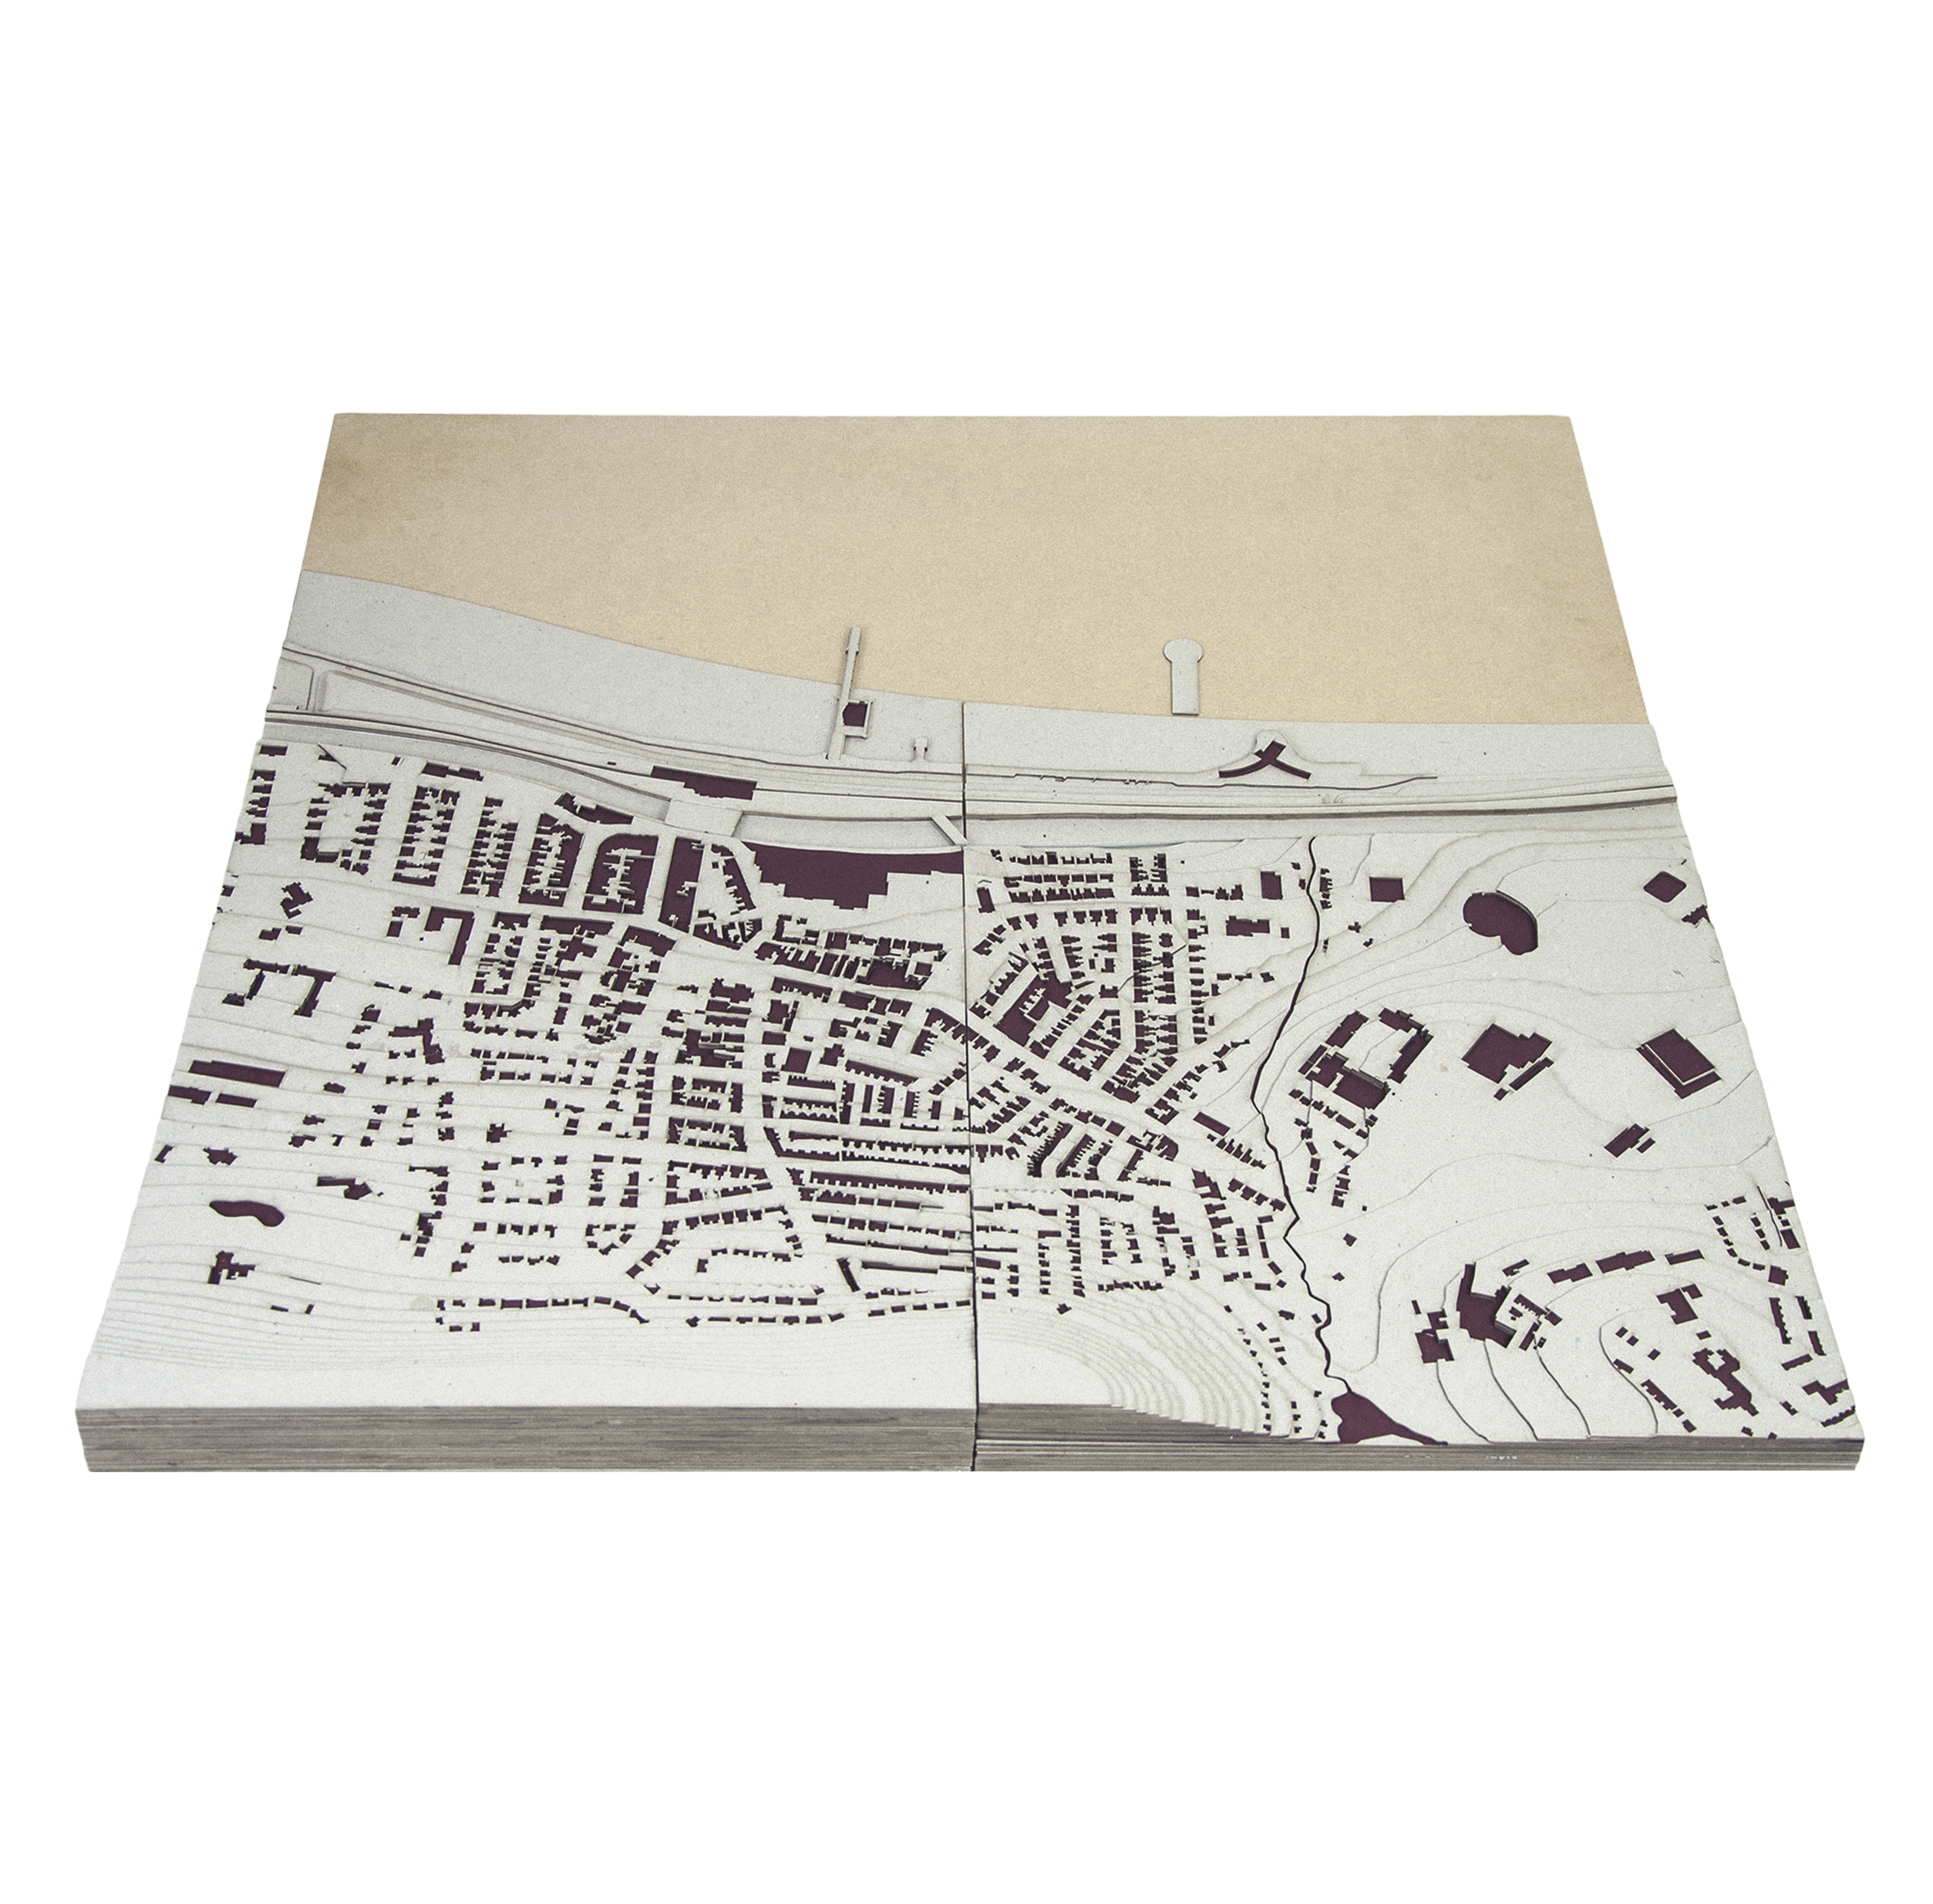
After gaining more confidence with the tools, the material and act of carving, I attempted to produce a concept model and 1:500 site model. I thought these early analytical studies and their method of production, along with site analysis could inform my approach to design later on.

sam-stone-3

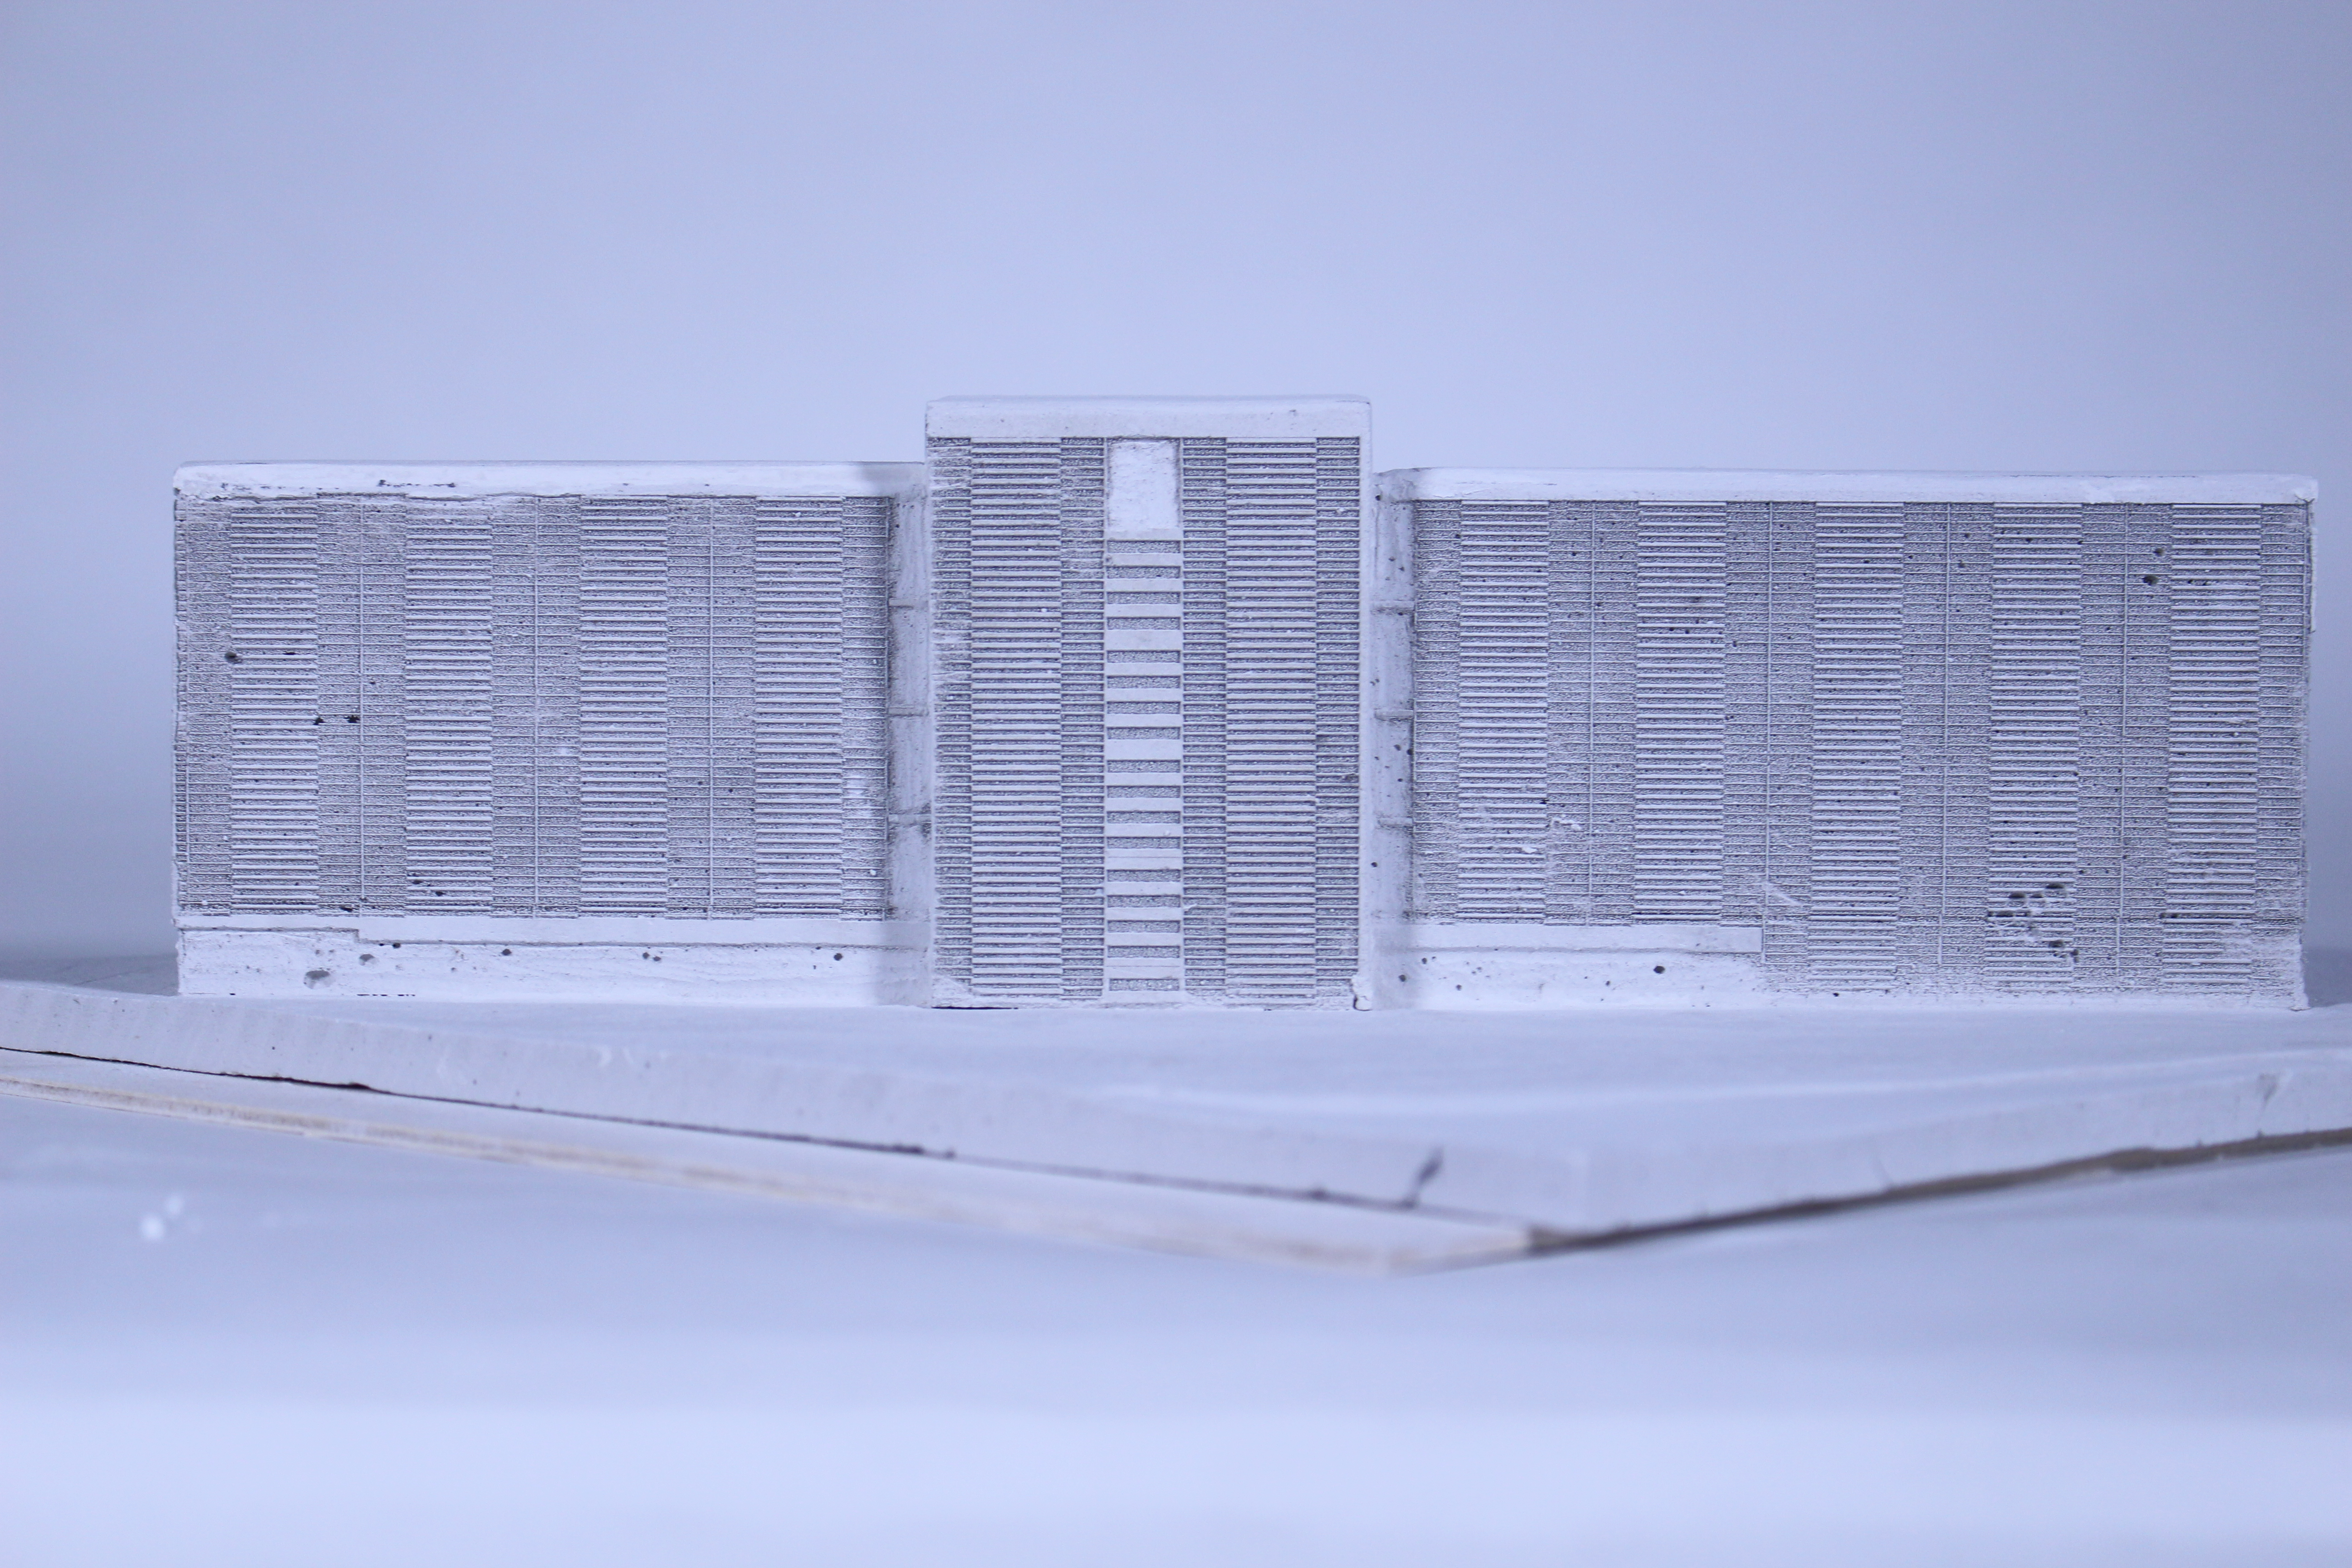
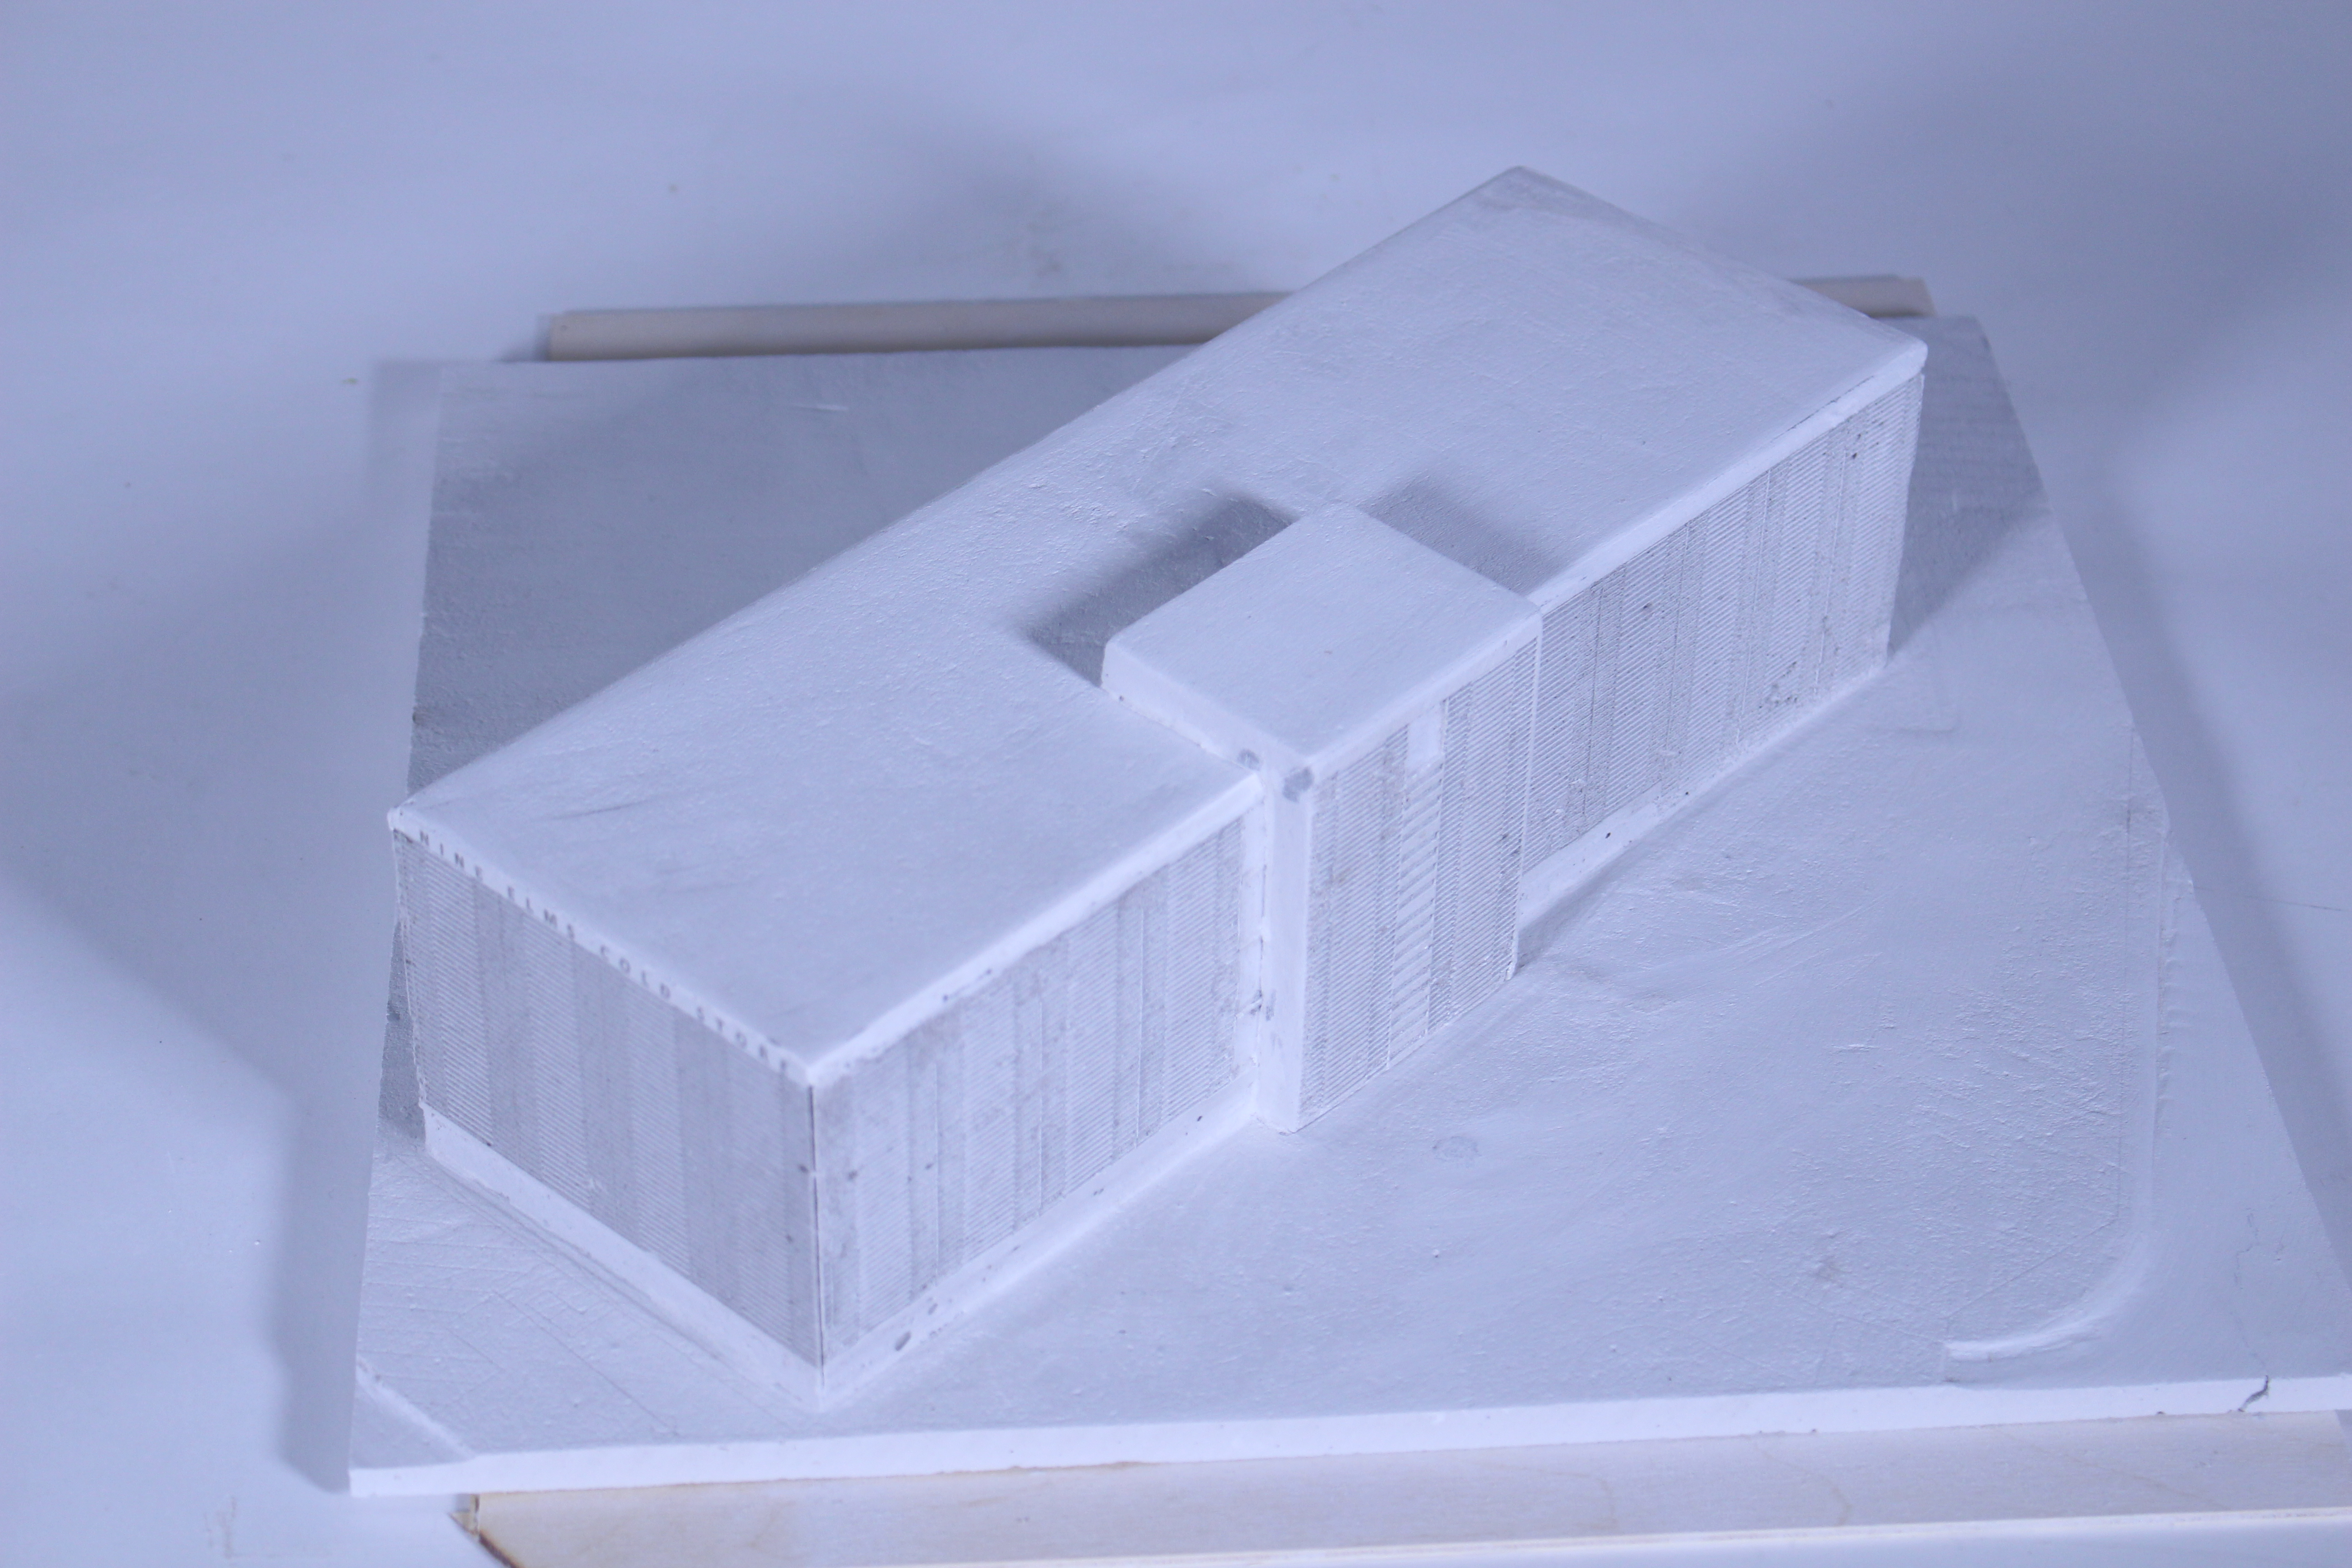
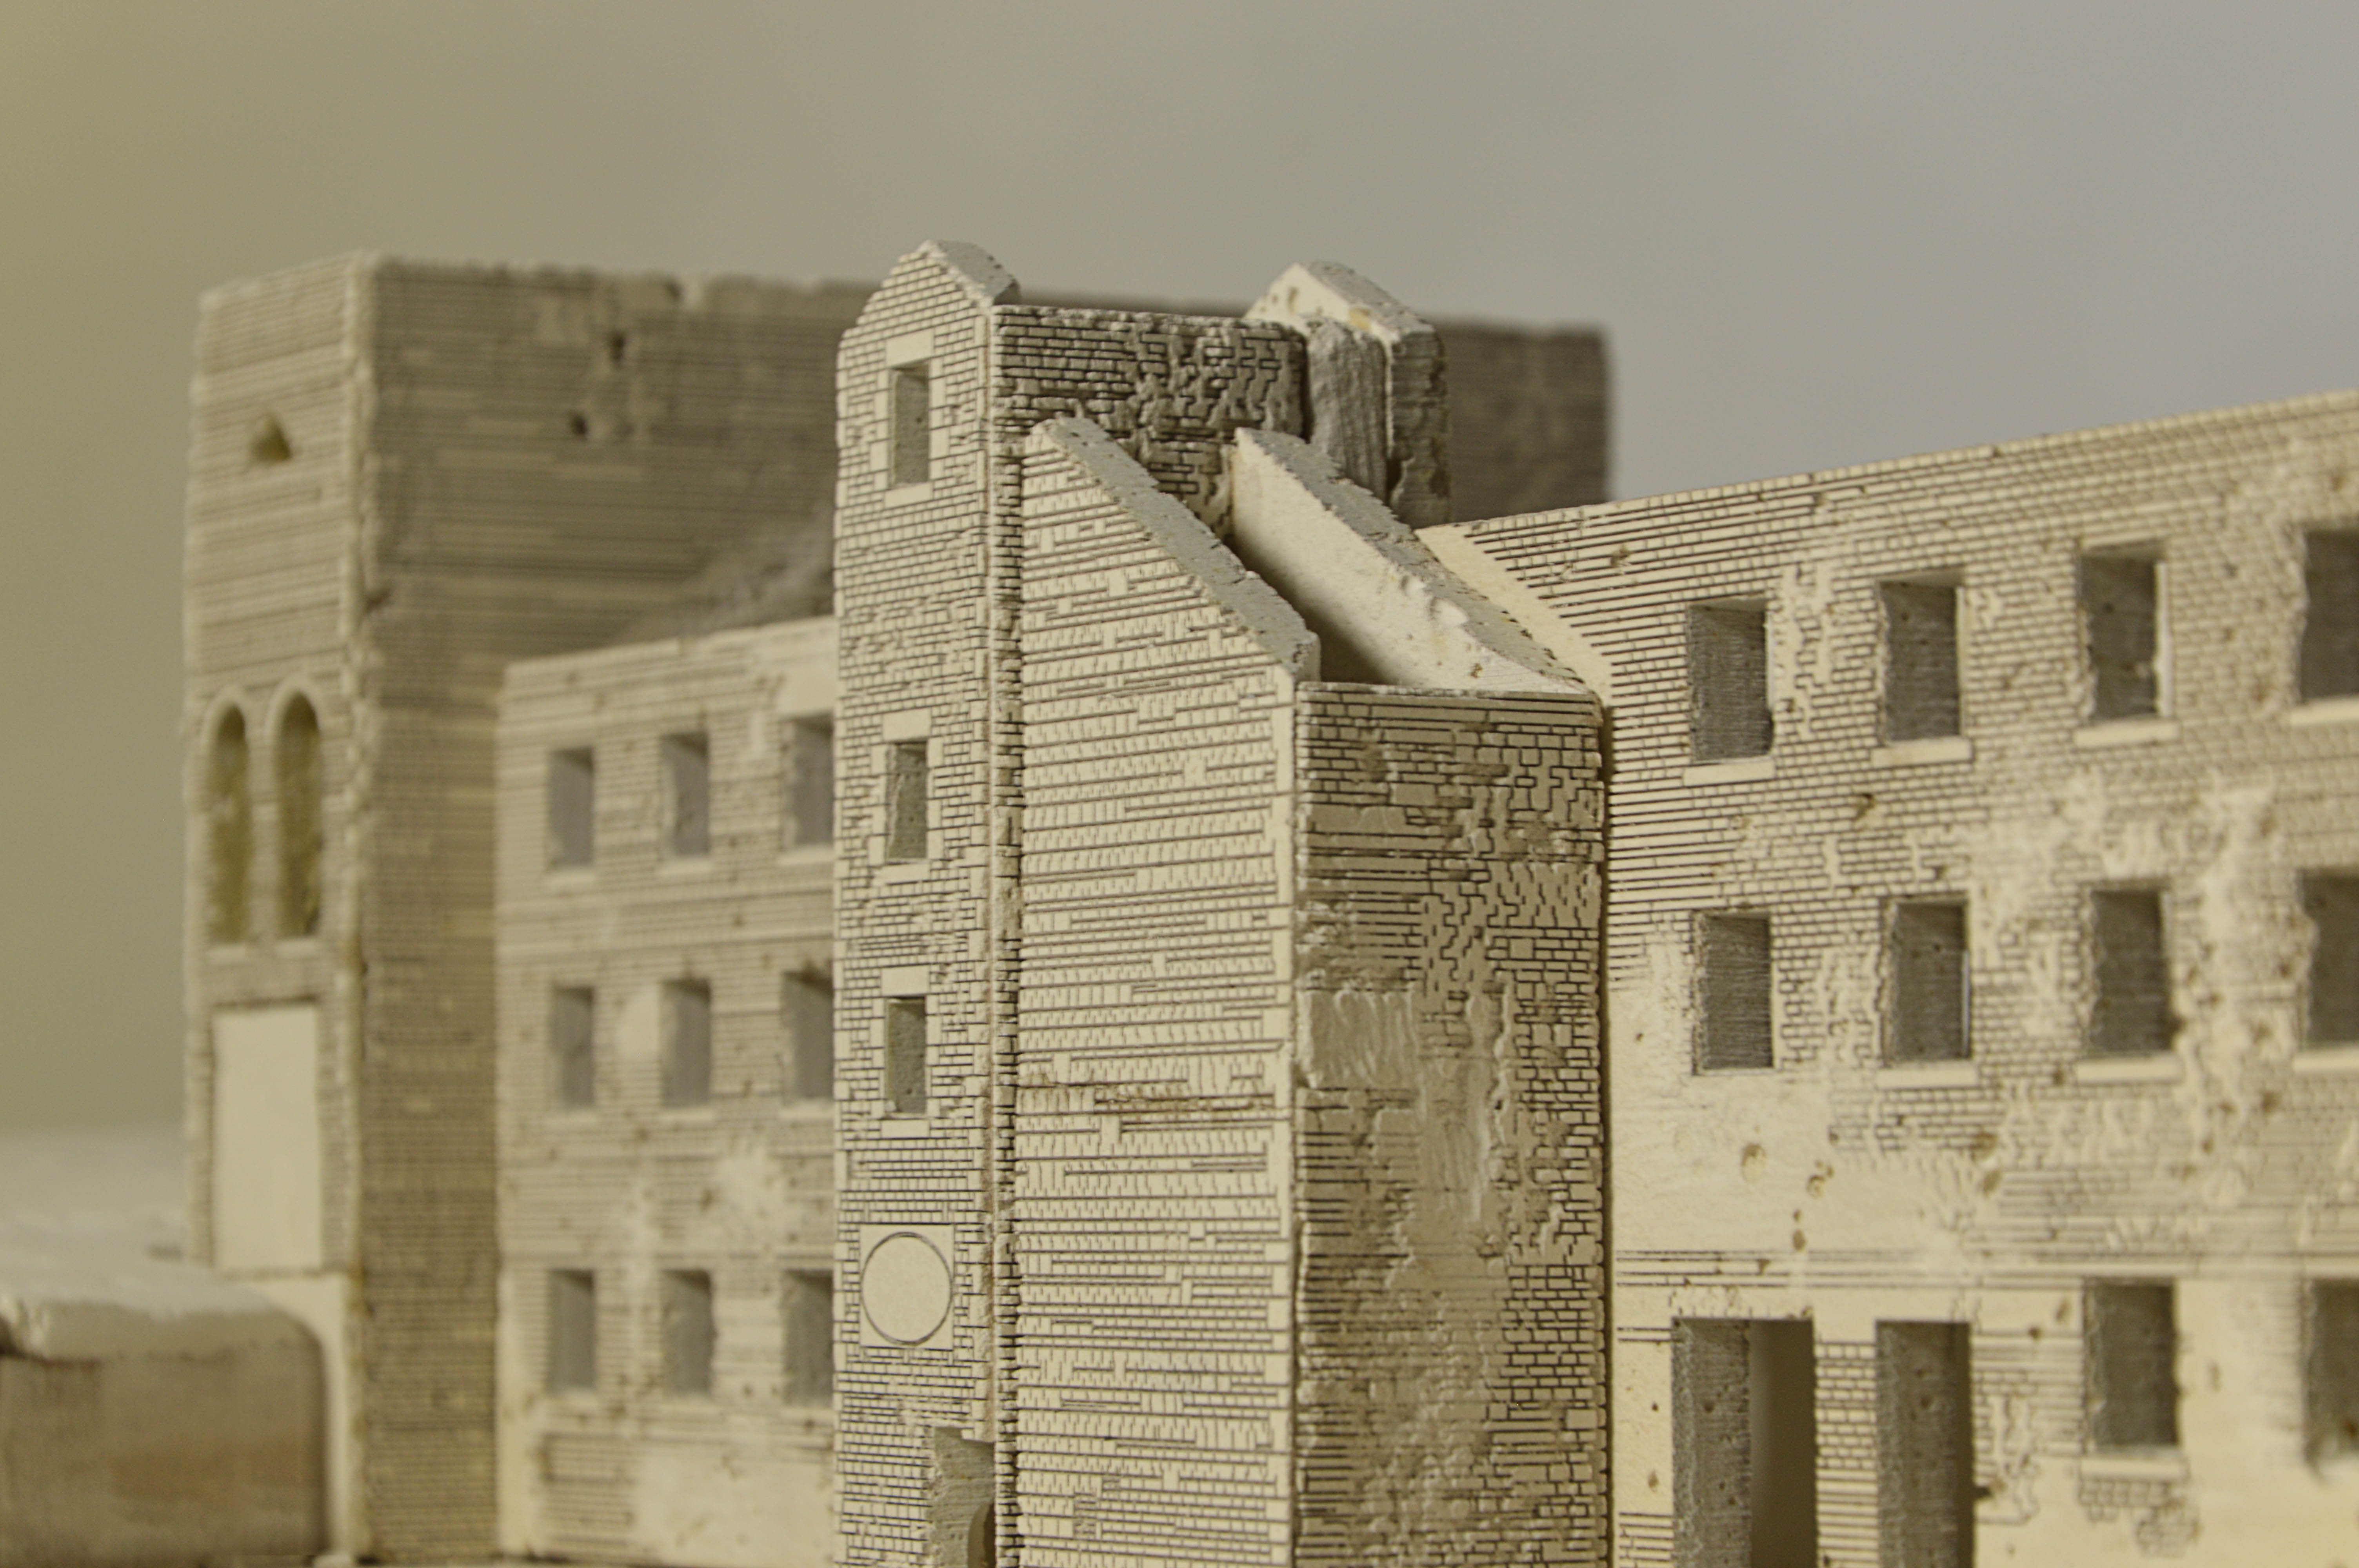
The concept model outlines my approach to design decisions on the site. The block is cast stone plaster with the landscape of the site ‘excavated’ by foam formwork. Protruding perspex rods under the lateral void describe the transient nature of the road that divides both sides of the site. A mahogany piece rests on the stepped landscape as an indicator of ‘place’ I wish to create in the void.

img_2661

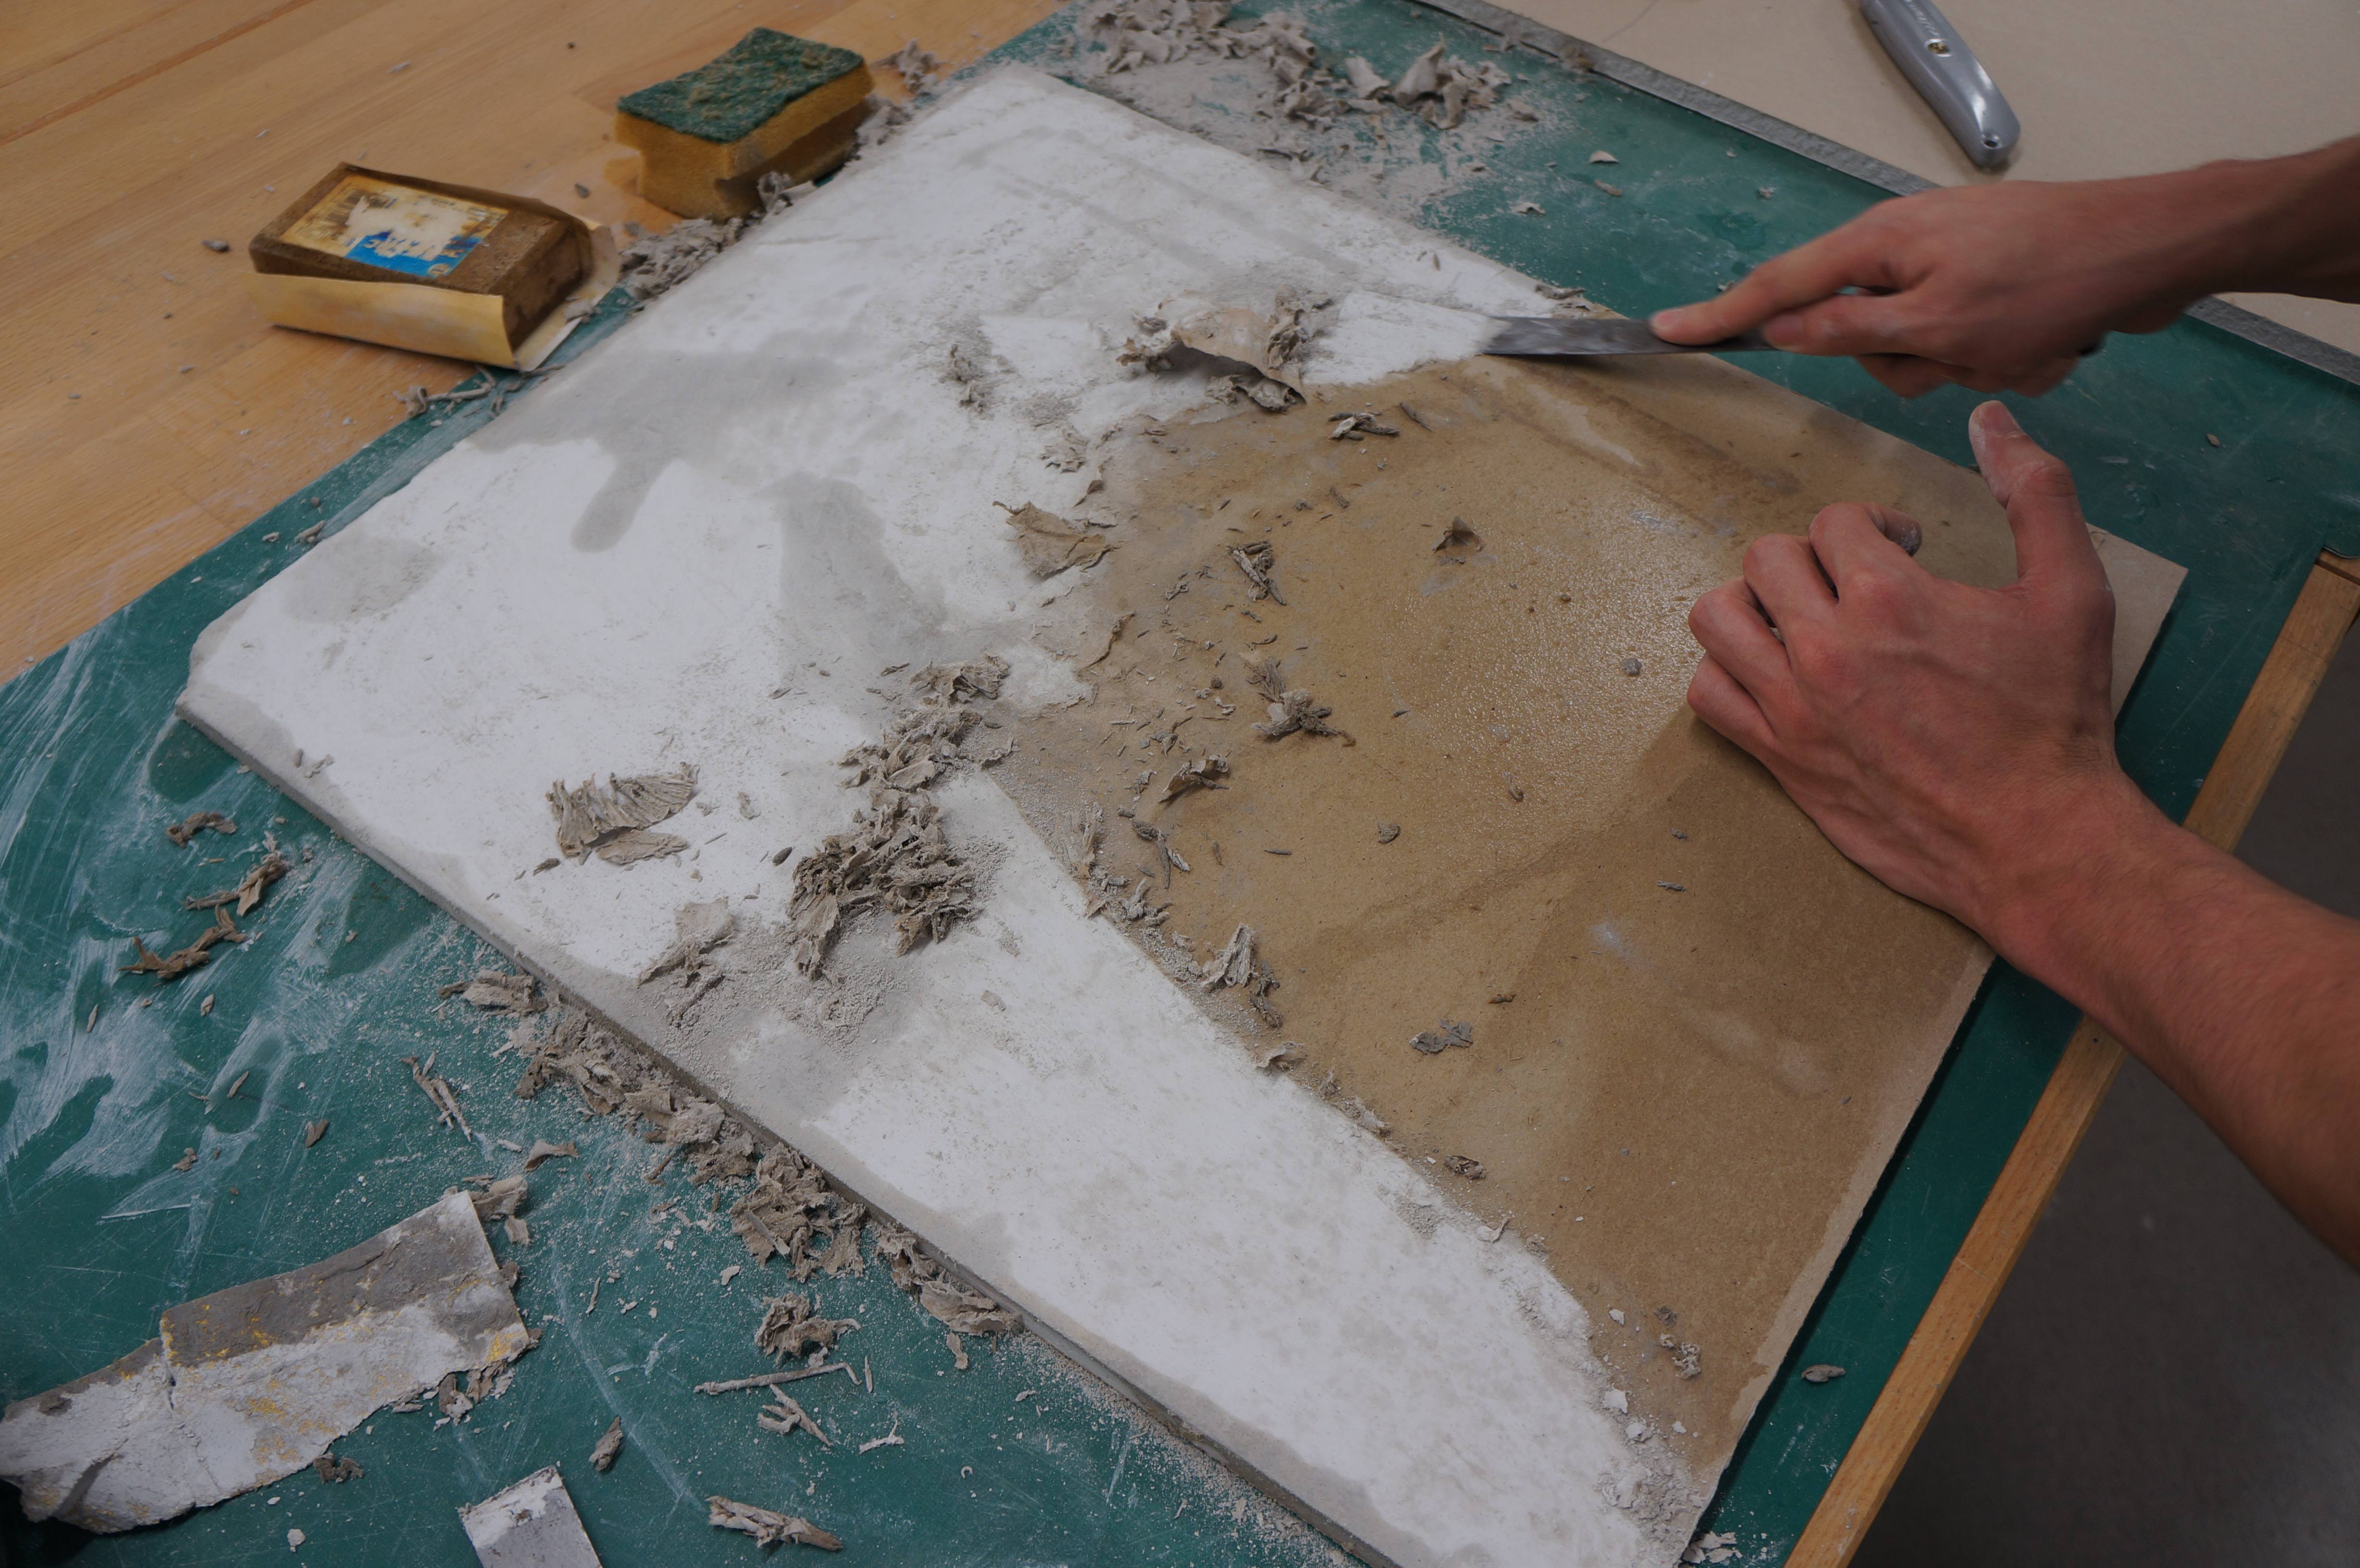
The 1:500 site model was carved out topography from a casted block of pigmented plaster. The excavated, subtracted nature of the landscape suited this method of modelling. Faster methods could include using the CNC machine to mechanically remove material, or making an accurate mold. However, through manually carving away to reveal the site I grasped a deeper understanding of the varied topography and stepped character of the sloped landscape of the site. It also enabled me to interrogate the landscape closer.

dsc06880

dsc06950carved plaster topo 3

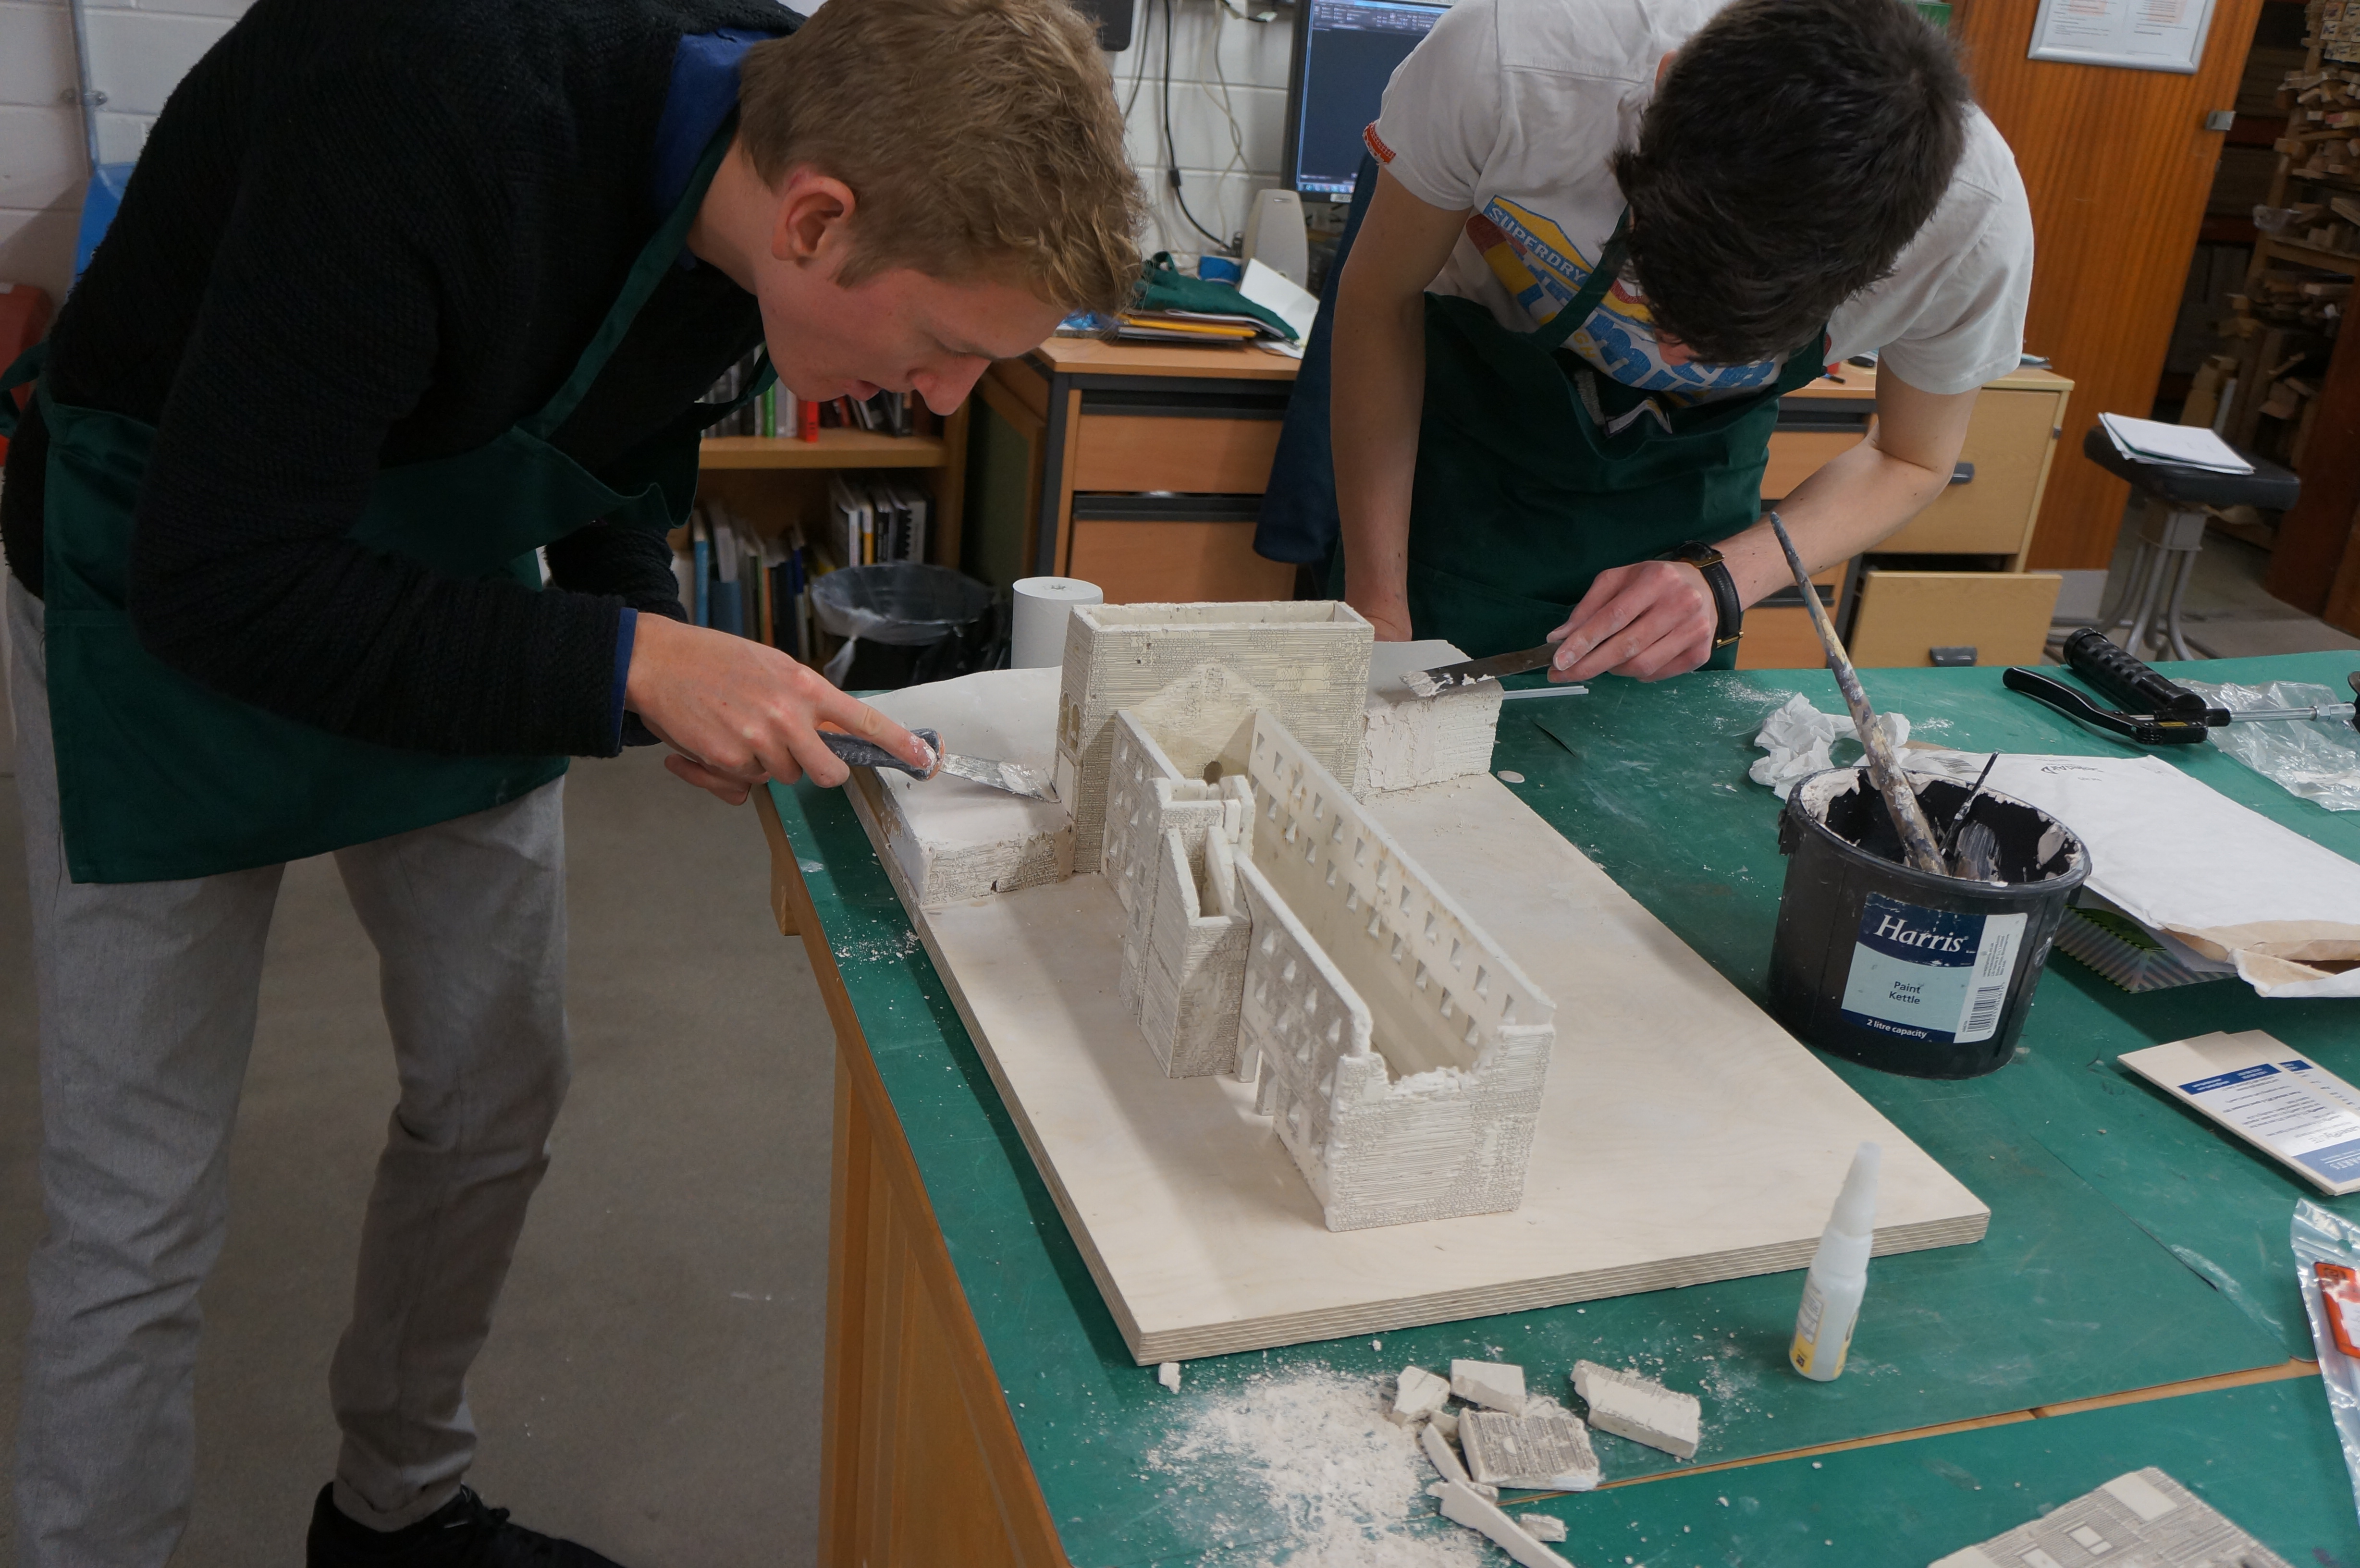
If I was to offer advice to anyone wanting to experiment with modelmaking in a similar way I’d say spend time to learn the particular craft or method, its great to learn a new skill and you could find out something unique about your abilities.

Don’t rush it, at times modelling requires close attention and care, mistakes can be difficult to amend (especially in painted plaster!). As always don’t hurry modelling, if you think the model making method could help inform your design decisions later, it’s worth being patient.

– Sam Stone Jan 2017

DSC06977all 5

It’s great that Sam decided to approach his studies in this ‘hands on’ way and especially that he took the time to really improve his understanding of the material. The commitment of time is always a big issue to working this way but in marrying his practical trial and error approach to making Sam has been able to balance other study commitments against the making craft he clearly enjoys.

– Scott

Low-Melt Metal Detail Casting by Jana Kefurtova

Jana explained her project for us:

The 1:10 detail fabrication was my first-ever casting exercise and definitely one of the most exciting tasks I have been involved in throughout my architecture course. It required a lot of preparation and careful planning of each step, but I was extremely happy with the outcome and I would repeat it if I had a chance. The key to success was to understand the casting process and plan the whole procedure beforehand.

Firstly, I modelled the hinge in SketchUp and tweaked it several times to make sure it was water-tight for 3D printing. After it was printed, I added an additional layer of acrylic to increase its thickness in certain areas, which was necessary for creating the mould. This step could have been avoided, had I known better how the mould was to be created. As I learned, it is definitely worth carefully checking your 3D model with the staff before printing. You do not want to 3D print repeatedly due to the relatively high cost of the process and unavailability of the printers during busy deadline times.

Next step was a fabrication of the mould, which was to be as tight as possible in order to save the material (silicone). When pouring the silicone, I did not mix it well enough with the activating agent, which caused it not to dry properly overnight. Luckily, it was still possible to save the mould by additionally mixing more activating agent into, and the whole mould came out really well in the end.

The putrid pouring was probably the simplest step of the whole process, however, there were still lessons to be learned. The mould has to be fixed together very tightly with clamps, as the hot metal is unexpectedly expansive and it will push your two halves of the mould apart. I repeated the casting itself twice, as the first piece was not perfect. This did not require any additional material as the first cast was simply melted.

The metal hinge was then integrated into a sectional model of a timber door to show its function. This was another part of the model-making task, which took almost as much time as the casting itself. One of the unique aspects of this exercise was that apart from the putrid and silicone, I only used scrap material from the workshop: acrylic, timber, plywood and MDF. This significantly reduced the price and proved that almost every piece of material that a student disposes in the workshop can be used further by someone else.

Working with metal left me being amazed by its strength and heaviness combined with plasticity and the ability to be shaped into very fine details. It might seem like a challenging material to handle, but it is in fact incredibly fun and fascinating one. I would recommend casting to anyone who wishes to add something bold and unique to their project.

– Jana Kefurtova 2016

Designing the Mould

When it comes to successful casting the work is all in the design of the mould. There are many considerations to have that require some reverse engineering in your mind before being able to pour the first cast correctly. In this case as Jana was creating her cast detail from scratch she had to first make the detail the the correct scale in order to have the mould be created around it. This was done using a combination of an ABS 3D print and some laser cut elements.

Due to the final cast being in metal a suitable silicone for high temperature casting is essential.

Here are some key considerations when designing a mould:

  • The mould should always be designed to use a minimum of casting material (in this case the expensive heat-resistant silicone) to ensure you are getting the most from it without having to overspend.
  • How are you going to pour material into the mould?
  • The mould must also consider the cast removal – Will the cast piece come out in one? Does the mould have to consist of multiple parts? If so how can we effectively locate these parts to ensure an accurate cast?

Metal Casting Jana Kefurtova (4)
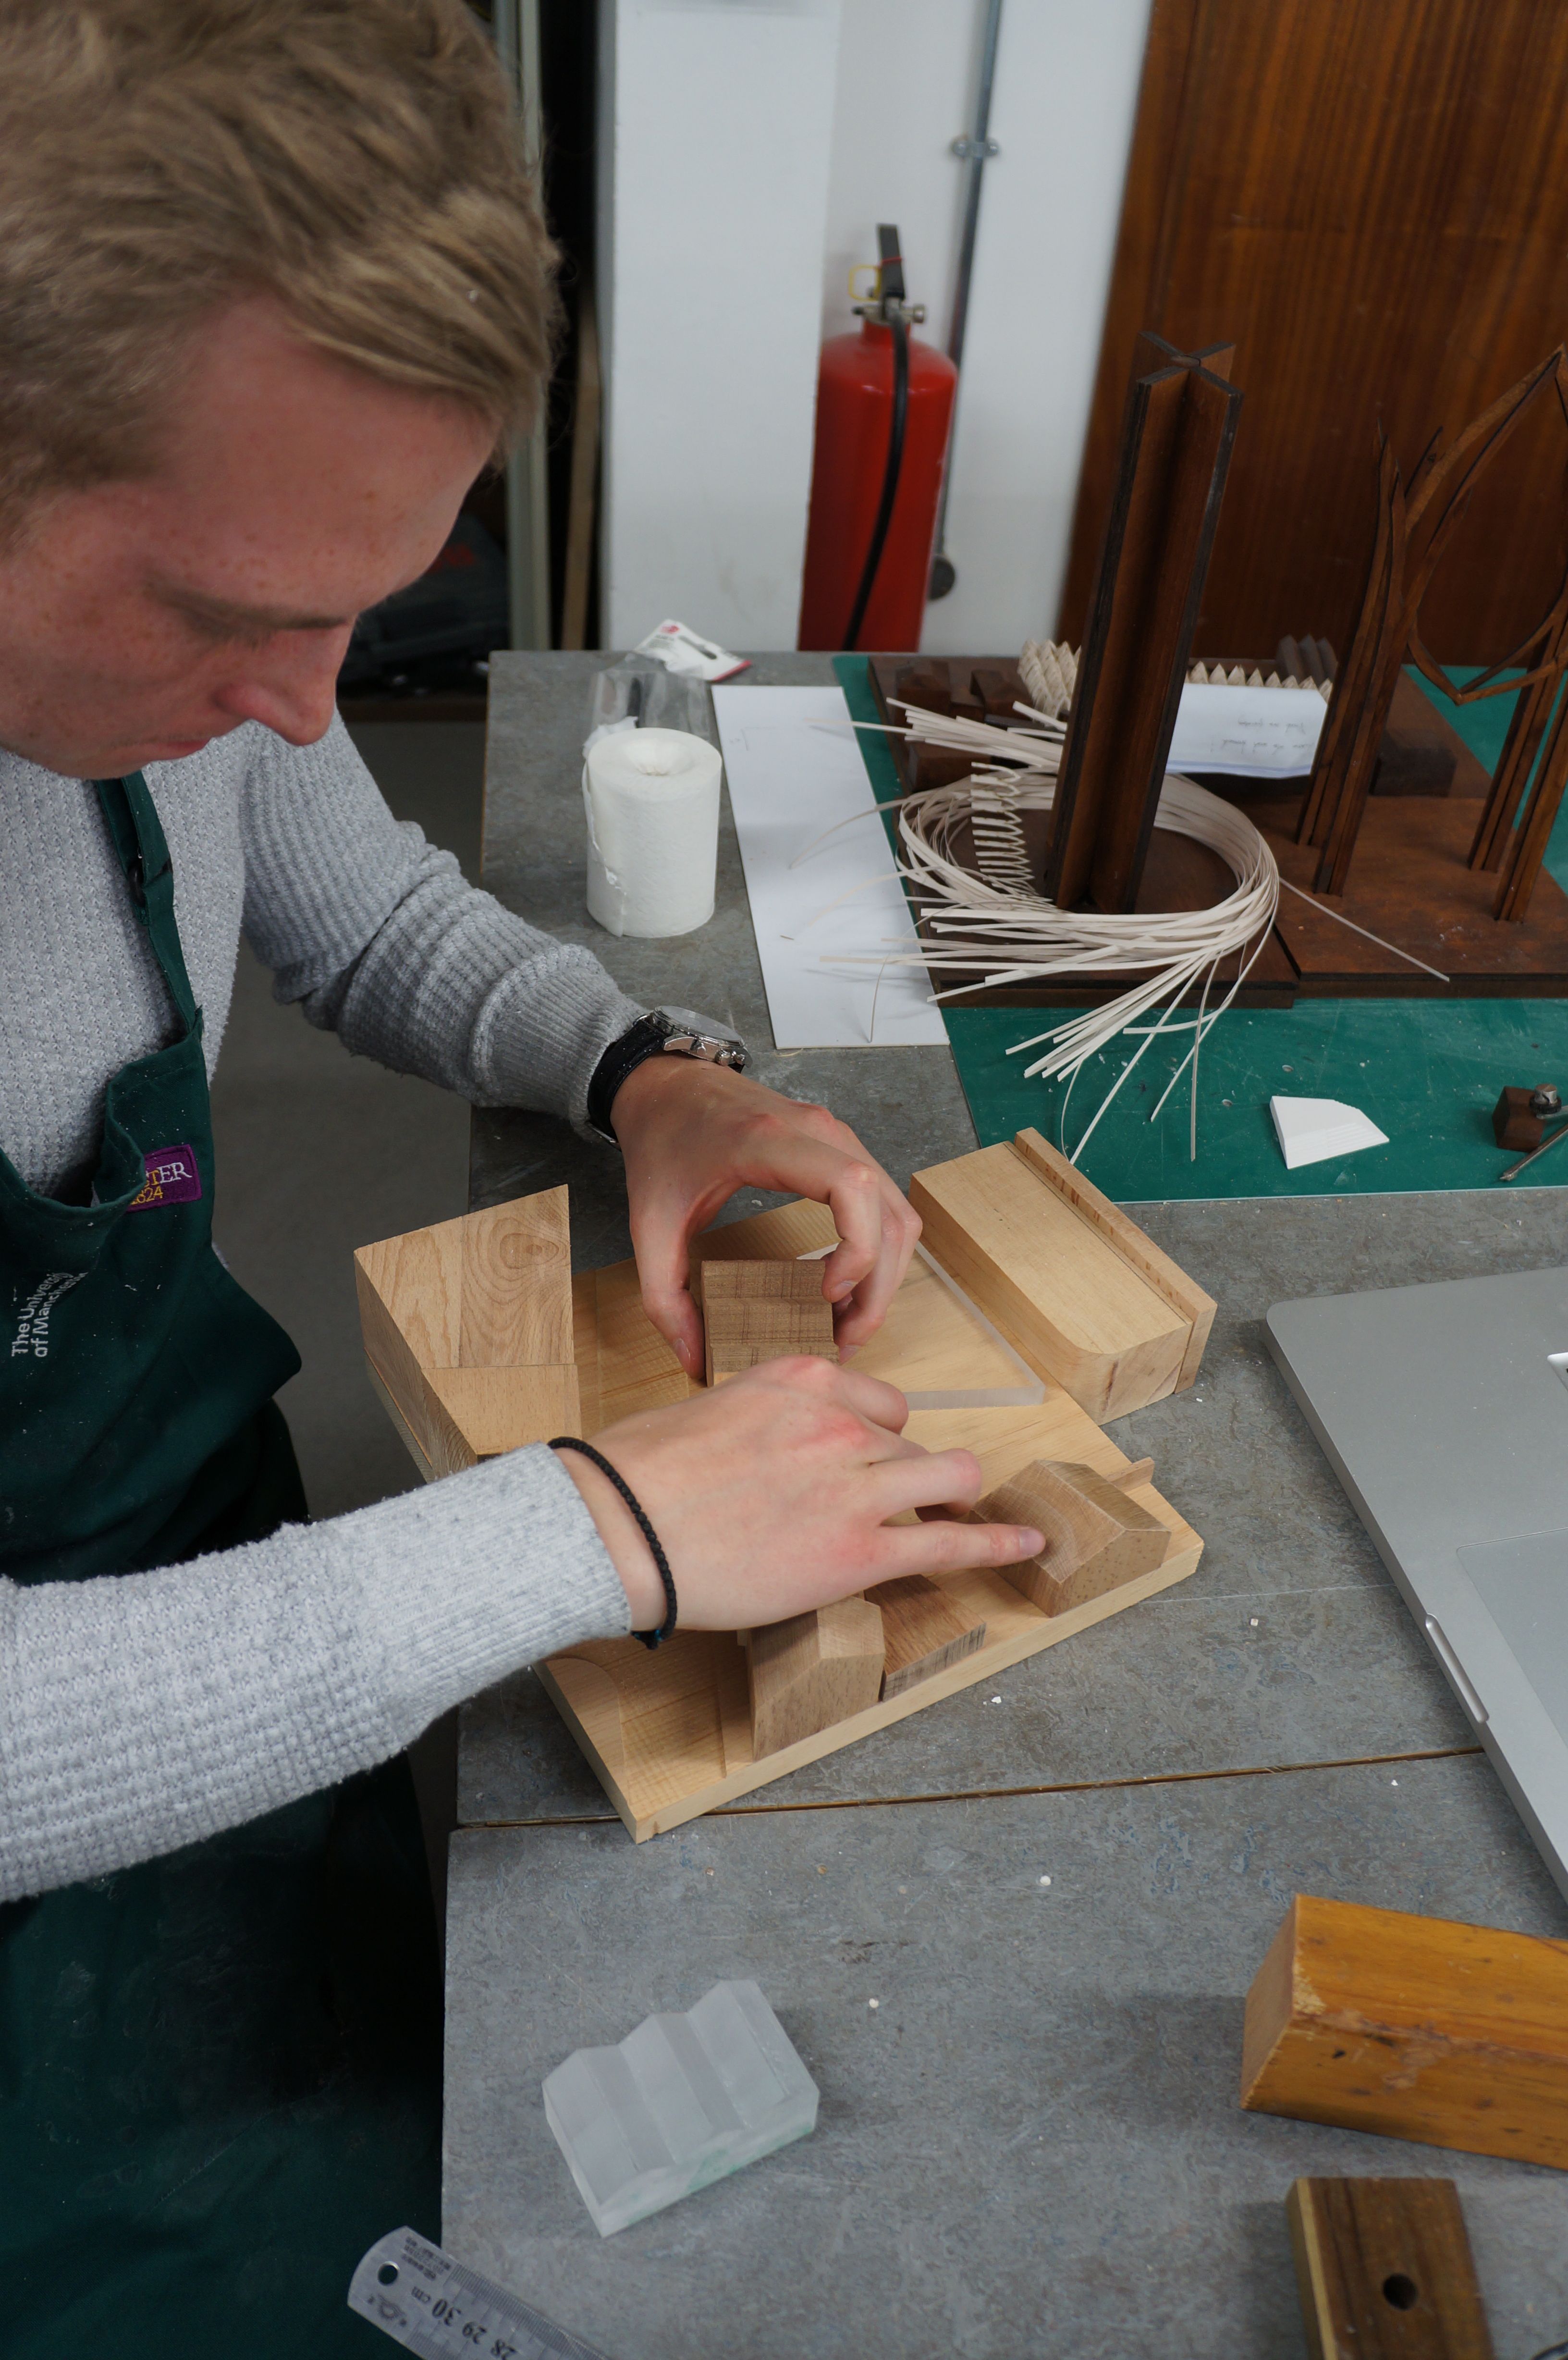
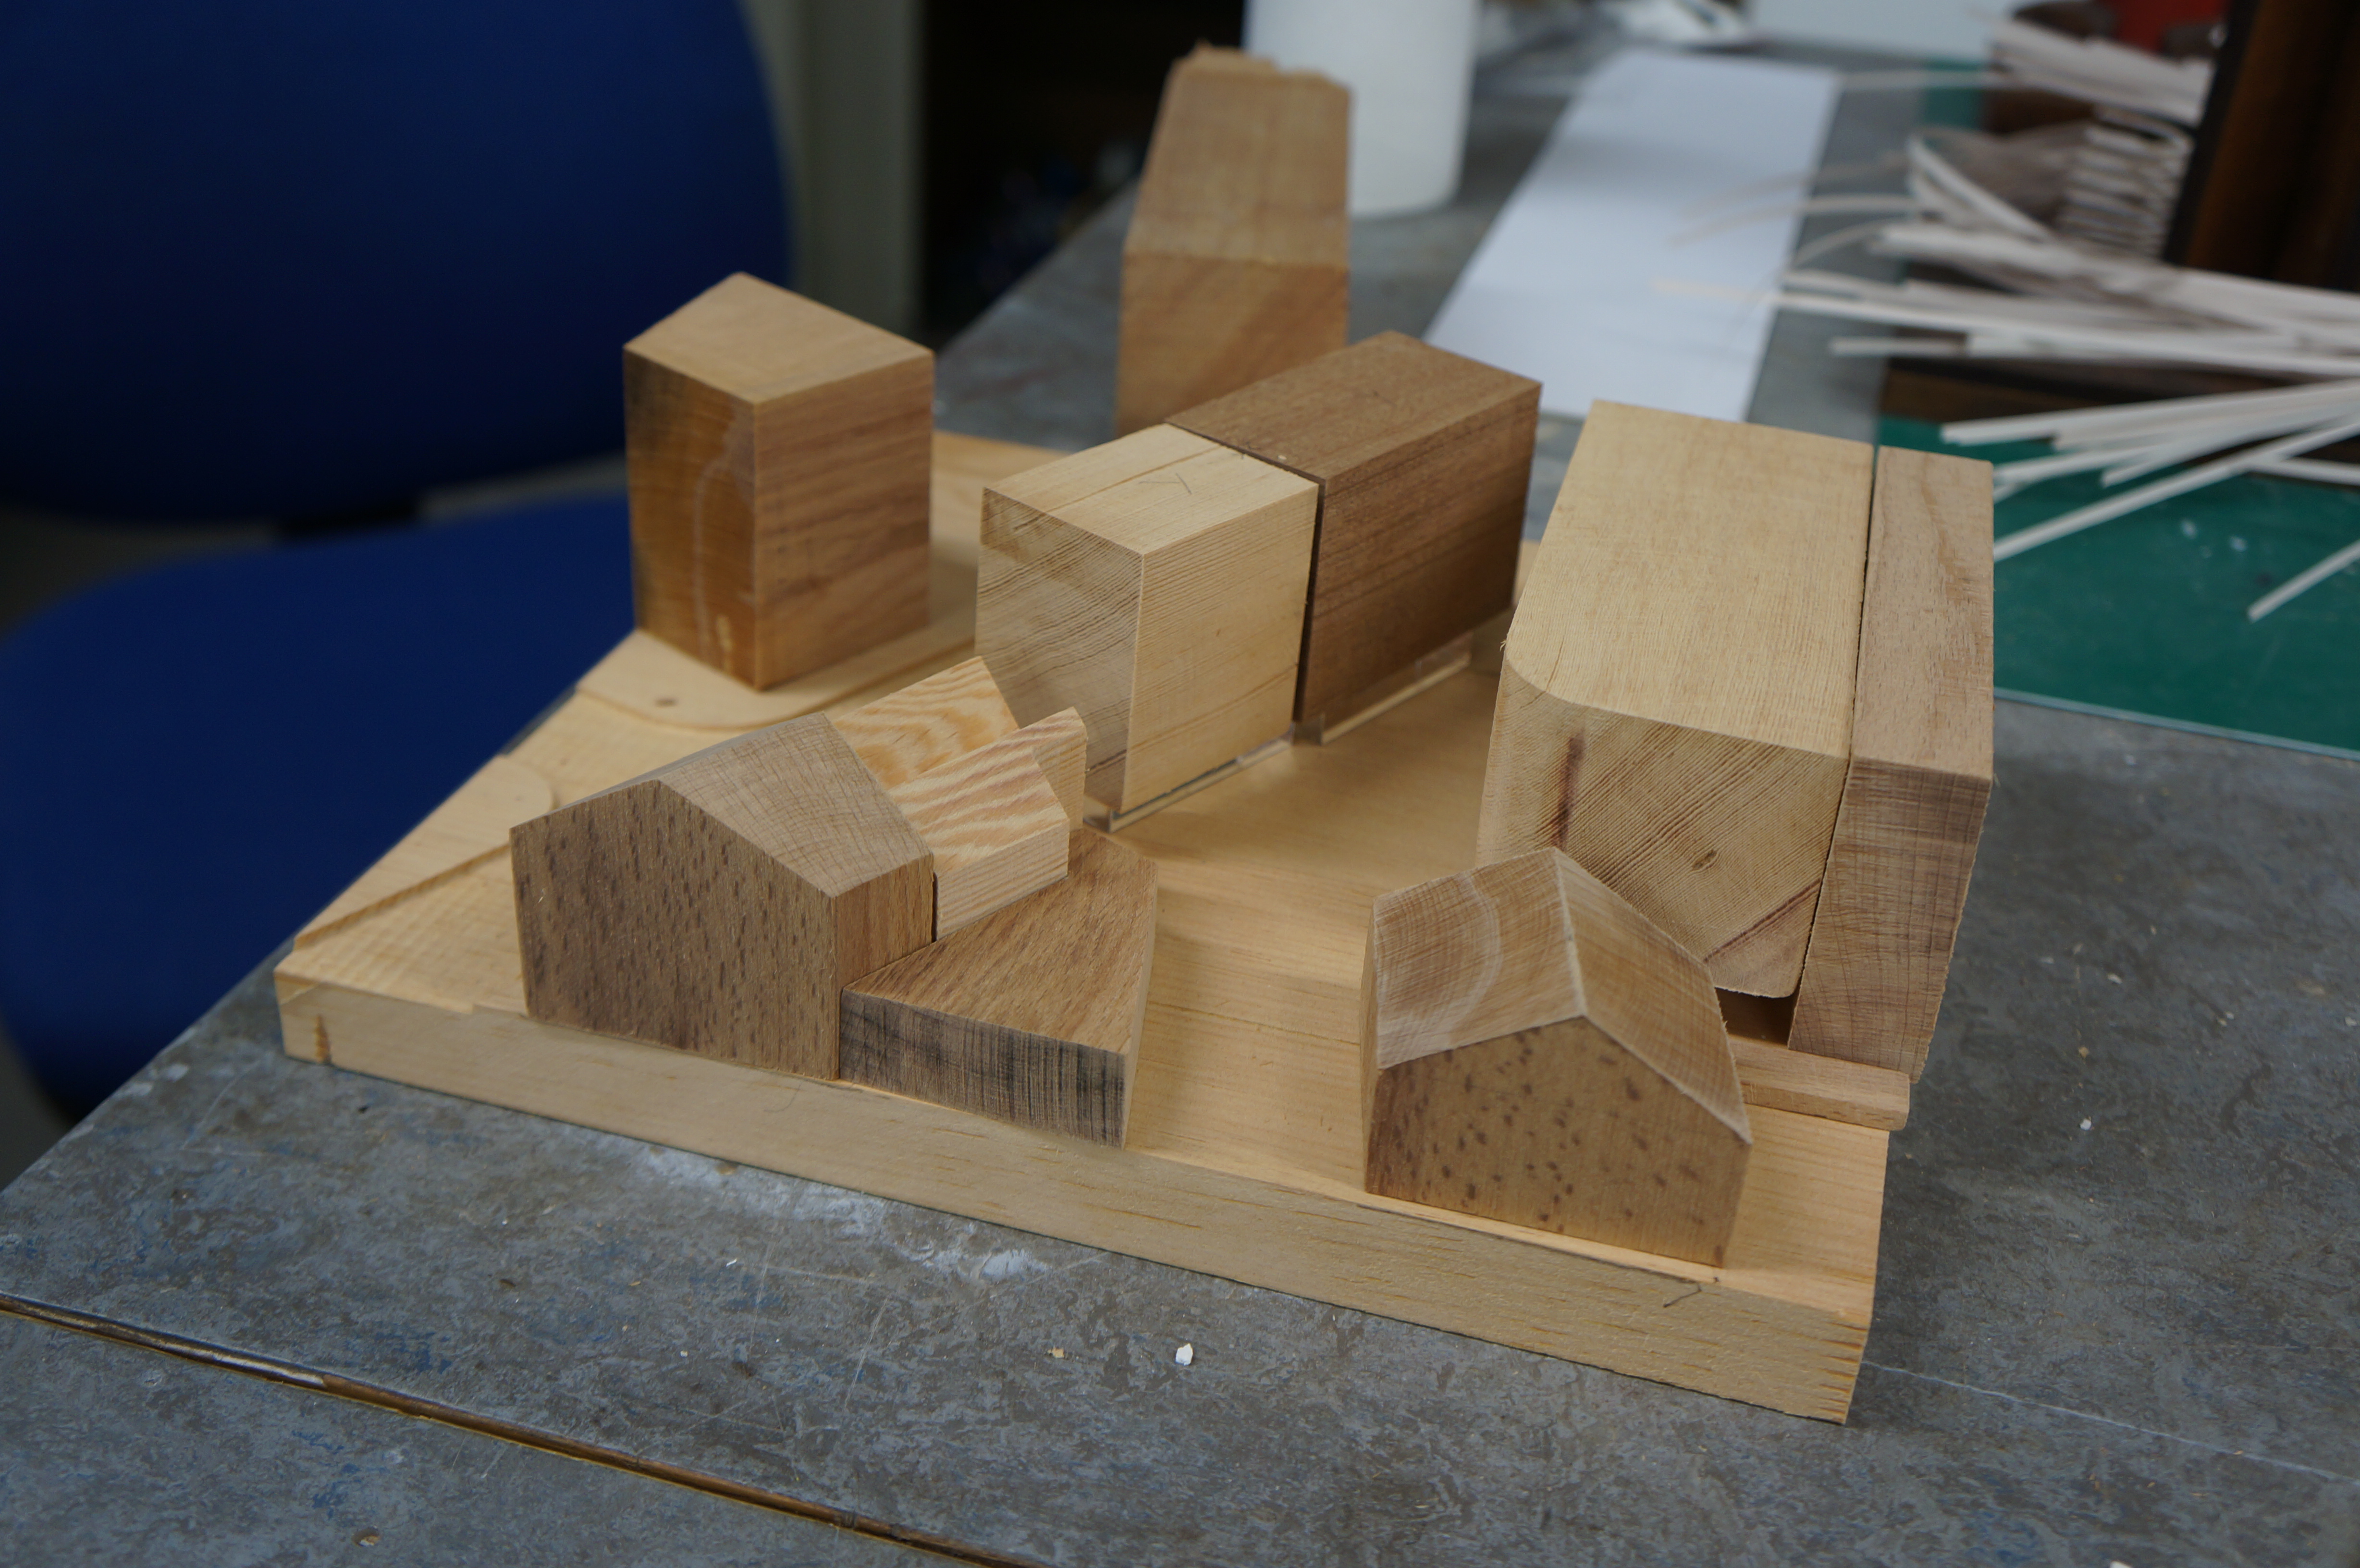
In Jana’s case it was decided that the mould could be created in two parts. In order to do this the master model had to be suspended in the middle of the mould casing to allow the first half to be poured. The support piece that was used to suspend the piece would also serve as the pour hole once the mould was ready to be used. In addition to the overall shape of the mould casing Jana also added two location ‘lugs’ which would allow the mould to fit together exactly. These lugs were in place until the first half of the mould had cured before being removed to allow the second half to create the positive part of the lug.

Before pouring the second half of the mould it is important to add a release barrier to prevent the two halves sticking together. In this case a spray wax coating was used but there are several products available for the job. Metal Casting Jana Kefurtova (5) Metal Casting Jana Kefurtova (9) After the second half is cured the mould can be taken from the casing and any overlaps in the pour can be hand trimmed and removed ready for casting.Metal Casting Jana Kefurtova (10) Low Melt Metal Casting

Once the mould has been trimmed and cleaned of any foreign matter you are ready to cast. To ensure the cast is easily removed from the mould it is necessary to lightly dust the mould halves with talc.

Metal Casting Jana Kefurtova (12)Suitable casting metal can then be broken up and melted using a melting pot. All equipment and elements used are specifically for casting purposes and you should always be sure the products are suitable for the job you are attempting.

ALWAYS WEAR HEAT RESISTANT GLOVES WHEN WORKING WITH HOT METAL AND EQUIPMENT!Metal Casting Jana Kefurtova (13)

Once the metal is completely molten in the melting pot it is then time to fill the mould using a suitable ladle. In this case it was necessary to have an extra pair of hands to support the mould whilst pouring.

Pouring in one smooth action will help to get the best quality cast. In this case it was necessary to pour three times to fill the mould. This is not idea but due to the working time with the molten metal the cast was crisp and consistent after a second attempt. (A key benefit of this material is that any failed attempts to cast can simply be broken up and re-melted to be recast meaning little waste material) Metal Casting Jana Kefurtova (17) Allowing around 15 minutes to cool is important so as not to distort the metal when trying to remove it from the mould in a soft state. Metal Casting Jana Kefurtova (20)The competed cast piece was then hand finished before being added to Jana’s functioning detail model. The moulds made for this project and the resulting detail model are currently on display as part of B.15:ARCHITYPES on the first floor of our building.

Metal Casting Jana Kefurtova (21) Metal Casting Jana Kefurtova (23)All equipment and material used here is available from 4D with your student discounts.

3-5

dsc06068

Continuity in Architecture 1:500 Bollington Site model by Will Priest

Will recently completed this working site model of an area of Bollington made from a CNC routed block of Mahogany. Once the CNC job was completed will spend several hours hand finishing details such as the building footprints and road details.

It’s worth considering this aspect when using the CNC route for a wooden model. Even though the bulk of material is removed with the machine there is usually a considerable amount of finishing to be factored in.

Will Priest CNC (5)

“I required a site model to make massing and programme arrangement decisions in relation to the topography and trees on the site. I chose to use the CNC machine because unlike the laser cutter, it allowed me to get smooth contours at the 1:500 scale and as a result decisions could be made at the smaller scale.

Will Priest CNC (9)

It required considerable sanding to remove the CNC excavation lines. For this is started with a low grit sand paper slow working my way up to a fine grit. I used mahogany because it is a hardwood with an attractive grain which gave the model a material connection to the actual wooded site.

Will Priest CNC (16) Will Priest CNC (17)

The trees were an experiment in process. I wanted to recreate the densely wooded appearance on the site with varied tree types. For this I used a variety of modelling trees, brass wire and pieces of bush.”  Will Priest 2016

will priest2 will priest3

Experimenting with Modelling in Plasterboard

When casting with plaster you always have to contend with mould design, consistency of mixing the plaster and the eventual extraction from the mould. These factors can cause a fairly high fail rate if one or more are carried out incorrectly. One way we can get around the need to mould and cast slabs of plaster is to utilise a ready made substitute in the form of plasterboard. Pre-cast plaster board can be purchased readily and cheaply from most DIY stores. It provides a consistent slab of plaster that can be easily worked using hand tools or machine cutting.

5th Year Lost Spaces (5)

In its bought state plasterboard has a layer of paper adhered to the outside which can be removed using a wet cloth. This is the most laborious aspect of using this material but is a small price to pay for the time and expense of trying to cast slabs from scratch.

DSC05132

5th Year Lost Spaces (2)Once clean of paper the board should be left to thoroughly dry before being worked.

With this particular project slabs of plaster board were cut to size before being engraved with detailing on the laser cutter. This level of detail created a cast concrete imitation that would be very difficult to replicate from a cast piece.
5th Year Lost Spaces (15)The main disadvantage of this engraved method is in its fragility. Once completed the engraved pieces have to be held with great care to avoid damaging the surface. One method of strengthening the pieces is to spray over a layer of clear lacquer. Even with this coverage the surface can easily be damaged so this process is really for aesthetic purposes and doesn’t lend itself to models that need to be handled.

To create the impression of a solid cast block the edges of each piece were mitred prior to being engraved. Mitering the edges made for an even more fragile edge that required filling with a quick drying Poly-filla which was then lightly blended with sand paper.

Lost Spaces – Nine Elms Cold Store

Initial experiments with this method were done by George Thomson, Jilly Clifford and Ayo Karim as part of the 5th year Lost Spaces workshop brief. Their project was focussed on the Nine Elms Cold Store.

“The choice of using a plasterboard method of construction was derived from our aim to have a scaled model which reflected the materiality of the Nine Elm’s cold store. The cold store was a prominent concrete landmark alongside the River Thames in the 1970’s with no apparent human scale; its only characteristic to the outside world was a repetitive façade detail wrapping the entirety of the building – something we successfully represented on the plasterboard model and by using the laser cutter.”

Nine Elms Cold Store (13) Nine Elms Cold Store (15) Nine Elms Cold Store (25)

Bollington Mill Project – Continuity in Architecture

Following on from this project Continuity in Architecture students Robbie Stanton, Sam Stone and Jahan Ojaghi chose to experiment using the same method to represent a derelict Mill in Bollington.5th year Bollington Mill (3)

Robbie Stanton explains the project:

Our initial research into Bollington exposed the town’s rich industrial heritage and emphasised the hugely influential role cotton manufacture has played in defining physical environment and local history and culture. However, many mill structures – the powerful emblems of a rich, multi-faceted past – have been lost. As a consequence, the physical townscape seems disconnected from its socio-historical context. The installation proposes a recognition of the lost forms of Ingersley Vale Mill, one such site at risk of being demolished and forming a further void in Bollington’s continual identity. By artificially lighting the ‘ghost’ structure we aim to draw attention back to a lost icon, re-stitching the building into the wider industrial fabric of Bollington. Continuity in Architecture 5th years were running a competition for a live installation on our site. This project is one of the short-listed 6 and basically proposed artificially lighting the ghost forms of a derelict mill using electroluminescent wire. We chose to try laser etched plasterboard because we wanted a model which could appear highly textured and lends itself to the decaying qualities of a ruin. A combination of CAD and hand scratching / editing were used to get a varied result.”

In addition to the laser engraved plasterboards the group used polly-filla to marry the land mass of the site with the walls of the building.

5th year Bollington Mill (7) 5th year Bollington Mill (8)5th year Bollington Mill (9)

The finished effect, as with the Nine Elmes Cold Cold Store Project is fantastic at capturing the rustic look of the building. It worth noting that this technique can be time consuming and the resulting pieces are very fragile so certainly don’t suit anything intended to be handled. North close up presentation photo south agled perspective

Colwyn Bay Conservatorium 1:250 Massing Model by Kristian James

DSC04477
Continuity 5th year student Kristian James produced this 1:250 massing model to outline the existing jumbled mass of buildings enclosing his site. The final model form was refined after careful consideration for the role of the model in his project. As the massing was an indication of form rather than a detailed representation, hand crafted block forms were chosen over detailed engraved or printed inserted models.
Kristian summarised the project:
“Using a range of recycled hardwood timbers, I built a 1:250 site massing model which conveyed the different elements of the project. The natural aesthetic  properties of the timber were used to subtly suggest a difference in the design but also retained the desired rustic effect.
With this in mind, the model was left in its raw state and the time spent on the model was used towards create a high quality finish.
 
The CNC machine was also used to remove the road path from the site base.
DSC04459
 
During the build of this model, I spent a lot of time building elements using hand tools, which although may have taken longer, provided a far more accurate finish.
Unlike most models I have made in the past, I did not laser cut any components and therefore each element was bespoke and done by hand.
Although far more stressful, it was very rewarding and resulted in a product that was far more beautiful than anything I had created before of this size.
 
I would summarise by saying that a good model in my opinion should integrate both modern and traditional techniques!”
Kristian James (16) Kristian James (19) Kristian James (24) Kristian James (31)

6th Year Site Context Model, Granada, Spain

This 6th year group project took time to think about their options with this model of a site in Granada, Spain. Initially they had thought about producing their model using the laser cut ‘Stacking’ method which has become something of an epidemic of late in the workshop. I’ll be writing a piece on why we’d advise you steer clear of stacking components soon.

Thankfully with some deliberation it was decided that a much more effective and exploratory process of could take place saving a lot of material and laser cutting as well as yearning an effective learning curve in model making.

Taking some inspiration from our B.15:45 display the group decided to make their site context using Jelutong Block and offcuts. The only use of laser cutting was in the engraving of the base plan on 6mm Plywood. As with many site context models, this one will serve as a working model that will be used by individuals to display their work throughout the development of their ideas this year. With this in mind the consistent use of jelutong as a block massing material is quite suited and is aesthetically quite nice to look at.

The group divided their site into areas with each of the 5 team members taking responsibility for the production of a given set of buildings. This way the workload was split and progress of the model can be achieved to a good standard the time managed efficiently. Rather than spending days on the laser cutter effectively pressing ‘go’ then sticking pieces of a very easy (and bland) puzzle together this group have used their workshop time to improve their making skills and understanding of the form of their site by thinking about each and every building beyond its footprint shape on a Digimap file.

This process is much more useful to learning than simply laser cutting material for the sake of it I think they would all agree.

Scott

Colwyn Bay Contour Site Model, Ketil Rage & Kristian James

Rather than using heavy and considerably more expensive wood to make their contour model, Continuity in Architecture students Ketil and Kristian opted to use grey board which saved them considerable time in cutting and money on materials.

Rather than simply engraving the outline of the building footprints it was decided to make each a more defined presence by cutting down into the contours and layering in a maroon backing.

Ketil described the project for us:

The model is part of our master plan for Colwyn Bay, which is our 5th year project. We decided to focus on the topography of the area as well as viewing the model as a figure ground map (with the buildings sunk into the ground), to aid our initial master plan strategy. The model will be ‘replaced’ by a 1:500 model now for our massing studies, so it was primarily used for our initial strategies for the town.’