Pavilions…..

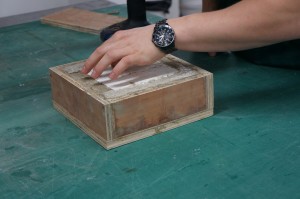
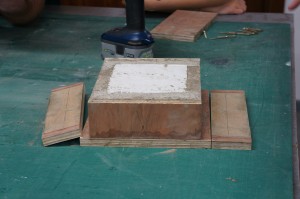
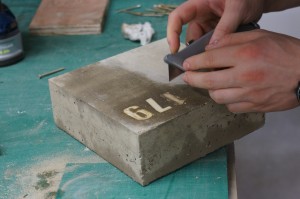
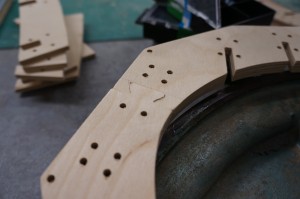
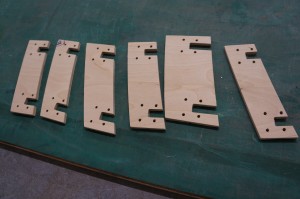
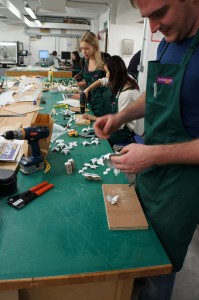
Danielle Foster and Patrick Gorman have begun making their moulds for concrete casting which will take place at the Sheds over the coming weeks. The actual concrete casting process will be time consuming and potentially costly so spending time to get the moulds right is essential.  Myself and Jim spent almost two days cutting components on our circular saw to make the moulds for the blocks. each mould will produce a positive and a negative indent to allow each brick to fit together. Each brick will also be numbered using the rubber number profiles the group tested at the previous stage of development. Cutting this material takes a little practice before going ahead to cut hundreds of components. The rubber had a tendency to melt and blacken as it was cut meaning that cleaning was required post cutting.

Hopefully we’ll start to see some of the finished components coming in the next few weeks. We’ll post an update when we do.

Further testing was required in Alexander Valakh and Lorena Chan’s design following some material and assembly issues.  Once the main structural form was complete Alex and Lorena were able to test the ‘skin’ components that started life being inspired by poppies. At this stage they are still unsure about the exact material that will be used to create this component. This project has been given the green light along with the concrete blocks so we can expect more posts from both of these projects in the next weeks/months.

Jelutong Blocks Back in Stock for Masterplan Modelling

After the recent onslaught of master plan models our stockroom was left somewhat depleted! Master plan models more often than not will require large pieces of wood to create multi-storey buildings in block form.

Whilst using laminated MDF sheets may seem like a cheaper option it is worth considering the huge amount of waste and resulting impact to the environment as a whole and the immediate surroundings. Cutting masses of MDF sheeting produces a lot of dust that when inhaled excessively can be very bad for your health (Wear Dust Masks!).

Laminating sheets together can also be time consuming and the finished aesthetics are less desirable. Jelutong block may seem expensive (Prices ranging between £15 to £40 per block) but the time saved in laminating and finishing may be comparable as the majority of master plans produced here can be achieved using a single £15 block when used economically.

Be sure to check with us about costings and the best approach for your model before rushing into anything. We use these materials almost everyday and can offer sound advice that will help you make the best of your projects in the most cost effective way.

Jim and Scott

Pavilion Development Continues

The development of the Dunham Massey Pavilions has been slowly progressing over the last two months with many different problems to overcome. Many of the original concepts have changed in scale and style whilst others have remained largely unchanged.

For Alexander Valakh and Lorena Chan the main problems have come from various material tolerances effect on their designs.

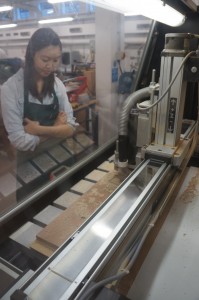
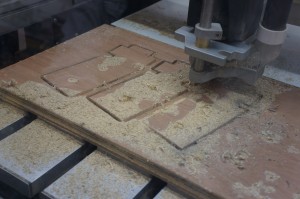
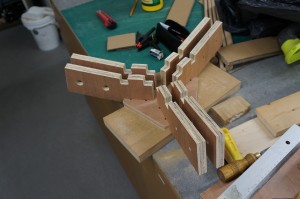
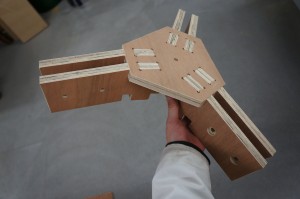
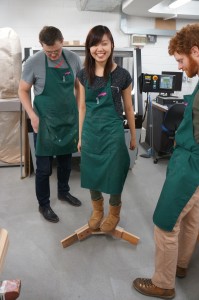
The group used the CNC router to cut plywood components for this phase of their design development. The original poppy concept that was made from cardboard and the riveted elements allowed a lot of flex. When applying the same ideas to a more durable and weather resistant material the same shapes could not be achieved. This is where 1:1 design development models come into use.To test the strength of each joint for their revised design the group decided to risk lorenas life lorena to the task. Luckily their design proved successful and despite a few oversights in fixing elements which can easily be rectified, the group can move on.

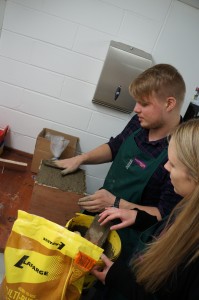
After the experimental first test in concrete casting, it was nesissary for this group to solve the issues of casting their numbers into each block. For their second attempt they tried using laser cut rubber components with a much smaller block to prevent material waste and save on weight.  Any mould is always worth considering in depth as a badly designed one will cause you a world of problems when you come to remove your cast. This box was simple but constructed well to allow easy disassembly once the cast has cured.  The finished block turned out well with the flex in the rubber numbers allowing for the expansion of the concrete as it sets. Laser cutting this material can prove time consuming and the number required may need to be outsourced due to demand on our machines from all Architecture Students. It is always worth considering outsourcing elements that need to be mass produced as if you are involved in a ‘real world’ project. Costs can often be lower and experienced companies will be able to offer you more specific advice on what you are trying to achieve at 1:1. We’ll be posting more on these project in the near future! 

3D Powder Printed Venice Master Plan Site model, Lauren Green and Becky Prince

Laura Green and Becky Prince Y6 (4)Lauren and Becky decided to create their site master plan using 3D powder printed components on a laser cut plywood base. The completed model looks great and shows in detail all the shapes that make up the exiting structures their chosen site.

Laura Green and Becky Prince Y6 (2)For those eager to try 3D printing it may be worth noting that this is a fairly unorthodox approach to making a site model due to the cost implications. This batch of printing came to a total cost of £116. When combined with other material and machine use time the total cost of the model came to around £150. This is minimal compared to commercial model costs but cheaper approaches can be carried out if cost is a concern.Laura Green and Becky Prince YR6 (1)Despite these cost implications, the outcome is very successful and clearly conveys the level of detail sought for the project. The use of timber against black acrylic to represent waterways is a style often used by David Chipperfield Architects Models.

[Re_Map] 4599/’Beyond Conflict’ 1:1000 Coventry model

This year 6 project has focussed on the city of Coventry with a view to looking at the functionality of the city post WW2. Given the scale of the area being studied the group chose to produce their master plan at scale 1:1000. Building heights we created by layering up cut components to an approximate height based on the number of floors at the scale. The group had two other methods of conveying their site.. Firstly a projector would be mounted above the model projecting mapping over the model to convey various changes. This required quite a lot of thought and as the group realised, time should always be made for overcoming scaling issues when using projected images.

Coventry Master Plan (12)Secondly, buildings the group has focussed on across the city were made as separate acrylic blocks assembled in the same manner as the laser cut ply components. There buildings would allow light from the plinth base below to be case upward mapping specific roles of each site.Plinth construction should always be kept as simple as possible without compromising the strength of the construction. It is important for the sake of material waste and money that any plinths are designed well and used only when necessary. The plinth-base construction was chosen to allow the group to store several map types which can be slotted in place to cast a variety of chosen scenarios across the buildings. This meant the proposals for the site could be demonstrated in variants and allows further proposals to be demonstrated at a later date.

Workshop Capacity

We thought it worth making a post about the 20 student capacity limits on our workshop.

Unfortunately due to the number of potential hazards in the workshop environment there is a restriction on the number of students we can supervise at any one time. This has been enforced several times over the last week resulting in a few disappointed and frustrated students. When in the workshop you should always sign in and collect an apron before starting your work. This is a good indicator of how busy it is as we only have enough aprons for our maximum capacity. If you can’t find an apron on the hangers its a good bet we have reached our maximum number of students for that time.

Aprons (2)

The best way to avoid having to wait for free space is to get into the workshop as early as possible both in your projects and each day. Asking for tips and advice about your project at an early stage will benefit how you plan your time and allow us to advise the best approach for what you are trying to produce.

Machine booking is also essential to avoid disappointment late on in your projects. We’ll see you all soon (if you aren’t here again already!).

Scott and Jim

Garden Pavilions at Dunham Massey 2013

Much like the brief set this time last year students are currently in the concept stages of designing a series of pavilions to be constructed at 1:1 at Dunahm Massey (Read our blog post here). This project was challenging for both staff and students last year and really pushed the boundaries of what the workshops can handle.

This year the project is aiming to be more refined and, with support of workshop staff, come to an effective and ‘speed-bump’ free conclusion!

Alexander Valakh (Below) is working on several sketch models to help convey his project named ‘The Shadow of War’ to tutors in the hope it will be taken to the next stage of development.

To test his theory for eventual 1:1 construction Alex had produced a plywood sketch model in identical fashion to the full size proposal on our CNC. Producing this model has allowed Alex to explore problems he may encounter whilst using this method and has already identified several areas that will need more thought. These issues are not a hindrance to the design process but feed into it and shouldn’t be seen as a waste of time. problem solving through trial and error models are often the best way of refining a design for production.

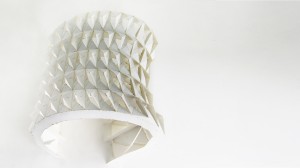
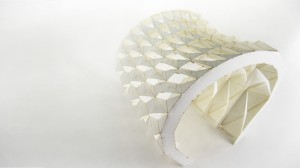
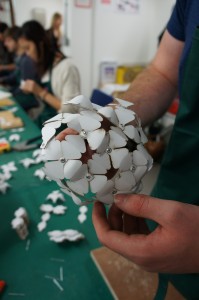
This group is also producing another concept pavilion using paper to create the sketch model. The flower-like components are created and joined using pop rivets which will eventually form a curved canopy. 

Another (!) concept from the same group involves casting concrete blocks as part of a wall sculpture. This is part of the same brief but is less interactive due to the nature of the proposed site. This was poured yesterday afternoon and is still setting so we’ll hopefully have some more pictures of how that is progressing by the end of the week.


Welcome back to ‘SEED’ and a new academic year!

As some of you may have noticed we have added an extra ‘E’ to our name due to the merge with the School of Education. Our full name is now the School of Environment, Education and Development or SEED.

Busy summer

Over the summer we have been busy co-writing a second edition to the highly acclaimed book ‘Architectural Modelmaking’ by Nick Dunn. We expect the book to be published sometime next year and should prove very useful for existing and new students of architecture. We’ll post more on this when we can!

This had kept us productive along with a materials re-stock and clear out in preparation for your return. We hope to stock some new acrylic thicknesses in the next few weeks. Up to date materials price lists are now up in the workshop and can also be checked here on the blog.

Up-front payment for laser cutting

From now on we will only be allowing students to book laser cutting slots if they have paid. This change is being implemented to reduce the number of no-shows that occurs during busy periods which led to many hours cutting time being wasted last term.

New Full-Time Workshop Technician 

The workshop now has an additional member of staff as Scott Miller has now been made a full-time member of the technical team. Some of you may have met Scott last year when he worked with us on a casual basis. Scott is a very accomplished model maker and will be happy to help with any of your model making requirements.

‘We Are All Explorers’ End of Year Show 2013

 It’s been a couple of weeks since our last update - with good reason!

With all systems go for the end of year show things have been very busy in the workshop with final model’s being finished, wall units and display plinths being made. As well as these student tasks we had our own projects to complete for the show.

The opening successful and the exhibition days over, we can be certain all efforts paid off.

Here are some photographs of the completed works on display. More case studies will follow soon! For more information about the ‘We Are All Explorers’ exhibition click here.

DSC00512