‘Wood Street Mission’ 1:20 Section Model by Katie Williams

DSC04382

Year 6 MArch student Katie Williams wrote about her final major modelmaking project for us:


“The project is an extension to the existing building of the ‘Wood Street Mission’ charity, near Spinningfields. Due to it being an extension in a constrained site, the design had to respond to the existing ornate Victorian building, as well as create spaces for the existing and new programmes (and users) to connect. The extension aims to reflect and reinterpret the structural strategy of the existing building by using brickwork detailing on the facade, and a glulam frame internally to support floors and the roofs. Key details include recessed imprinted brickwork on the facade, large perforated brick openings and angled roof support beams. This 1:20 model is a section through a covered terrace area on the top floor of the four storey building. This space was chosen as it incorporates the key design details, as well as showing the terrace floor build-up, the internal floor, curtain glazing wall, the roof build-up and the parapet detail.
Where possible, materials were chosen that are a true representation of the actual construction. The glulam roof beams are cut from hardwood, and the internal roof finish is birch ply. Due to the angles involved in the roof, wood was easy to model with as it could be sanded and shaped. Most of the floor build-up was also done using realistic materials, such as foam board for insulation, and Styrene plastic for the waterproof membrane. The roof build-up is less accurate in terms of showing battens an cross-battens under the tiles, but the waterproof membrane is the actual tape used in construction. The brickwork facade and primary structural blockwork are represented in MDF. The facade brickwork was laser cut to show perforations and spray-painted in brown. The parapet cover is vacuum-formed grey Styrene plastic, which was then cut to fit over and around the top of the walls.
DSC04386
The construction of the model helped me to realise the construction issues that were not apparent in a 1:20 section drawing, for example the continuation of insulation on the inside of the terrace area.
DSC04397
When modelling the angled roof beams and working out the angles they should be sanded, it helped me understand the connections that I had previously struggled to model digitally. This was my first time using spray paint finishes and it makes a great difference to finish off laser-cut wood nicely.
On reflection, I can appreciate that in order to achieve the level of finish I am now happy with, the (whole) day spent planning the model was key.
If you fail to plan you plan to fail!
IMG_0246

This project is successful as it carefully balances necessary detail with material choices. The scale of 1:20 is perfect given the amount of layered detail Katie chose to show in her construction and the choice of this corner section was well considered as it shows a good selection of details and finishes that would expand throughout her whole design but are not necessarily required in their entirety to understand their application.

The success of this project is largely down to planning and material awareness. Rather than making the medium her binding constraint and only working around a particular tool, Katie rightly chose to dissect her model into components to help her understand its form as well as considering the most appropriate method of manufacture to represent each part.

It is clear is how well Katie understands the assembly of her building and the lessons learned in making this presentation model no doubt only strengthen that.

IMG_0248IMG_0250IMG_0251IMG_0252IMG_0265IMG_0269IMG_0273IMG_0279

6th Year Site Context Model, Granada, Spain

This 6th year group project took time to think about their options with this model of a site in Granada, Spain. Initially they had thought about producing their model using the laser cut ‘Stacking’ method which has become something of an epidemic of late in the workshop. I’ll be writing a piece on why we’d advise you steer clear of stacking components soon.

Thankfully with some deliberation it was decided that a much more effective and exploratory process of could take place saving a lot of material and laser cutting as well as yearning an effective learning curve in model making.

Taking some inspiration from our B.15:45 display the group decided to make their site context using Jelutong Block and offcuts. The only use of laser cutting was in the engraving of the base plan on 6mm Plywood. As with many site context models, this one will serve as a working model that will be used by individuals to display their work throughout the development of their ideas this year. With this in mind the consistent use of jelutong as a block massing material is quite suited and is aesthetically quite nice to look at.

The group divided their site into areas with each of the 5 team members taking responsibility for the production of a given set of buildings. This way the workload was split and progress of the model can be achieved to a good standard the time managed efficiently. Rather than spending days on the laser cutter effectively pressing ‘go’ then sticking pieces of a very easy (and bland) puzzle together this group have used their workshop time to improve their making skills and understanding of the form of their site by thinking about each and every building beyond its footprint shape on a Digimap file.

This process is much more useful to learning than simply laser cutting material for the sake of it I think they would all agree.

Scott

Runcorn Reprogrammed Master Plan, Constantinos Papaioannou

Year 6 Re_Map Student Constantinos Papaioannou has just completed this master plan of his study area looking at Runcorn. The model will be used as an overview of the entire site with more specific site study models to follow.

The model used a minimal amount of Laser engraved and cut MDF combined with site focus areas represented with red coloured acrylic and frosted clear acrylic.

Constantinos produced the model in just a day and a half. We look forward to seeing the next stage of the project!

‘Testing The Machines Of A Third Industrial Revolution’ Cross Section Presentation Model, Abhi Chauhan

Abhi (33)

This project was completed in the final weeks of the last academic year by 6th year MA Student Abhi Chauhan. The project is the follow on to the 1:100 section we featured several months back. What is particularly appropriate about the styling of this project is the subject matter or the site. Being a 3D Printing Manufacturing facility of the future means no better method of production that the technology in question. This is definitely something to consider when devoting yourself to a major project like this – for example, if you are building an eco-concious design then that ethic should carry through to your presentation and thus model construction. This project sticks to its purpose through and through.

Abhi has been since graduated and started a full time position at Grimshaws in London. We wish him all the best in his future career!

IMG_4753

This piece will be on display as part of our B.15:45 Exhibition so be sure to have a look in person.

Abhi has kindly written us this extensive account of the theory and construction methods he used in this stunning final piece. Enjoy!

This model is a final exhibition 1:50 sectional model. The slice is located through a key component of the building scheme titled ‘The Machines Of A Third Industrial Revolution’ The model slice – in detail depicts the processes of 3d printing of 1:1 architectural components, to be tested on a stalled concrete frame bounding the site. The design of the facility is such that it sits into a trench in the ground and features a folded roof structure which integrates a 3d printed park at ground level with the industrial processes of the facility within. The scale of the facility has been designed to be oversized, to deal with the variety of large scales that are needed in the manufacture of components for the construction industry.

The model builds upon the 1:100 sectional model completed earlier this year, and takes on a similar aesthetic to that of a cross section through a large industrial machine hanging of the walls of the facility.

The model has been constructed with a variety of different techniques.

IMG_1003

The base has been CNC cut from x15 18mm mdf sheets layered and glued together. This method, although not the most cost effective meant that each layer of the base could be designed to incorporate slots and grooves within for housing of the various components that would eventually complete the model.

Abi (10)

2

The red structural parts forming the portal steel frame structure hung within the trench were all constructed in 3ds max and then 3d printed on the ABS printer. These parts were then spray-painted to get the final red finish seen. Other components that were printed, include some of the facade components, and the series of storage tanks and pipes to the right of the trench. This method of manufacture was chosen sue to the time constraints, the subject matter of the project, and the complex shape of some of the parts.

IMG_1016

The roof was also 3d printed and a shelling script in grasshopper gave the folded structure a thickness to make watertight for 3d printing. This part was the most challenging to construct and after a variety of failed tests the part was printed at Hobs due to their larger printer beds (up to 1500mm wide) which allowed for the part to be printed as one component. Finishing the roof are a series of card panels (depicting a metal skin) which were laser cut and engraved. These were bonded to the 3d printed structural roof frame using spray mount.

The material archives (in white) set into the base of the model were the last parts to be 3d printed on the model, and were done on the powder 3d printers. These constructs were notoriously fragile and once installed in the base had their edges and portions of their rebuilt in white pollyfilla.

The remaining components making up the model have been formed from either 2 or 3mm clear acyclic. For example the 3d printers on the -2 level have been laser cut form a mixture of 2 and 3mm acrylic and then assembled to snap fit and slot together to avoid gluing. This clear aesthetic was chosen for a variety of the model parts as can be seen.

Abhi Components

The landscaped elements including the cranes and gantry and the main internal staircase were all laser cut from 2mm mdf. These part were all spray painted to the final grey and black finish shown.

The facade skin (resembling an ETFE system) was vacuum formed over a 3d printed mould. The mould was designed with groves in it and as such were expressed in the final plastic shells.

Before any parts were manufactured every part was modelled in 3d and then assembled to create a master digital model. (see image) Due to the large amount of parts on this model this was necessary to eliminate any unforeseen mistakes which would be harder to rectify once parts had already been cut.

IMG_1046

Each part of the model was treated as a mini project i.e. the main facade, the main stair case, the 3d printers on the ground floor, etc. Once these were all assembled and sprayed the whole model was put together like a giant jigsaw. Due to the fact that almost every part was digitally fabricated there were few tolerance errors during final assembly.

The model took approximately 3 weeks to translate from an actual section into model drawings and then 3 weeks to get all the parts cut and painted and a final week to assemble together.

Abhi (6) Abhi (49)

Abhi (55) Abhi (2) Abhi (66)


A reimagining of slums , QED, Alexandr Valakh Part 2

Back in March we looked at Alex’s 1:100 model exploring the assembly of his proposed site. Alex completed his model series by producing a 3D printed site model and finally a cross section model showing the relationship between the individual units and the optional outer skin facade.

Alex 3d Print (1)

After several days in the chemical bath to remove support material Alex placed his 3D printed model in a purpose made display case to protect it from intrigued hands! It’s always worth noting that forms such as this require a lot of support material when made on the ABS plastic printer which often means extended periods of time post-printing in the chemical bath.Alex 3d Print (20)
Alex final Project (4) Alex final Project (11) Alex final Project (15) Alex final Project (18)The outer skin of the model was made using paper components that were CAD designed and laser cut before being hand assembled. The completed skin was fixed onto the plywood frame carefully using superglue.
Alex final Project (20) Alex final Project (21) Mass produced standardised components were designed to be quickly assembled to create the form much like the full scale proposal offers. Alex final Project (23) Alex Final Major Section (1)Alex Final Major Section (3)Alex Final Major Section (6)Alex Final Major Section (13)Alex Final Major Section (43)Alex Final Major Section (74)Alex has produced some fantastic models here over the last two years and we encourage everyone to look at this level of work for inspiration. All the best for the future Alex!

Alex final Project (8)

Abhi Chauhan: ‘Testing the Machines of a Third Industrial Revolution’ 1:100 Site Section Model

6th Year MArch student Abhi Chauhan has recently completed several models as part of his Intimate Cities project. The earlier models were used to demonstrate initial concept ideas and helped influence design changes. In keeping with the subject matter of the proposed development Abhi has put heavy emphasis on digital manufacture.

Abhi gives us an over view of the project and how this model fit in to its development:

As part of the Intimate Cities Atelier this year we were concerned stalled construction sites in the city of Manchester. These sites are unique in that their infrastructural order has been partially installed and my primary aim is the reconnection of these sites back to the city context. Situated on the Potato Wharf stalled construction site, the final scheme looks at the idea of bringing around a Third Industrial Revolution, by looking at the research and testing of an advanced manufacturing technique (3d printing) and a new energy infrastructure, (hydrogen fuel cells).

 Realised as a masterplanning strategy the stalled concrete frame on the Potato Wharf site is used a ‘live’ test-bed for 3d printed architectural components, in addition to this the scheme engages with the redundant  transport infrastructure bounding the site and reinstates the canal and rail network as a distribution matrix for the transport of raw material. A reconfigurable 3d printed public park defines the edges of the new site in the overall strategy.

VISUAL LIGHT

The renders depict how the main 3d printing manufacturing hall and hydrogen exchange will look. The 3d printing facility is concerned with the research, manufacture and testing of 3d printed architectural components and as such the construction and detail is oversized to deal with a variety of different scales present on this project.

This first conceptual model depicts the main processes occurring in the 3d printing facility and follows the life-cycle of a 3d printed architectural component from its raw powdered state – stored in a material archive; to the printer beds; then for reconfiguration in a graveyard of failed components; and ultimately to its reverse engineering back to its raw powdered state.

The main frame was laser cut from 6mm MDF and designed to slot together. After spray painting grey to depict a raw concrete surface a series of powder printed material stores were fixed in place. It was decided to 3d print these stores due to their complex shape and the desired ‘layered’ construction aesthetic I was after.

The main machines in the model have all been constructed from separated components each laser cut from 2 and 3mm clear acrylic.

The 3d printed architectural components created in the facility were depicted by themselves being 3d printed. These parts were modelled in 3ds max and made ‘watertight’ ultimately for 3d printing on the ABS printer. (Abhi Chauhan May 2014)

Abi (2) Abi (5)Abi (6)

Abi (7)

One aspect of Abhi’s model work which is particularly successful is the appropriate use of different process. Having an understanding of the best suited method to achieve a desired outcome is key to an effective model. Without a clear aim as to what it is you are trying to convey many models have little practical use in conveying the key aspects of a design concept. This model of course naturally lends itself to 3d printing due to the subject matter.

IMG_0740 IMG_0744 IMG_0750 IMG_0752 IMG_0753 IMG_0757 IMG_0758

‘In Limbo’ Presentation Site Model, Laura Minca

Laura SiteIntimate Cities student Laura Minca has designed an ever changing settlement within the city centre. The site, on the corner of Whitworth Street and Princess Street in Manchester has been a site of a stalled project for some years now. Laura’s concept would allow the site to continue to expand and develop as required with a construction crane remaining on site to build as the site needs evolve.

INTERIOR3


Laura gives us a description of her project below:

The project aims to initially investigate the city of Manchester under a temporal lens, focusing on the spaces ‘in-between‘ worlds, ‘in-between’ stages of development that resulted following the economic downturn. At the heart of the city’s commercial and conservation area lies Origin – unfinished, incomplete, abandoned, hiding behind faded slogans of glamour and projected fantasies of luxury living and work opportunities.

The research and output developed as part of the [Intimate Cities] Atelier will be focused on the current condition of the Roma groups that have targeted the United Kingdom ever since Romania’s entrance in the European Union in 2007. Although their ‘nomadic’ condition is debatable and its deriving taxonomy should be reassessed, the Roma groups provide a fascinating case study in terms of a traveling community’s continuous struggle to adapt within fluctuating social, political and economic climates. 

The temporal context of the project is set starting with January 2014 when the transitional controls on free movement adopted by the UK will end. Following the lift of the travel restrictions and free access to the UK labor market, a high influx of Romani groups are expected to arrive and settle within British and implicitly, Mancunian territory.

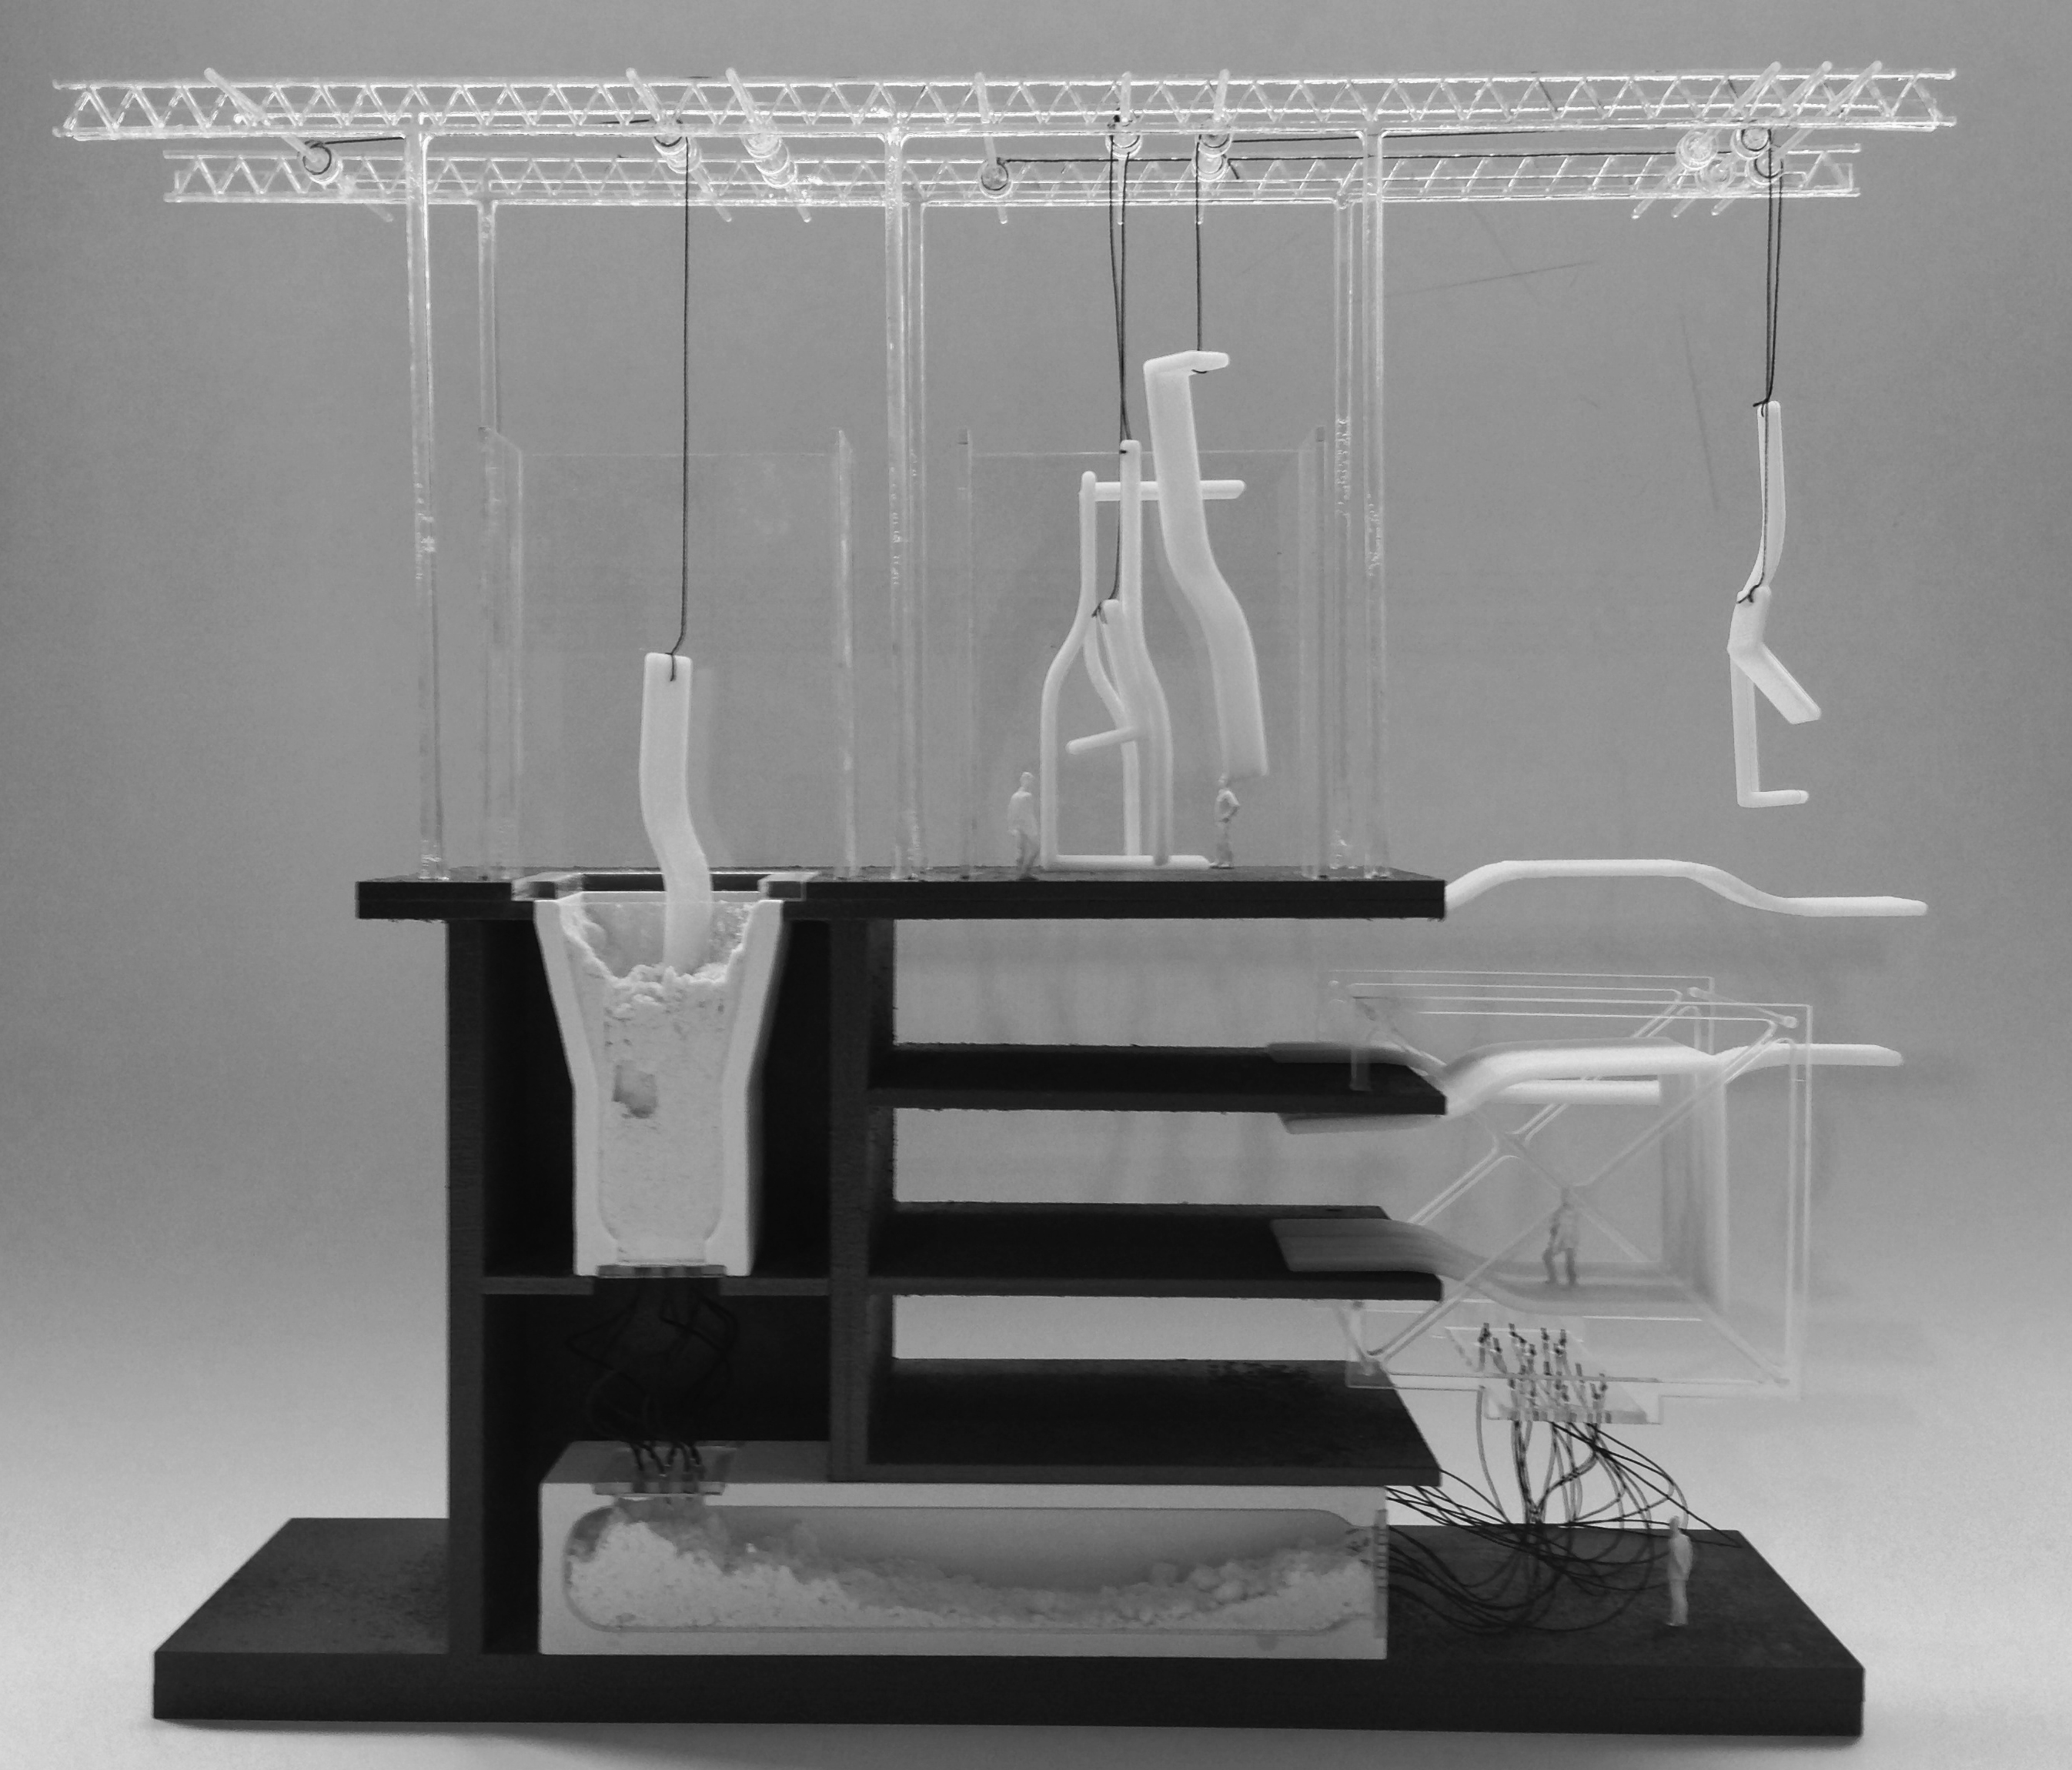
Drawing on dichotomies of spatial purity and impurity, on notions of boundary, transience and spatial justice, the scheme proposes a temporary, modular structure that plugs into the existing site infrastructure – a contemporary Roma camp, aimed to provide the incoming community with a set of architectural and spatial principles that develops incrementally.

The focus on temporary, adaptable, shared spaces challenges the sedentary predisposition specific to Western architecture and its affinity towards grand, enduring structures. The approach is driven by the idea that architecture functions as an ideology in built form, that homes are more than just fixed dwellings, more than just sheltering devices: they are tools that enable the communities that use architecture to carve their identities and redefine visions of themselves and their collective subconscious.

This is not a scheme about pristine, perfectly aligned spaces and sleek technologies, but an exploration of imperfection, of the random and the improvised. A breathing, ever-changing structure that echoes the unconventional ways of the Romani people and their ability to adapt in any given environment. (Laura Minca 2014)

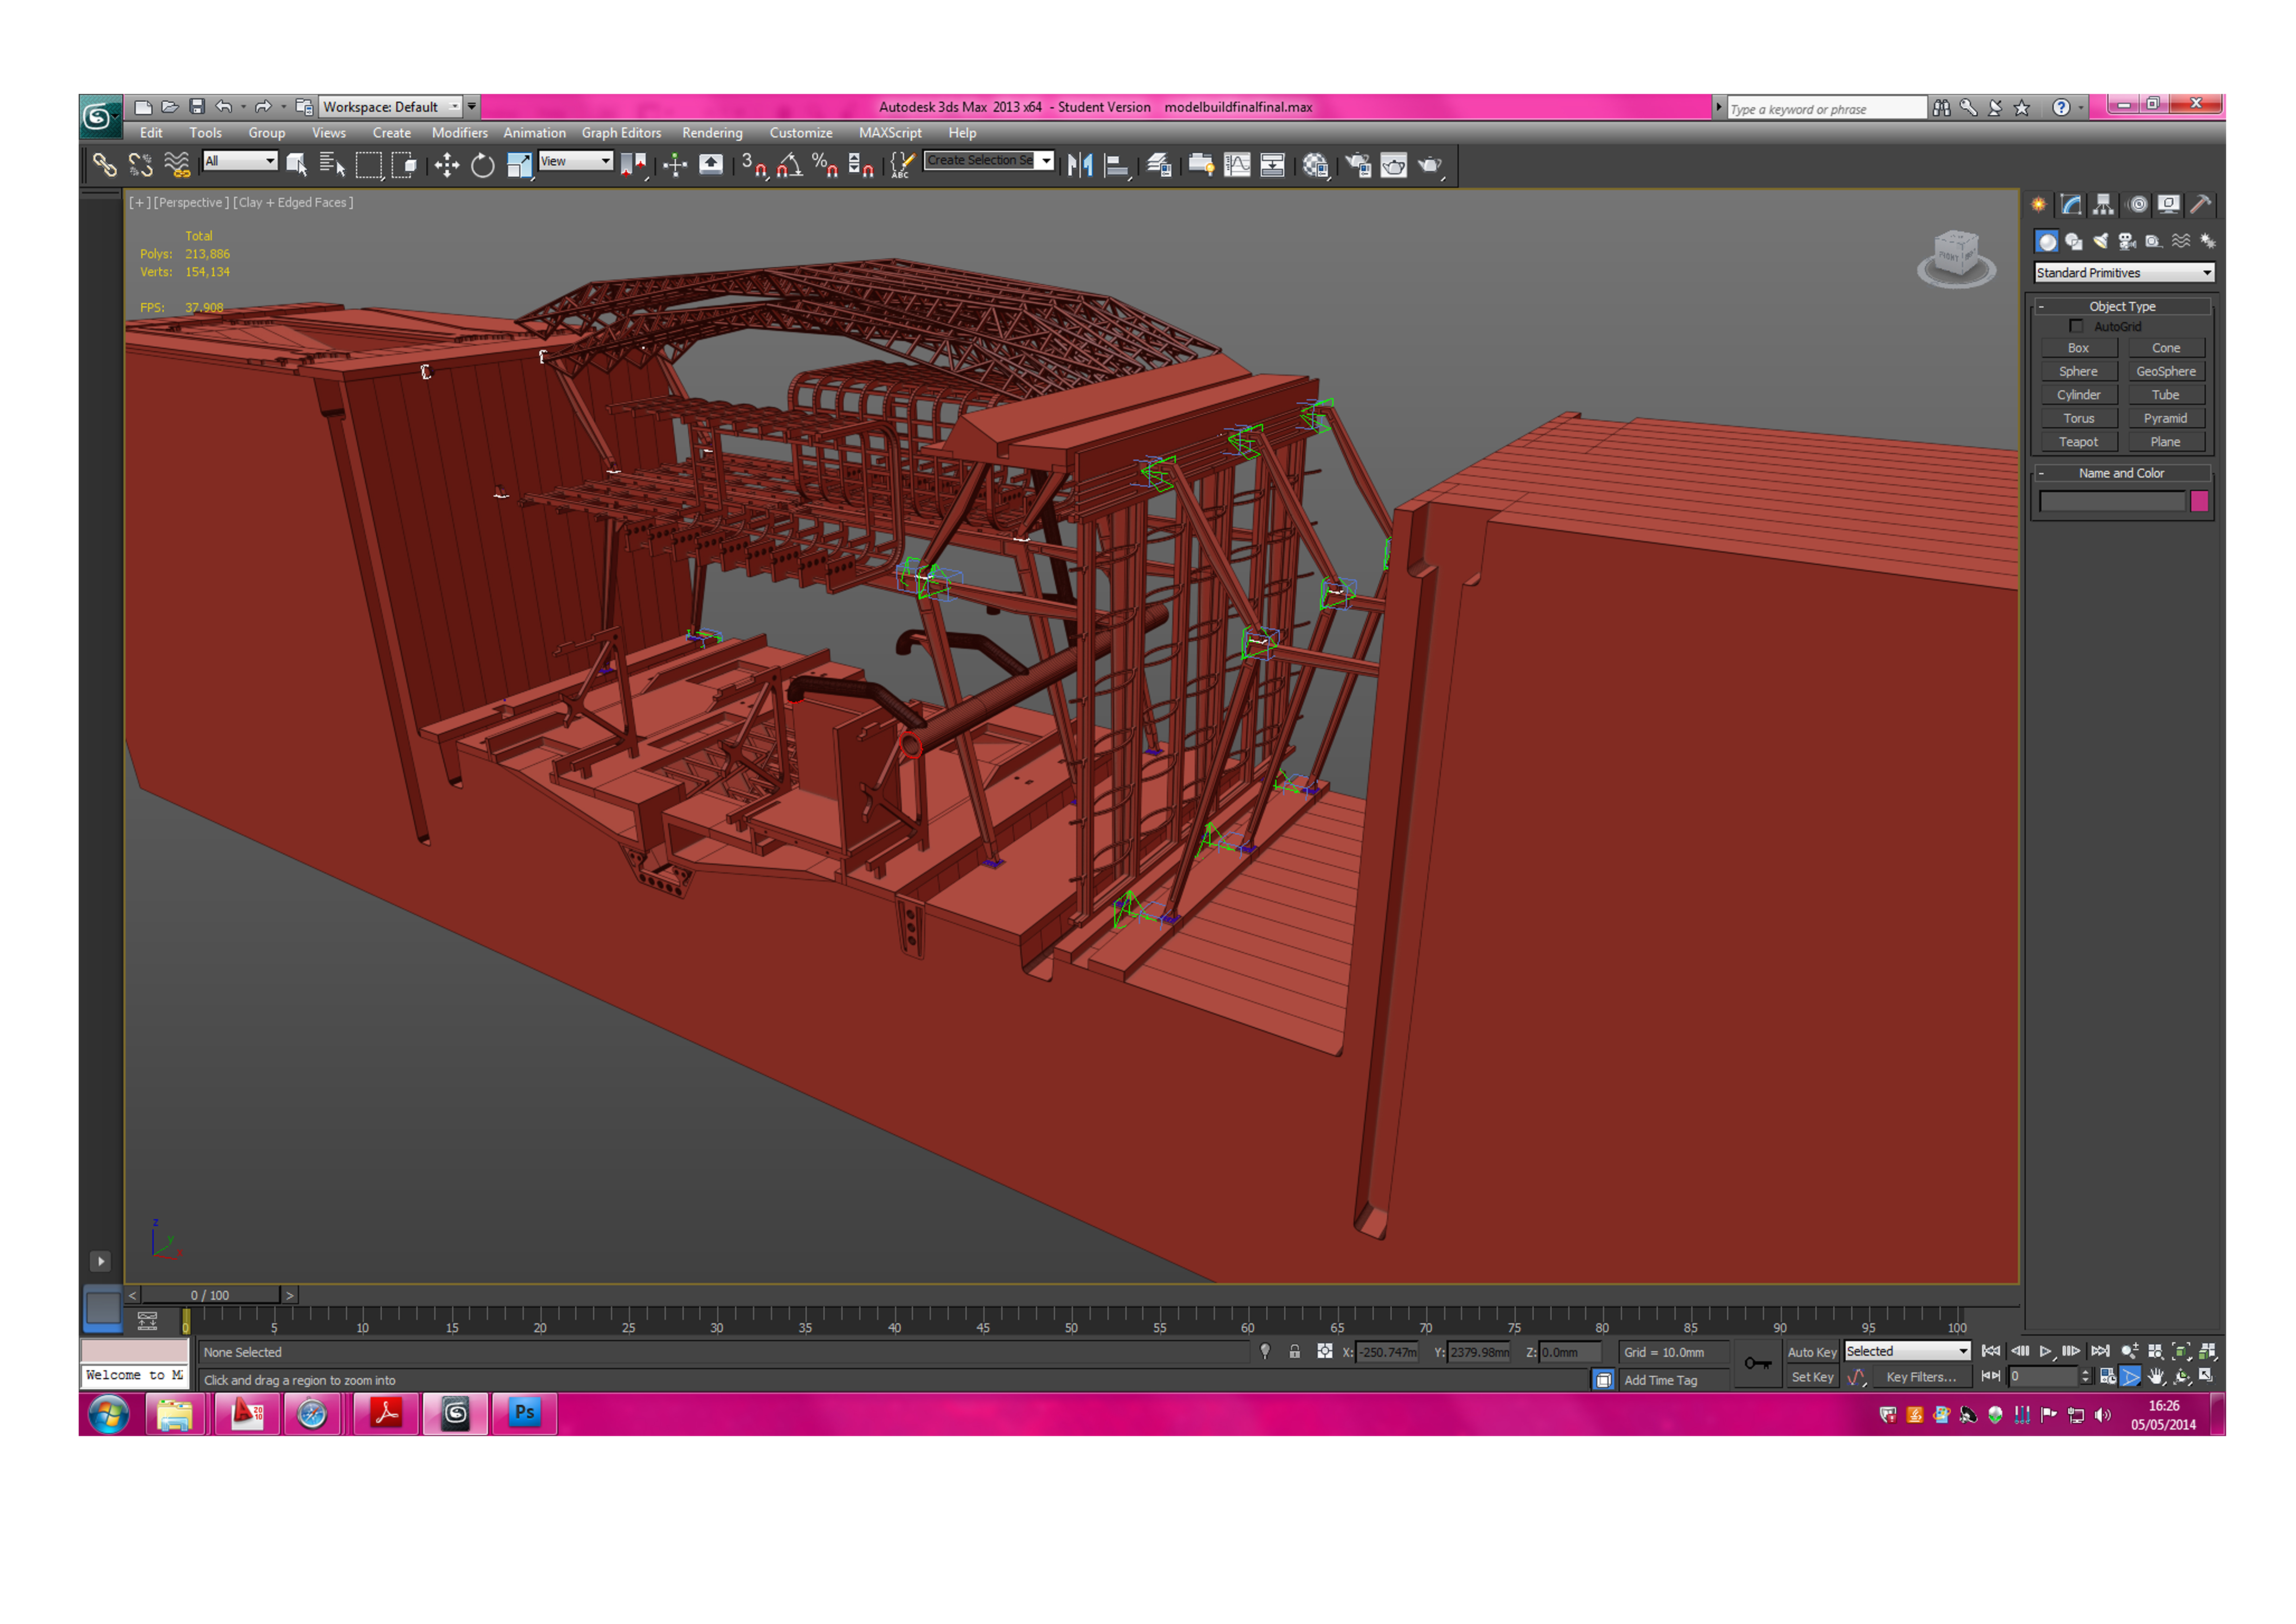
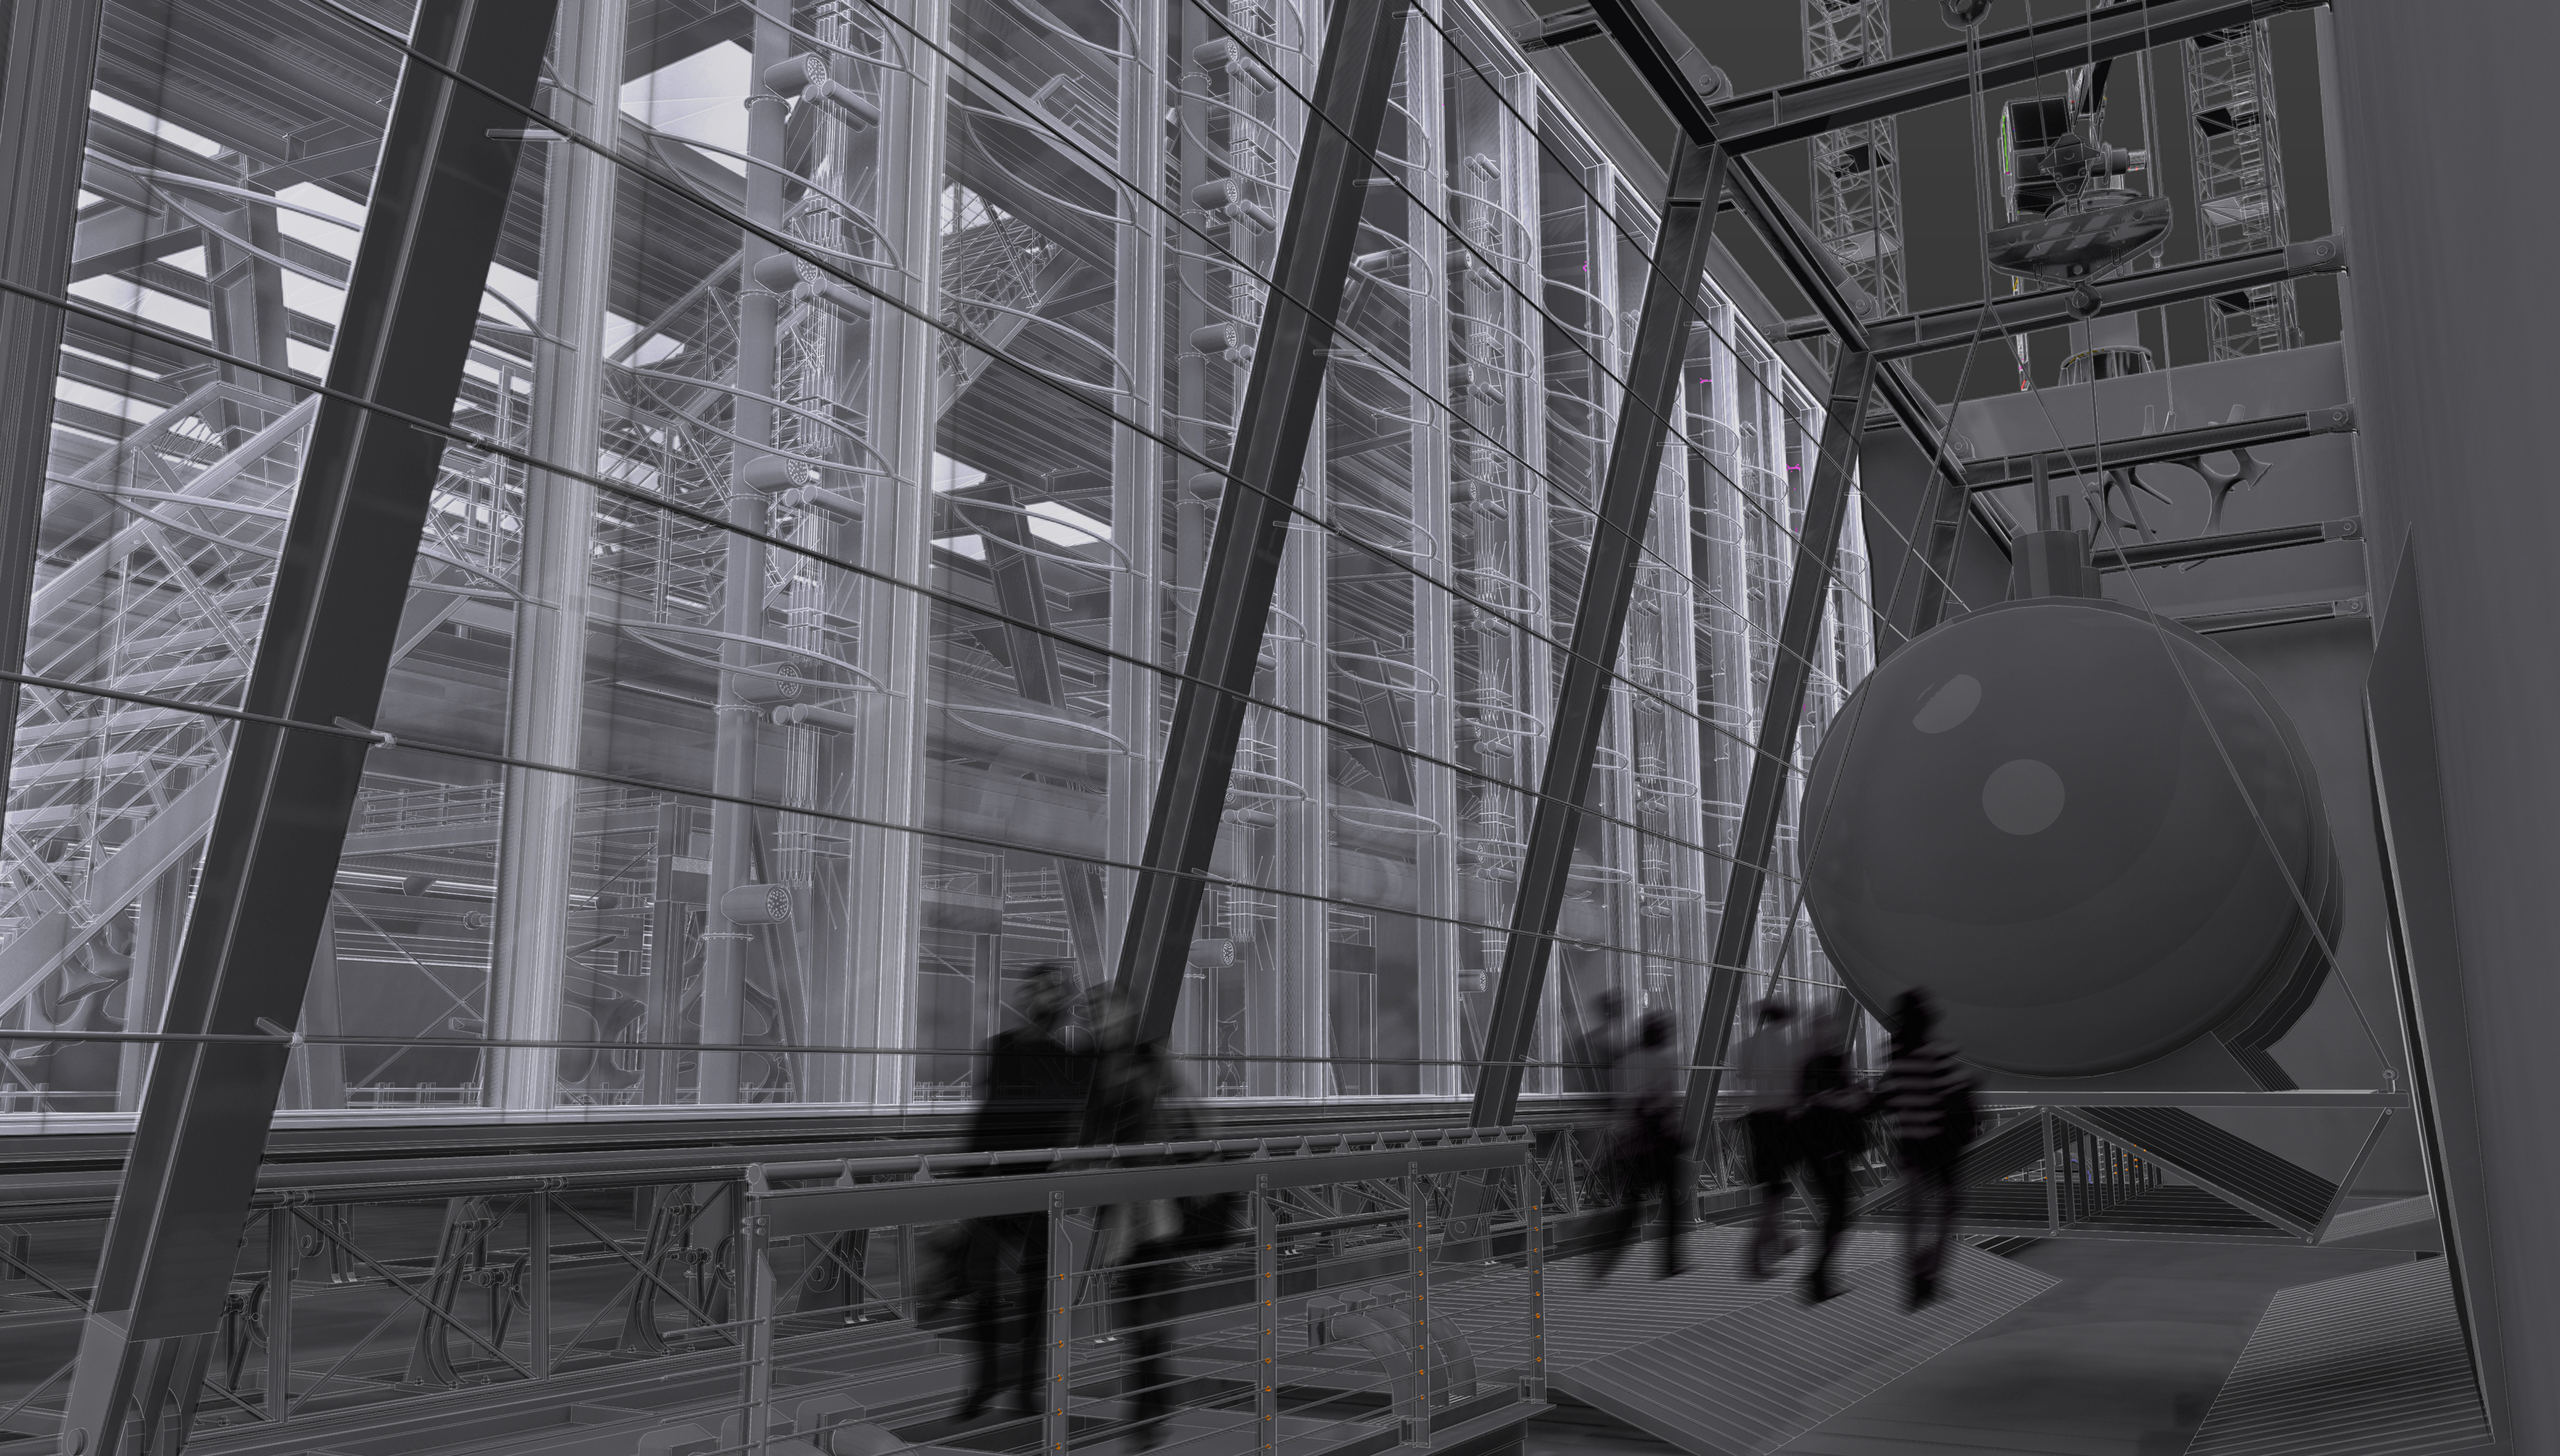
Concept renders of how the site would look.

E1 R3_Context2

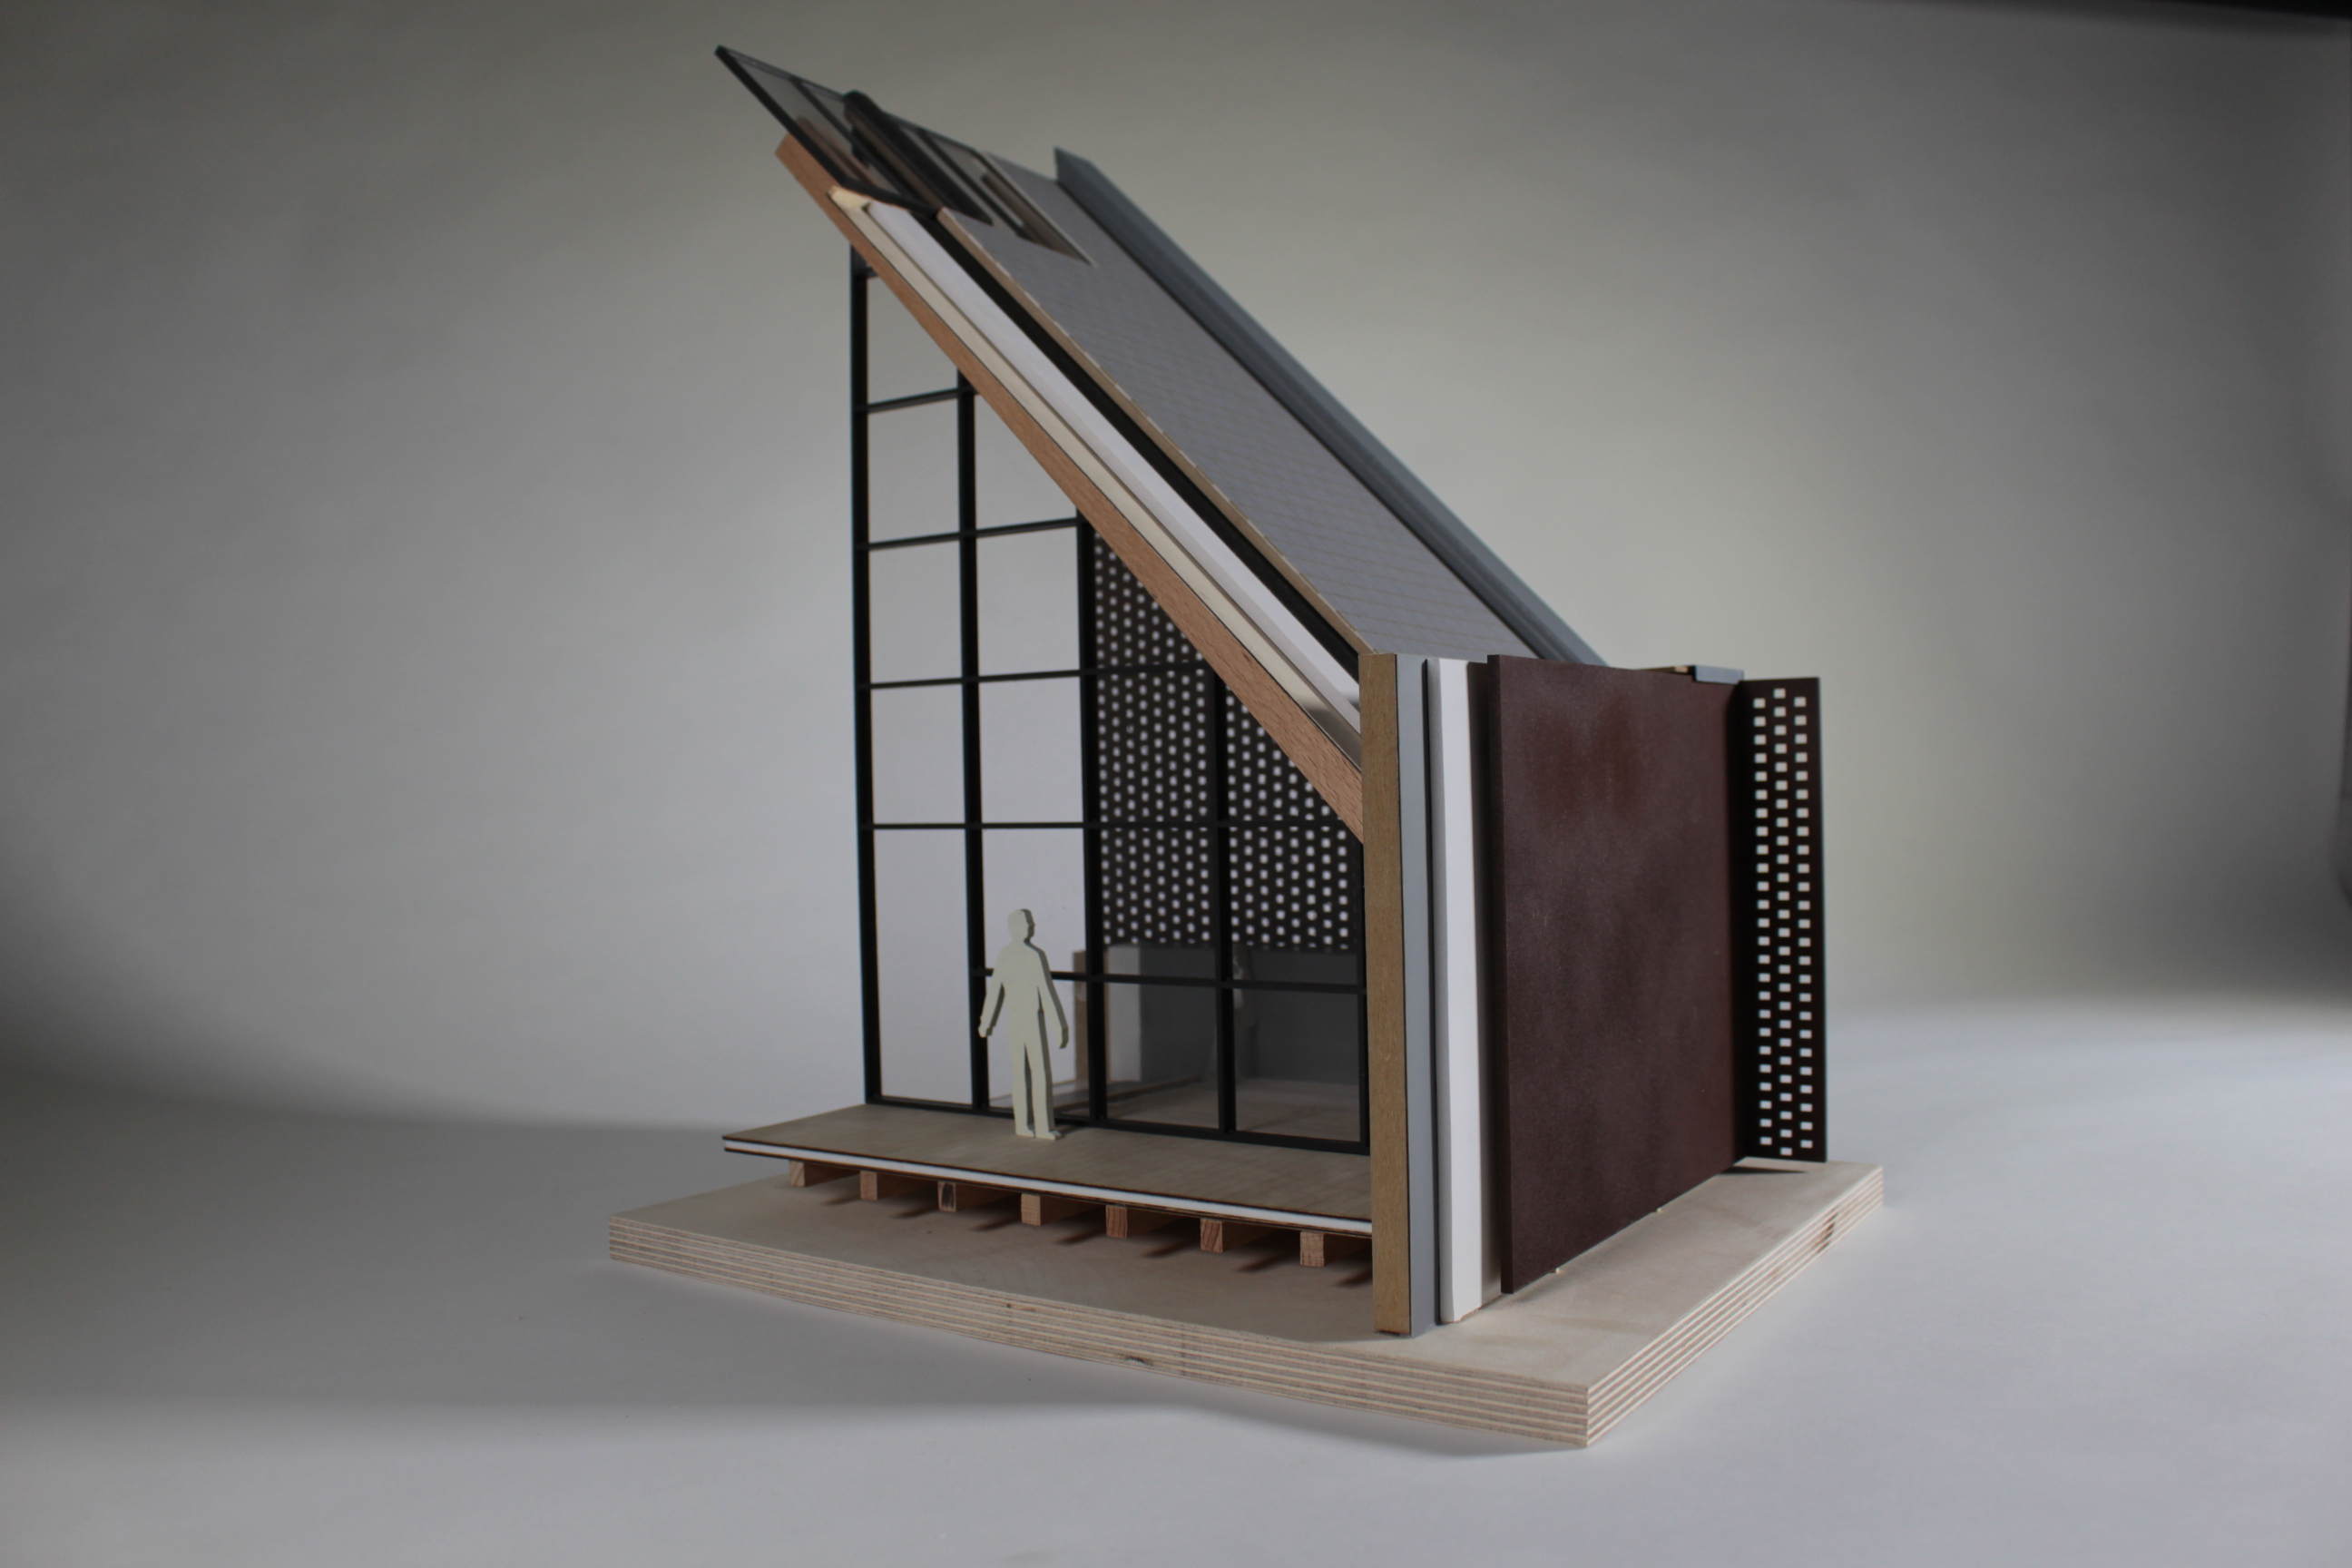
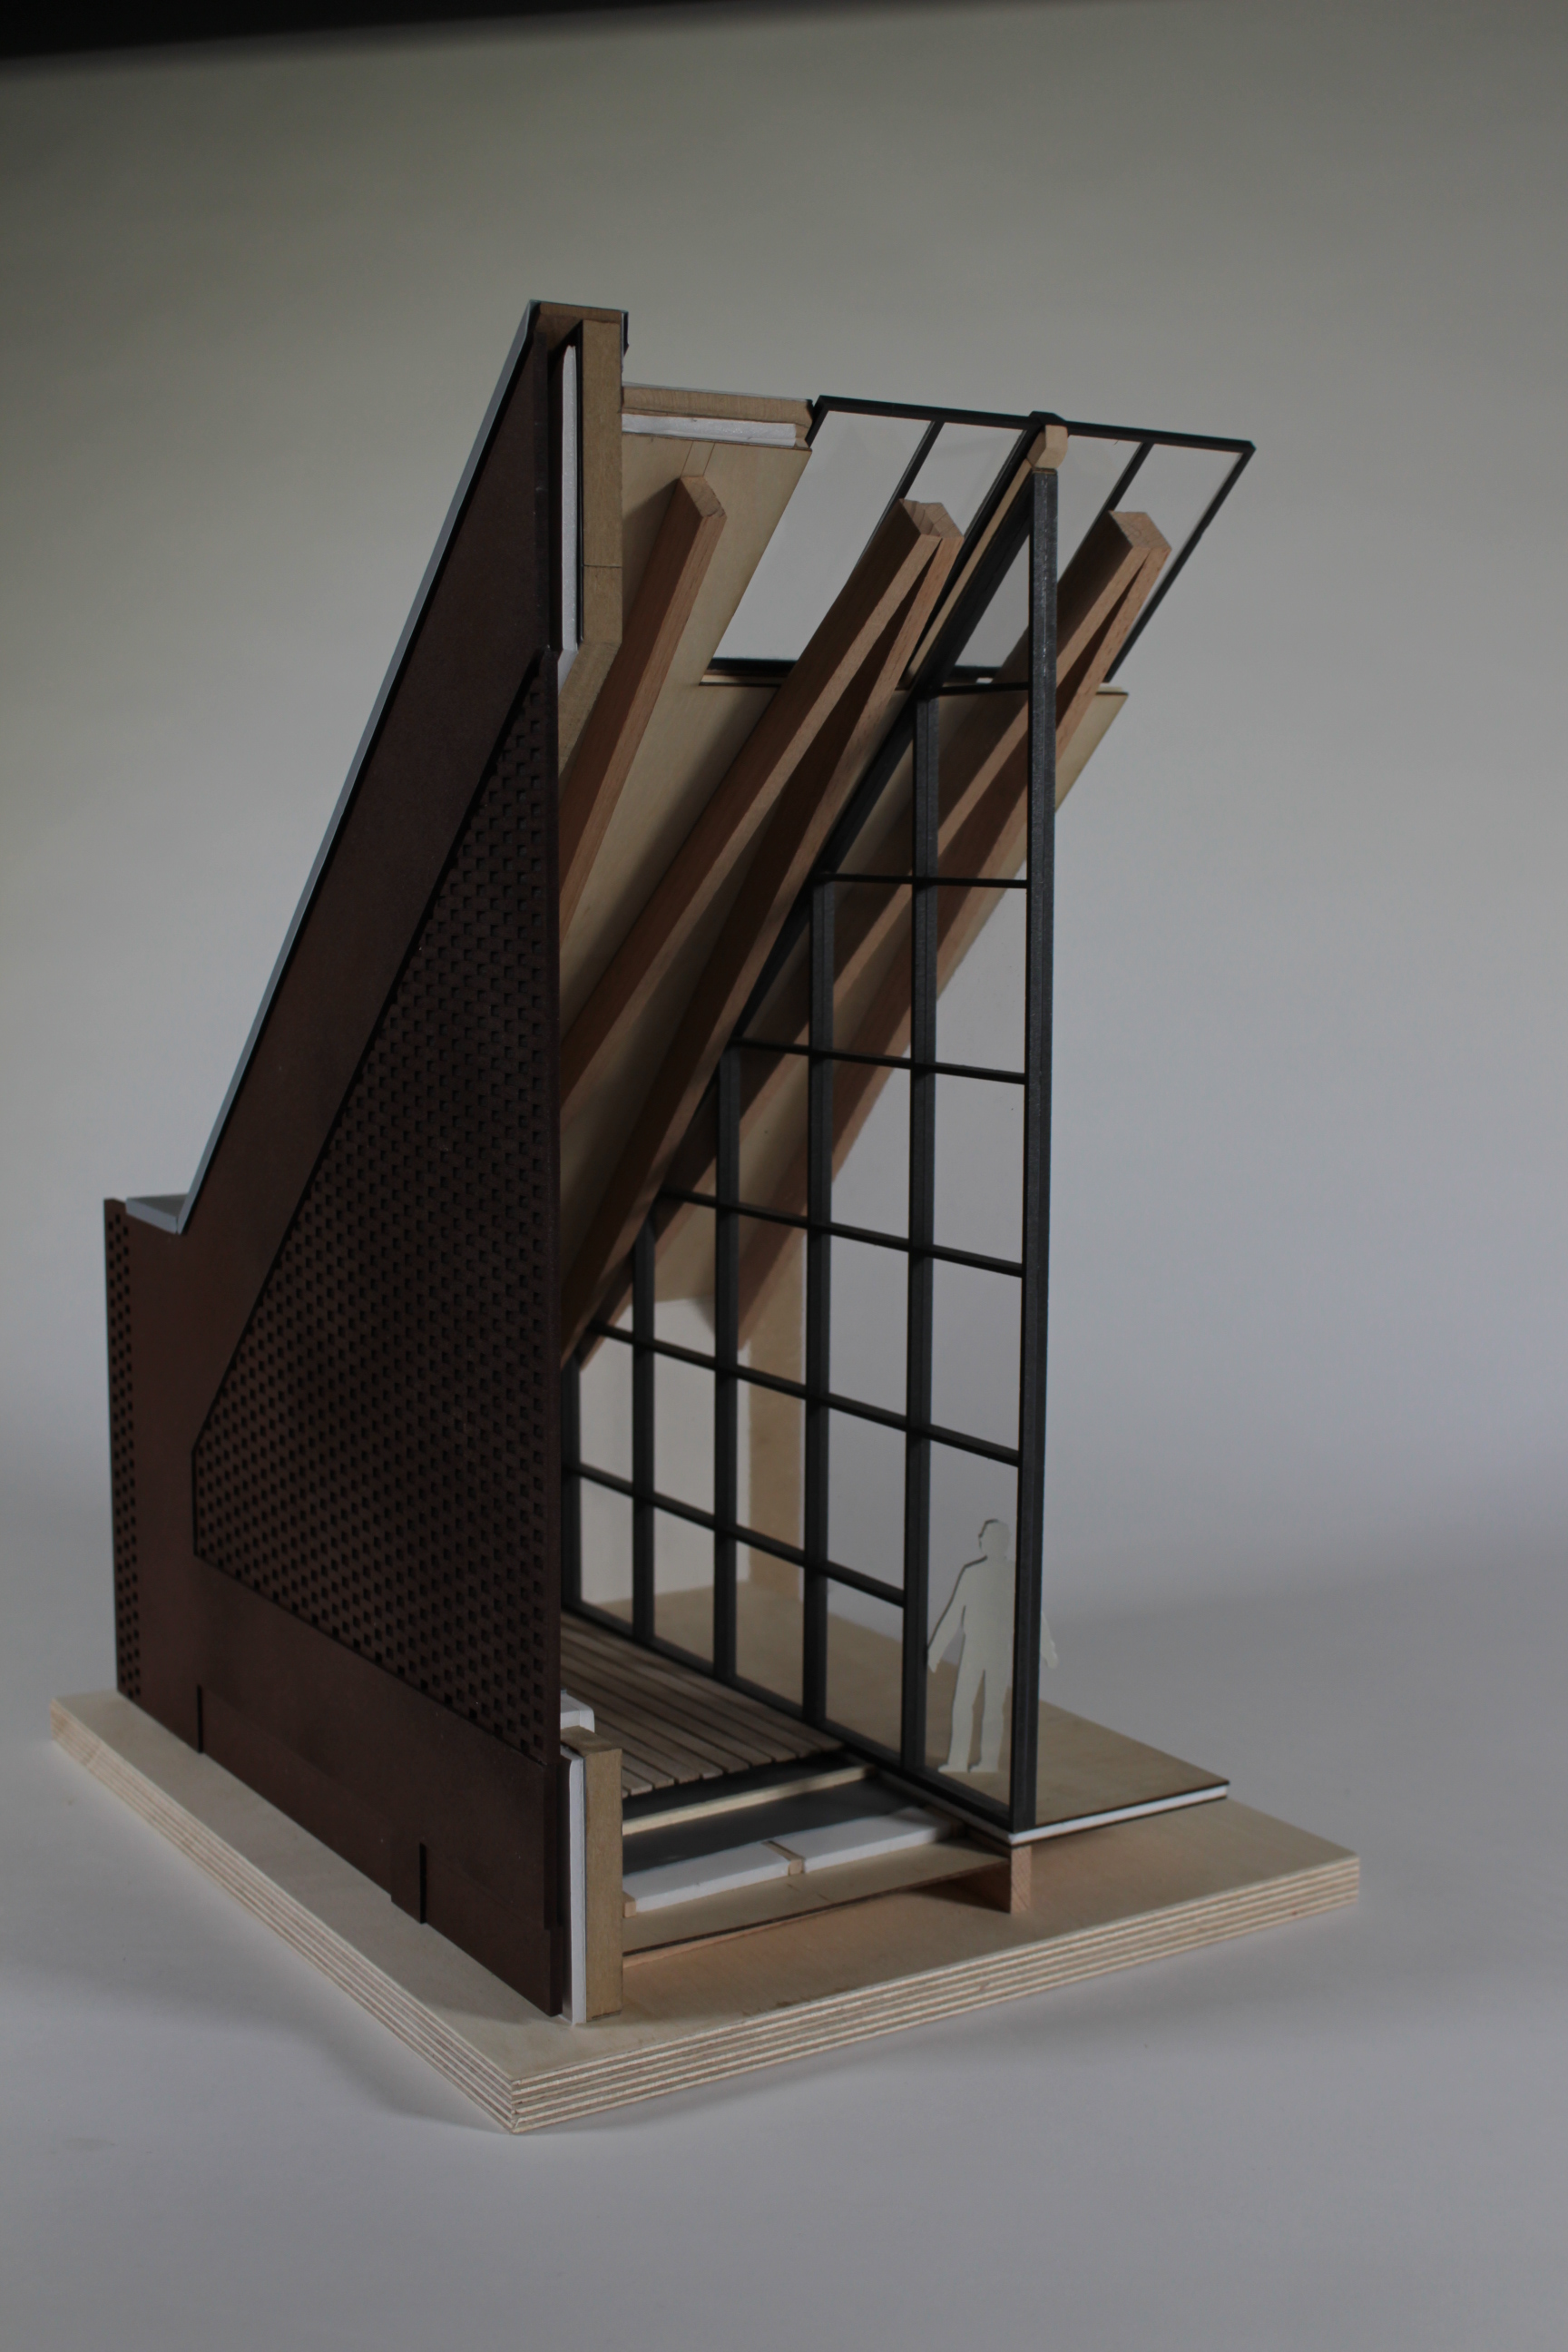
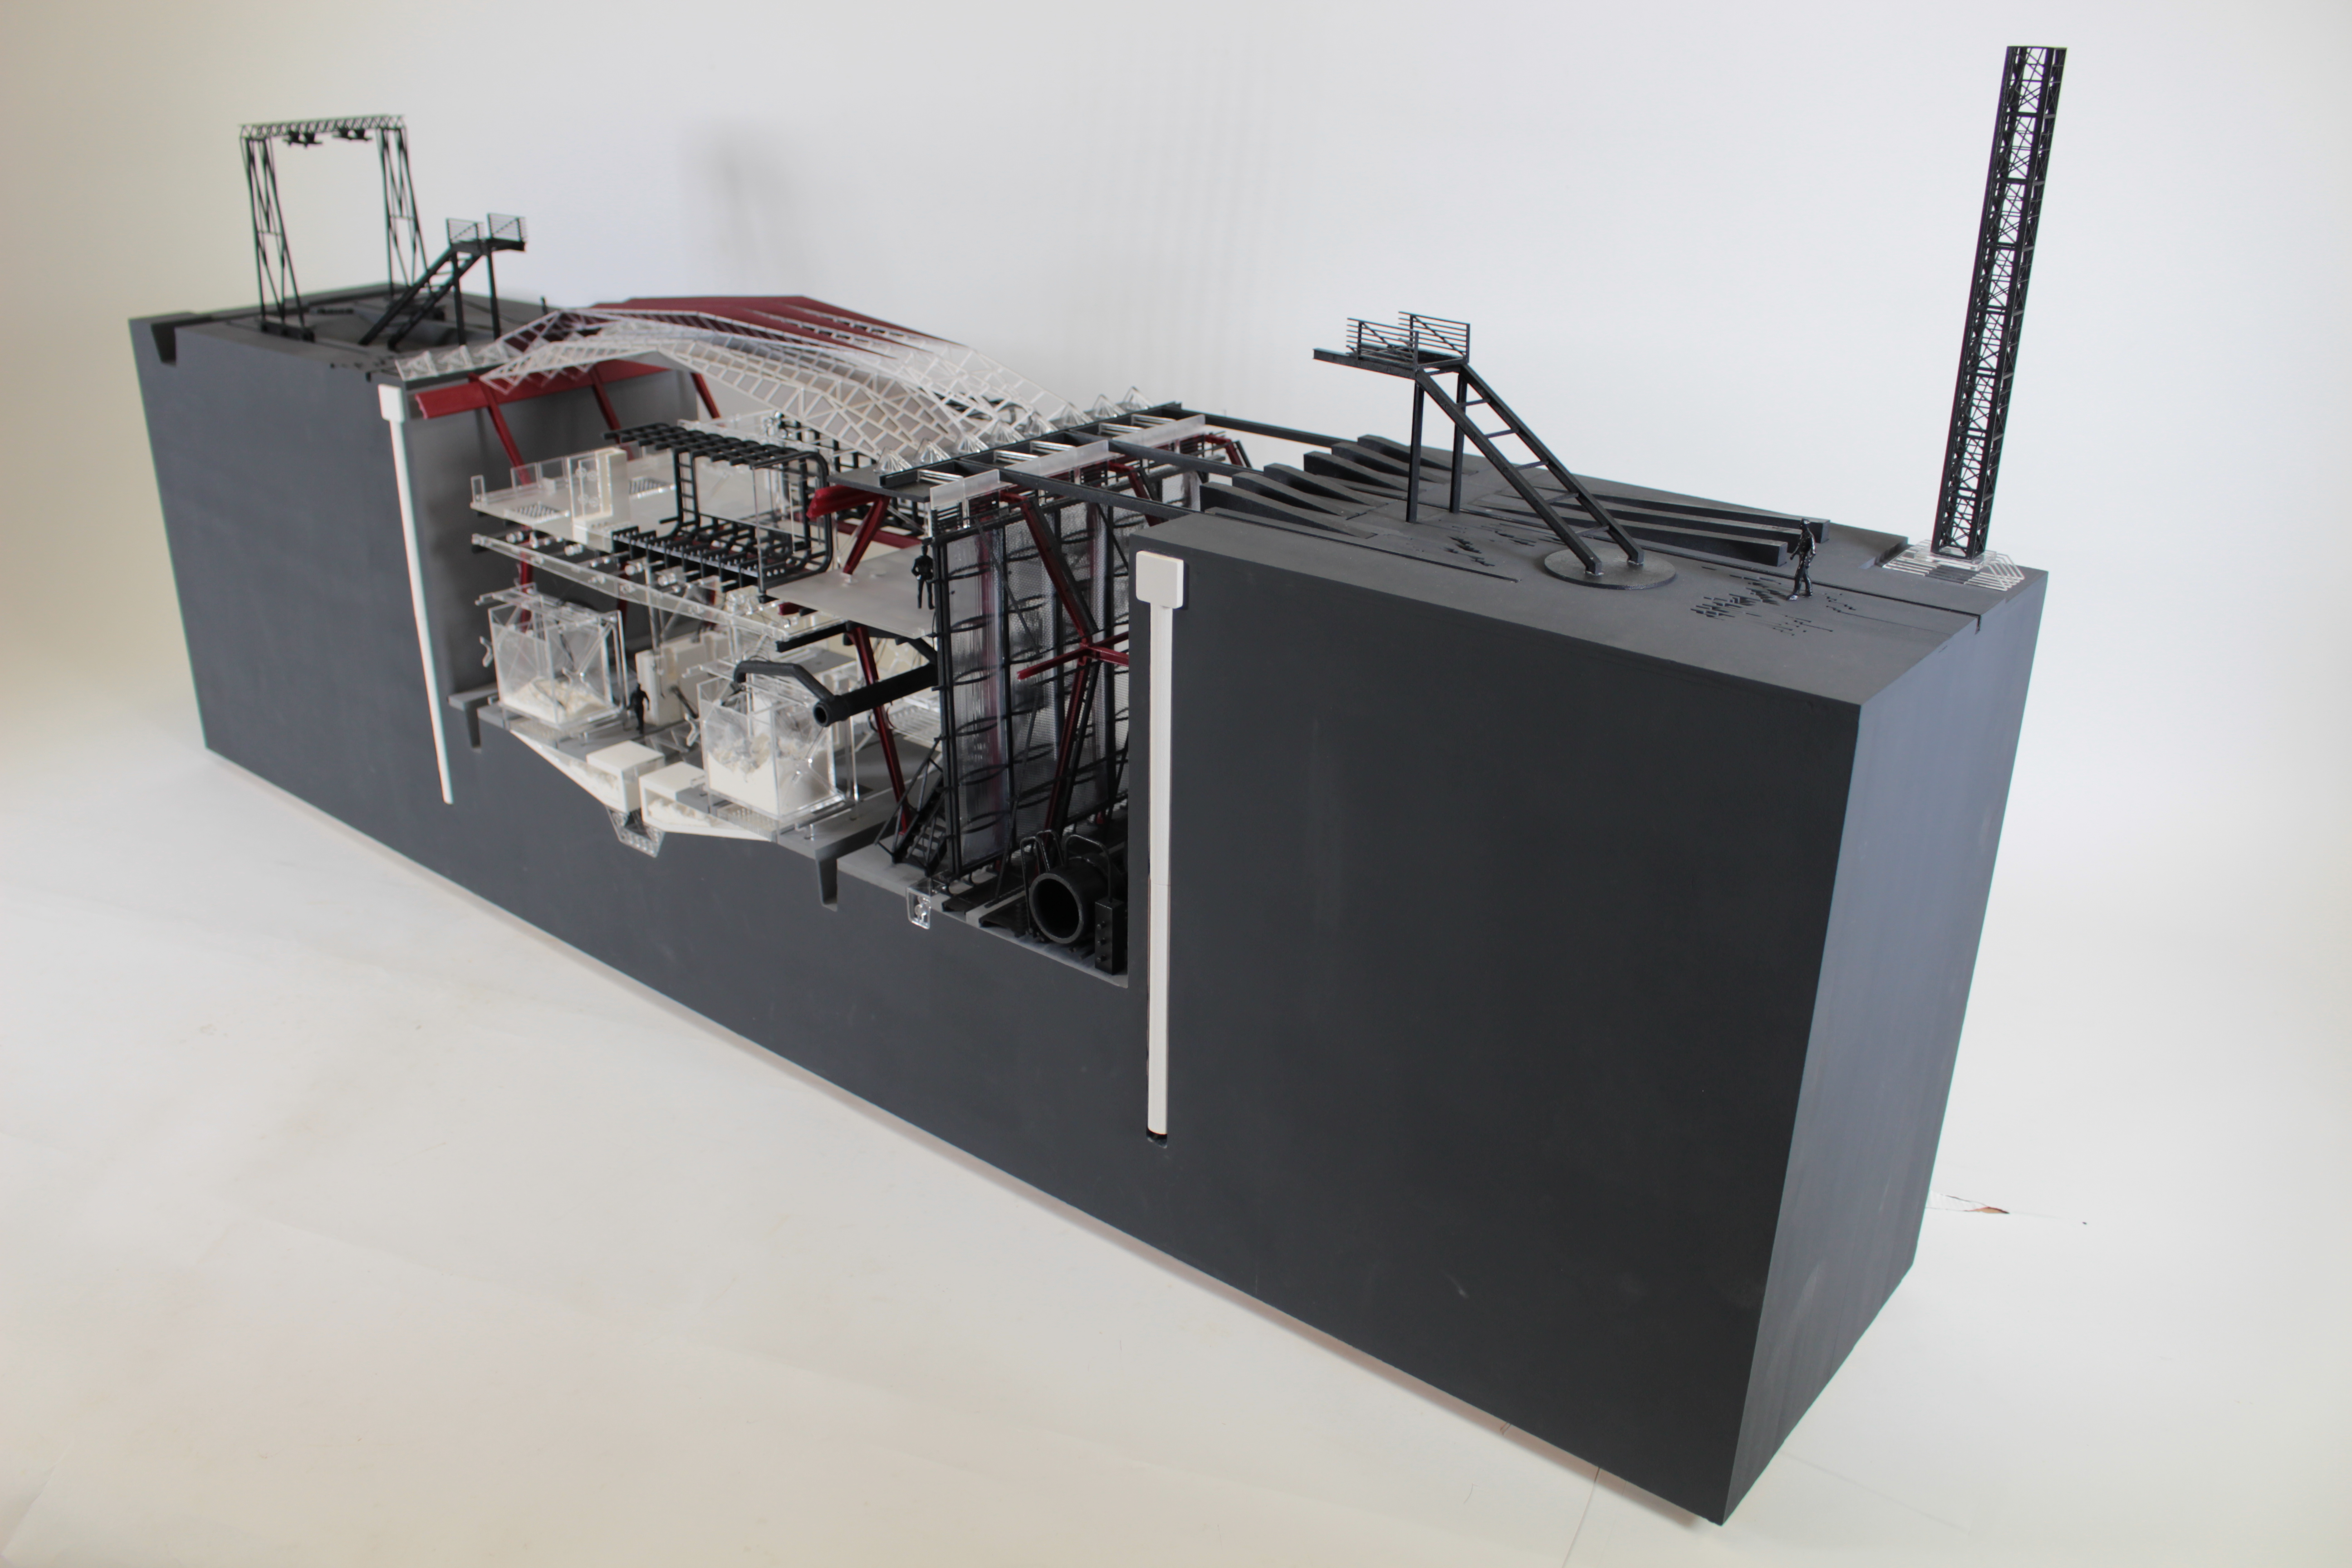
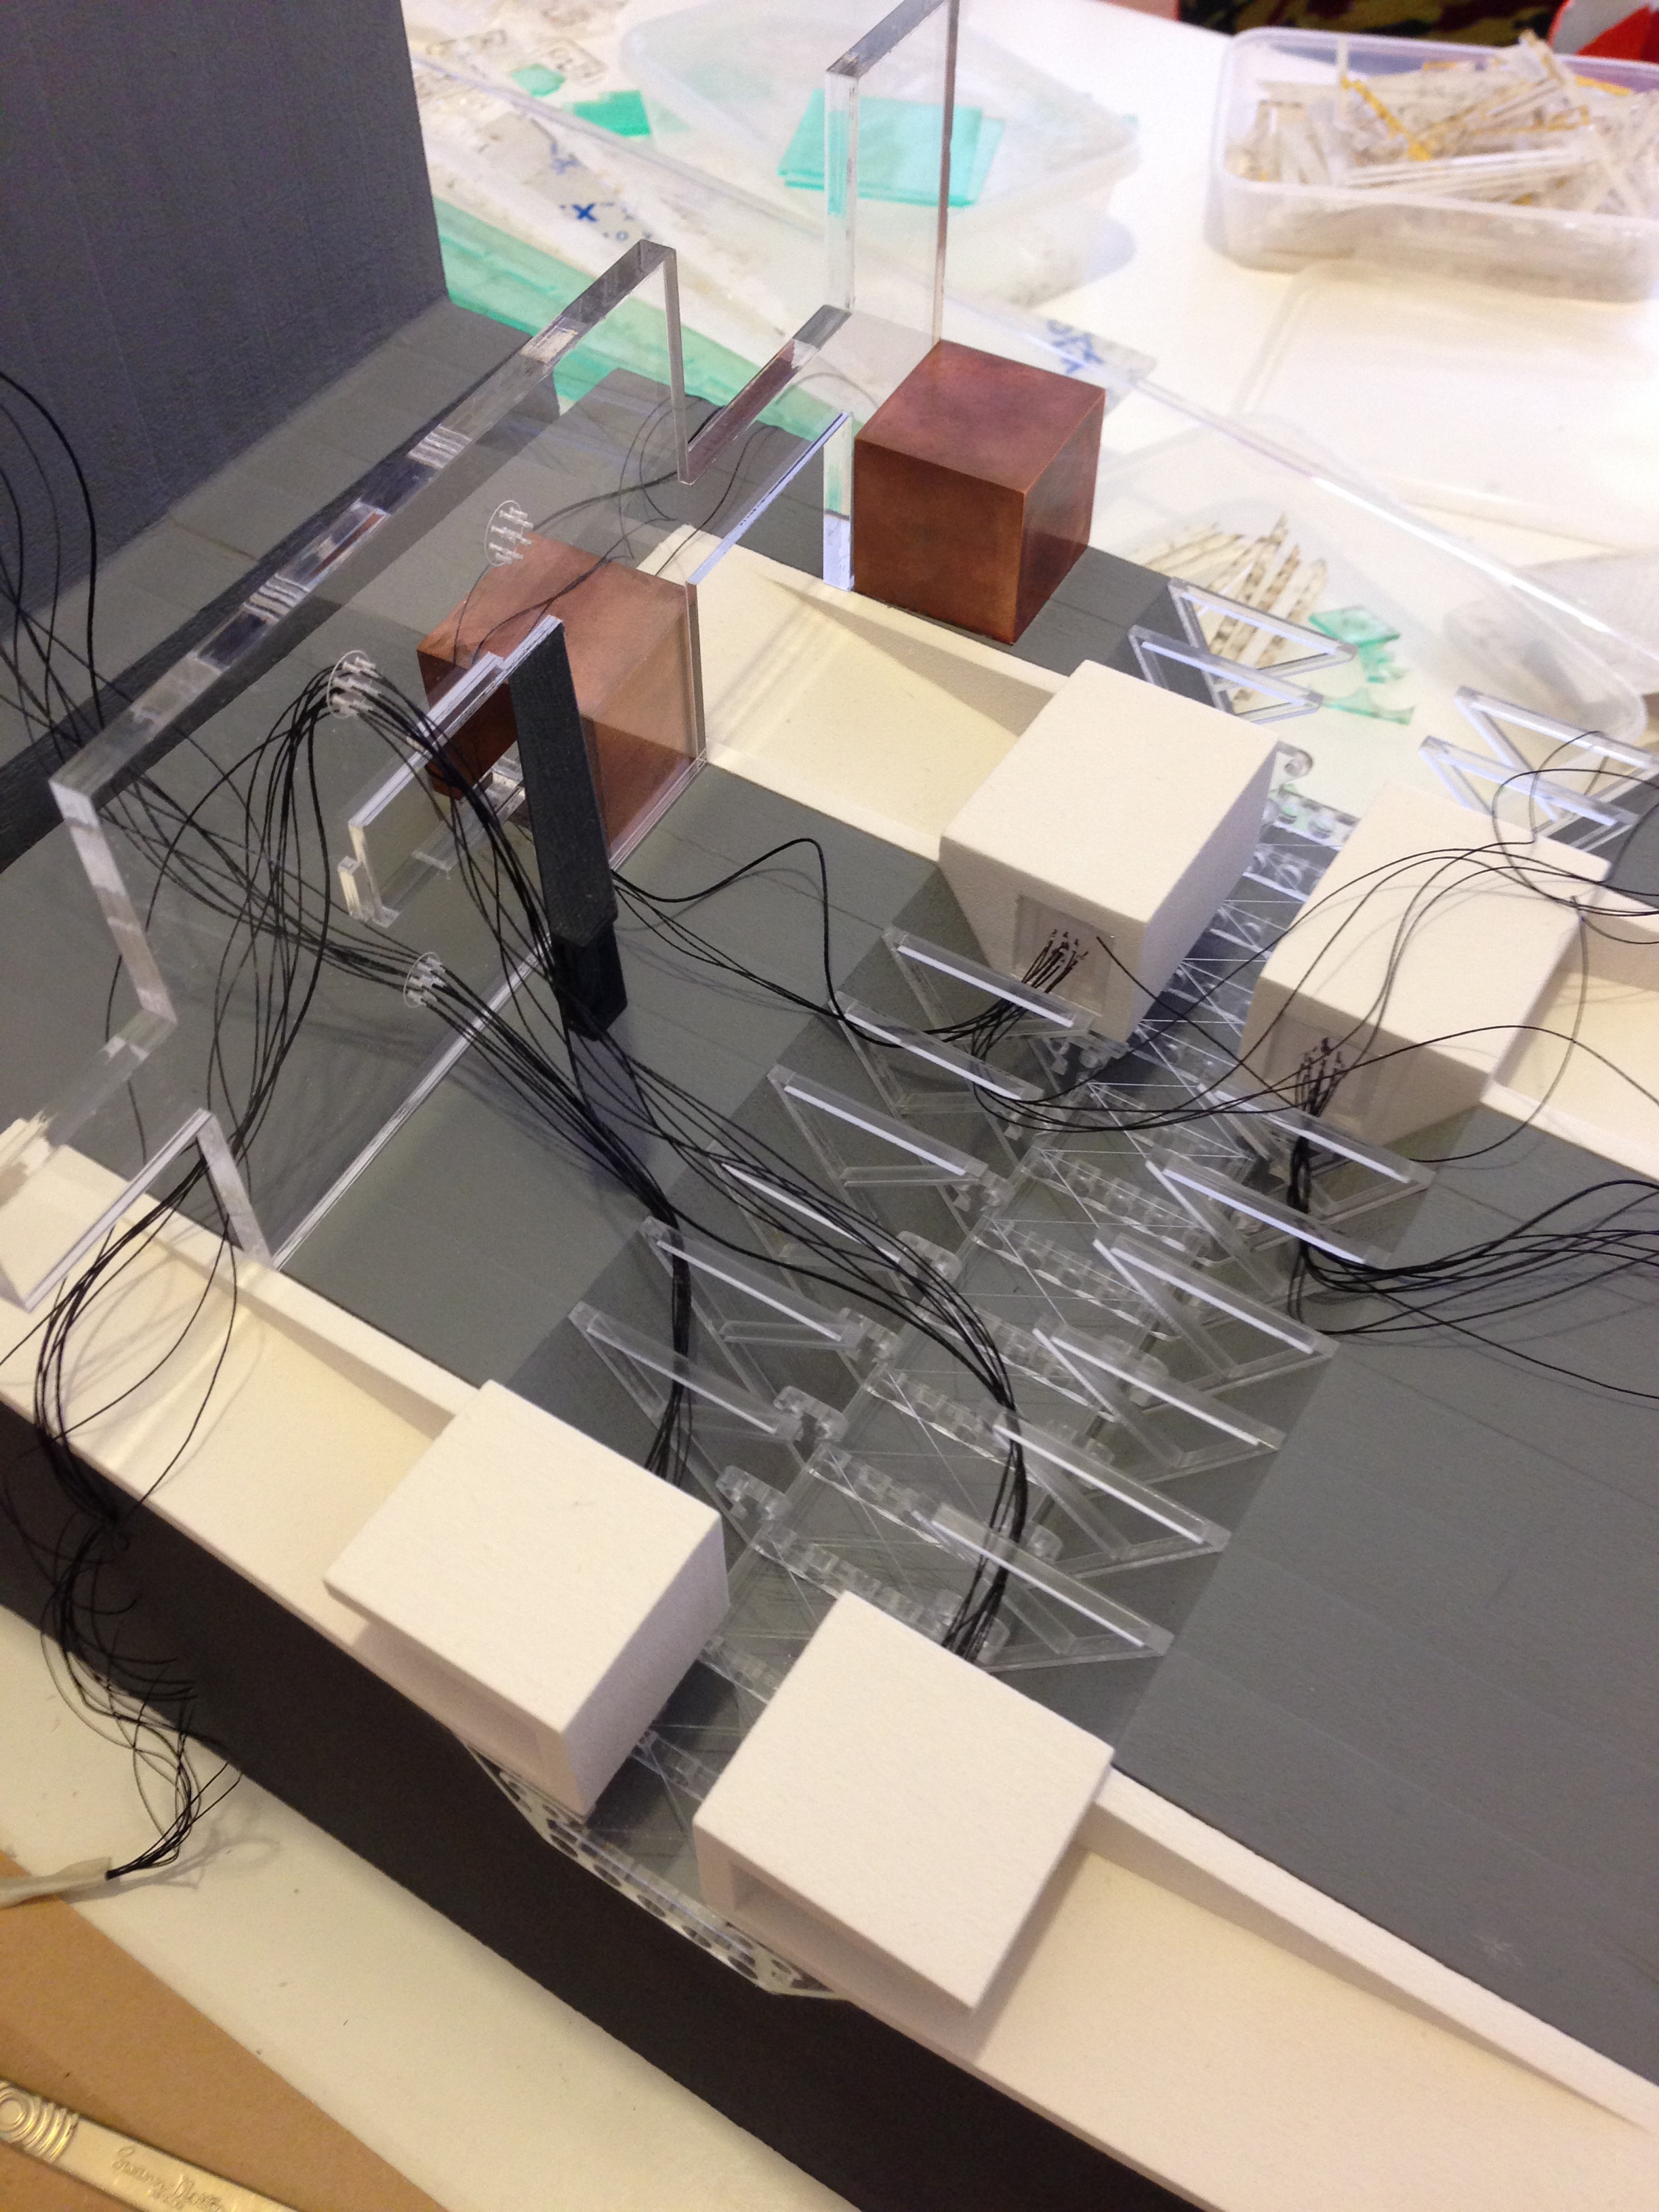
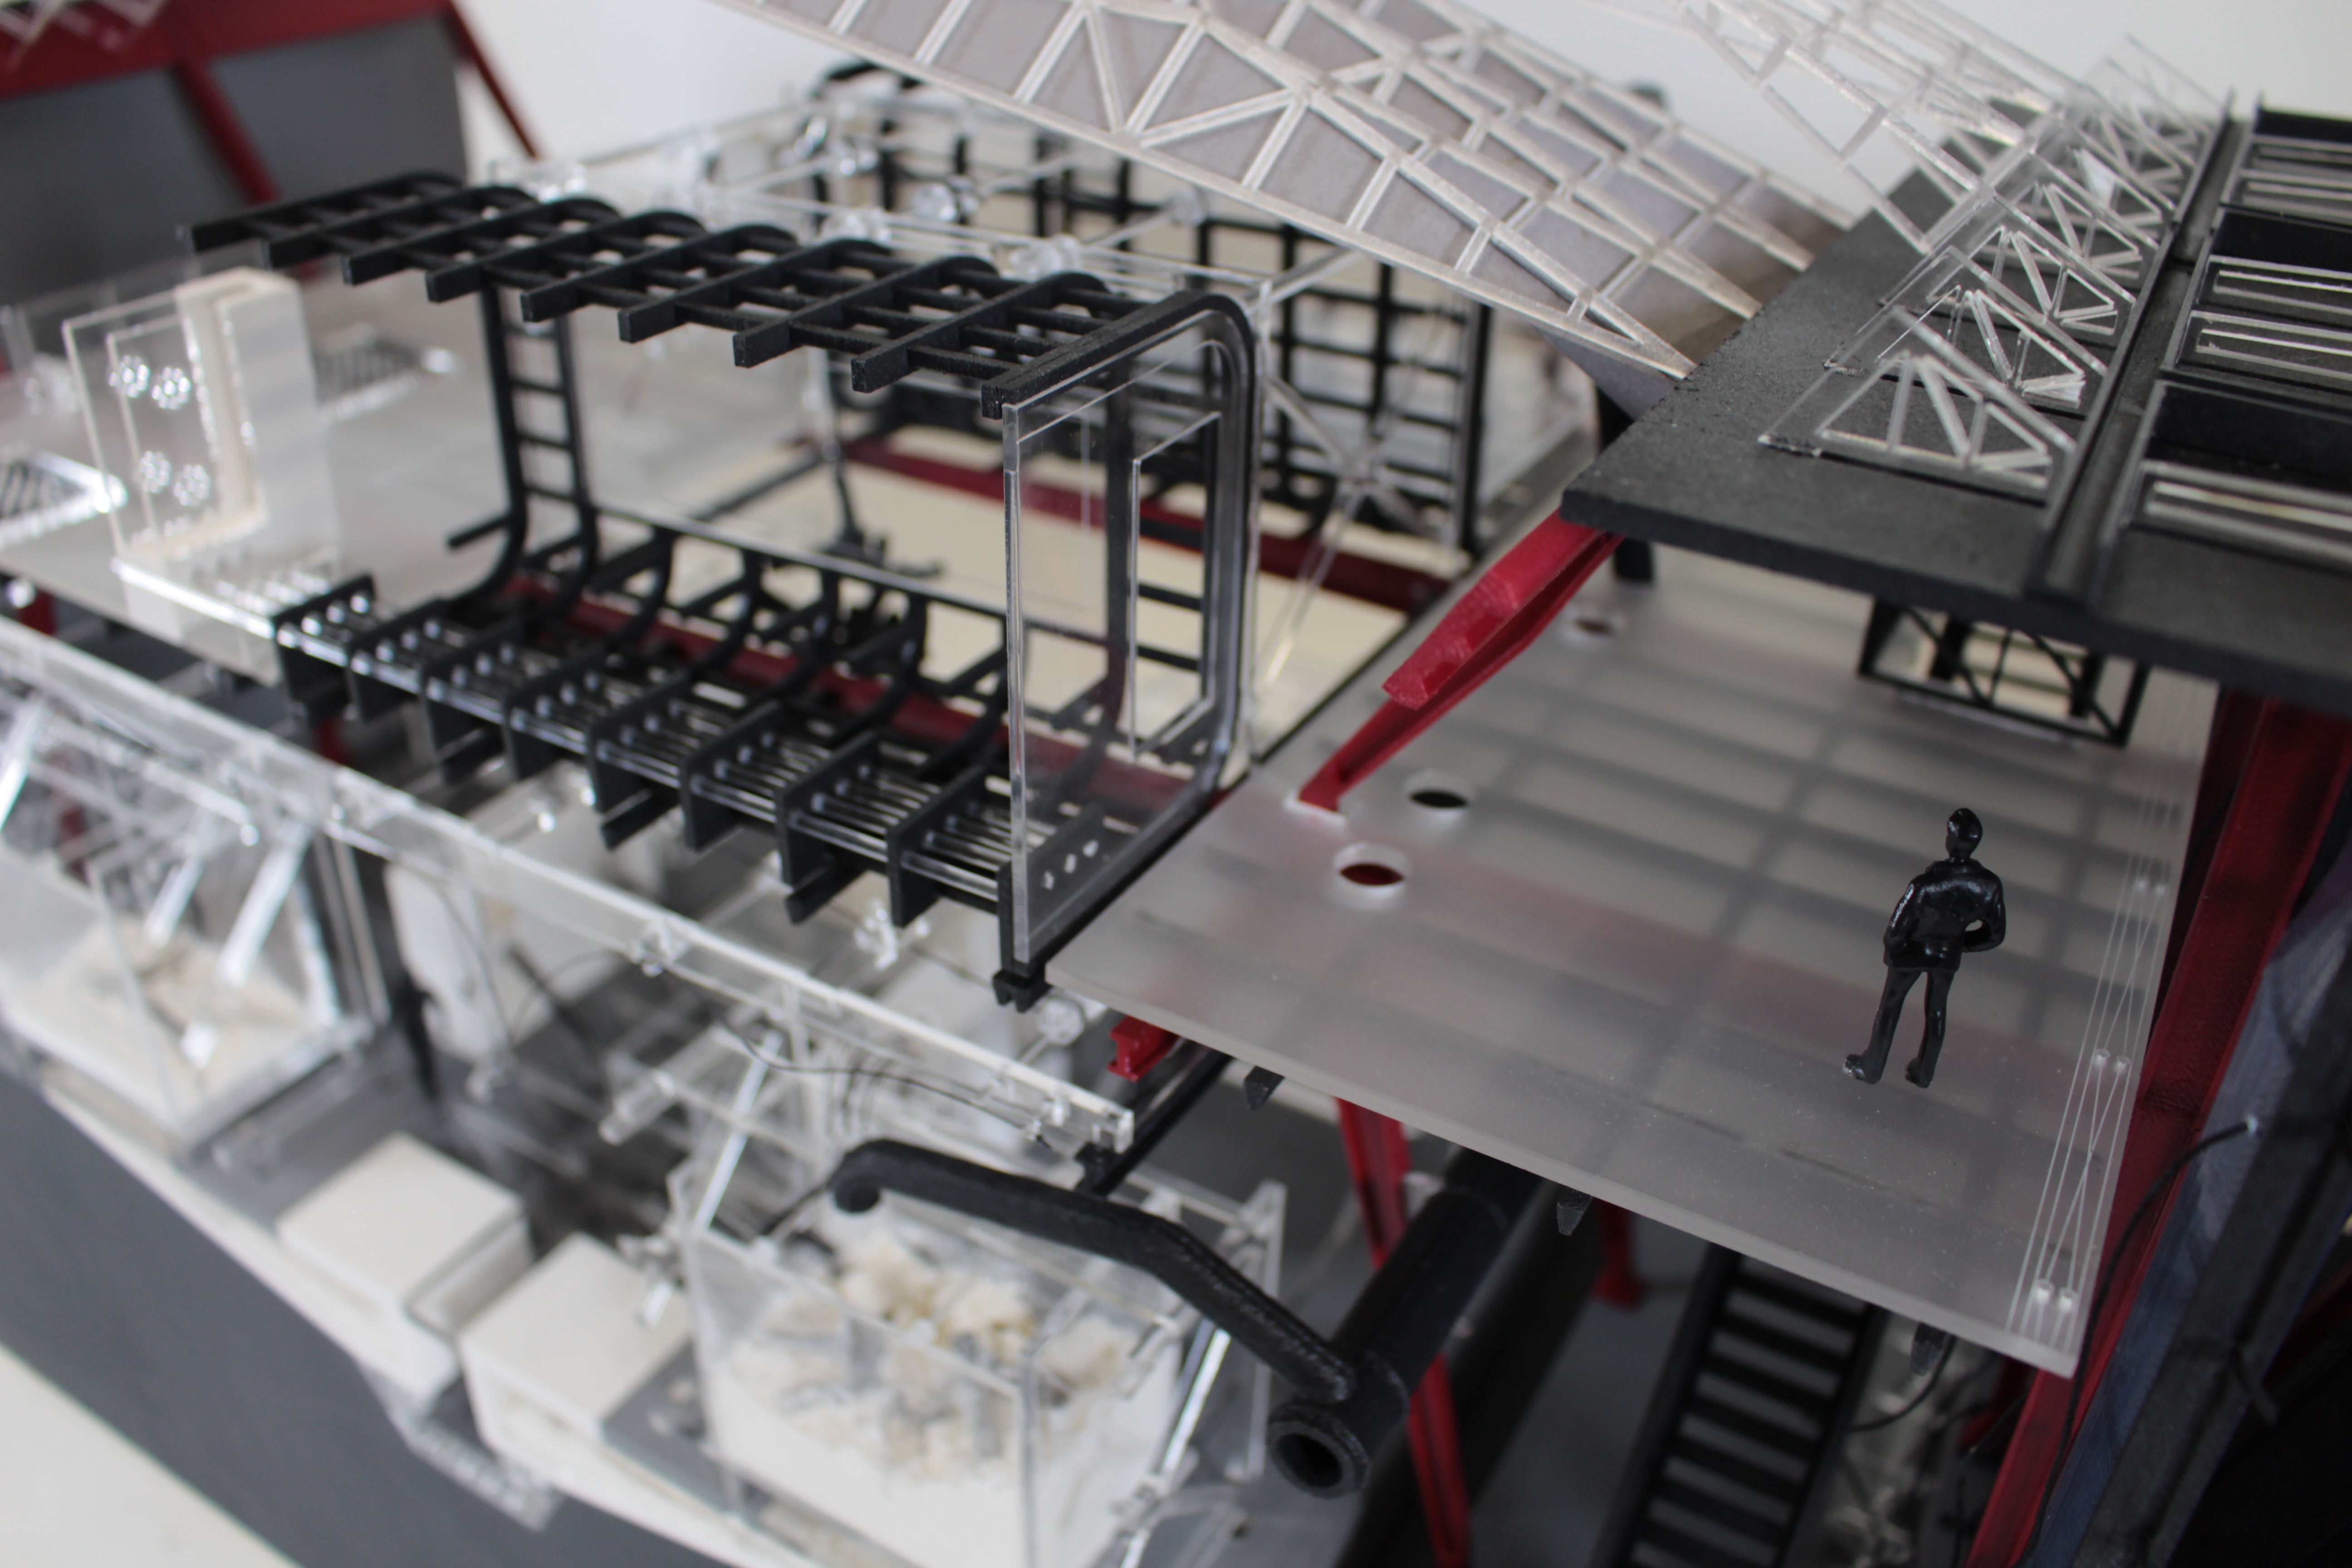
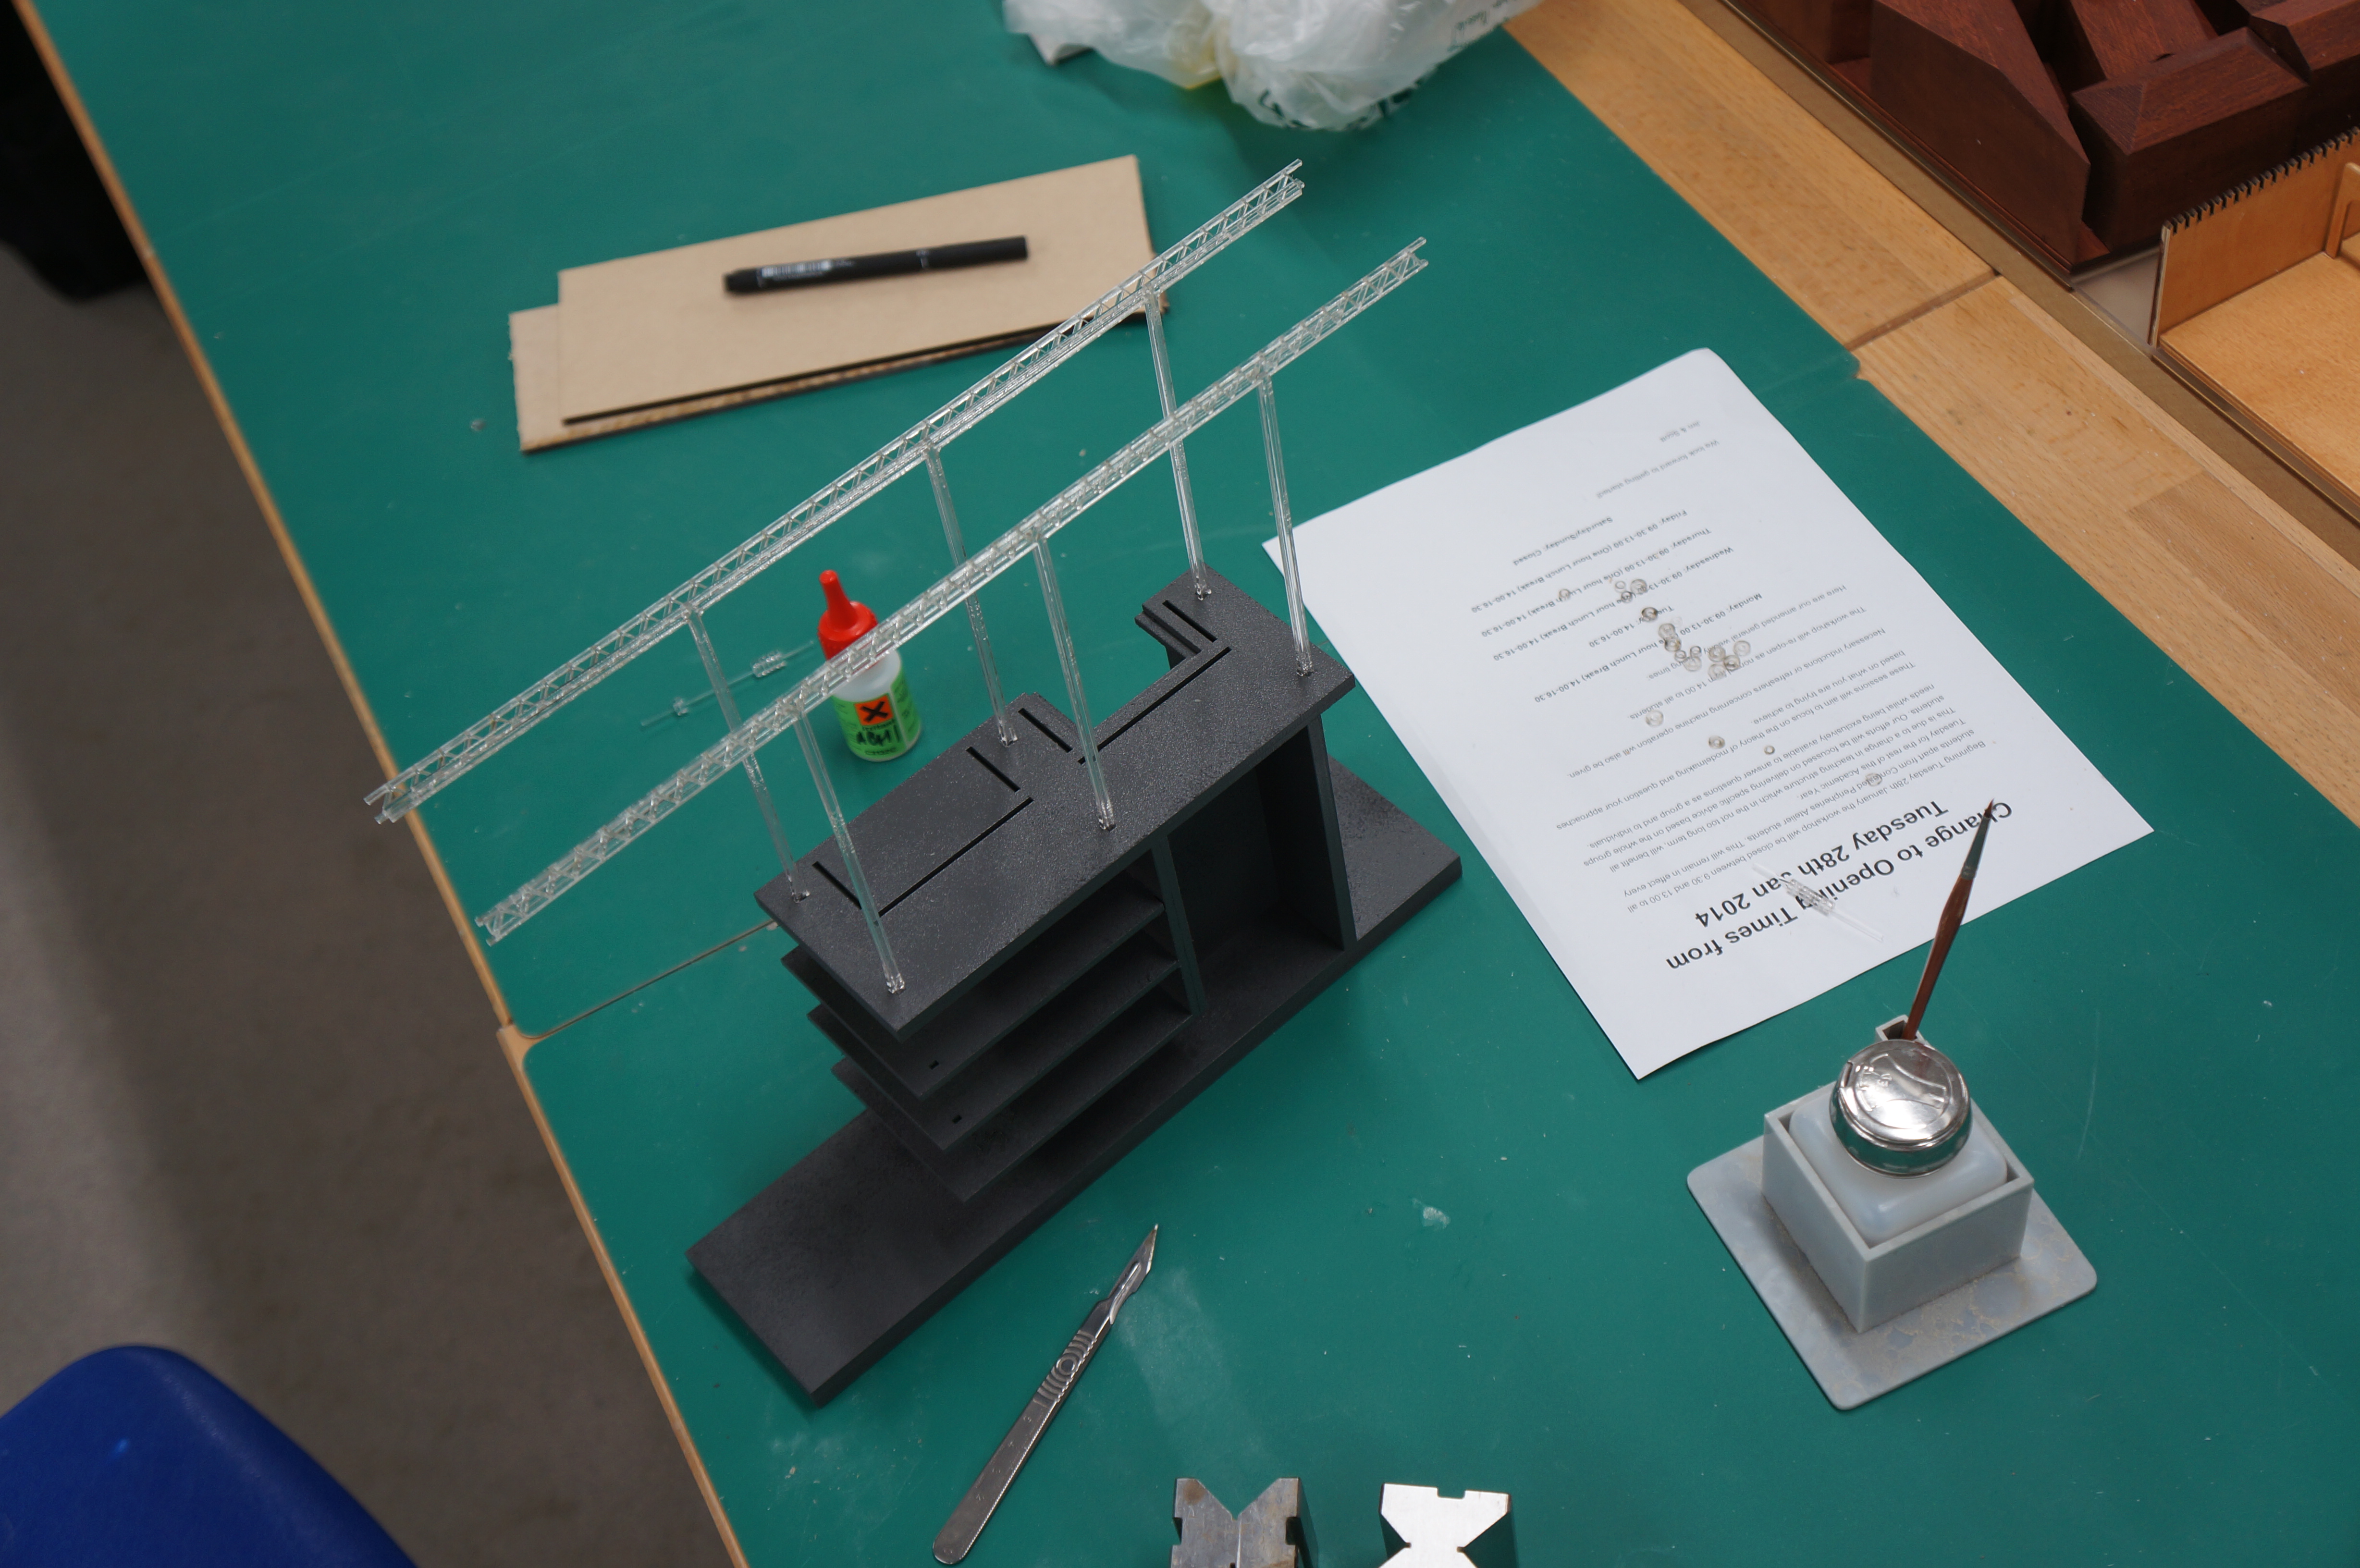
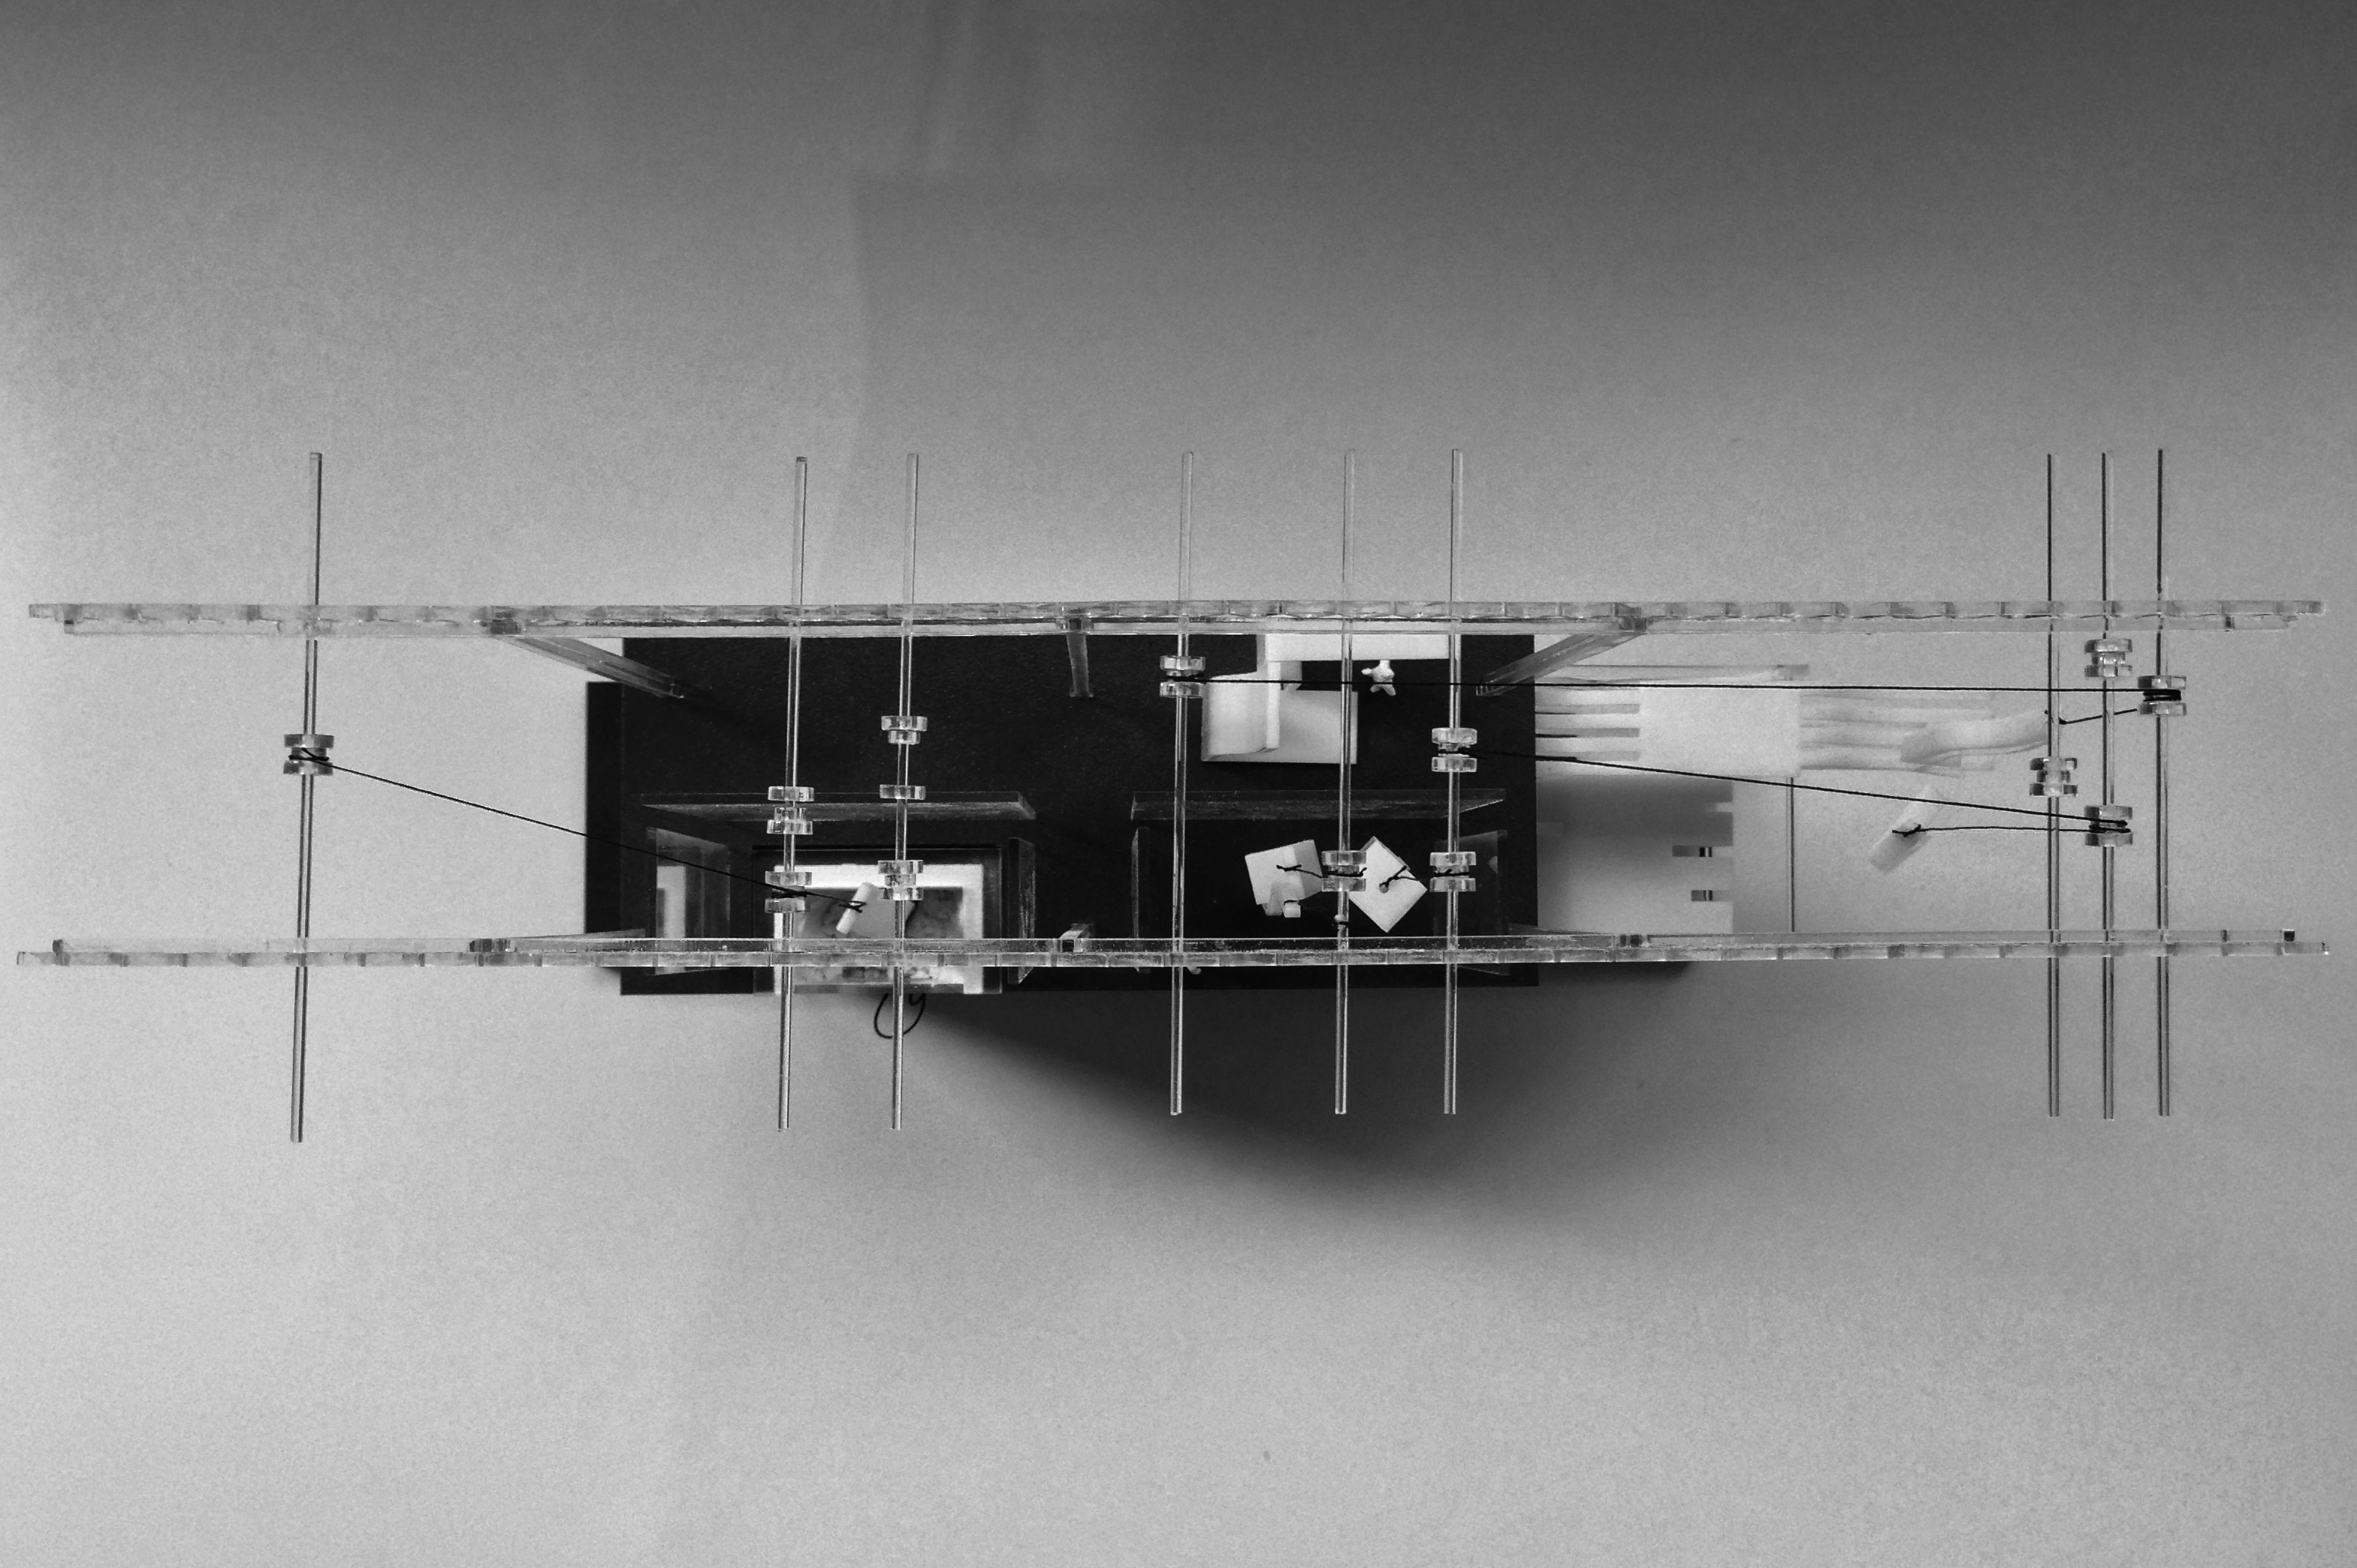
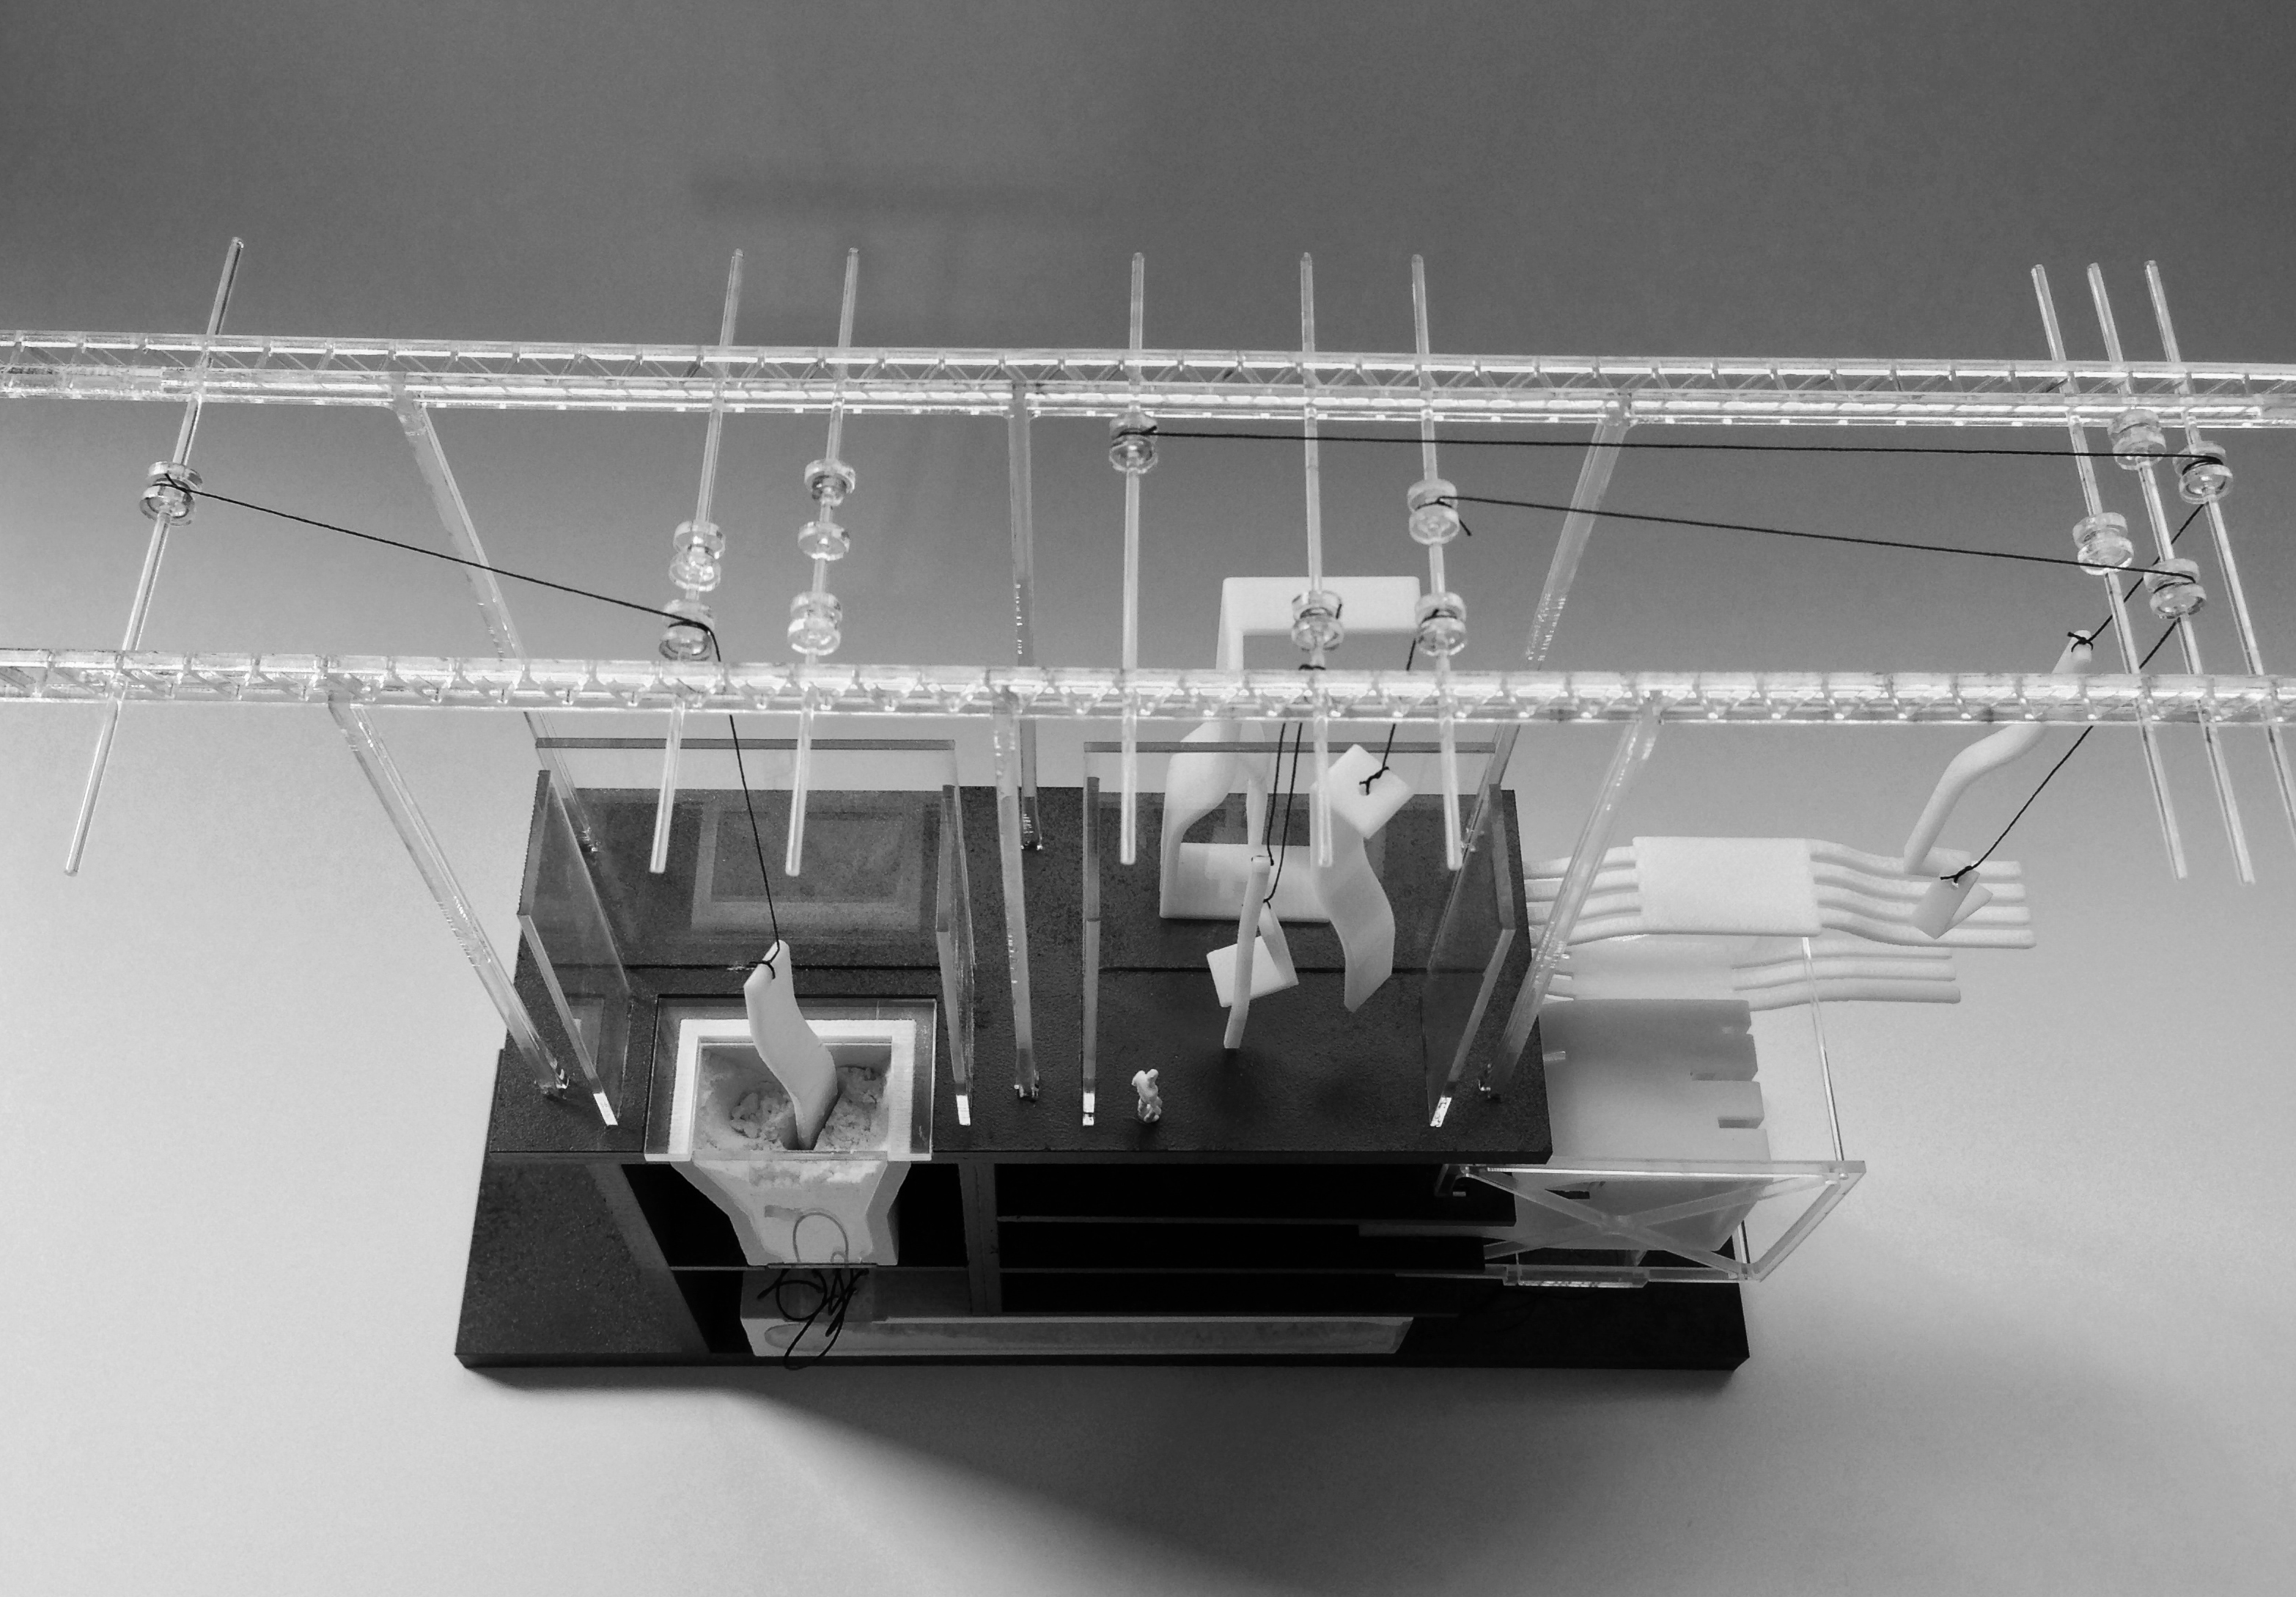
The scaffold construction that makes up the bulk of the design was represented by engraving the framework on acrylic sheeting and rubbing in acrylic paint to the define the details. This effect is much more efficient that attempting to construct each scaffold piece or laser cutting the frame at this scale.
Laura Minca  (6) Laura Minca  (8) Laura Minca  (9)
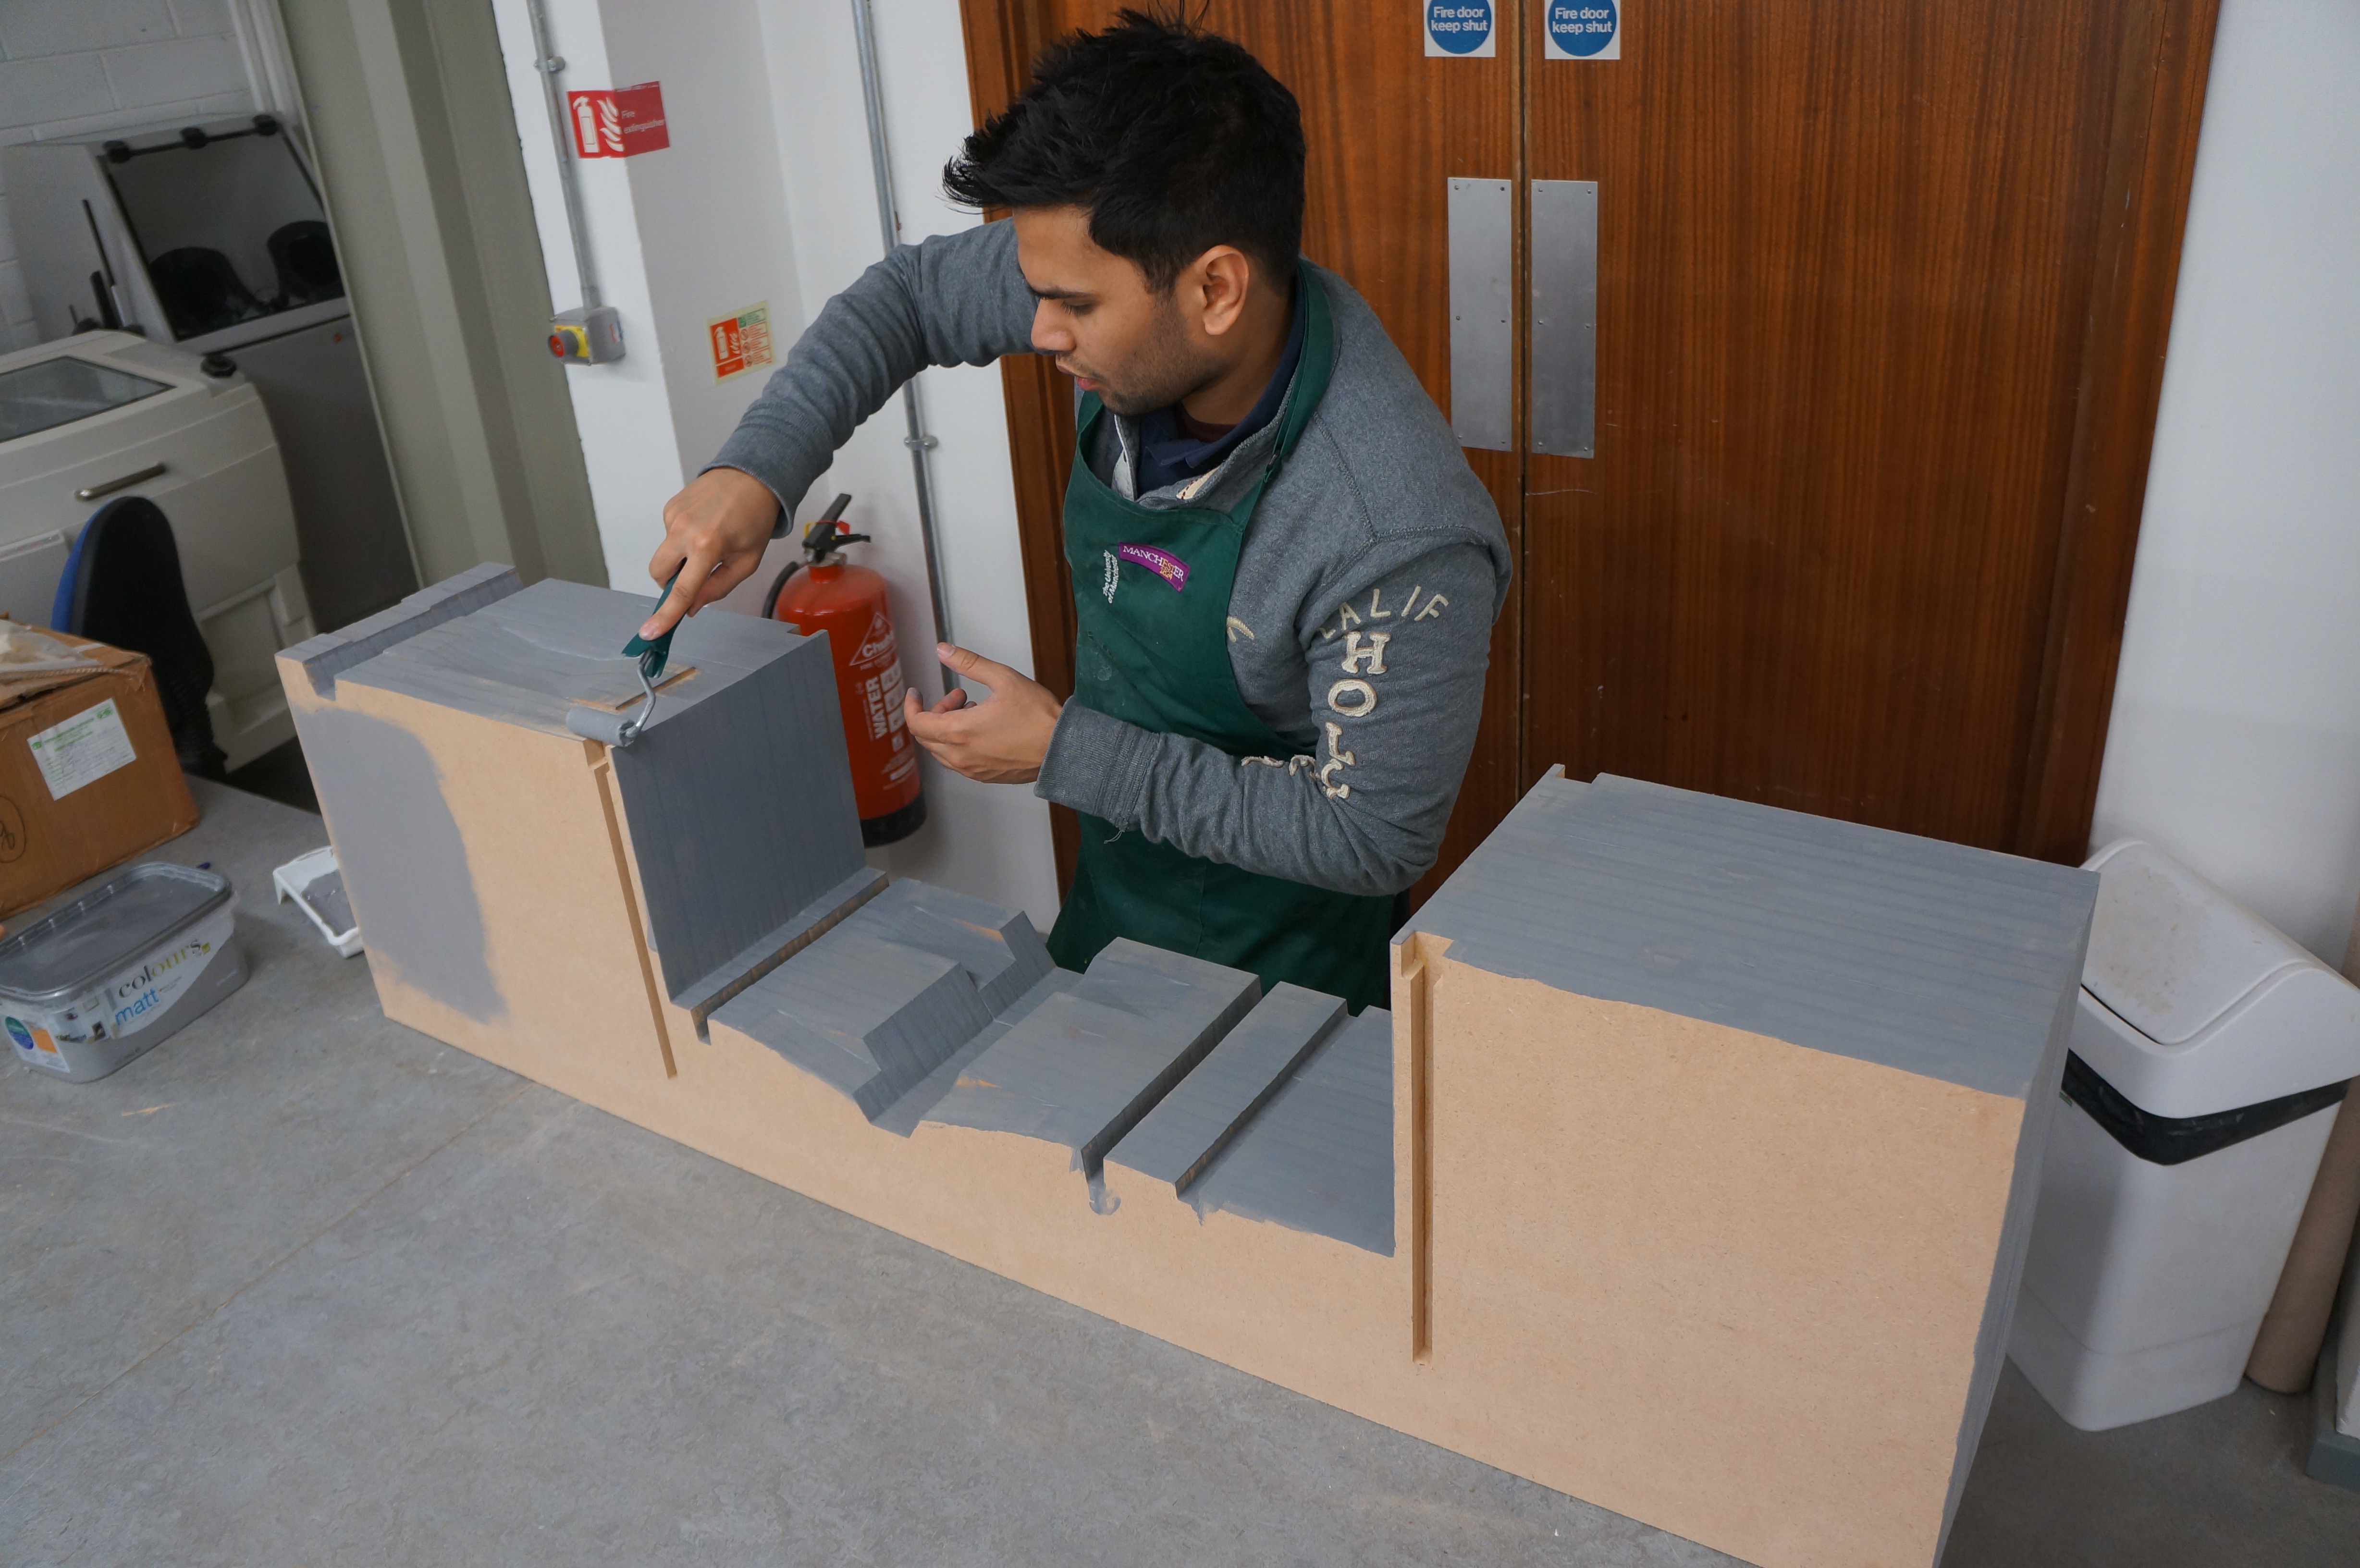
Laura used wood stain to define the site from the surrounding area. this was achieved by masking the edges and applying more coats of stain to darken her site footprint.

Laura Minca  (11) Laura Minca  (12) Laura Minca  (15) 
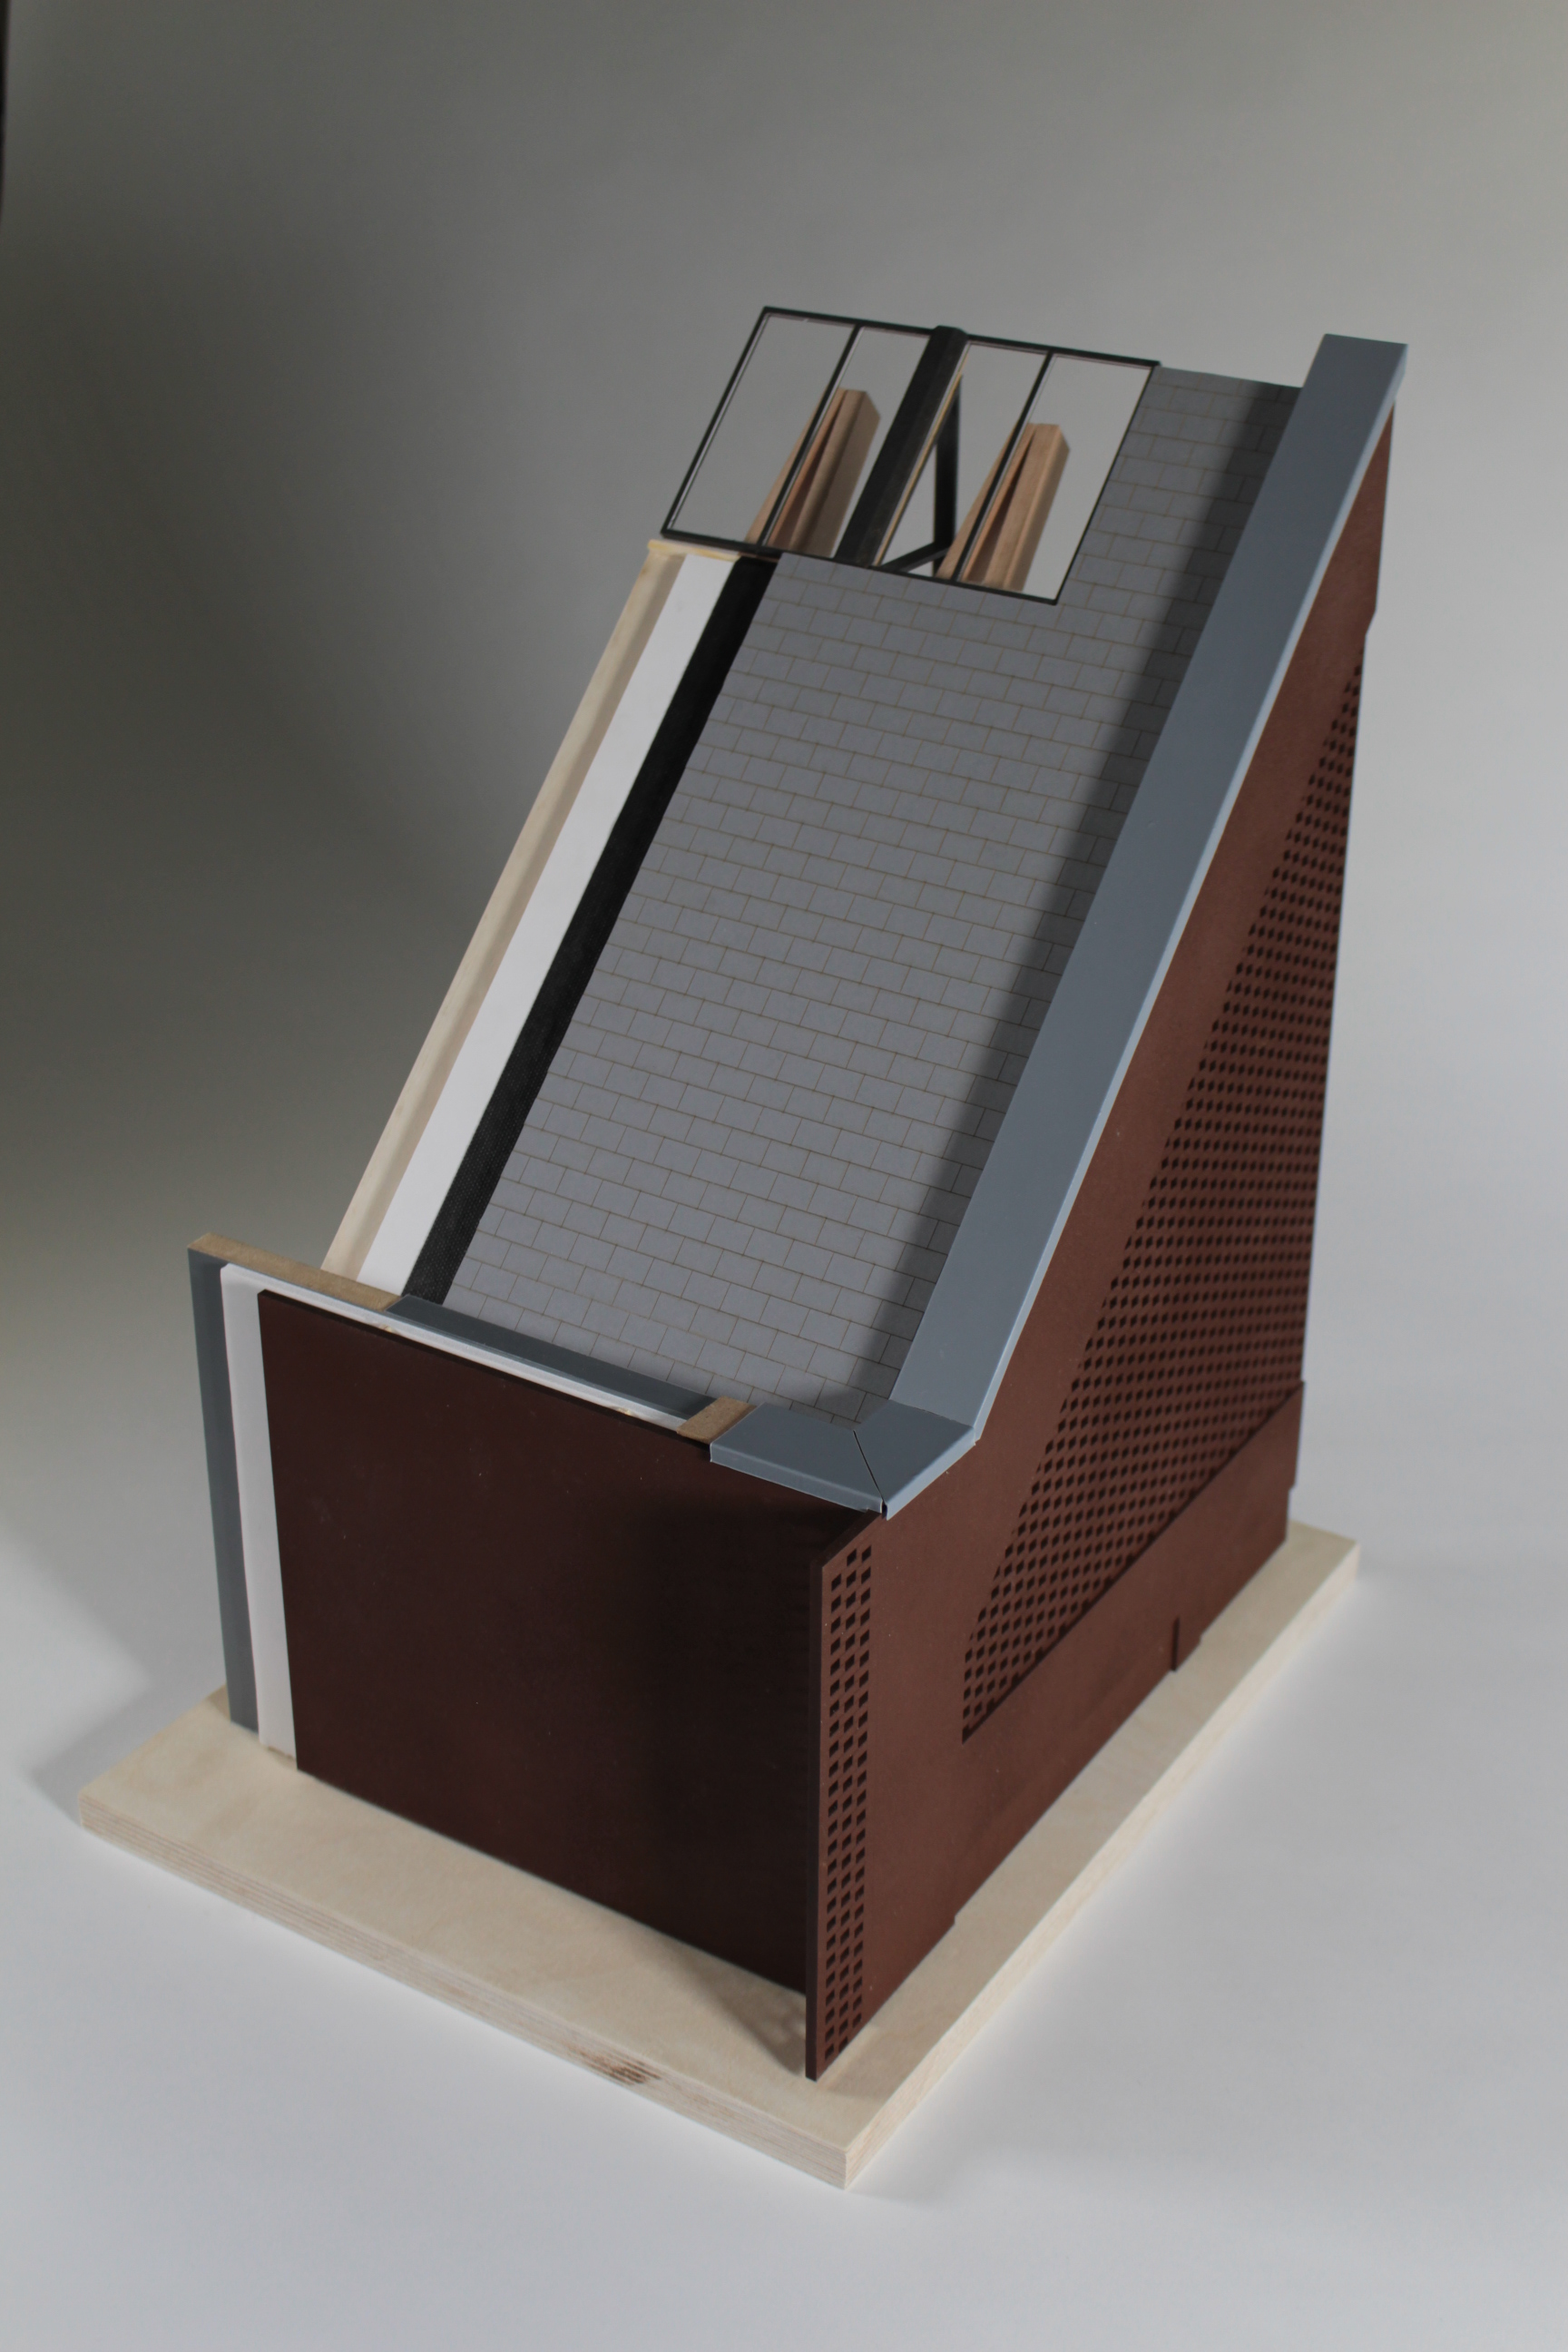
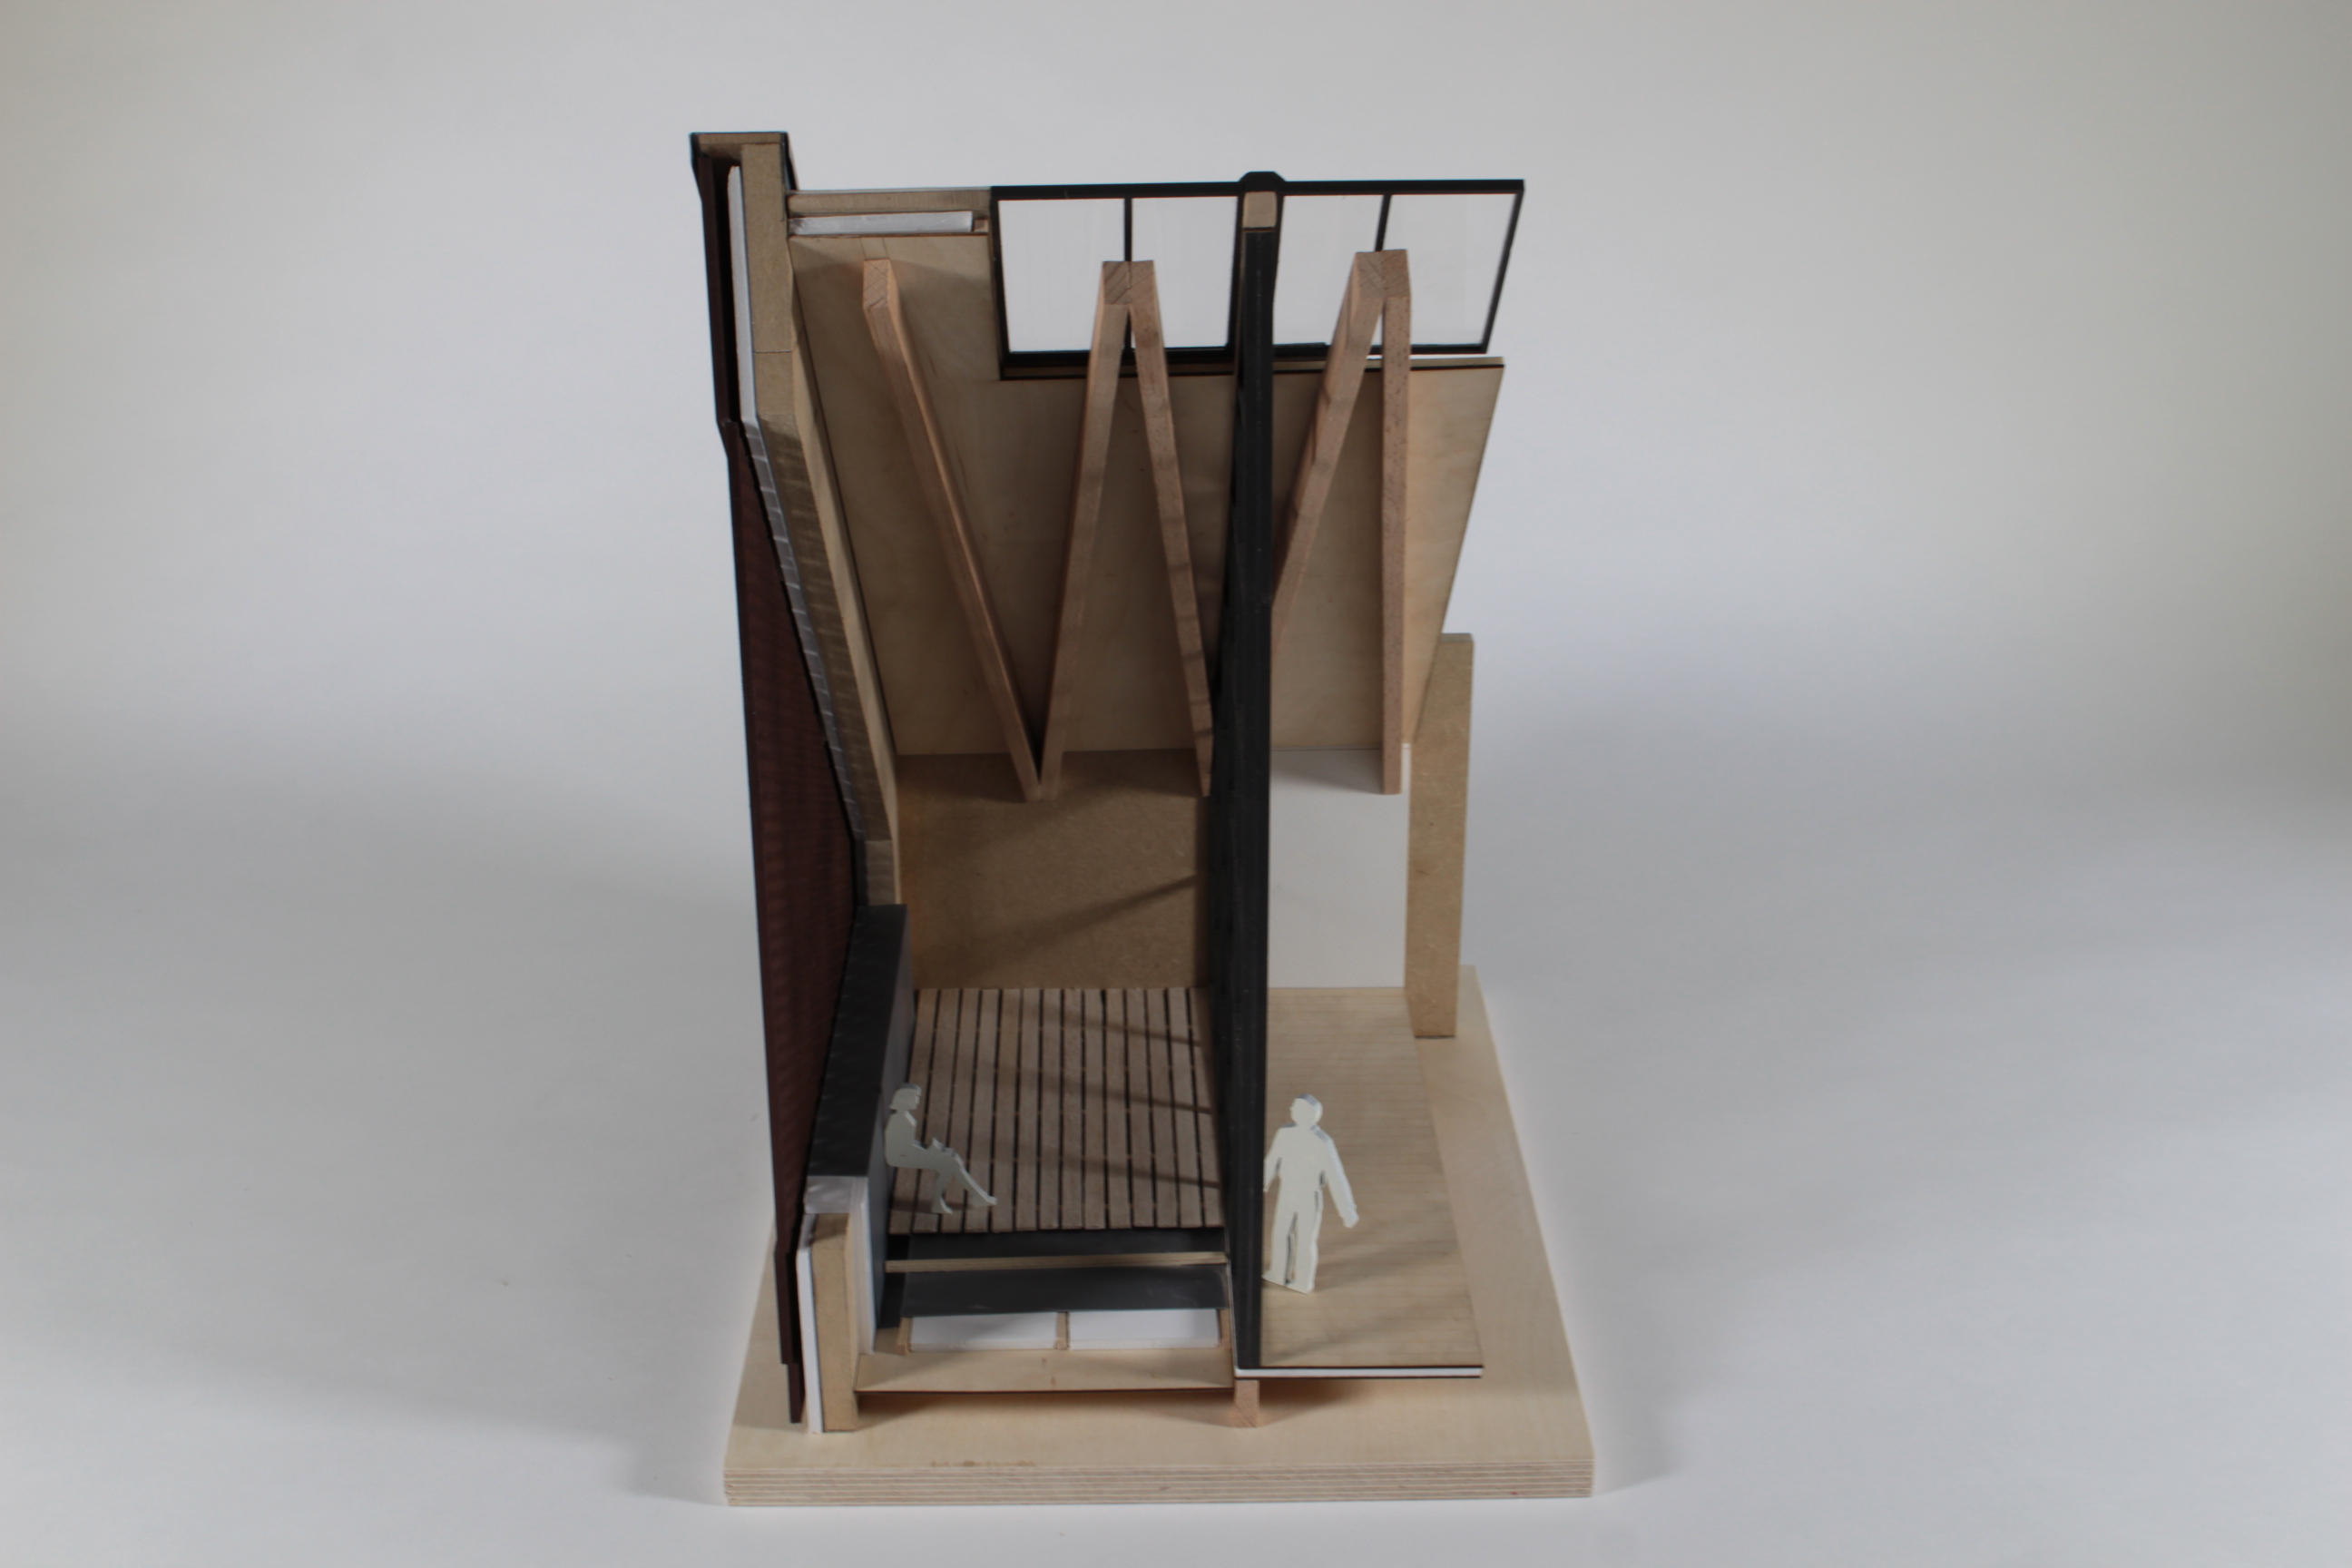
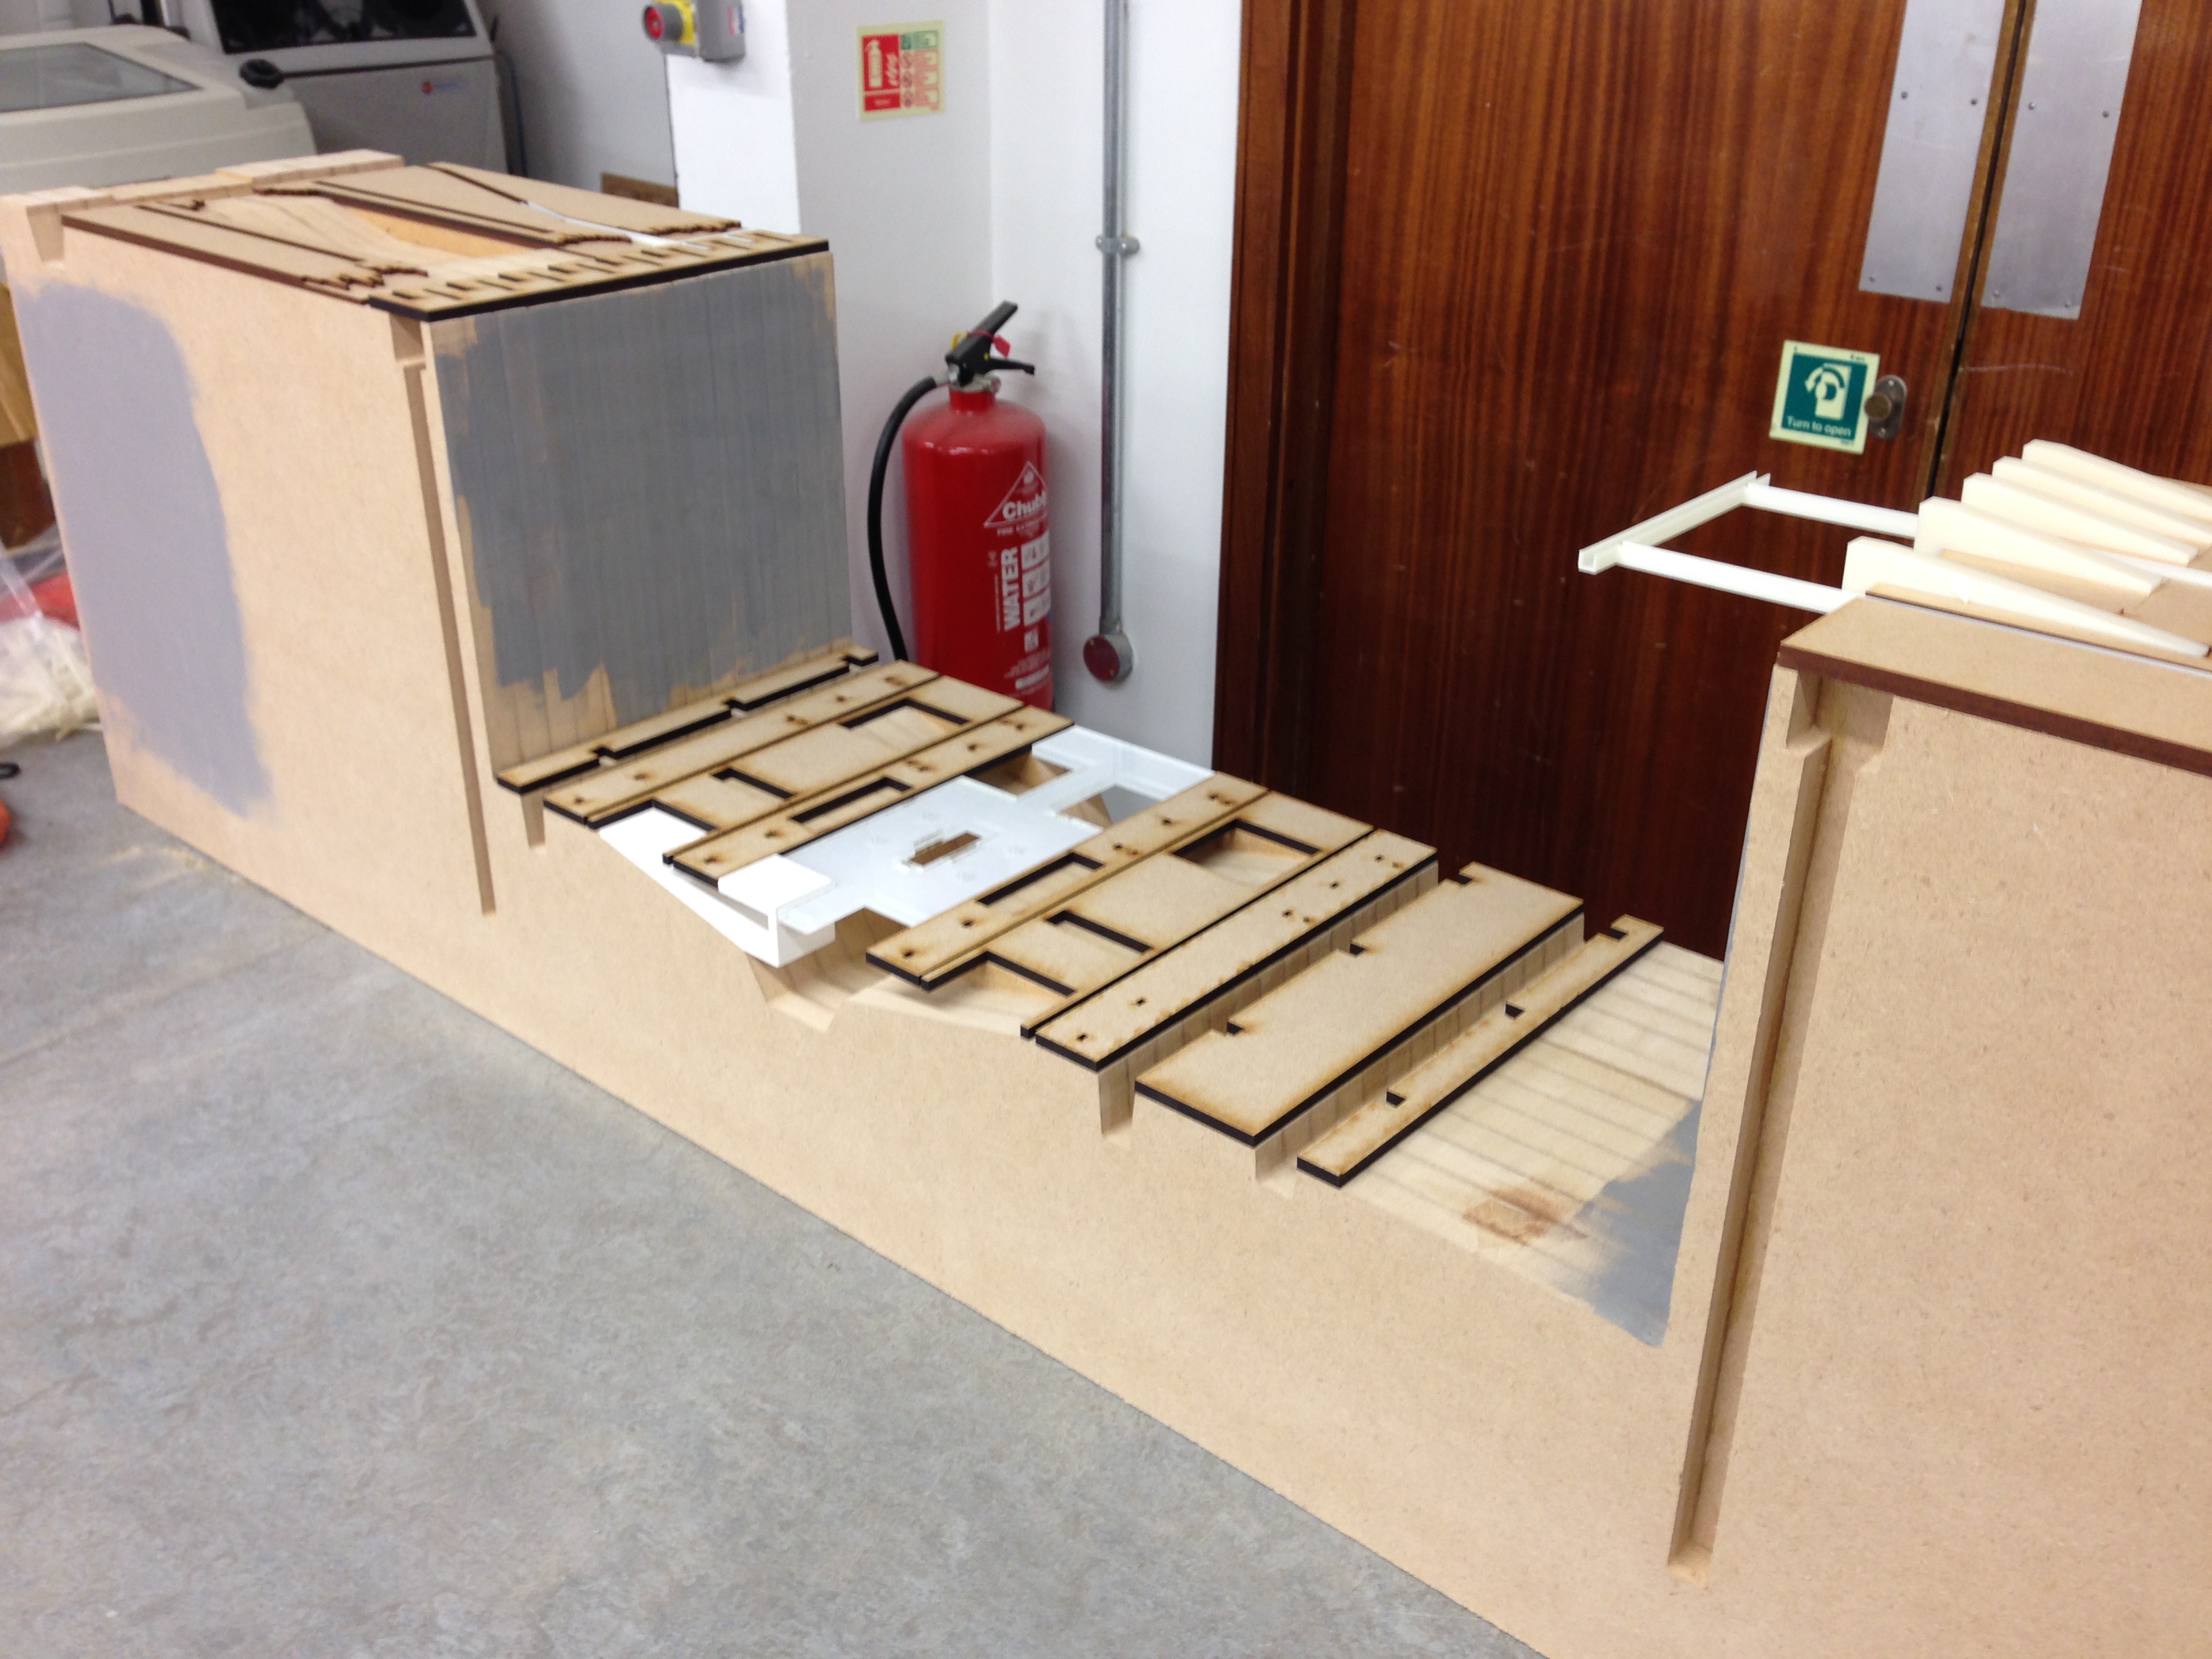
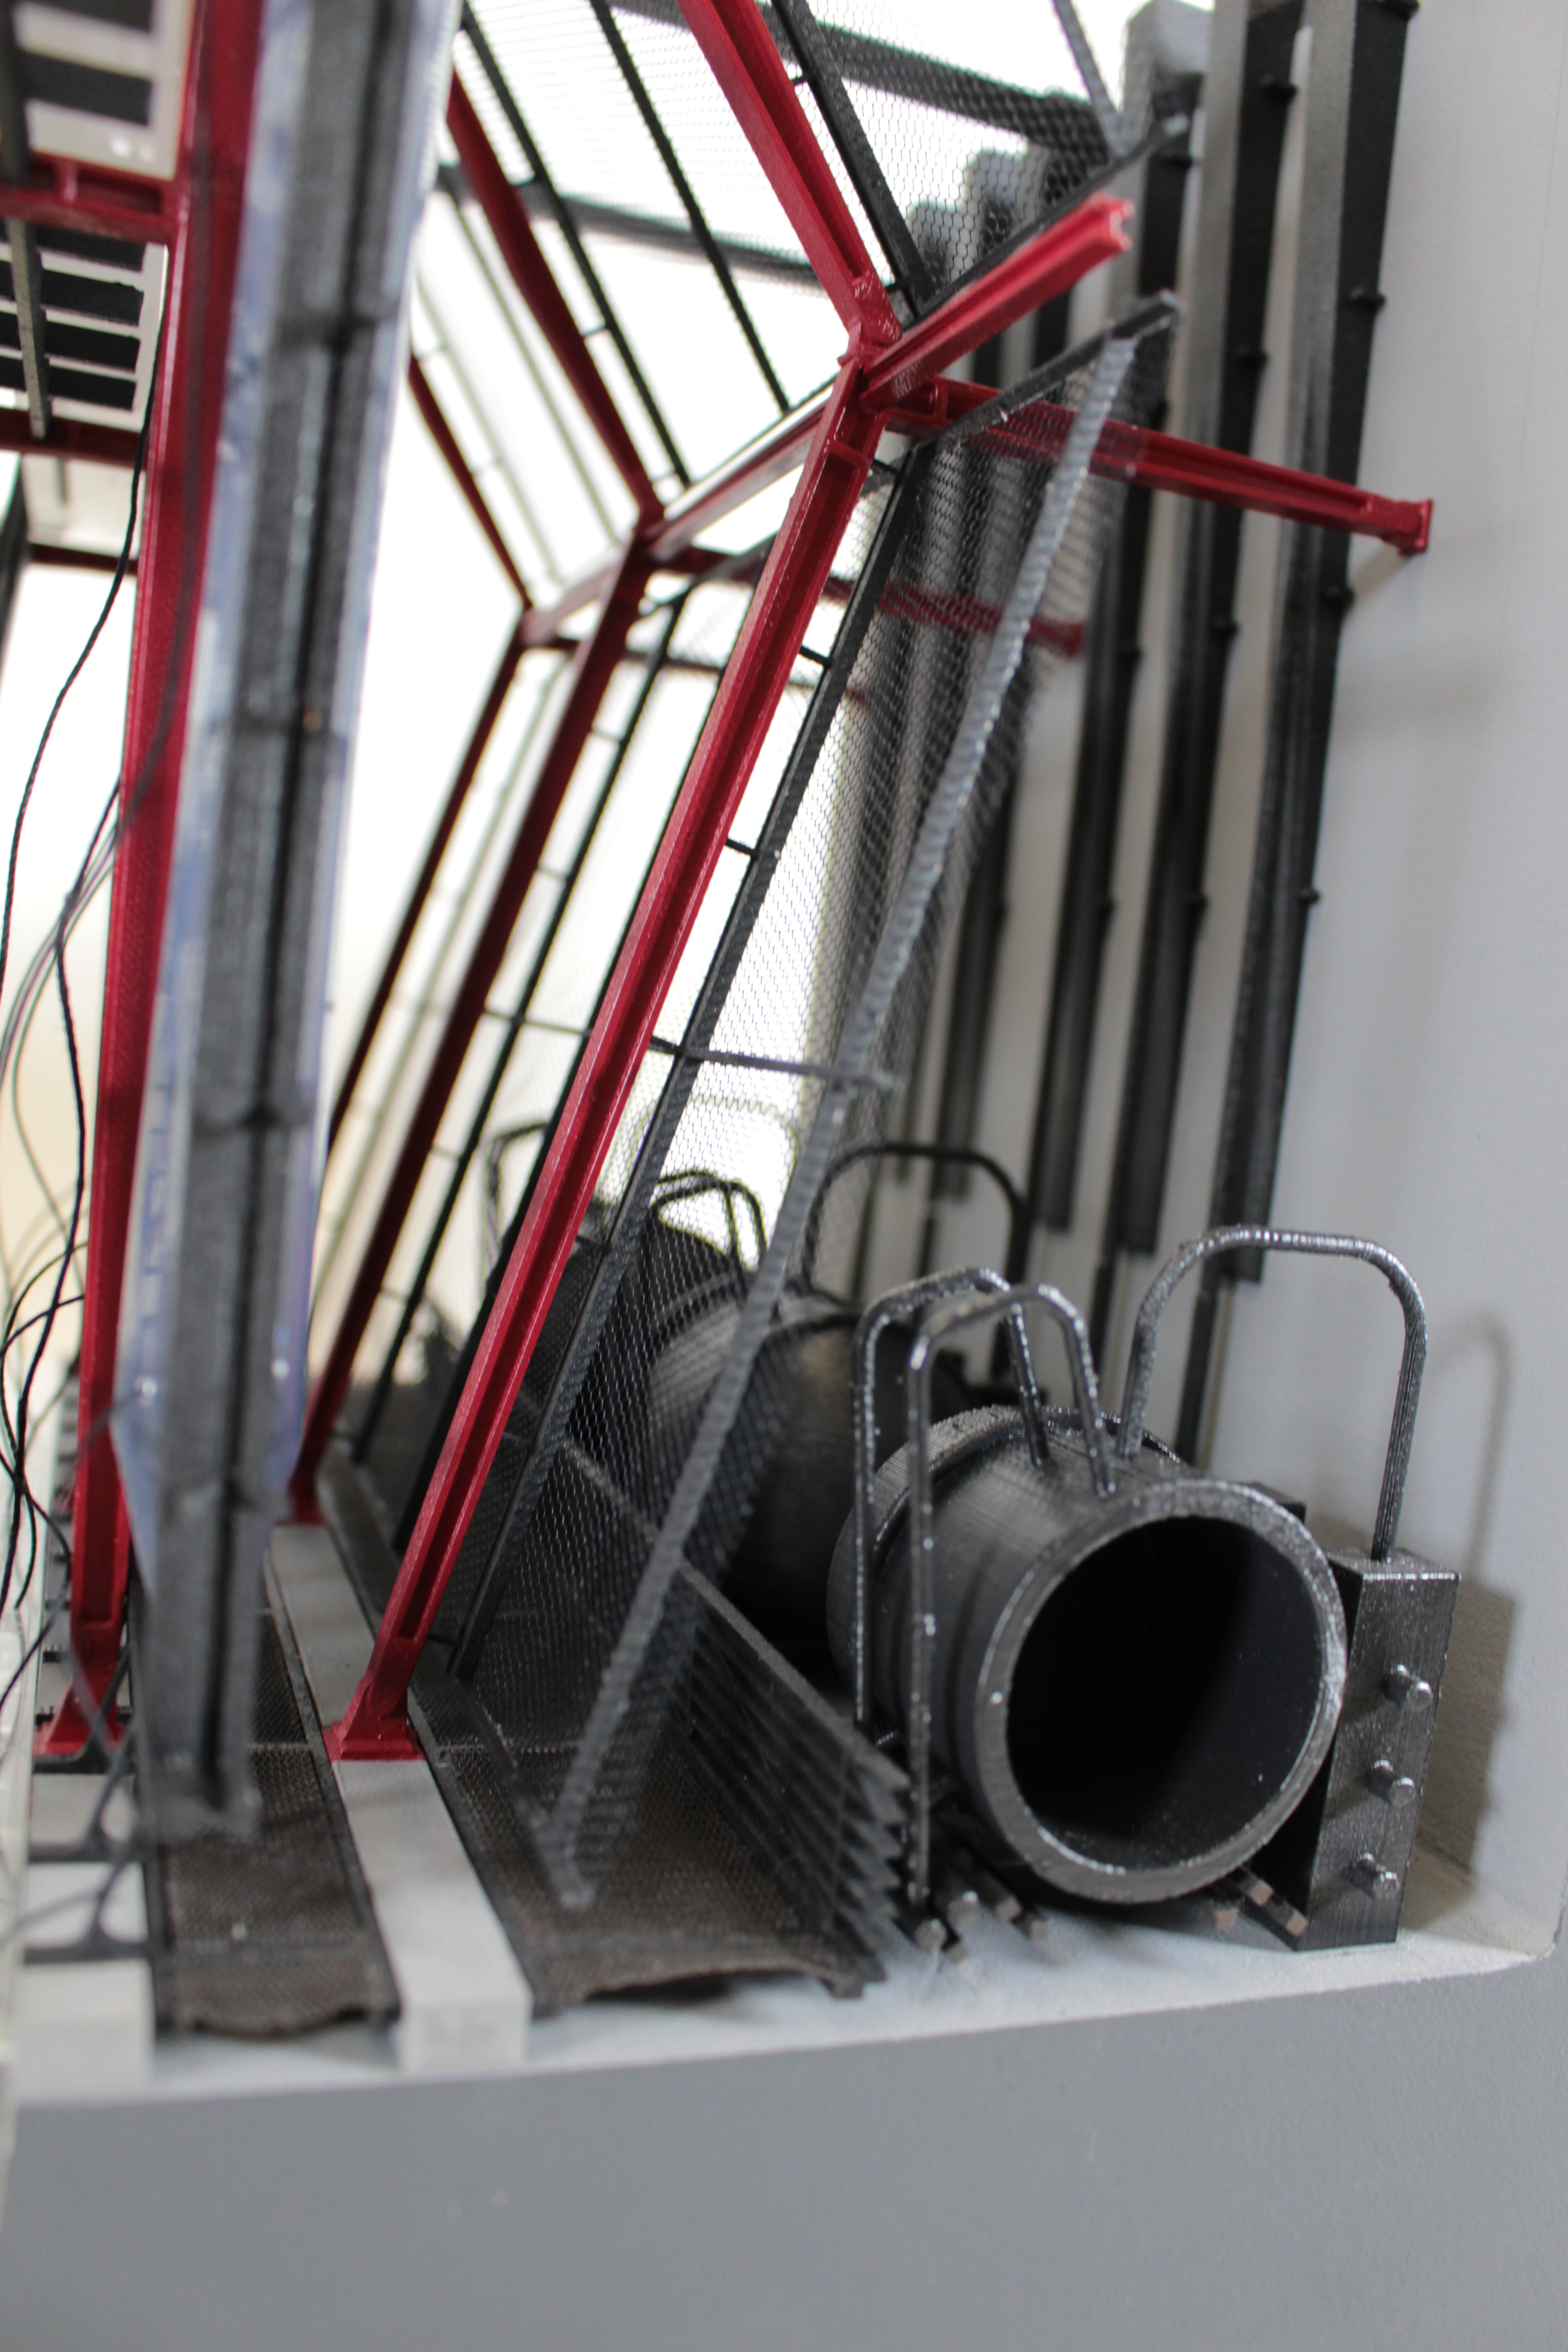
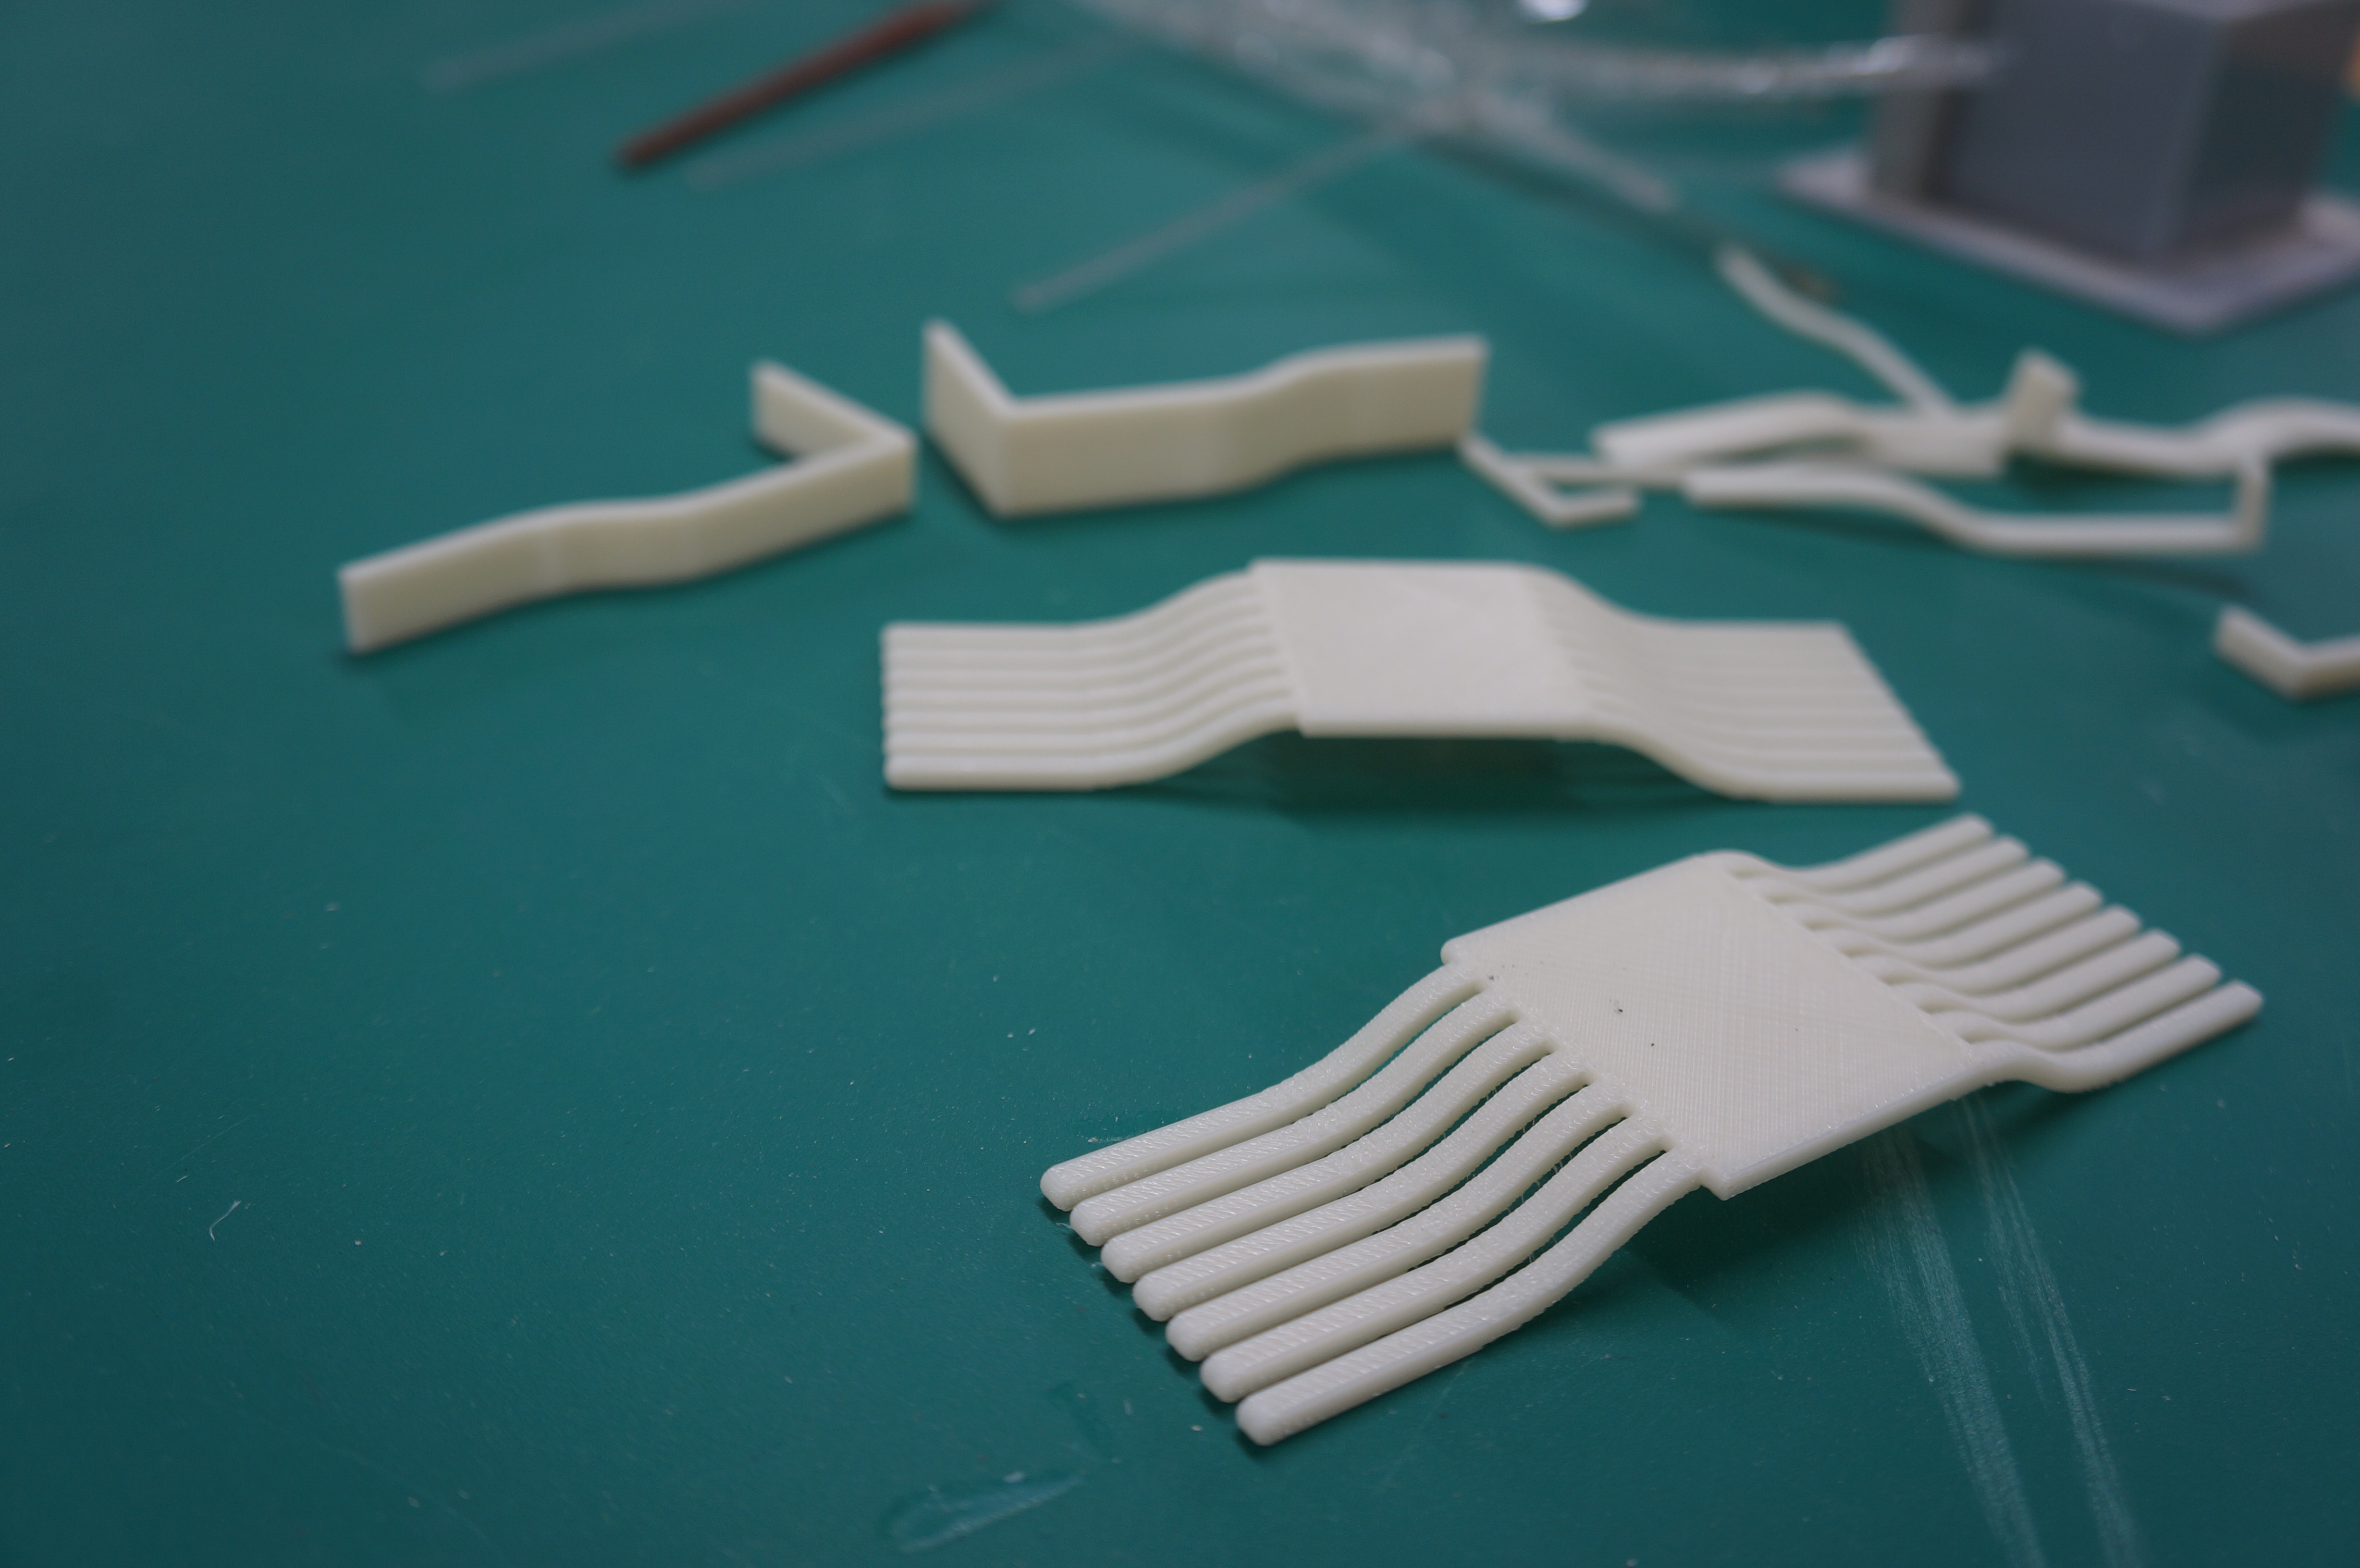
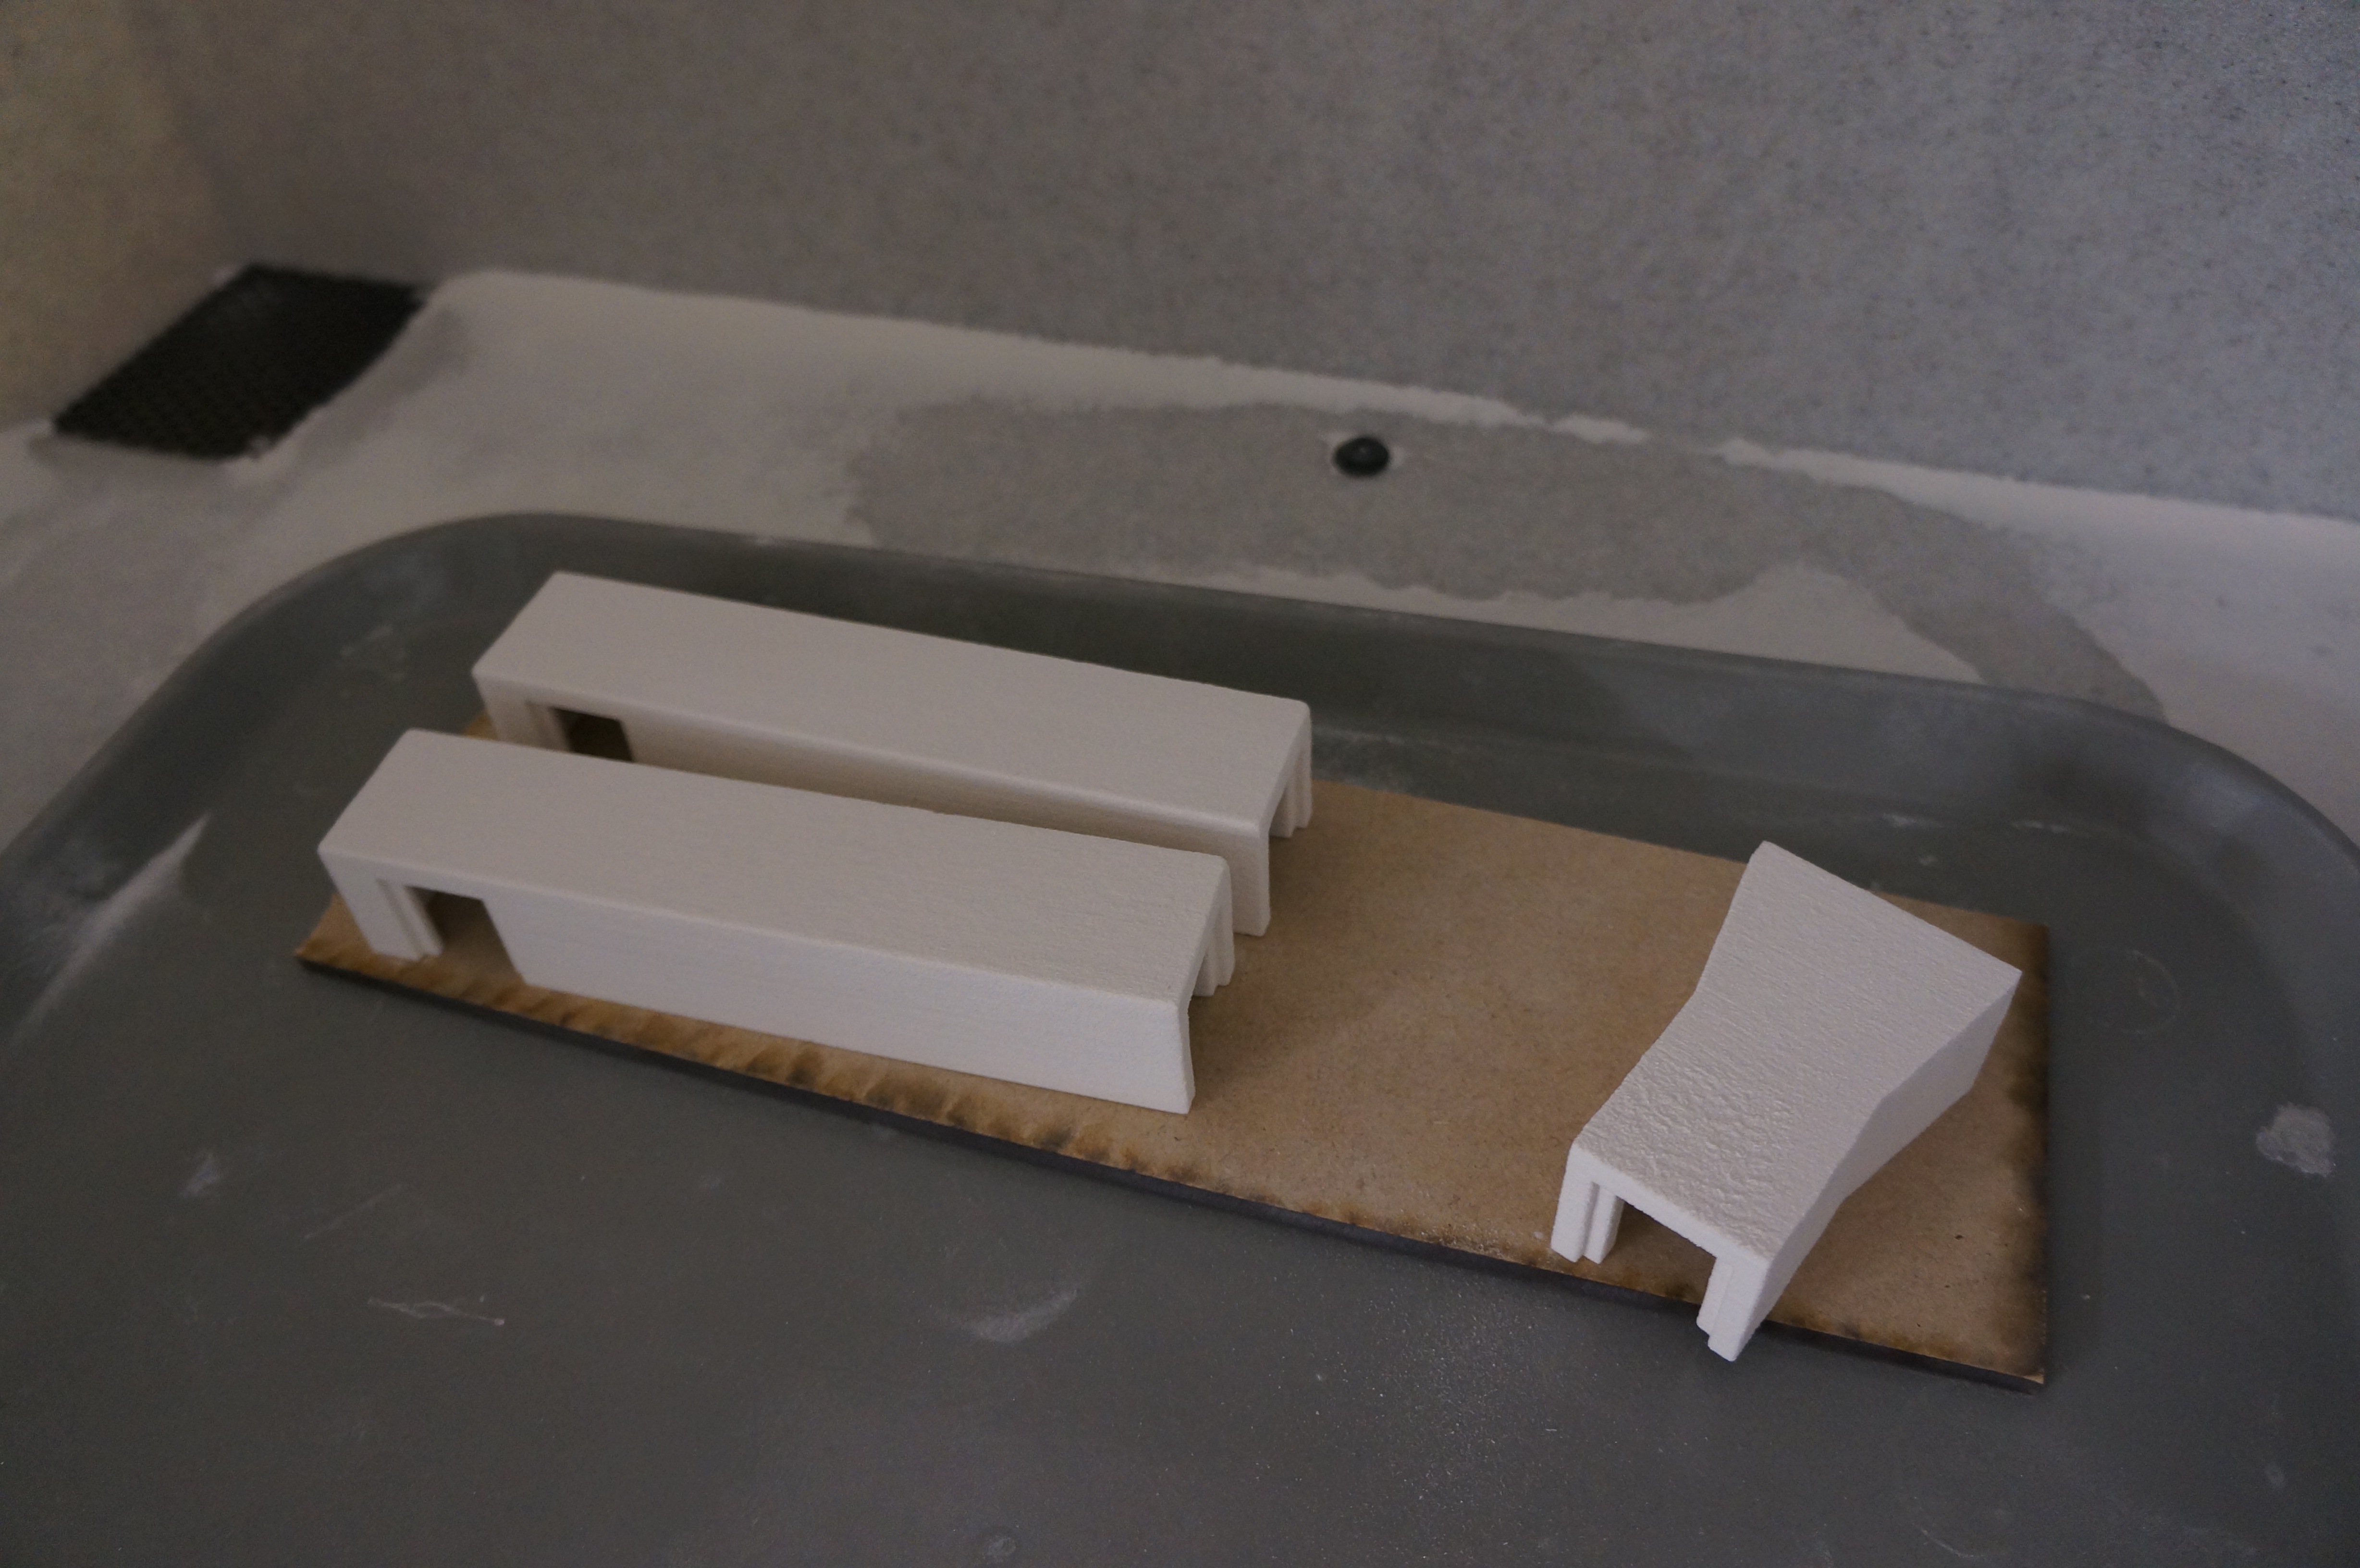
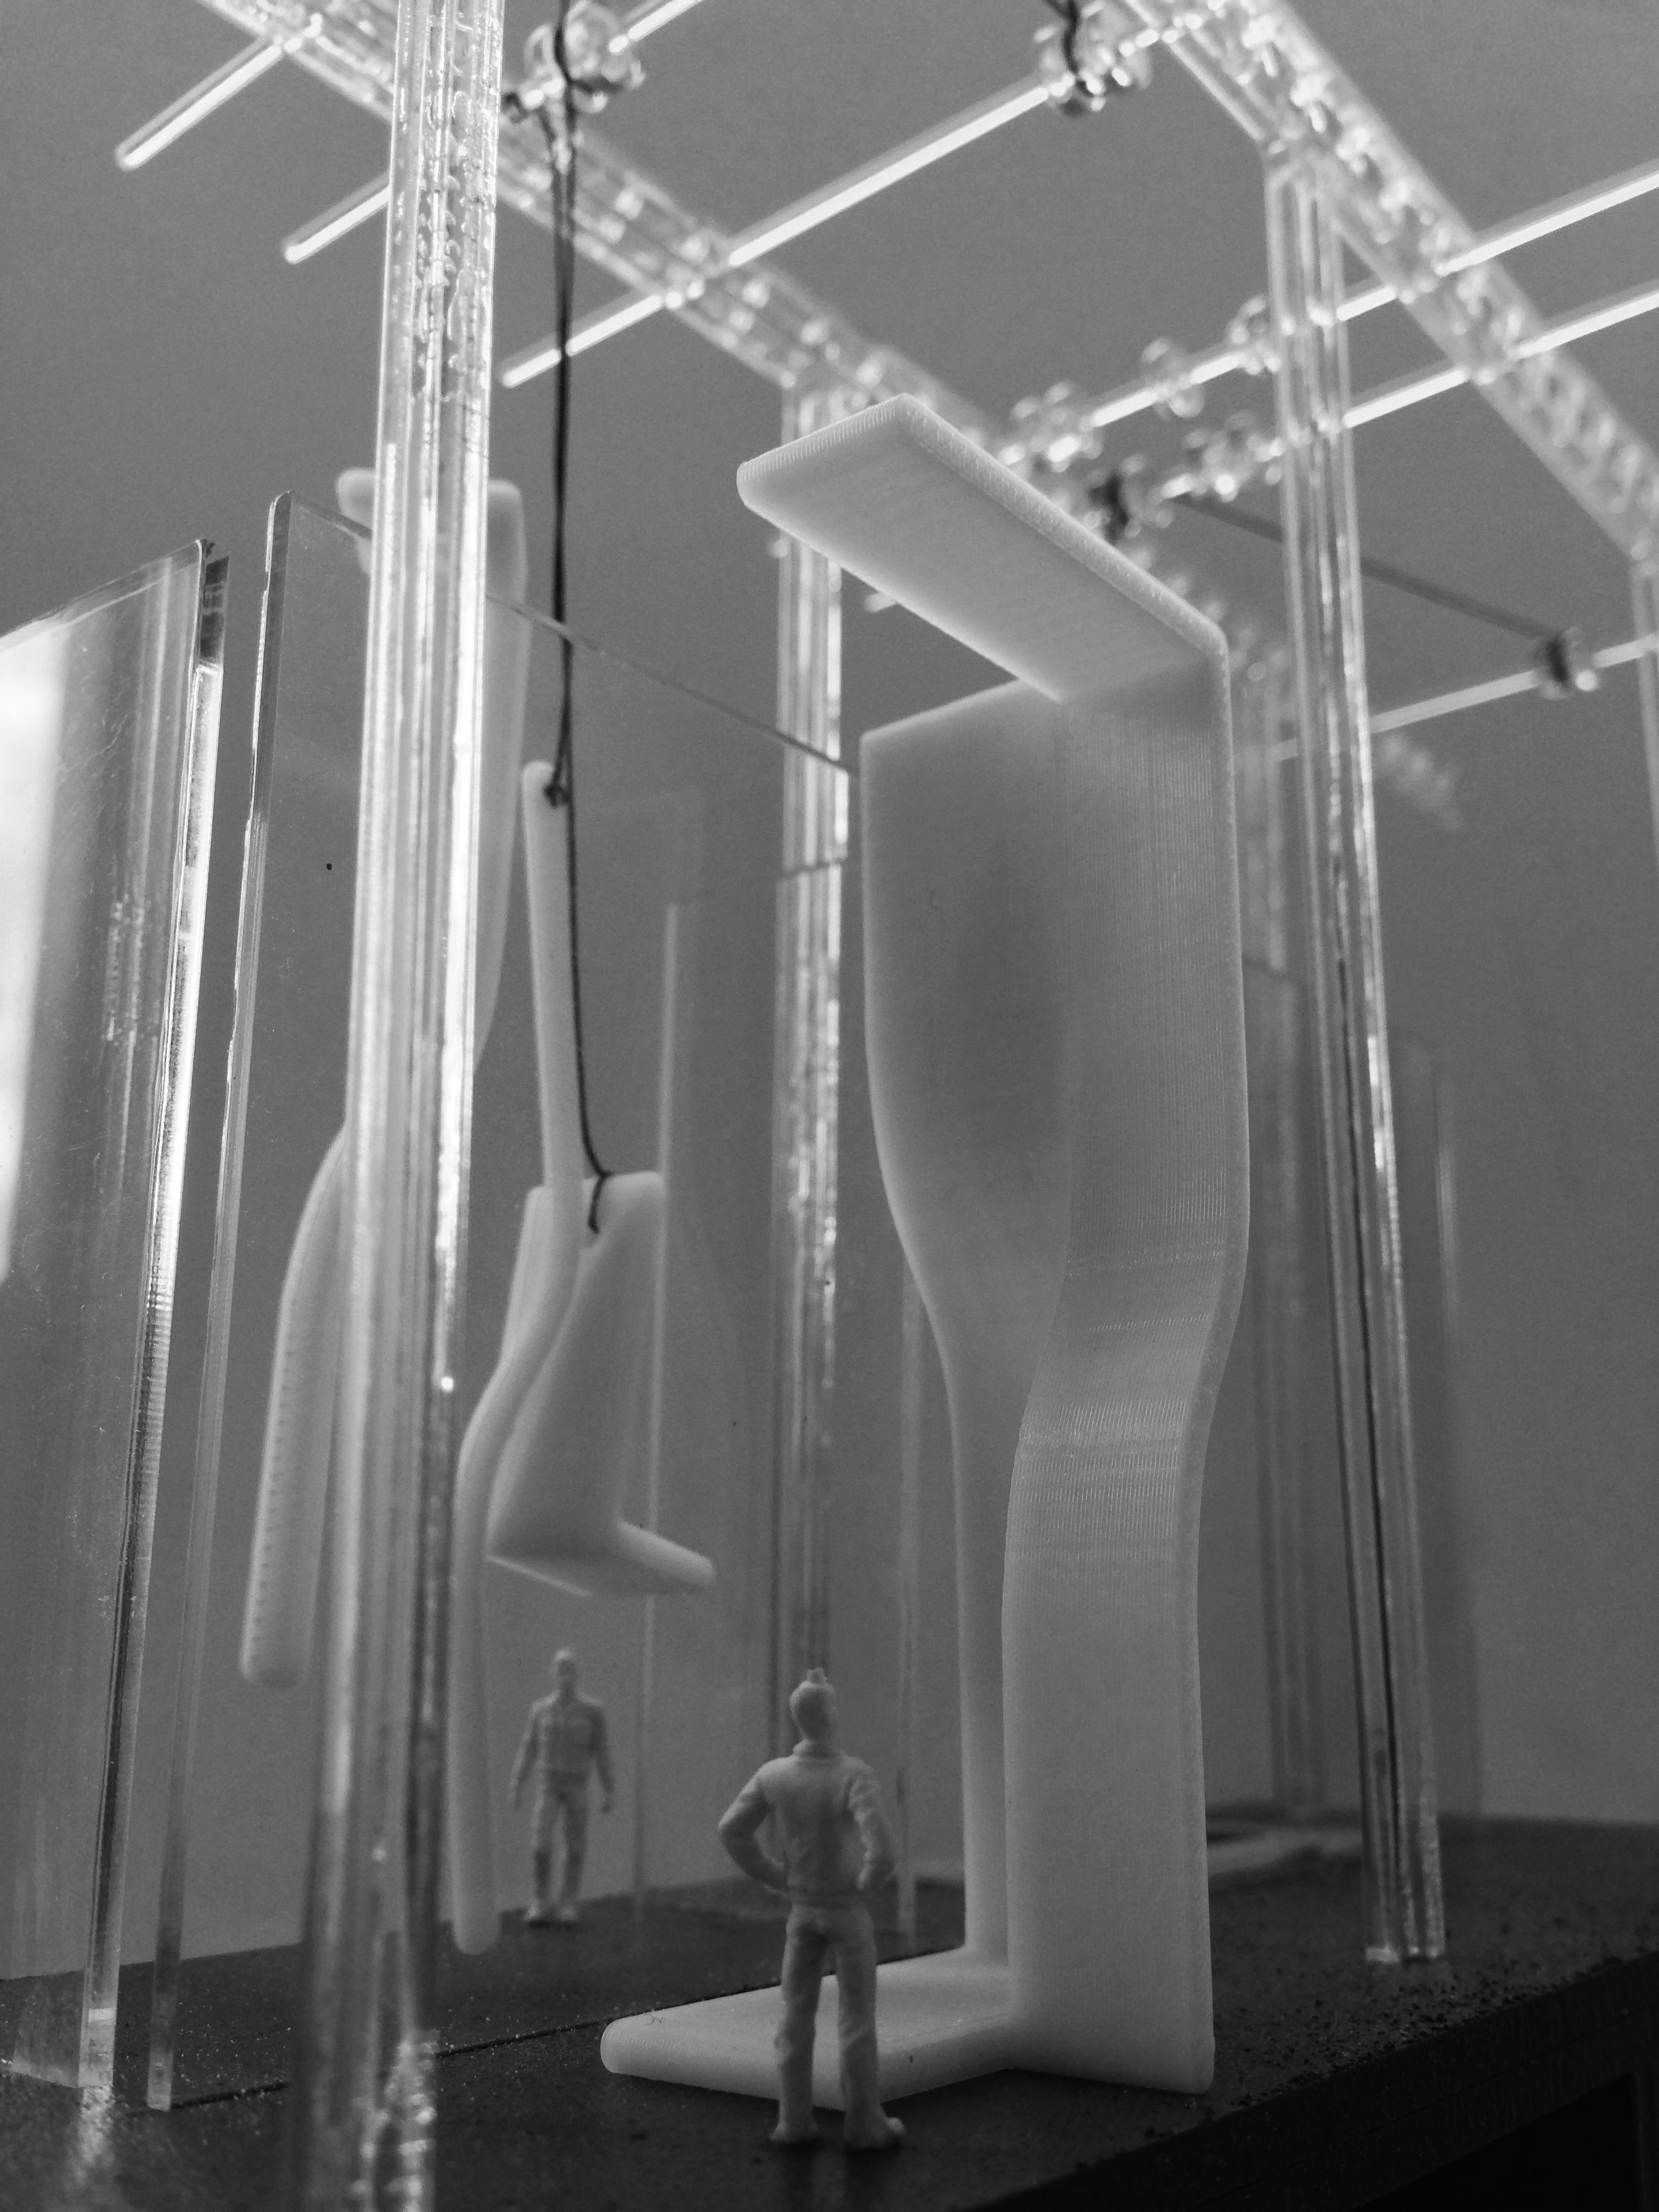
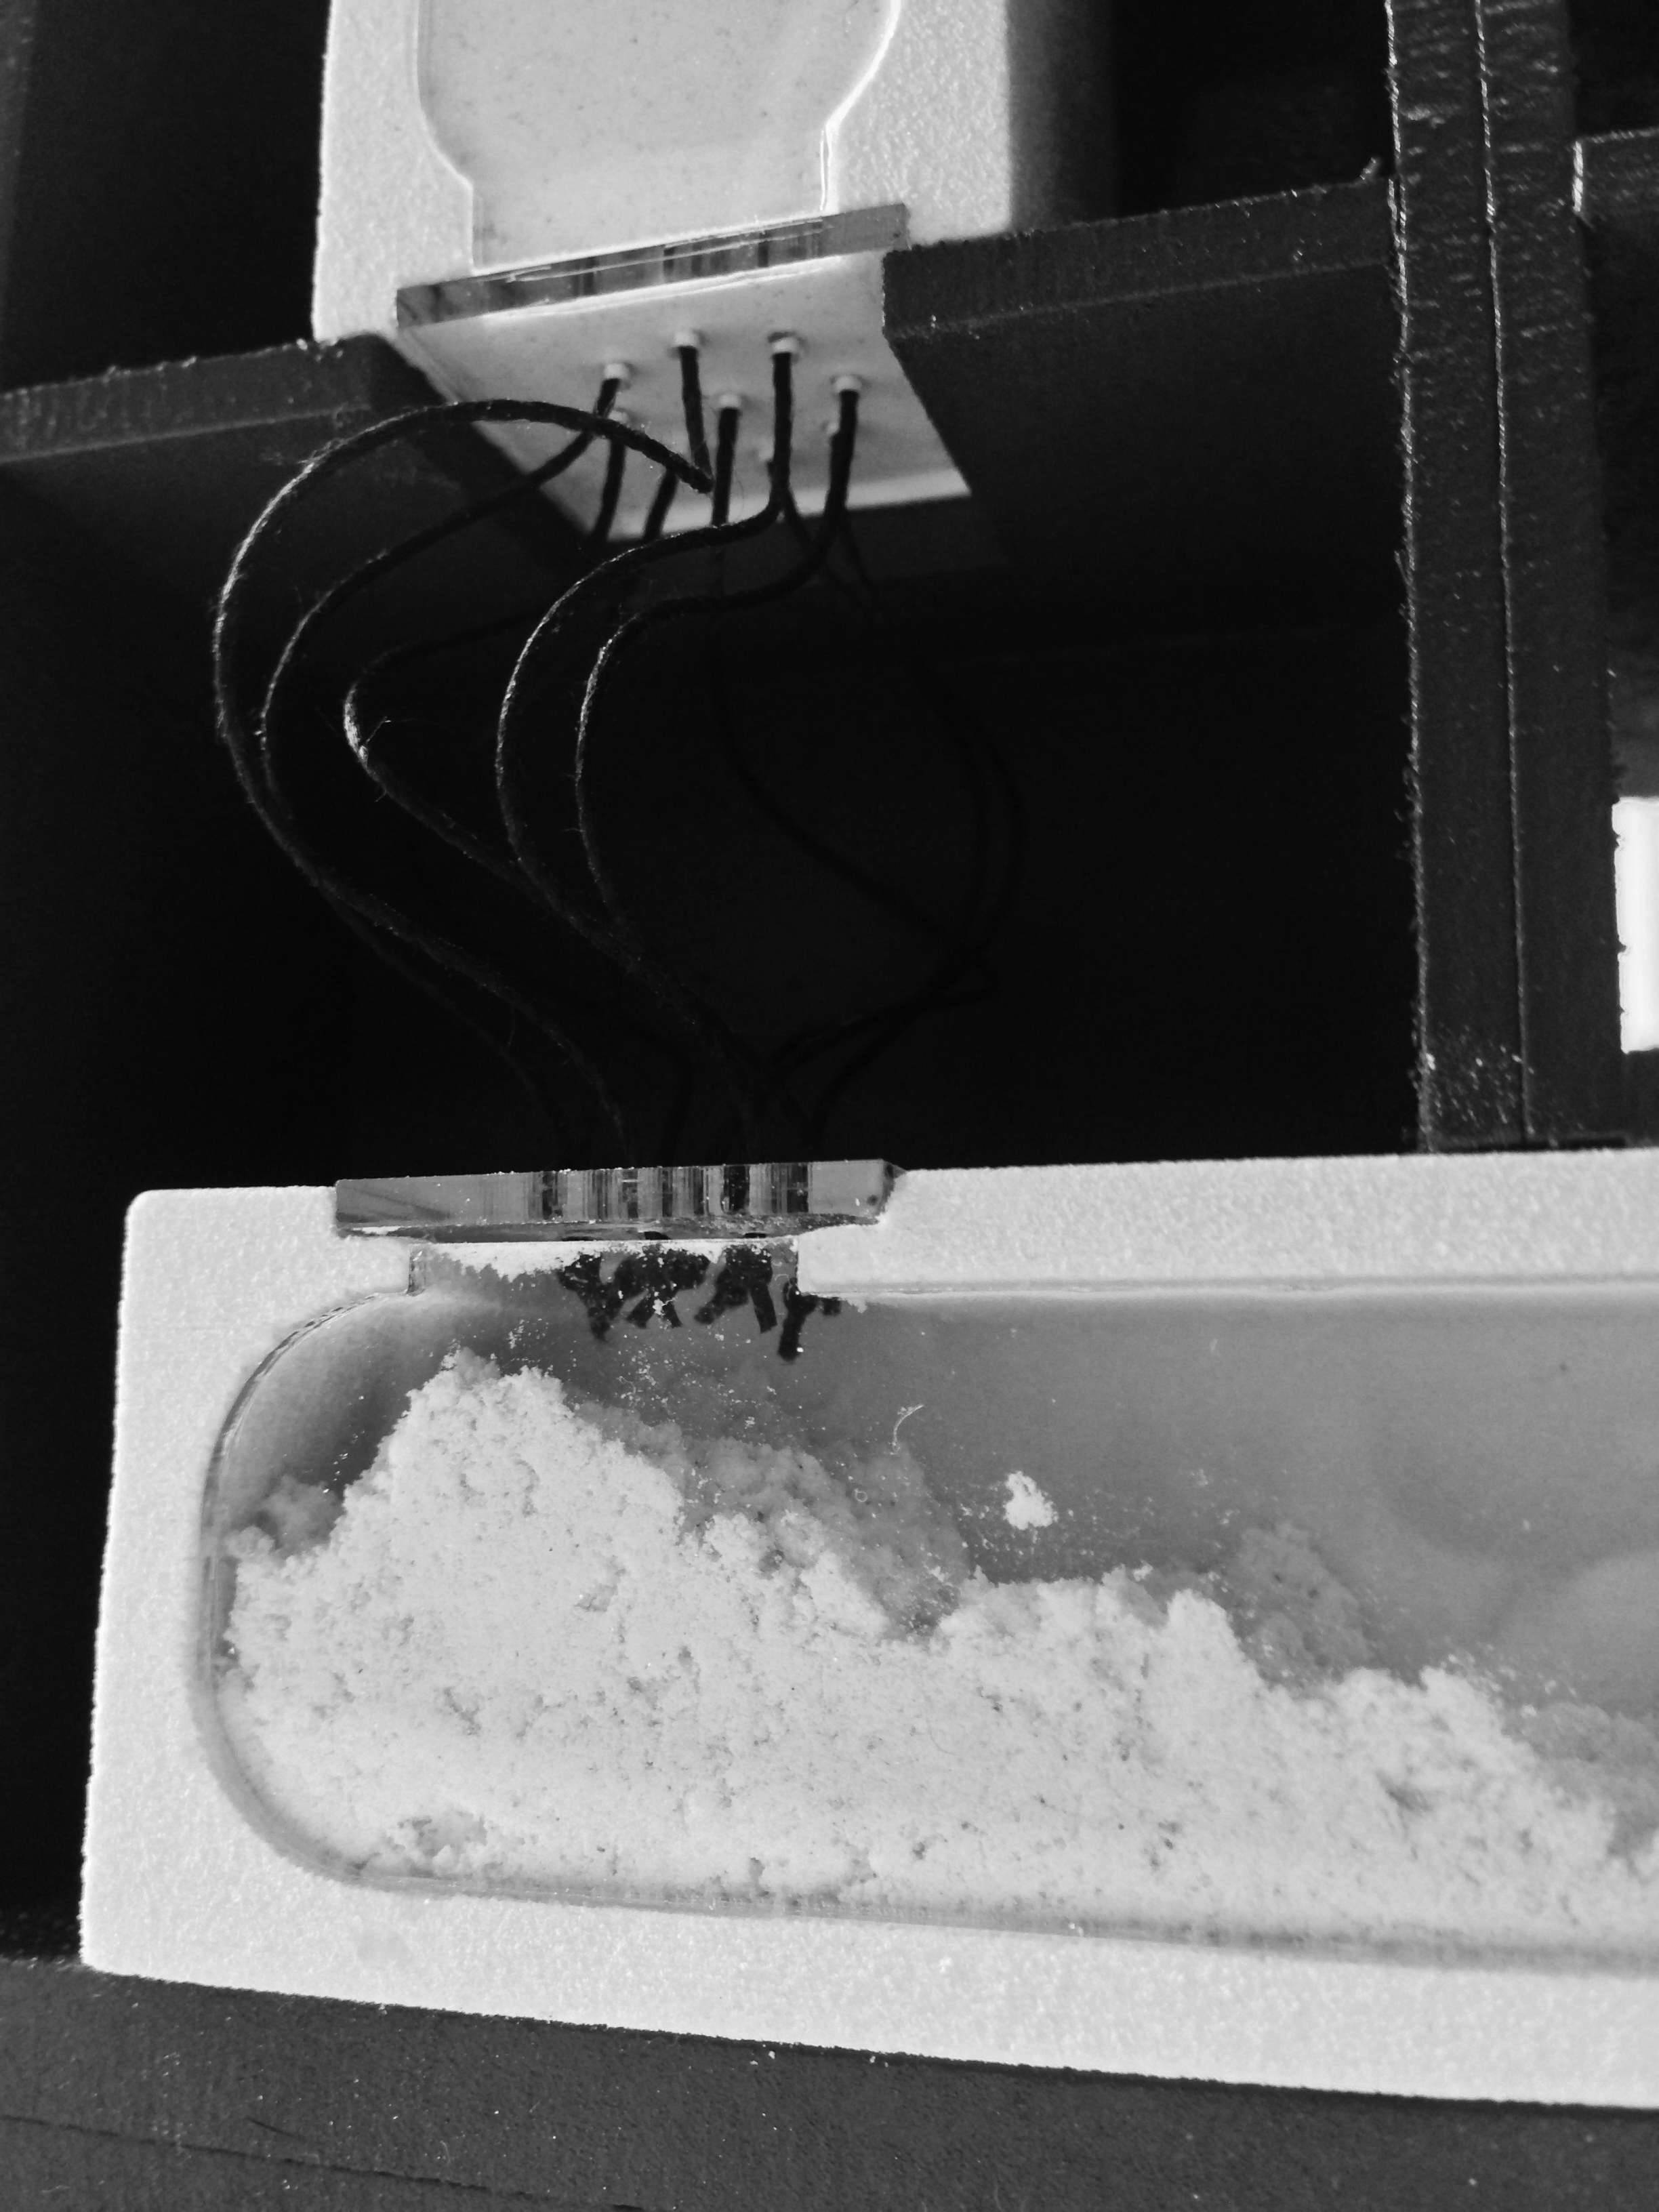
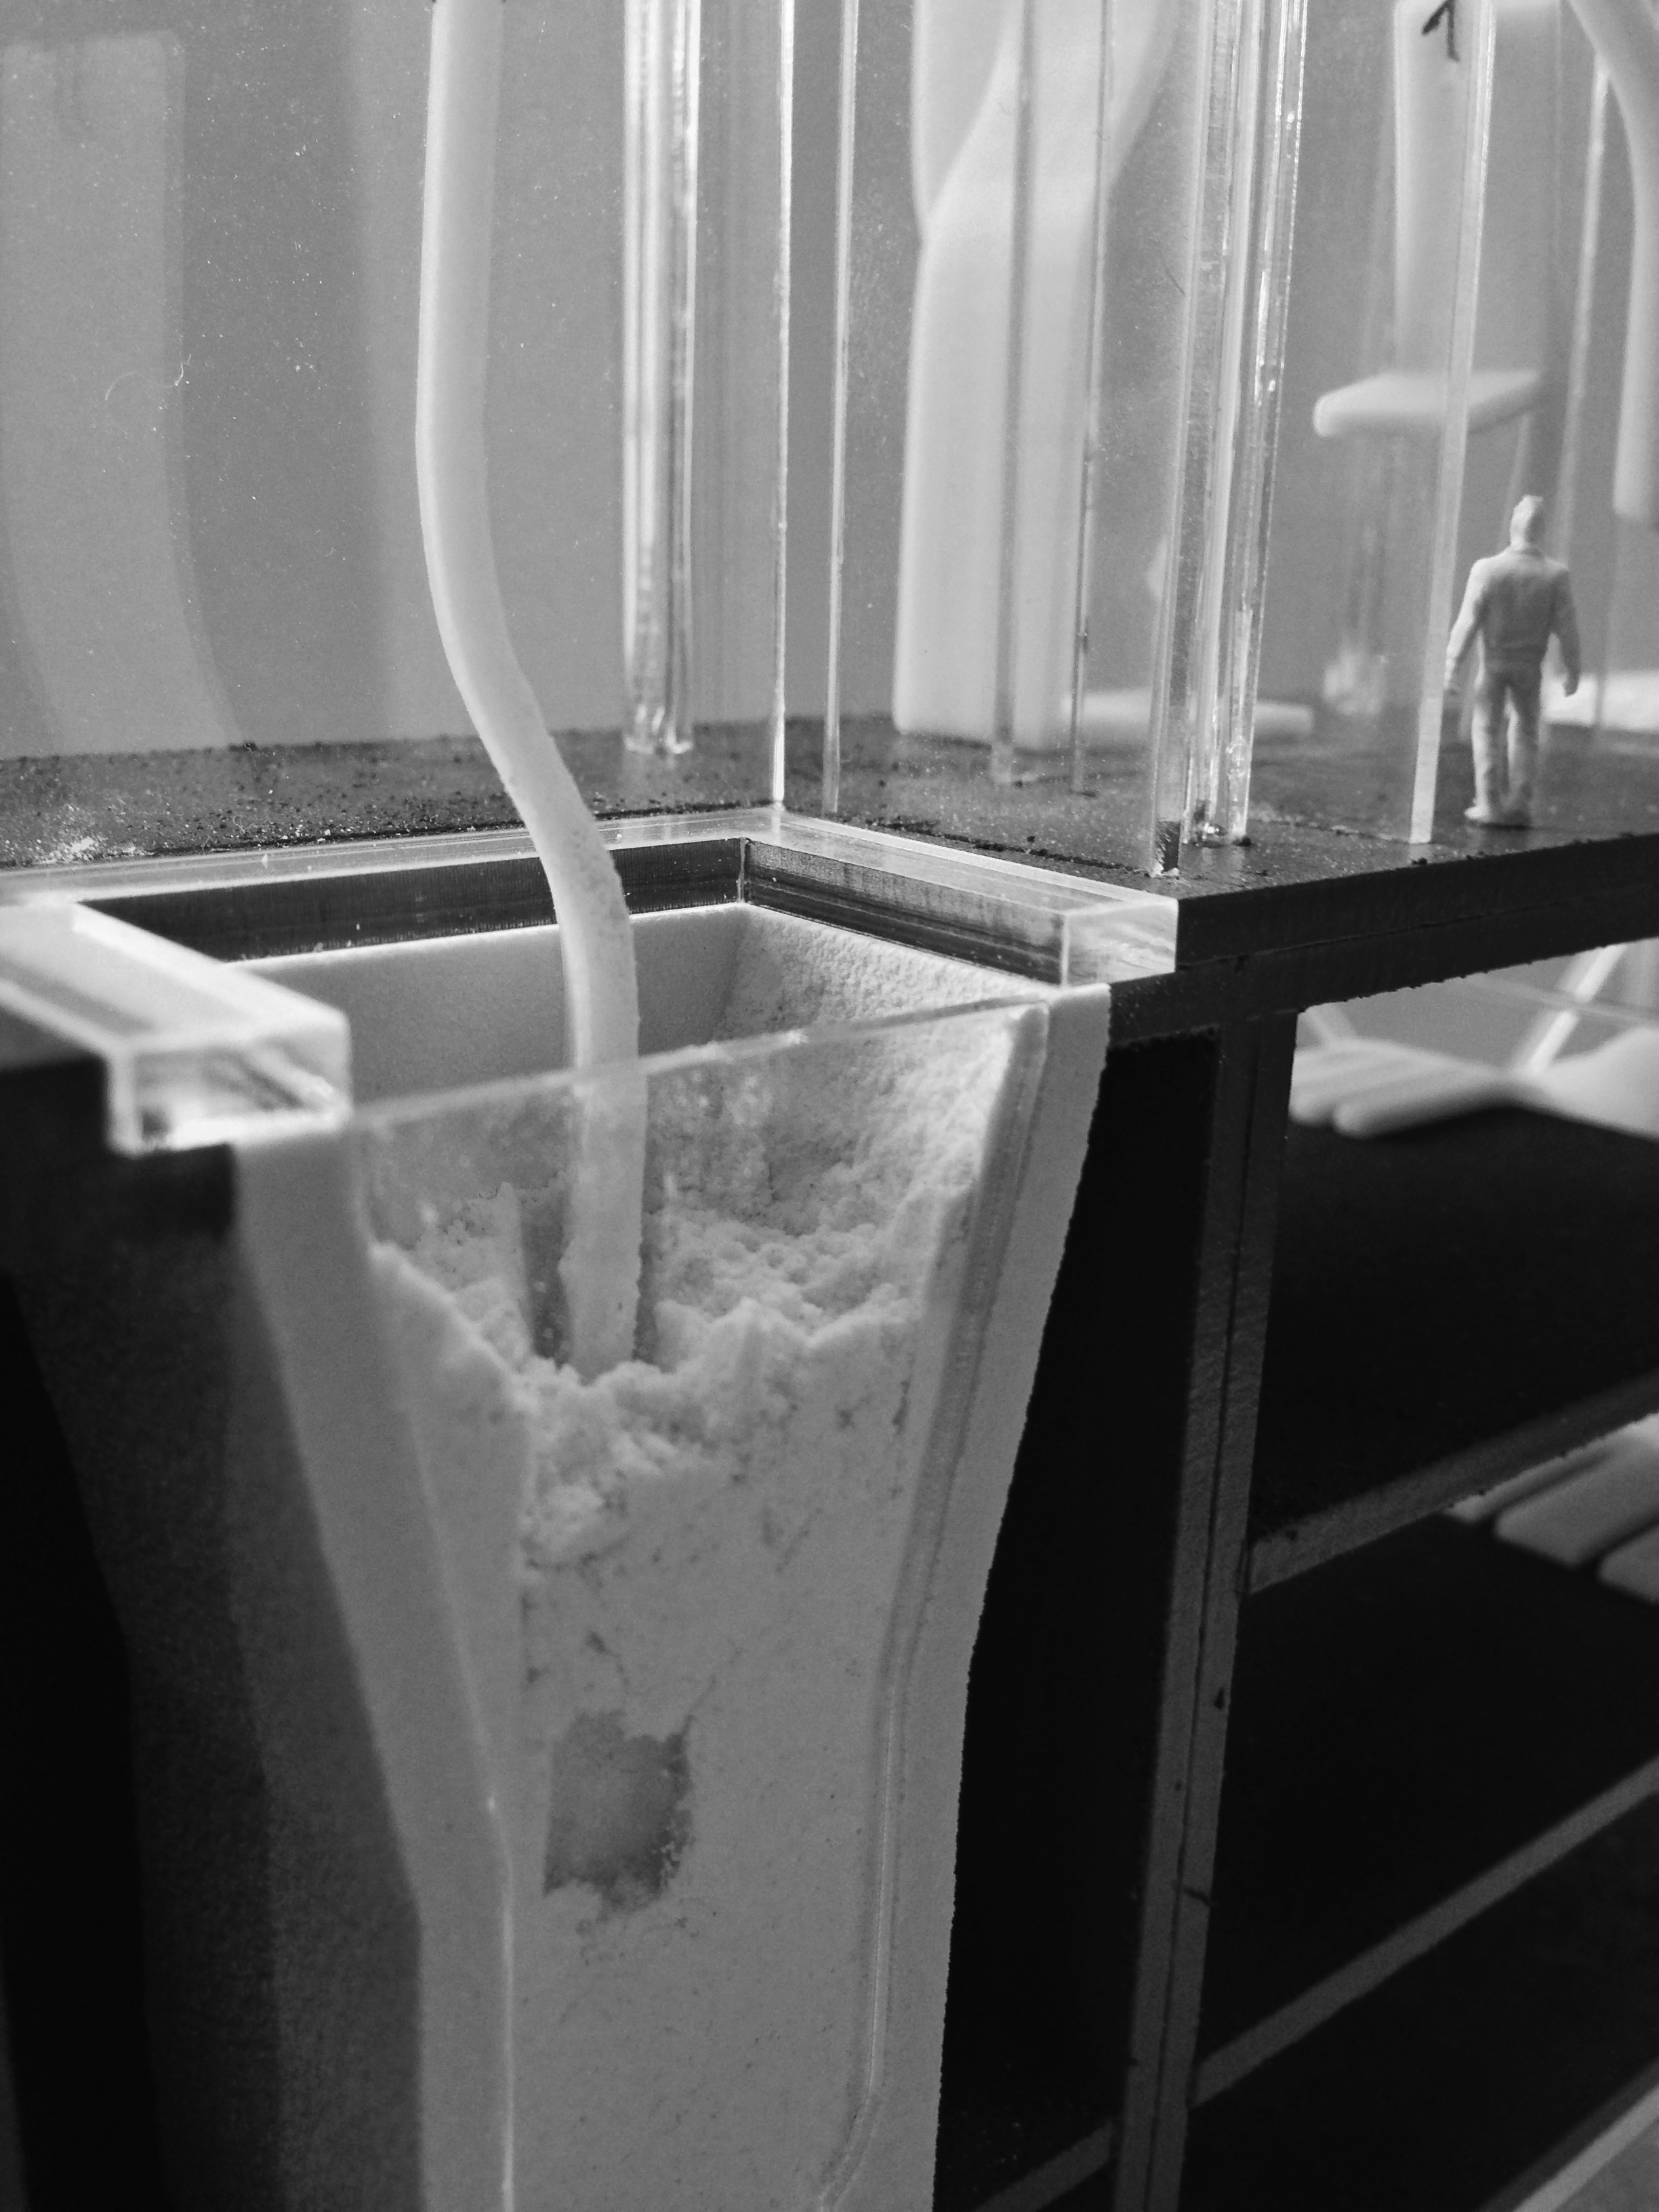
To create the tent like canopy above each area of the site Laura used a vac-formed sheet to create the draped fabric aesthetic desired. This was achieved by creating a former using Ureol Modelboard which was sanded to the correct shape then placed on a base to sit on the bed of the vac former.Laura Minca  (18) Laura Minca  (19) 
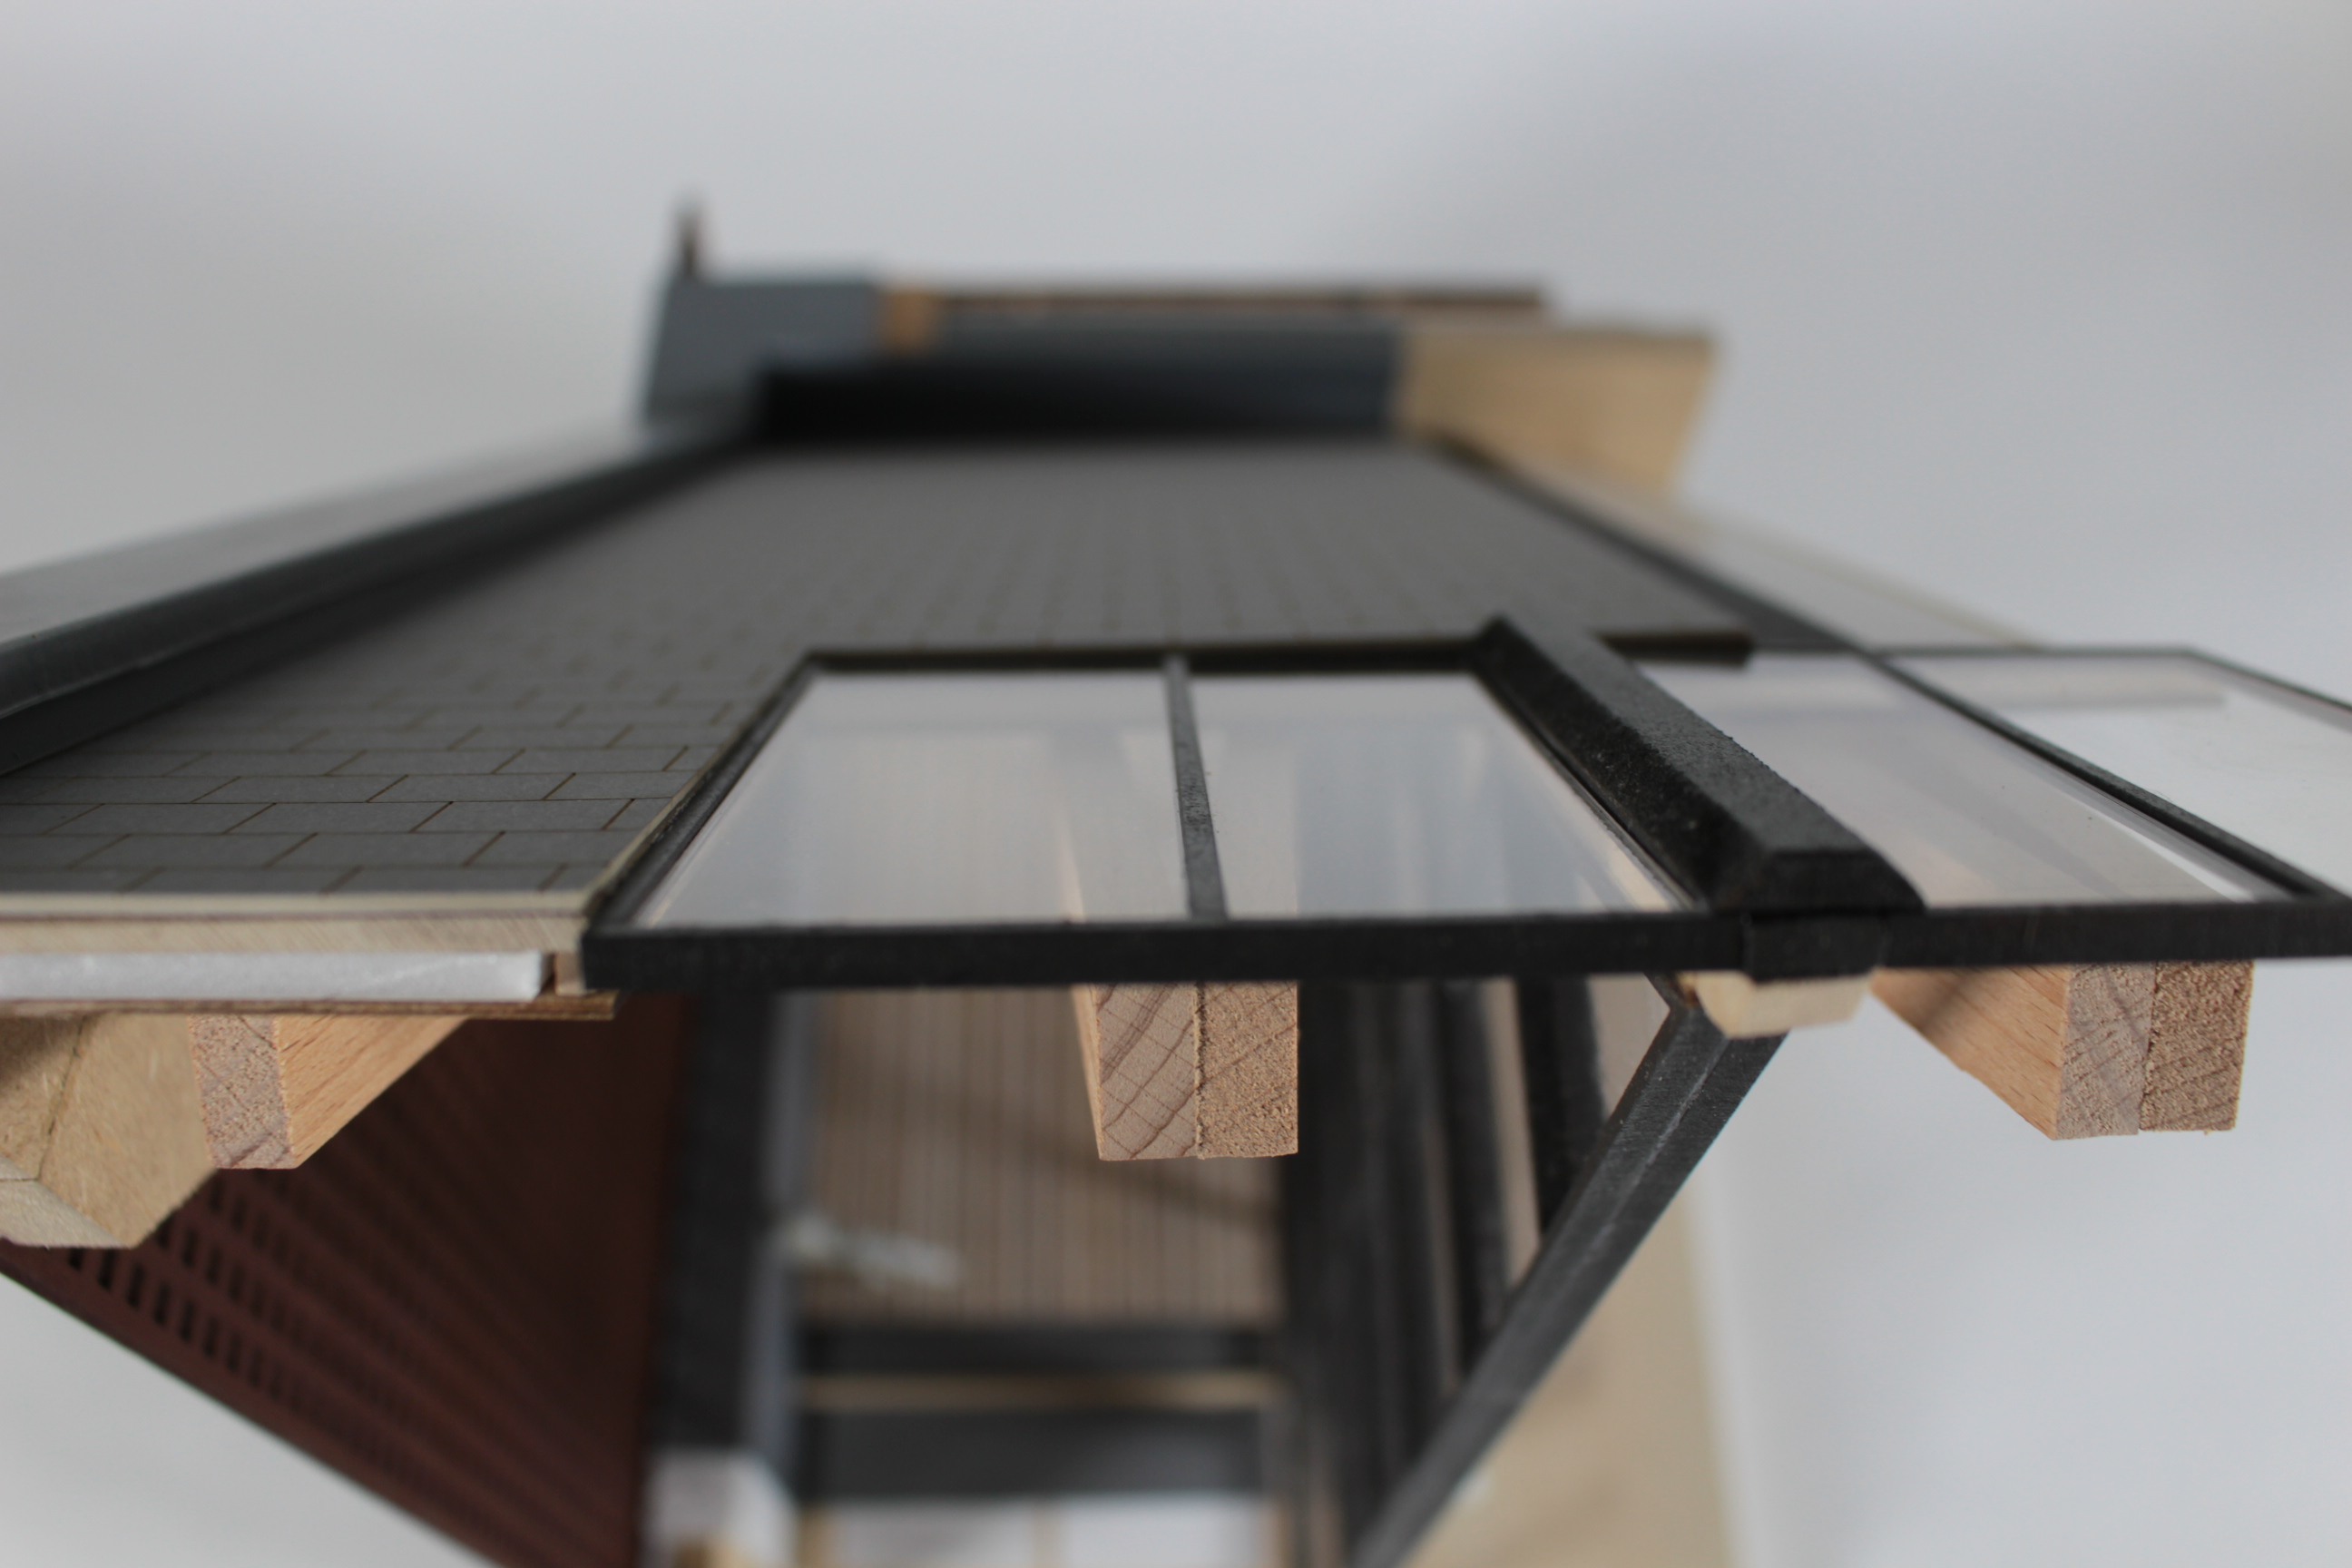
The vac forming process involved heating up styrene vac-forming plastic which is then suction formed around any given shape.Laura Minca  (20)

The completed form is then taken from the bed and trimmed to size for use on the model. Laura Minca  (21)

Laura Minca  (25)
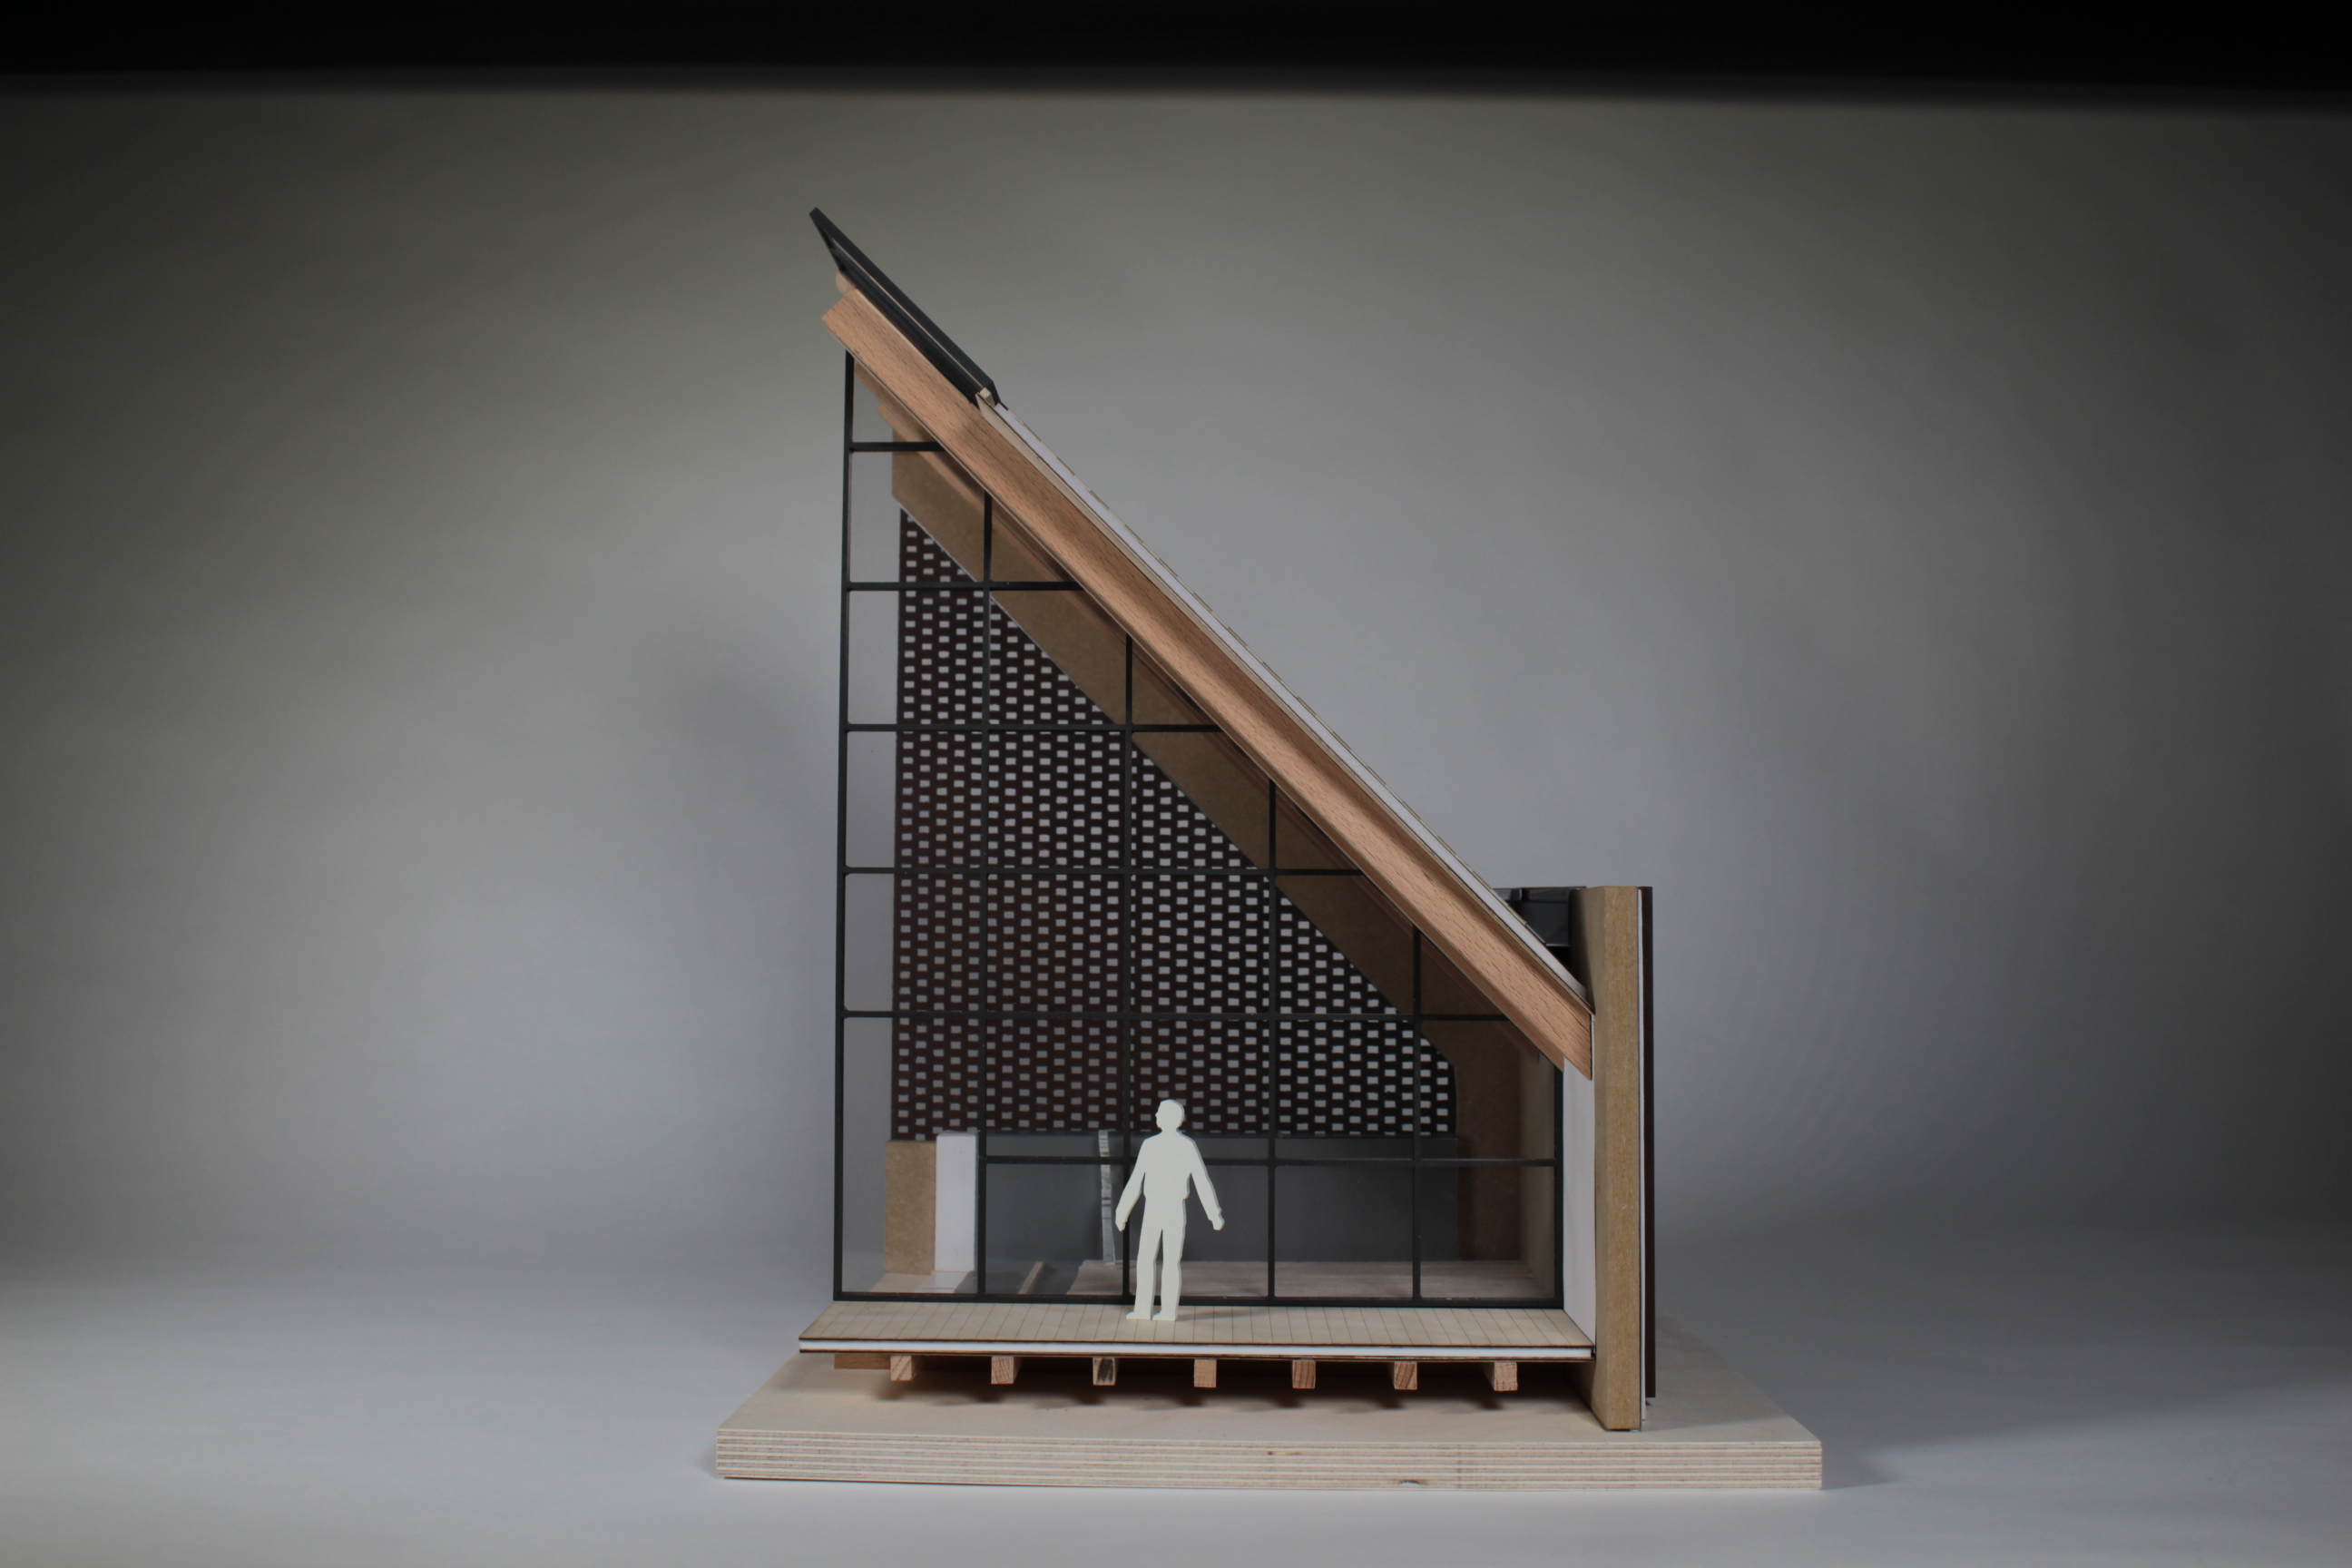
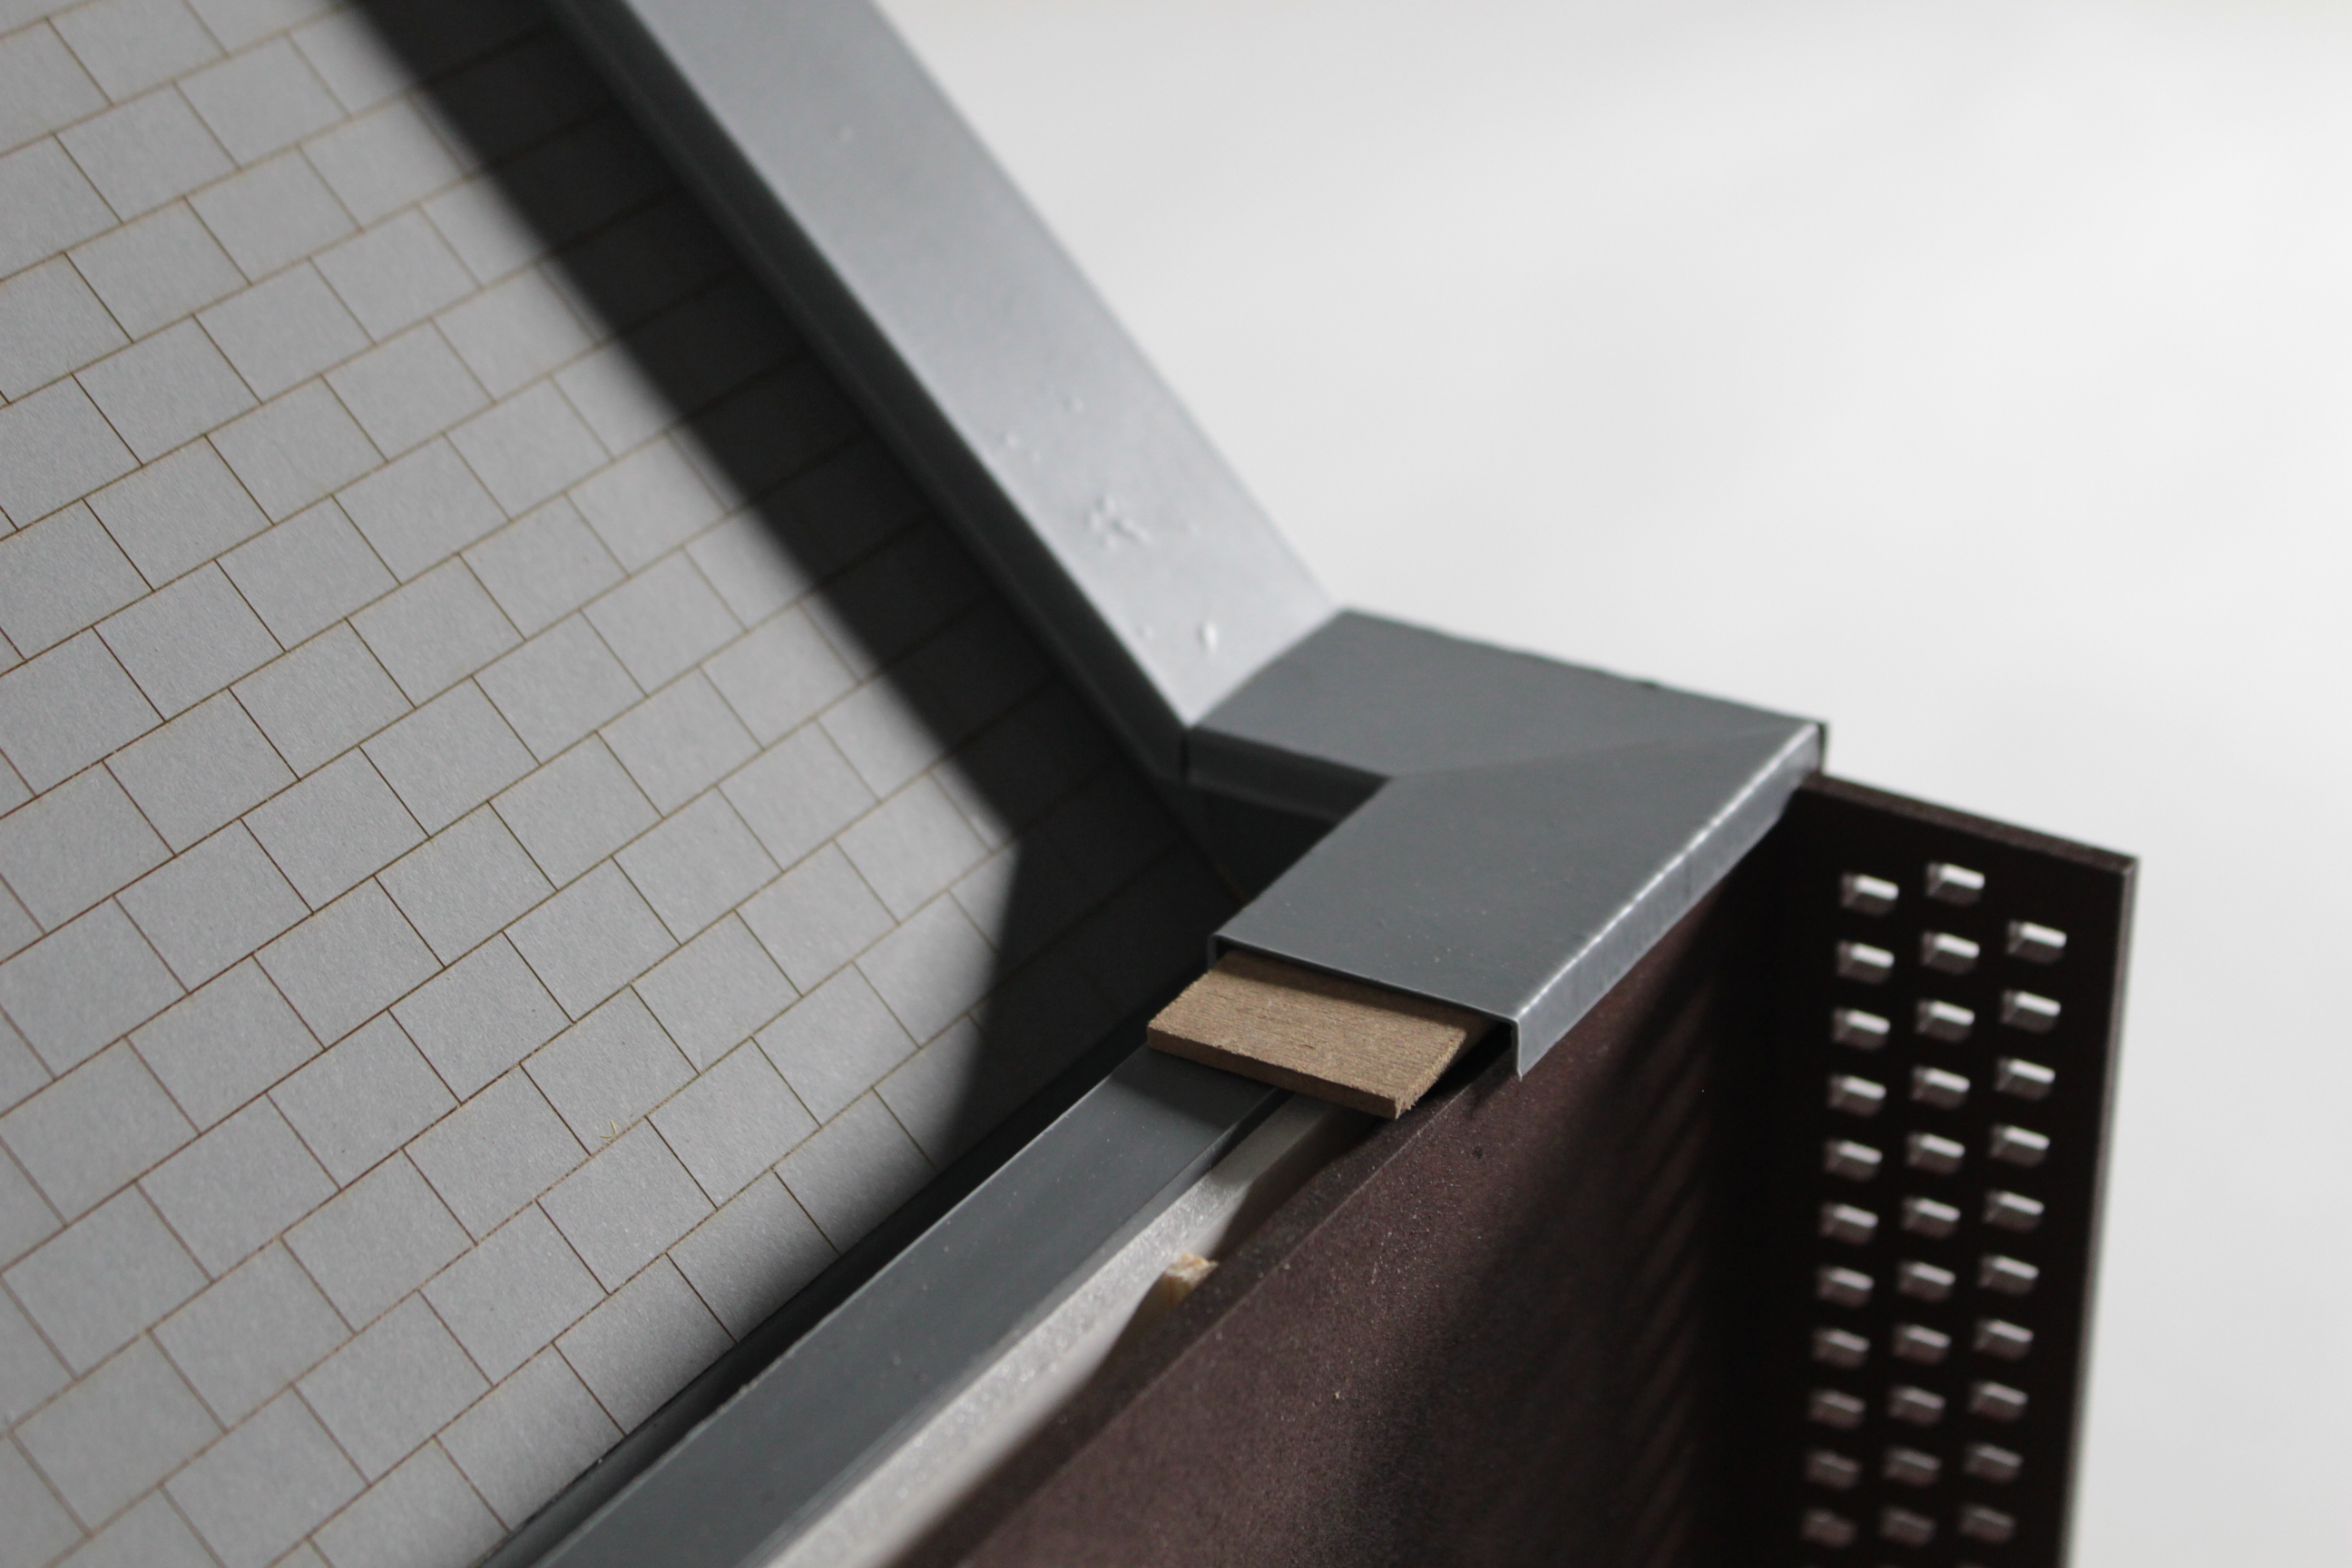
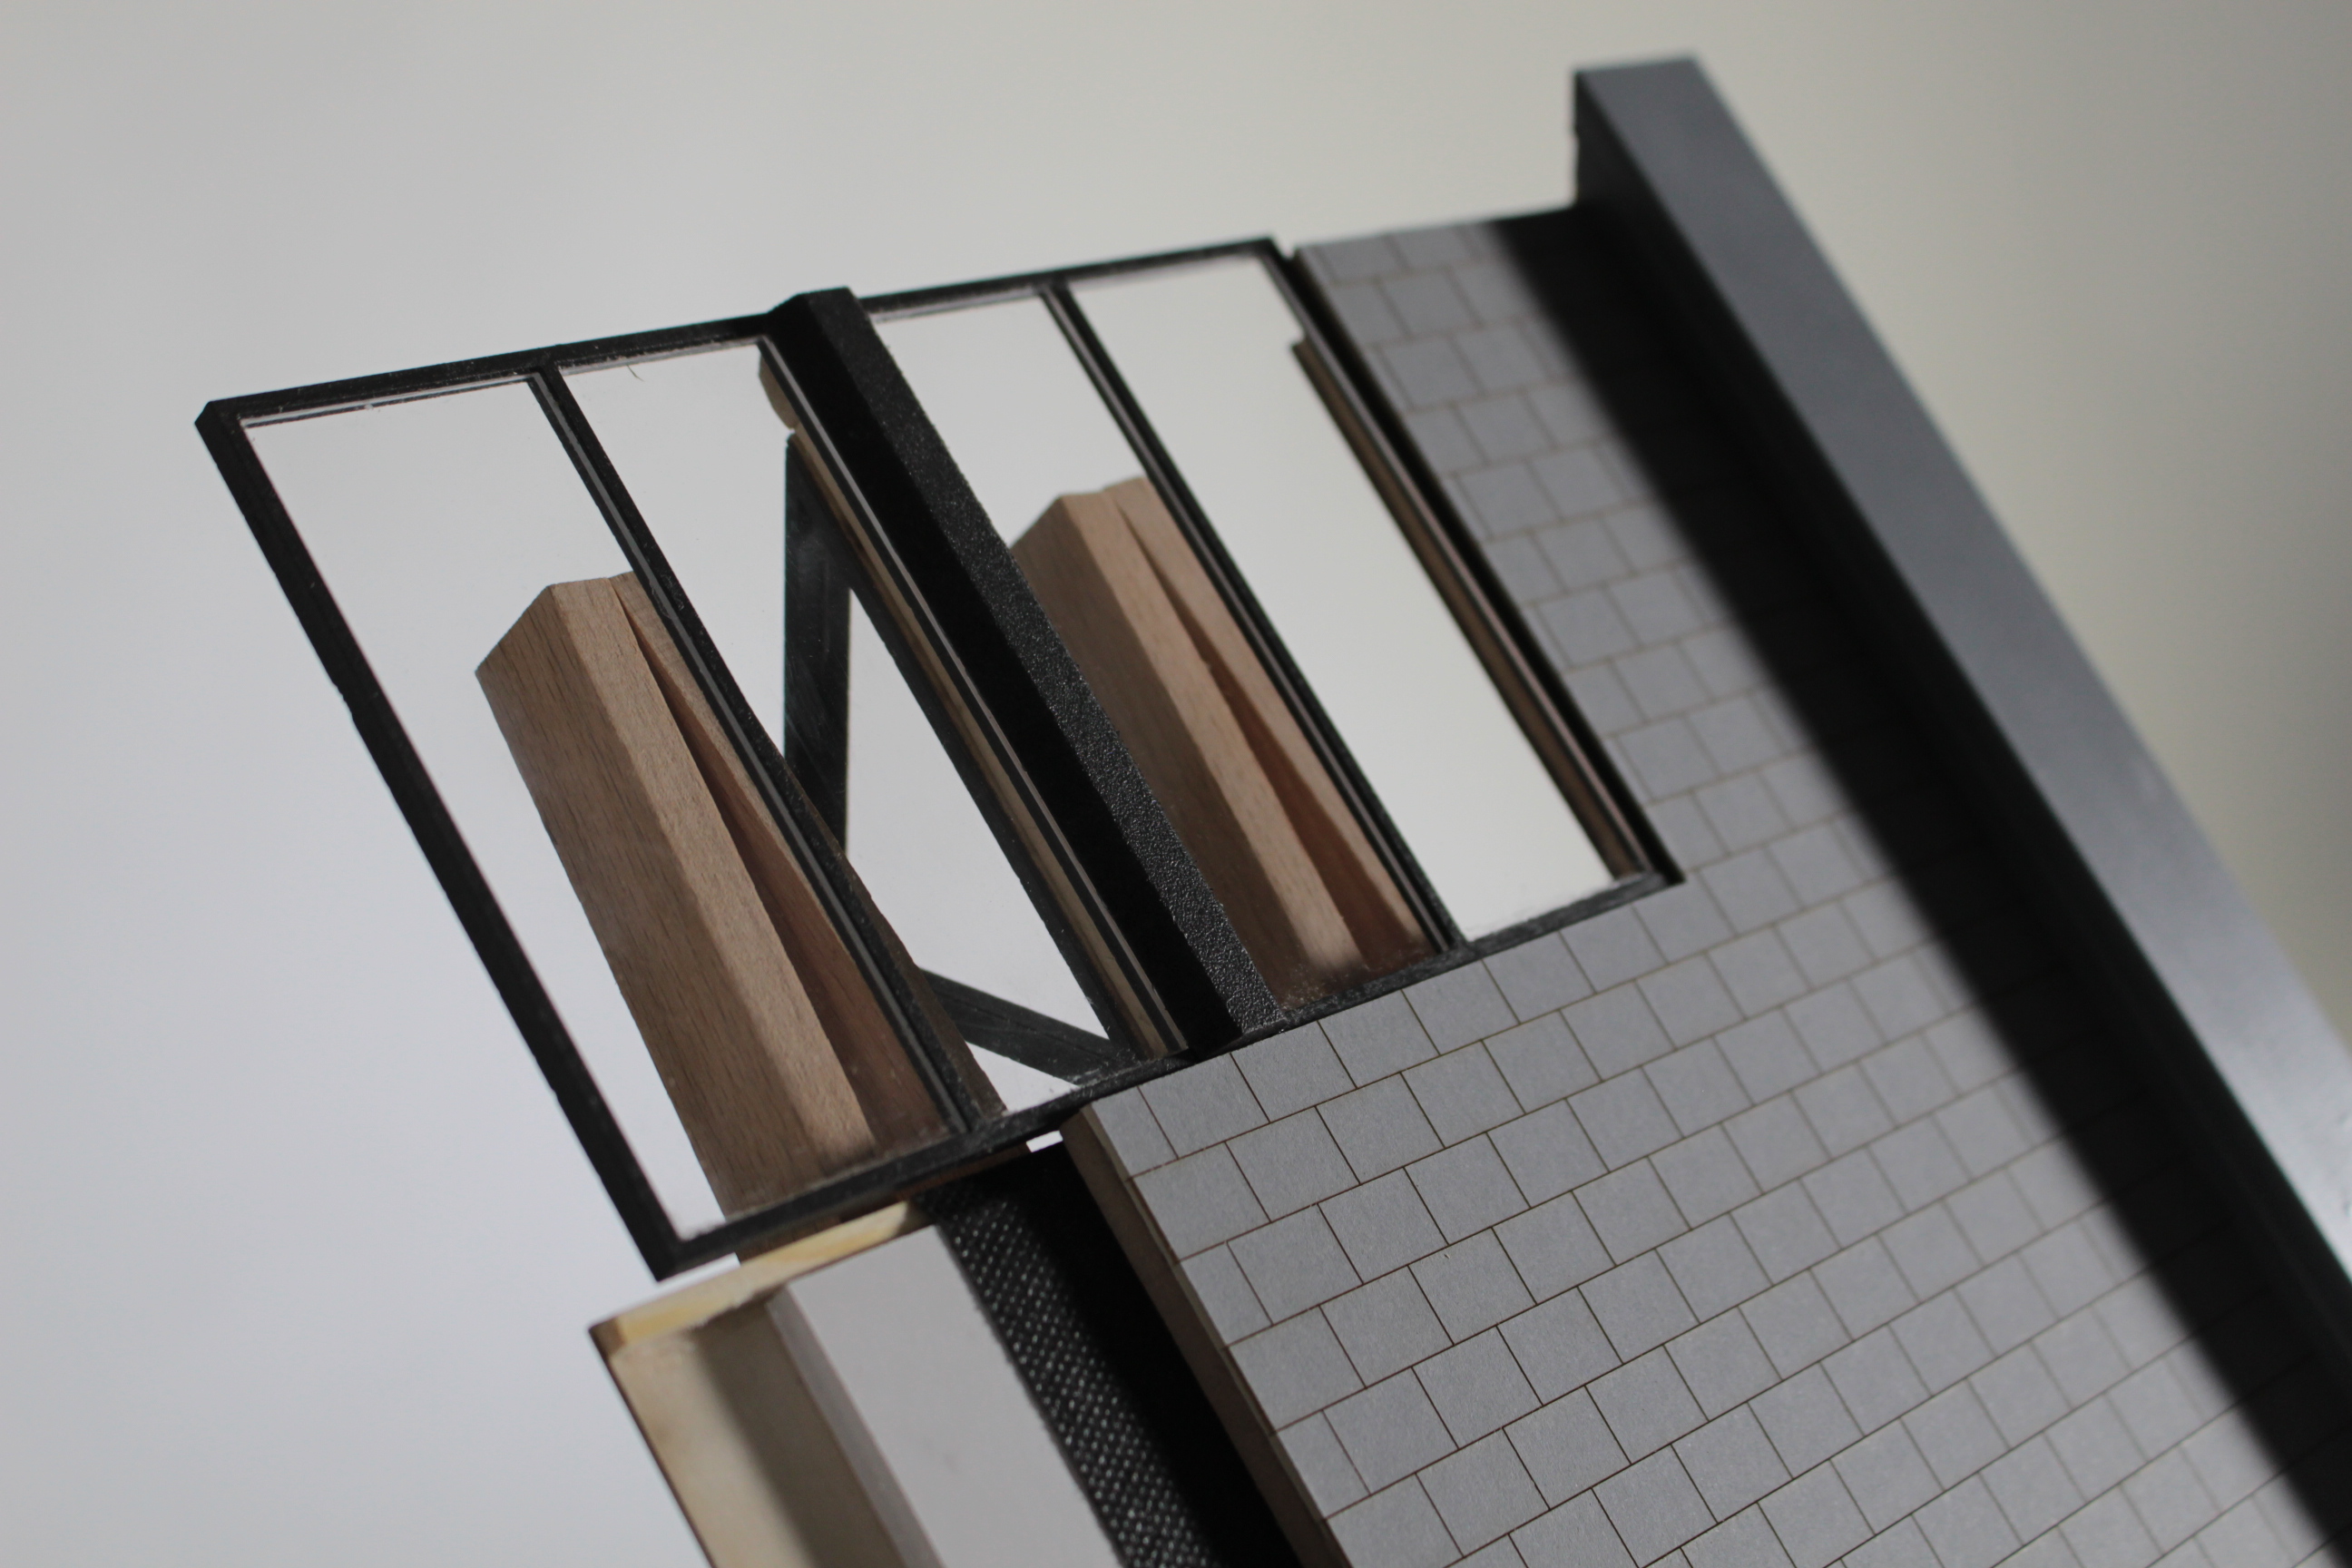
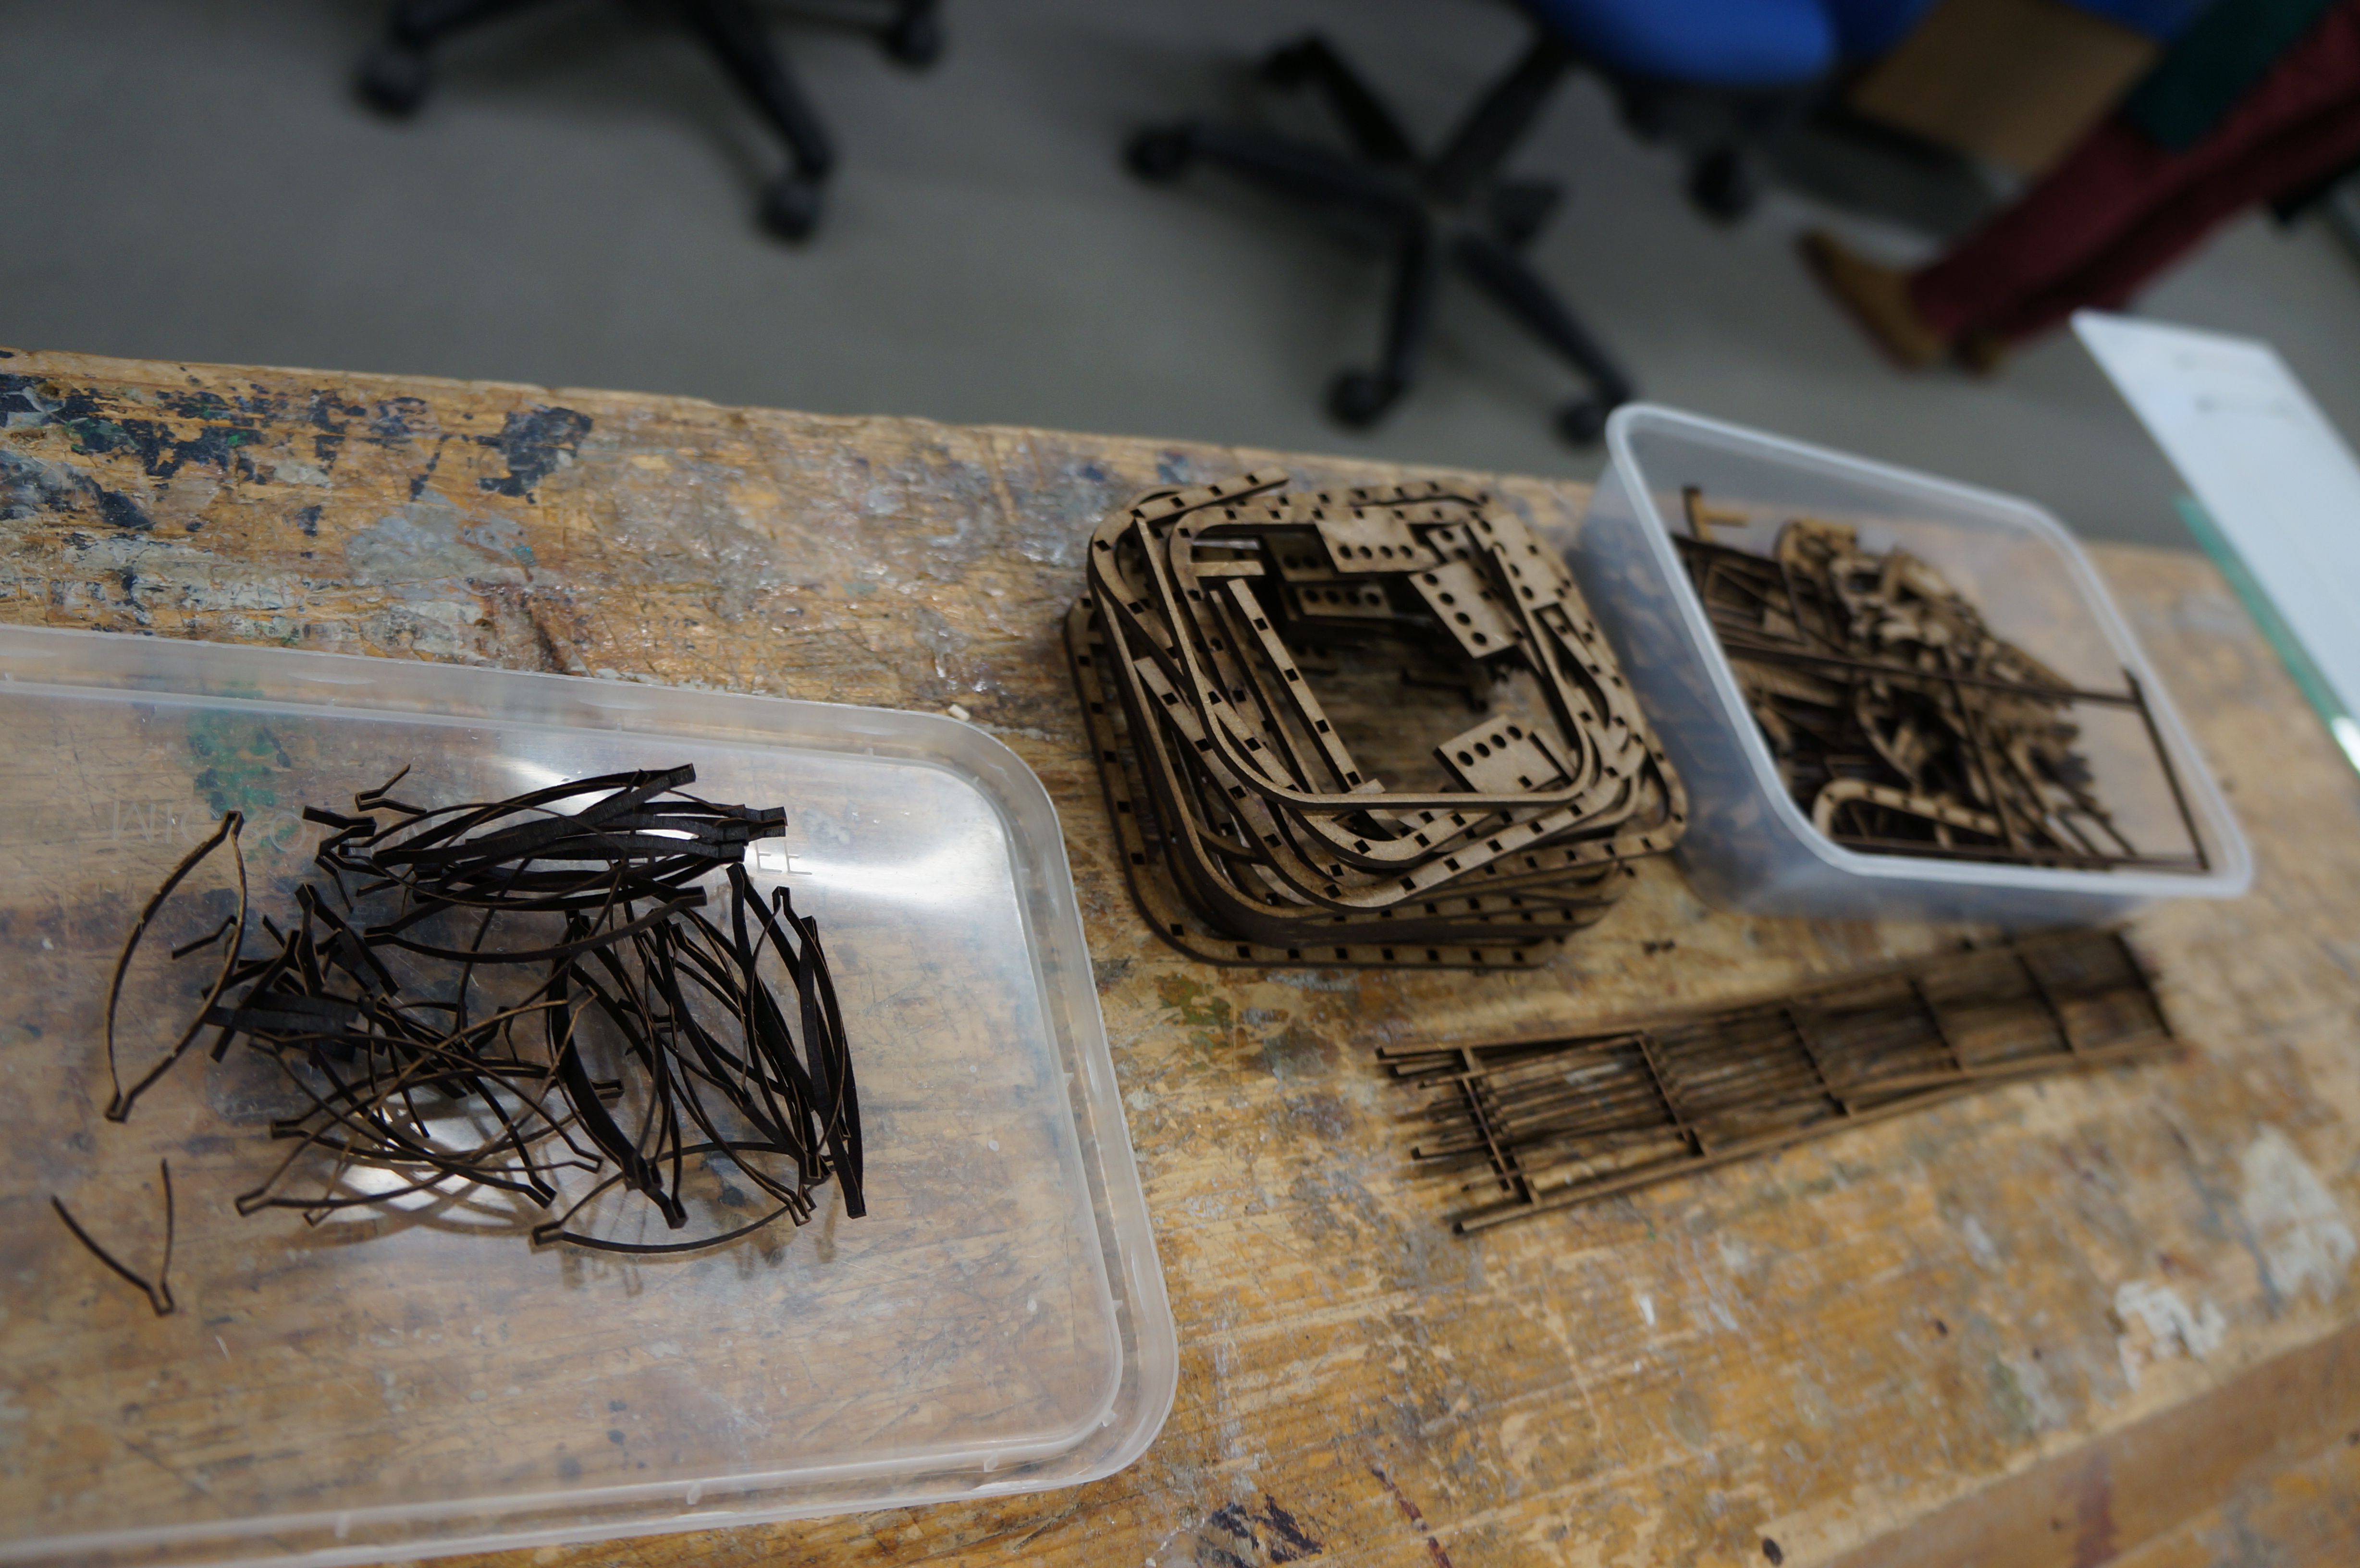
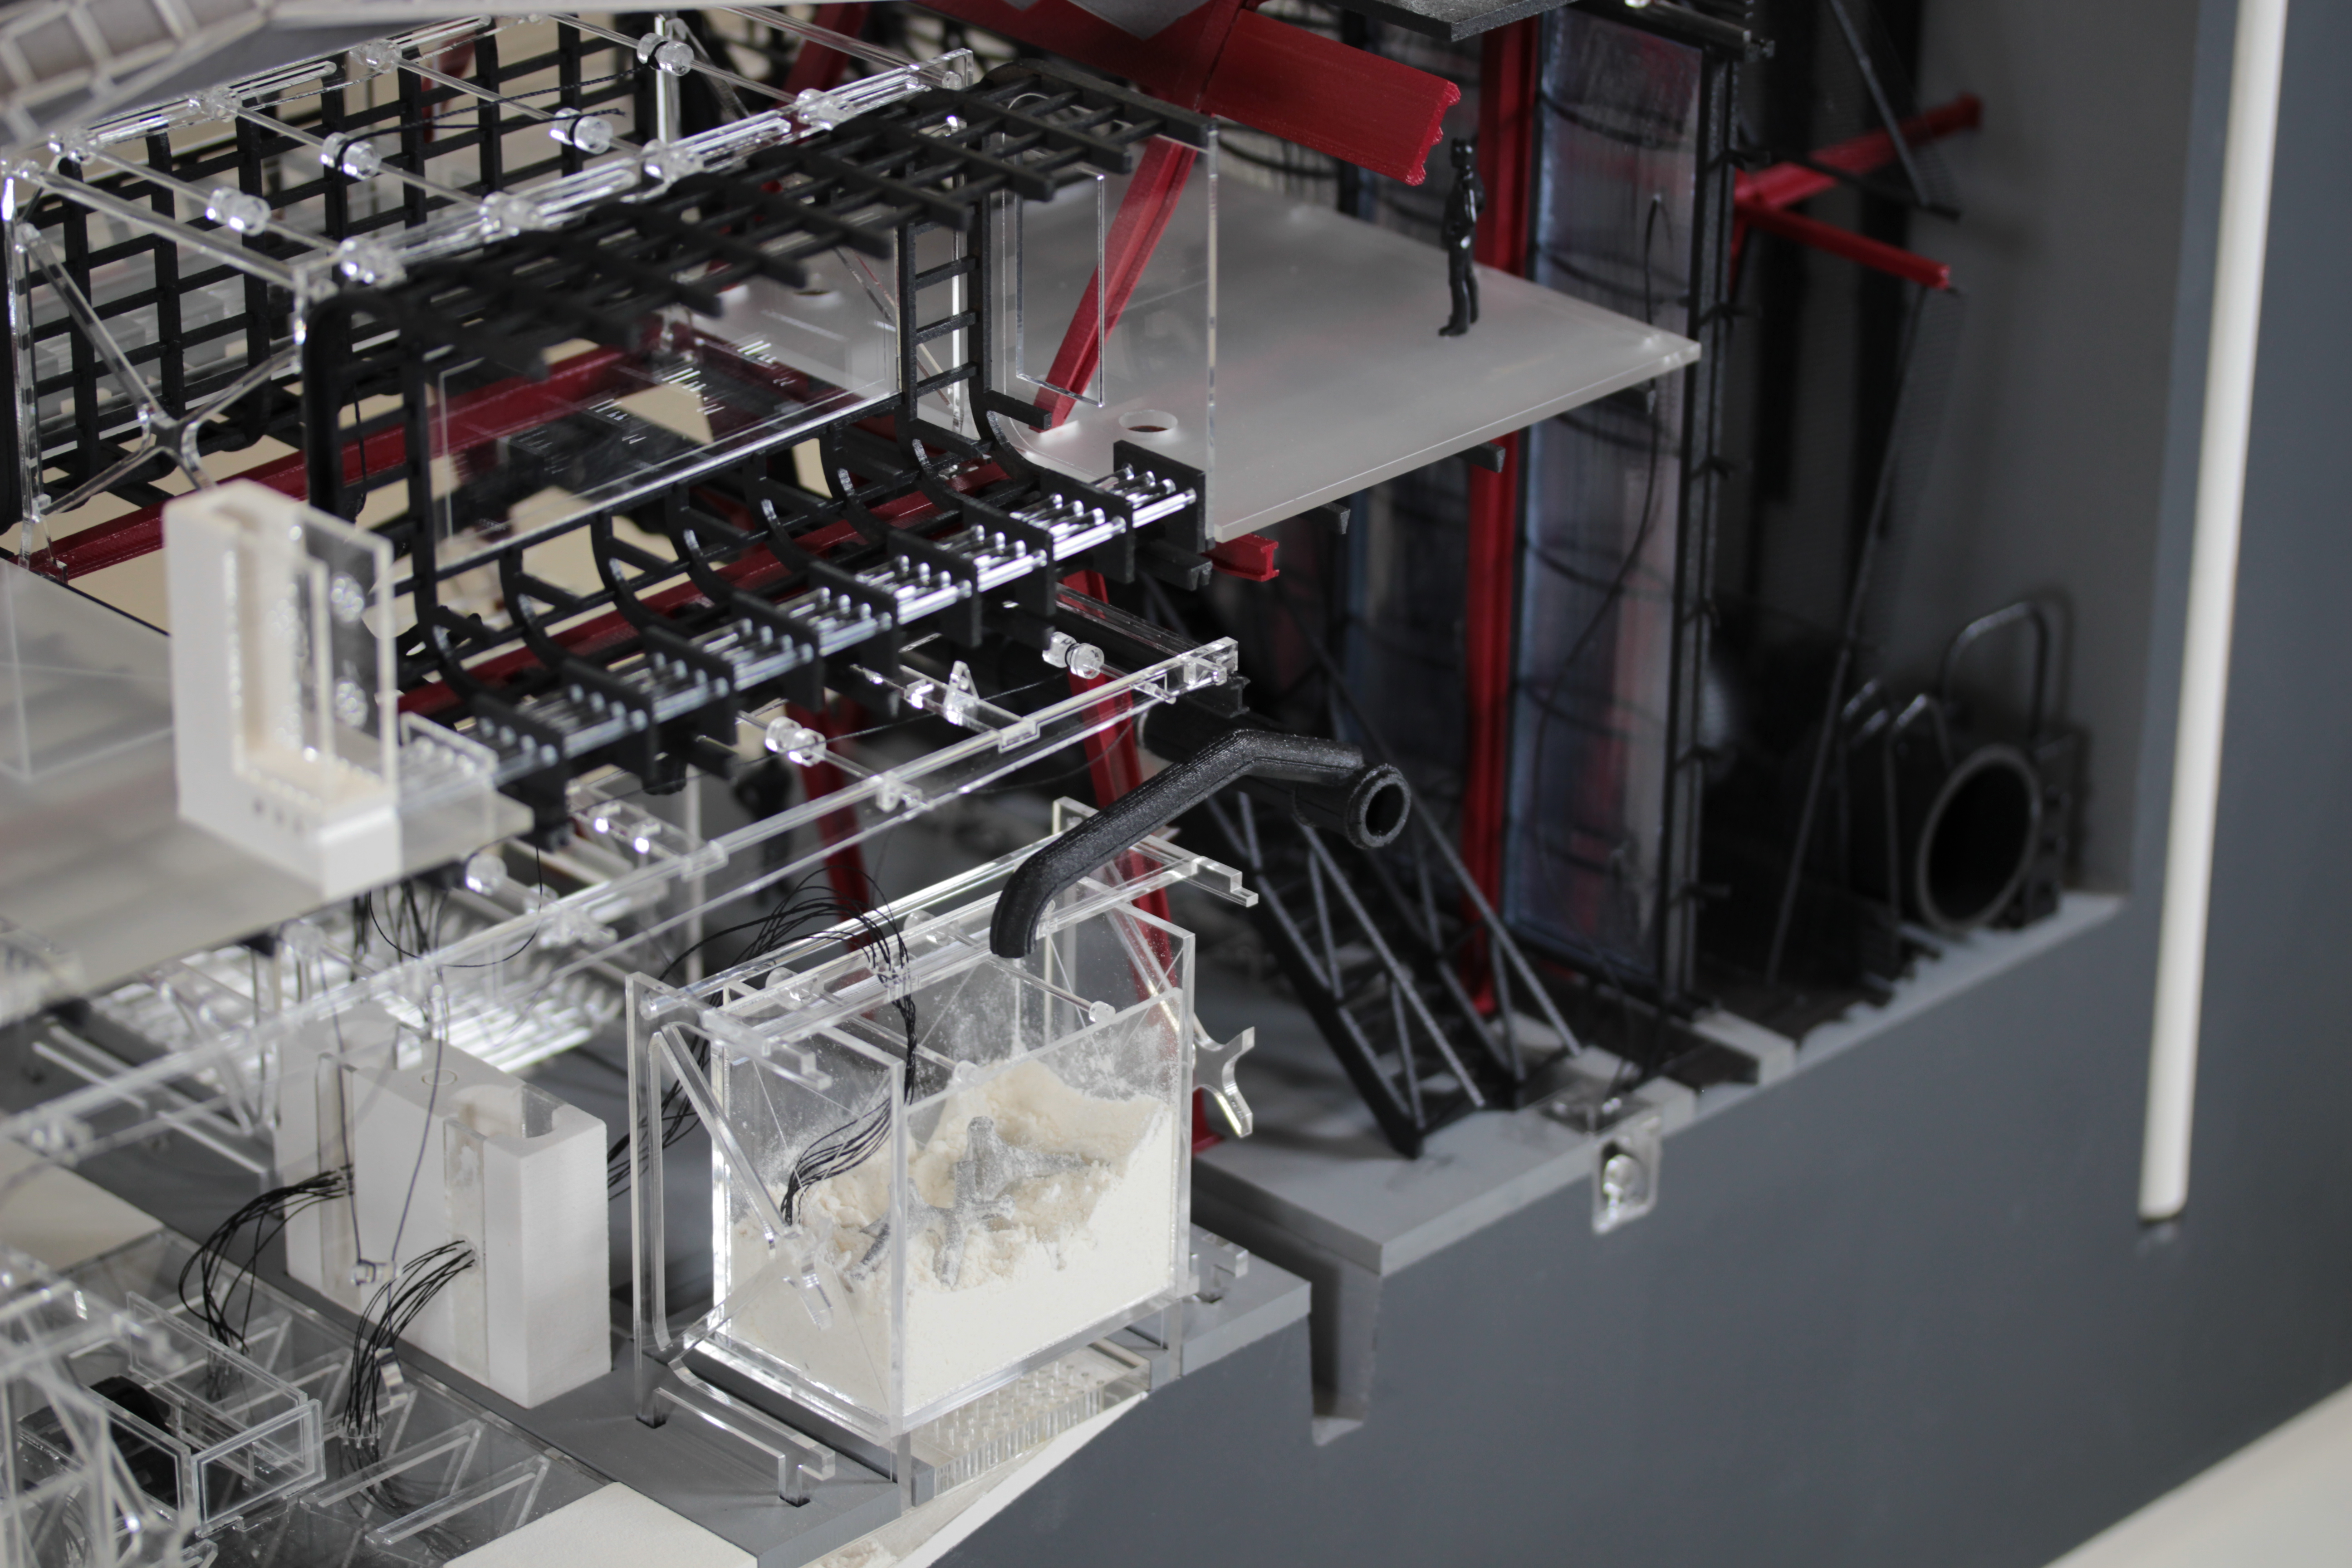
Further detail was added to the internal floor spaces using laser cut cardboard fixed to plywood floor plates. This plates were then assembled and slotted into place into the main framework before having the roof canopies fitted above.

Laura Minca (3) 
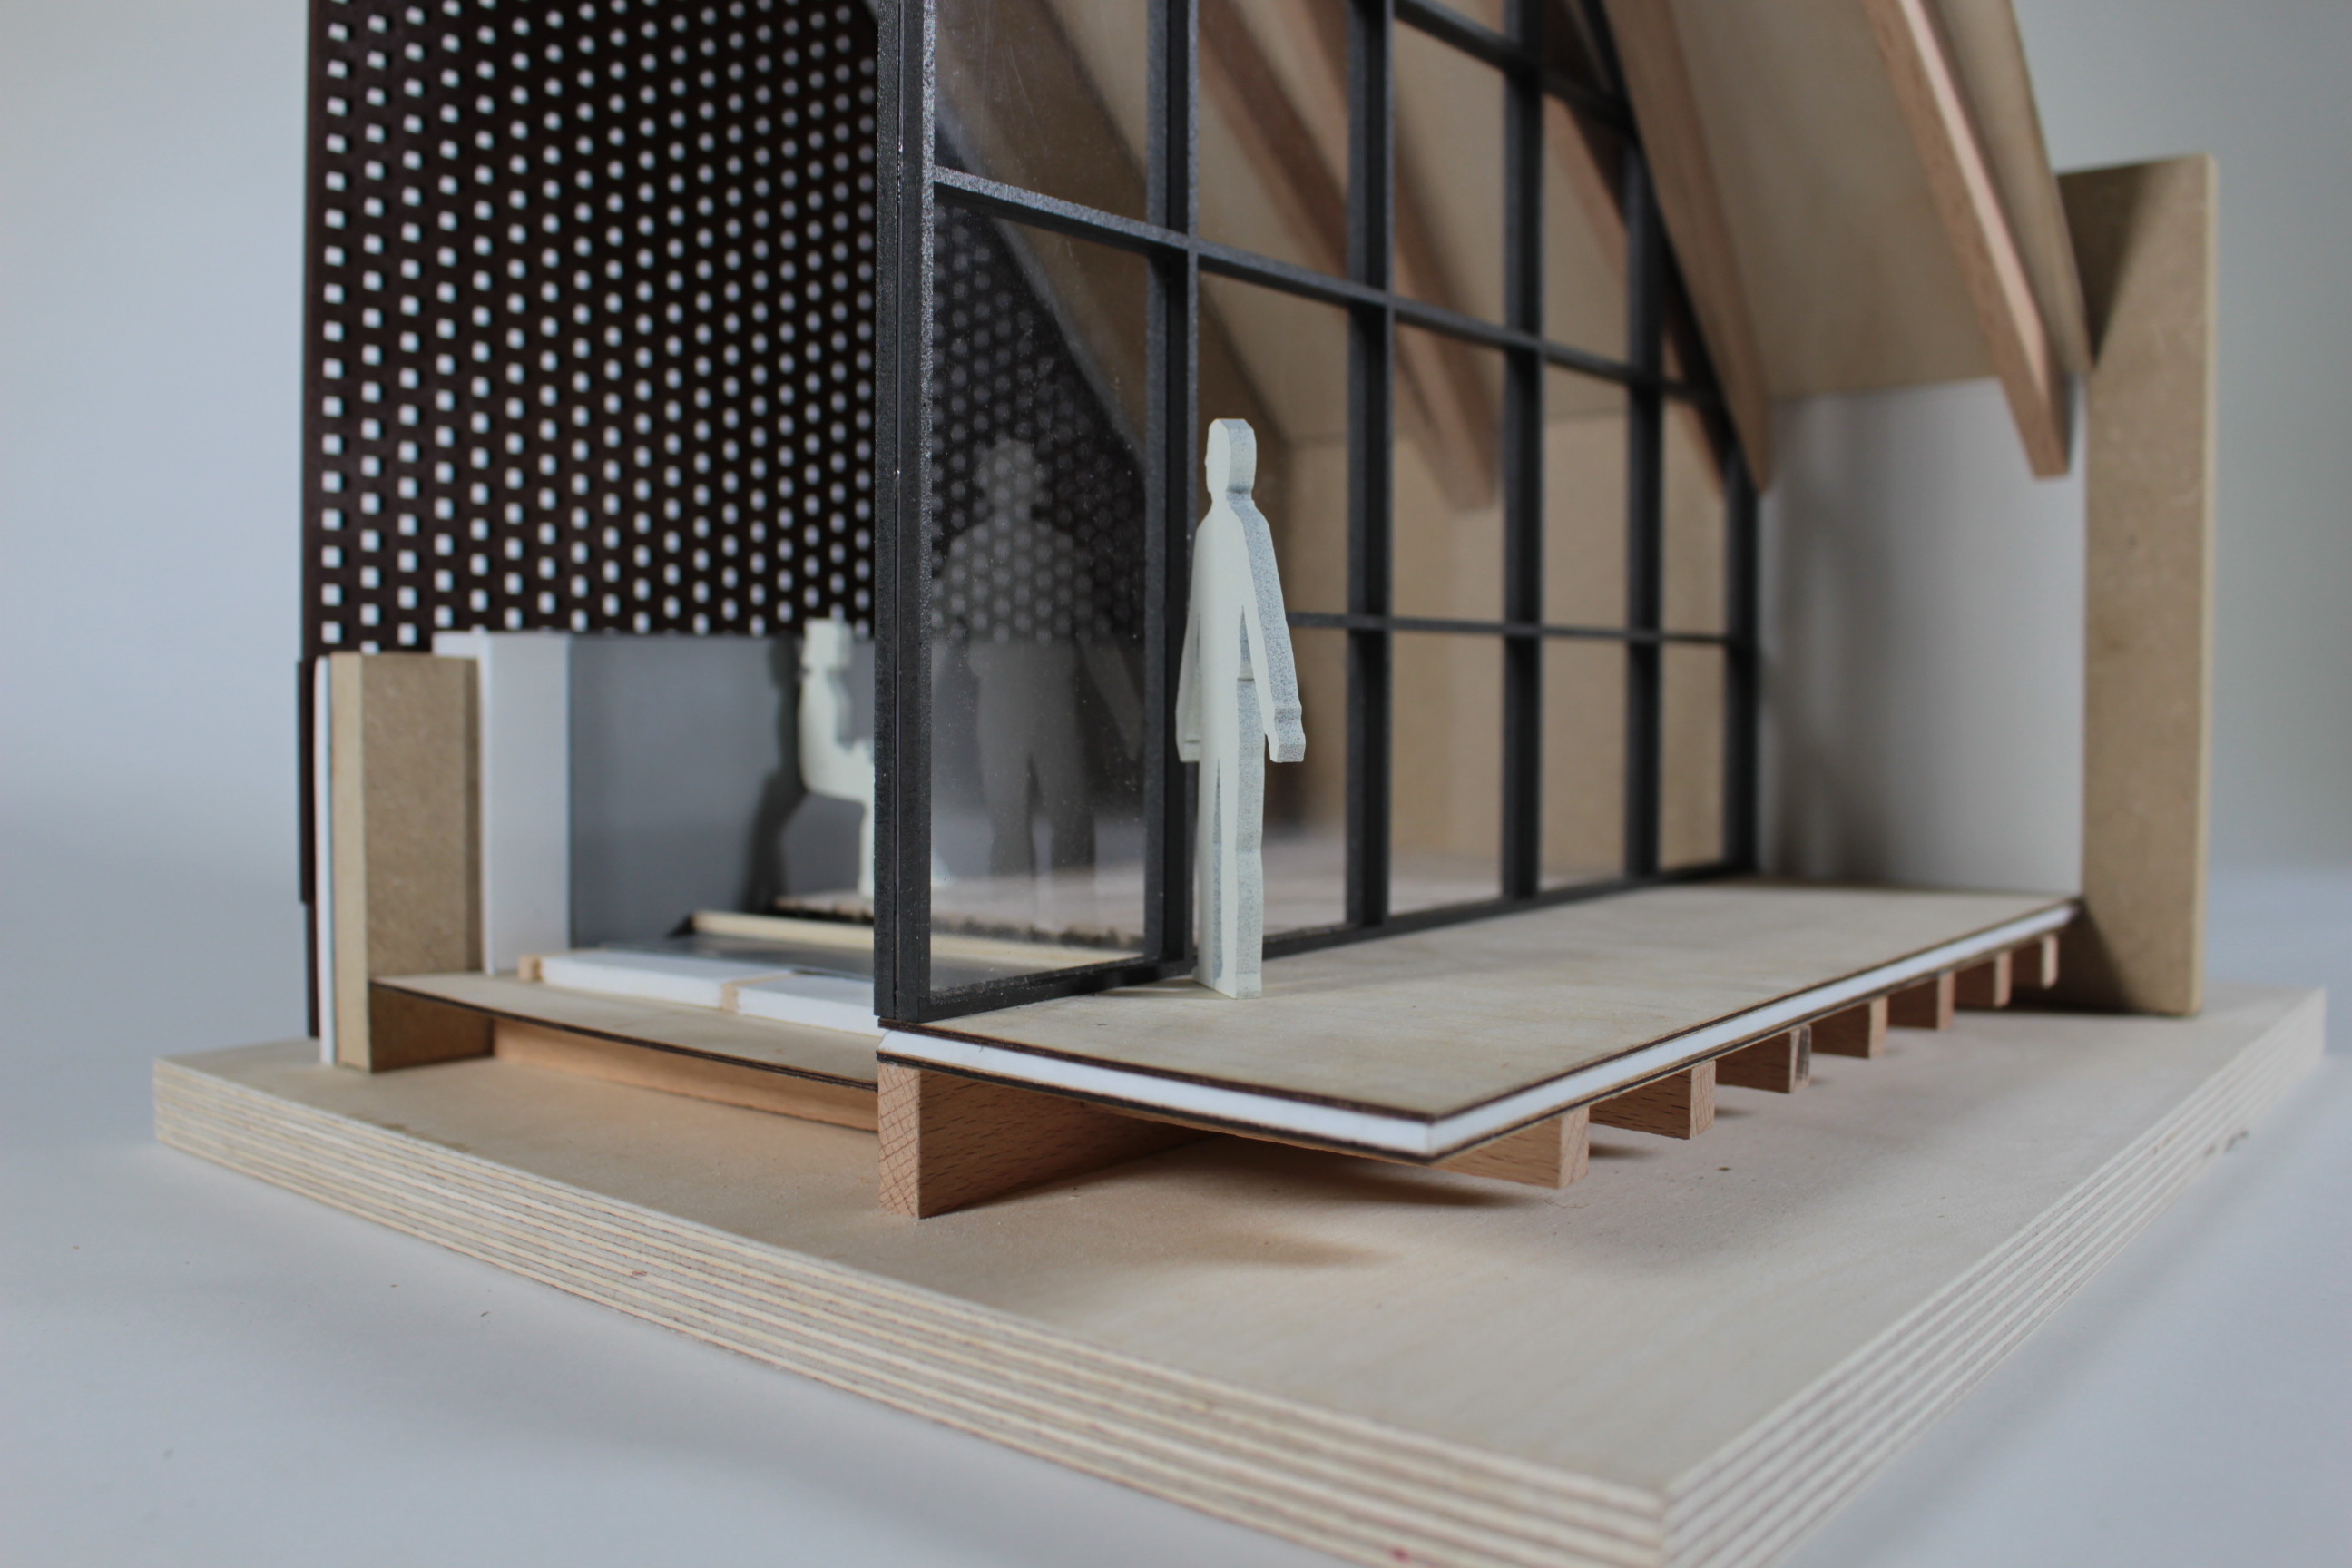
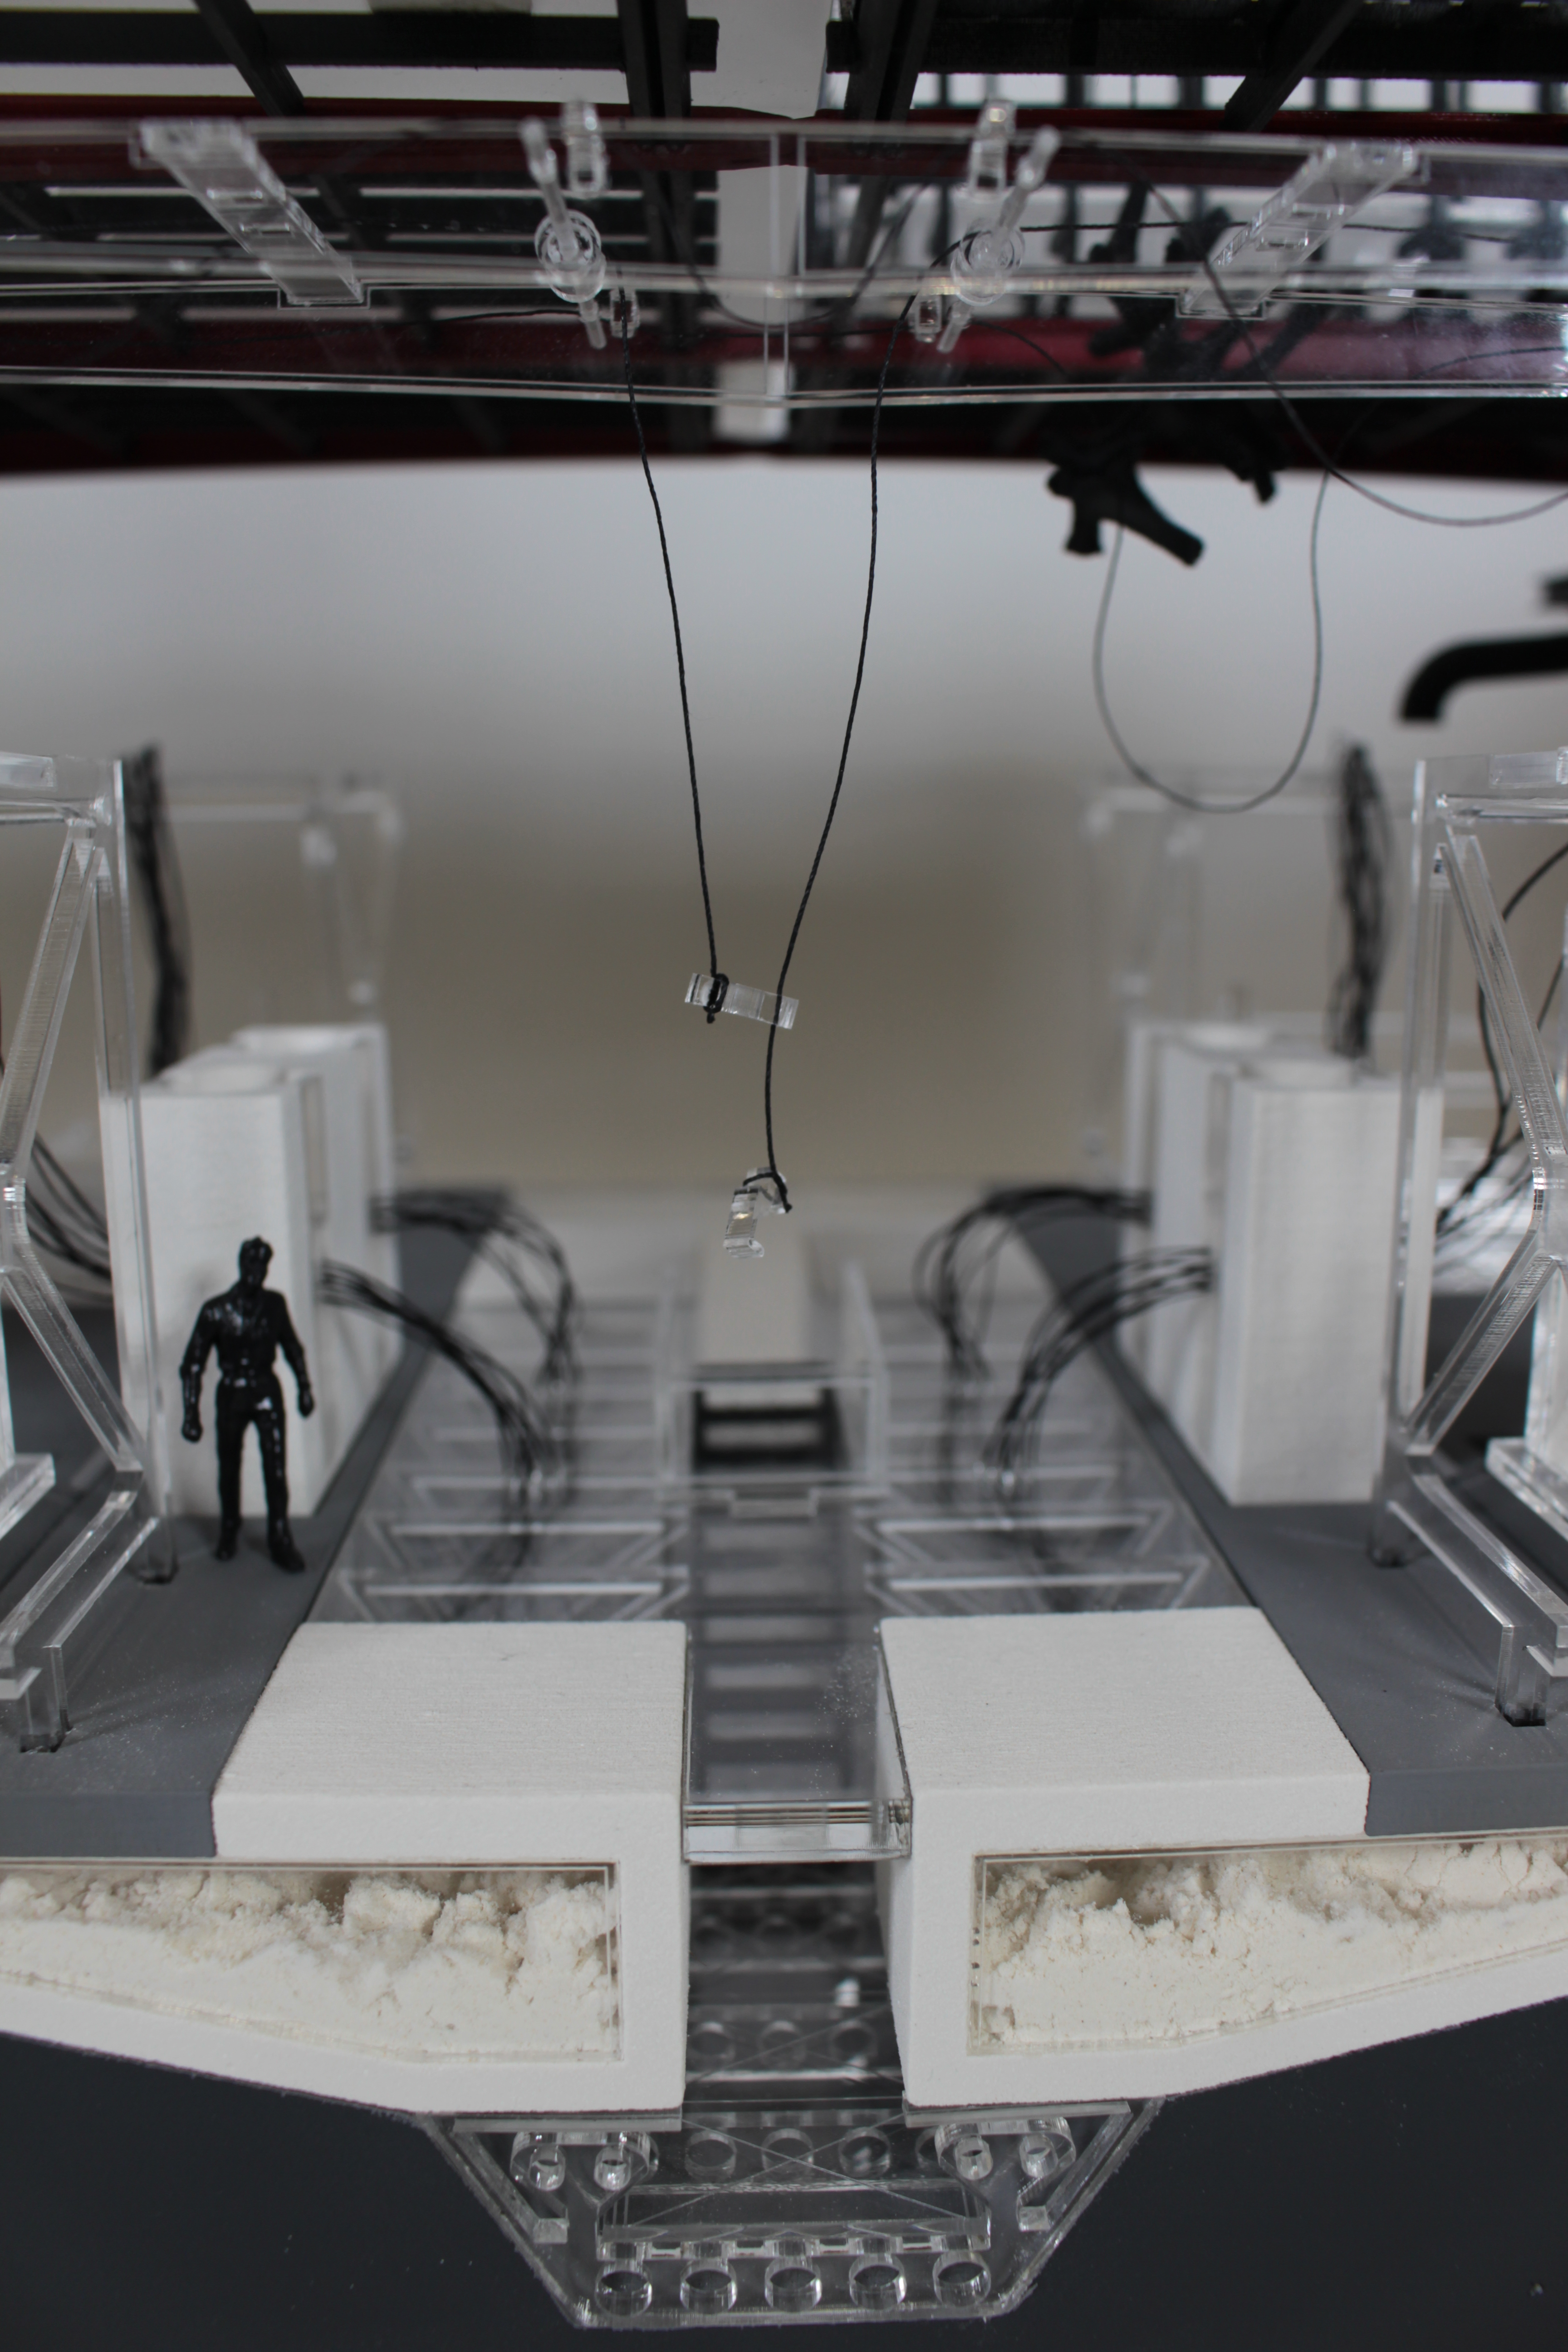
Laura used brass etched scaled figures to convey the use of the spaces with figures dotted around the site and near the context. Small pine cones were used to represent trees which always works well with wooden based models. These can be found on various trees and bushes around campus! Laura Minca (4)

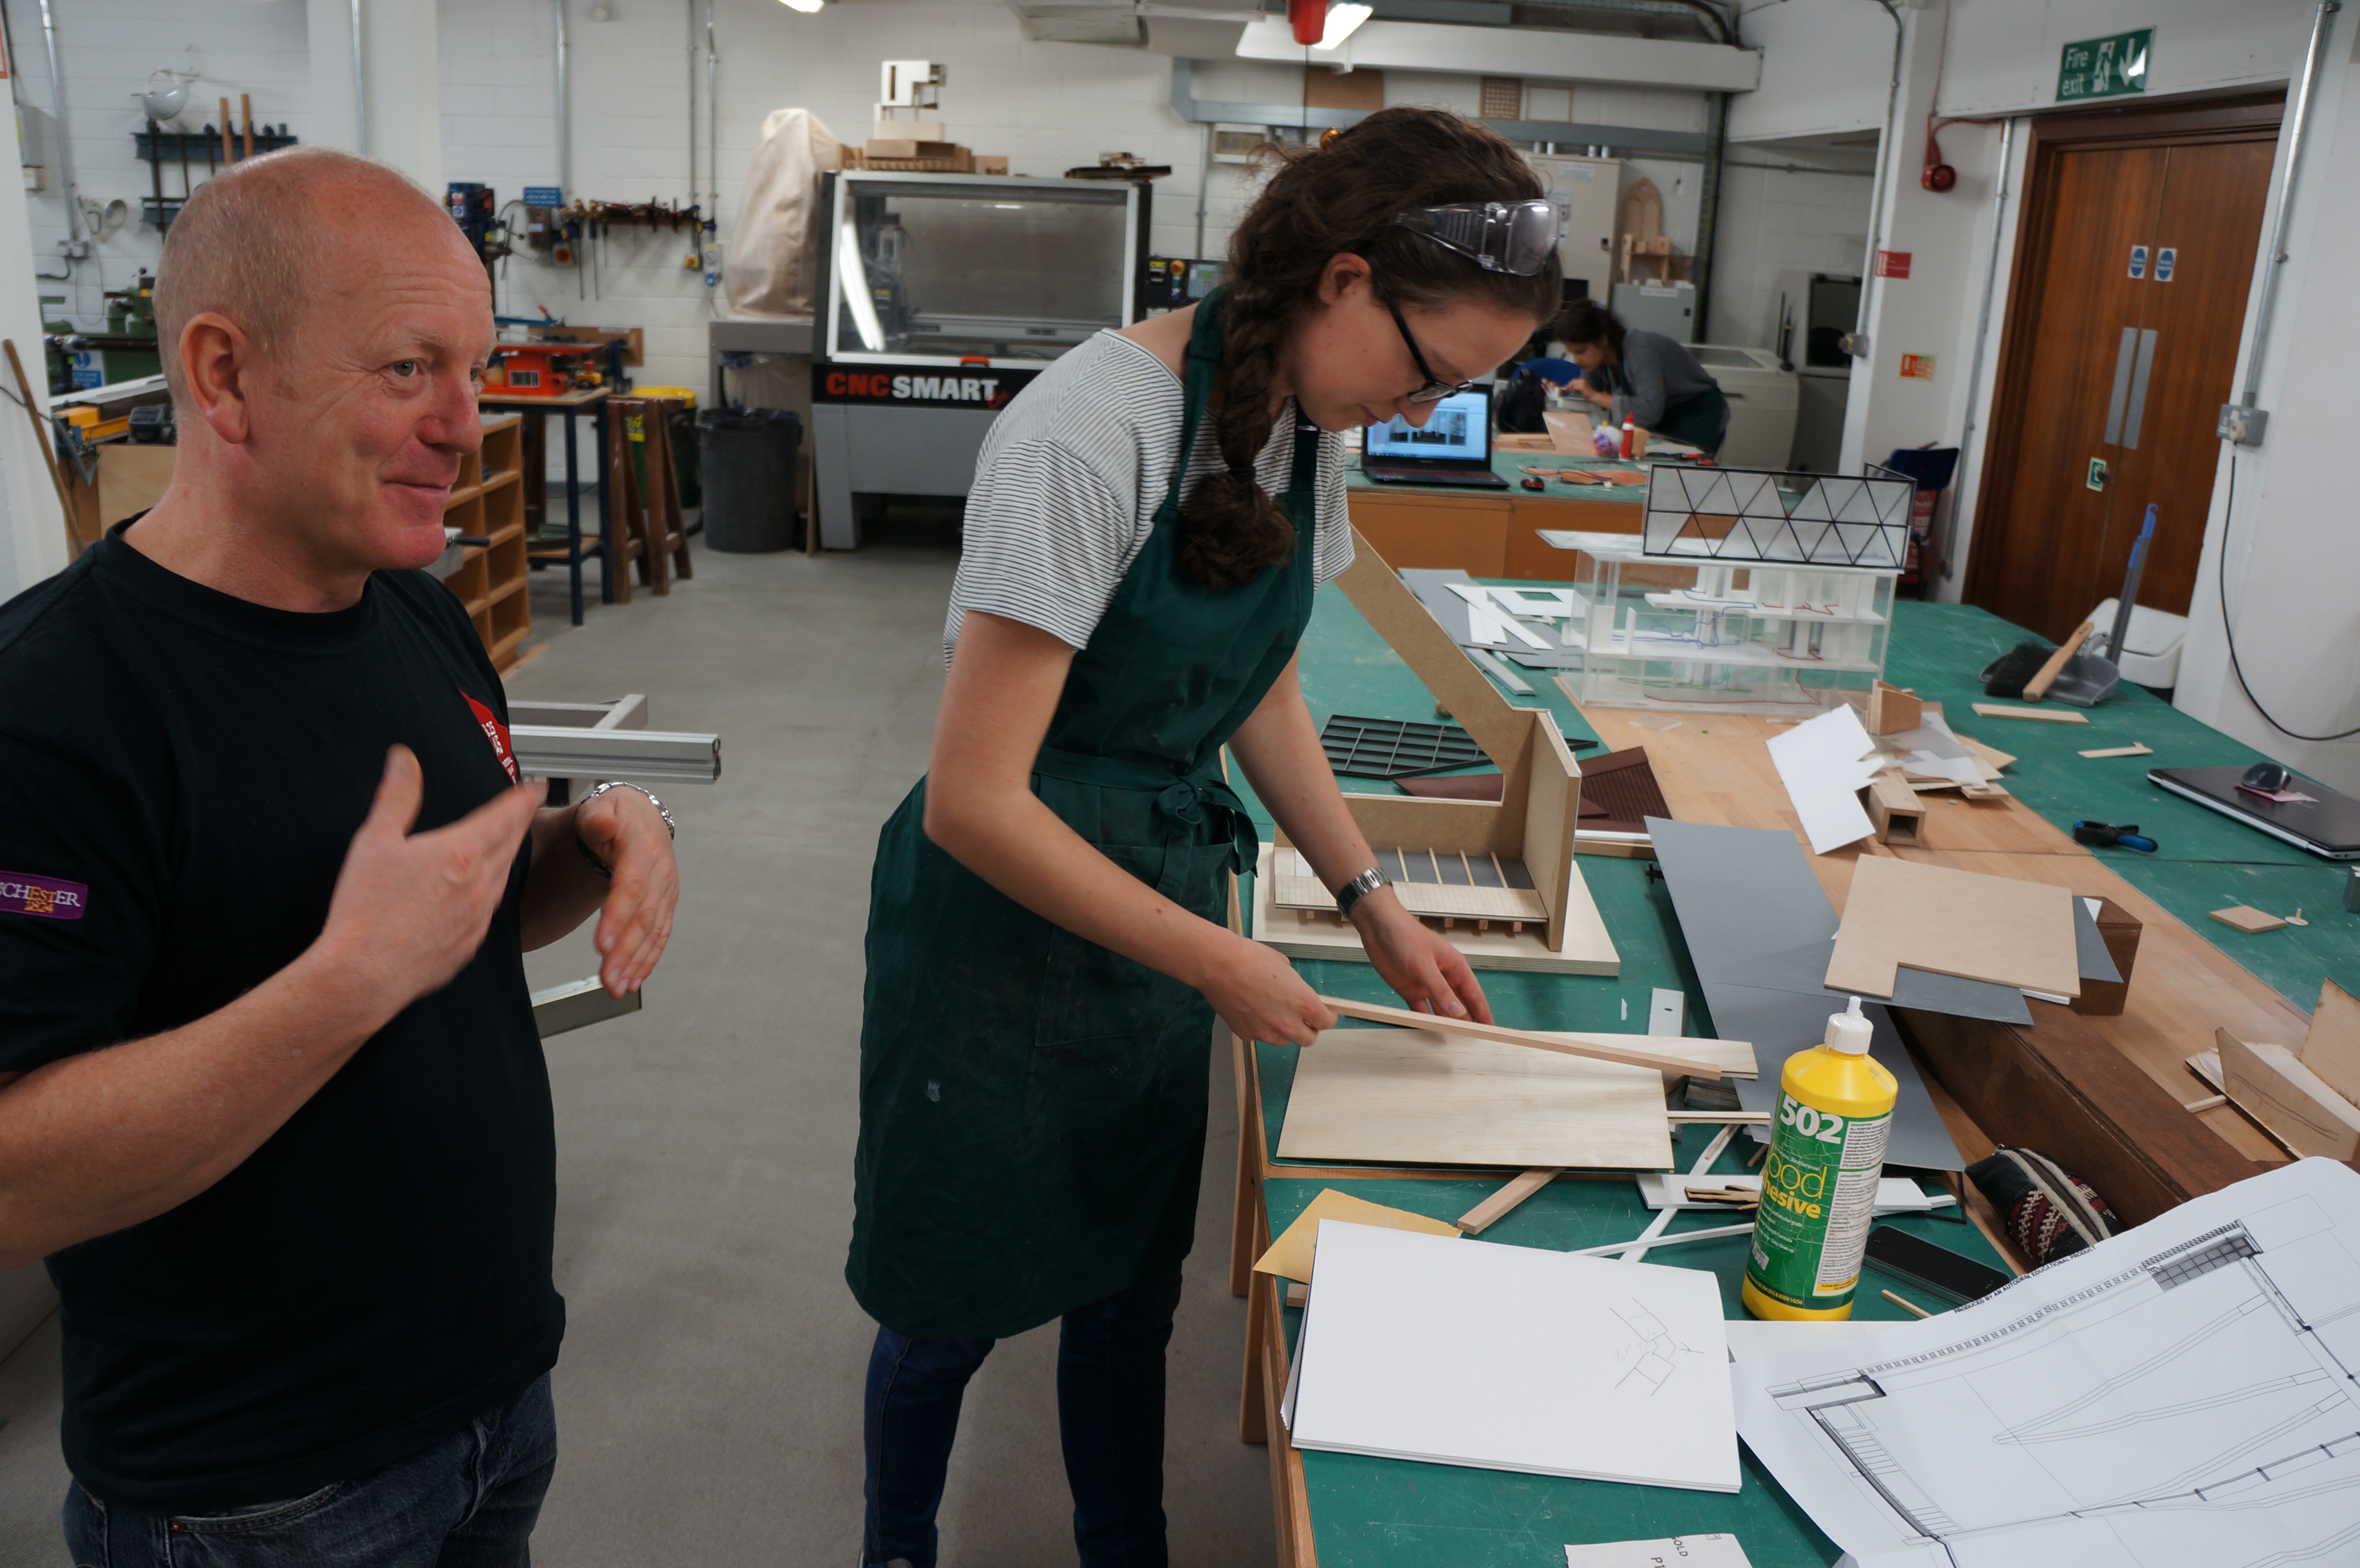
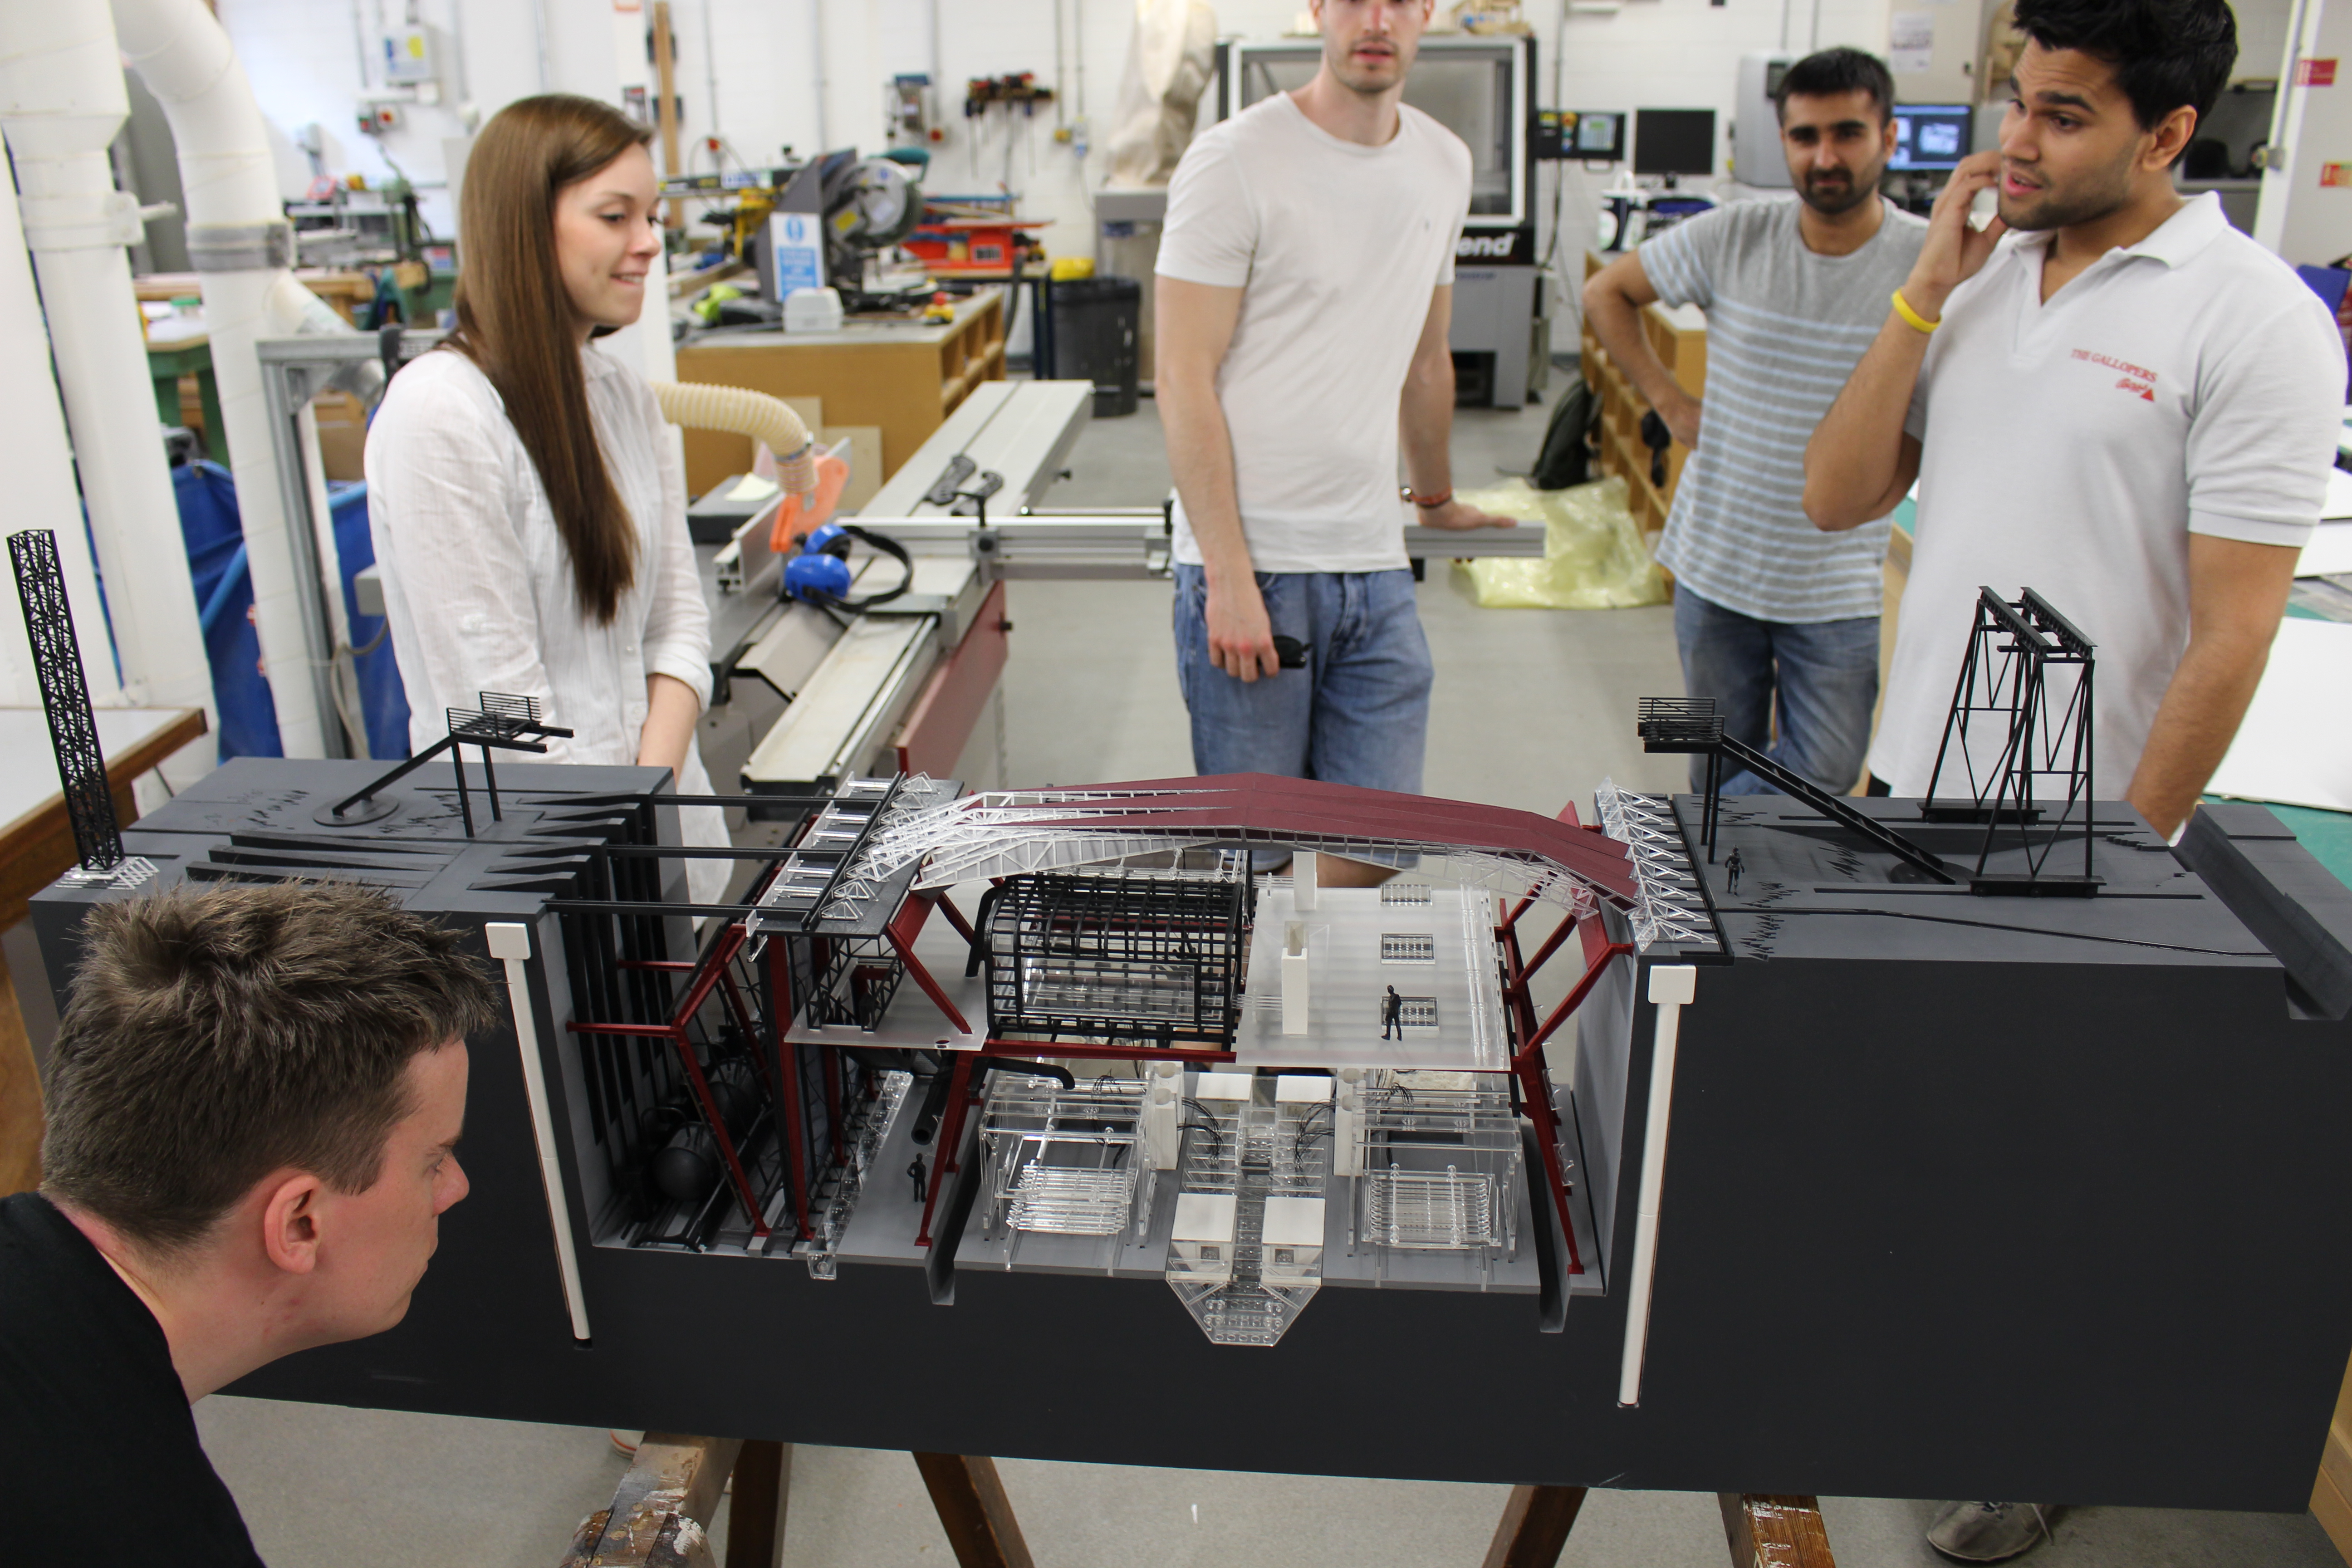
Once all scale elements were added and surround massing models were made using Jelutong block, the model was moved into the studio for photographing.

Laura Minca (3) Laura Minca (19) Laura Minca (24) Laura Minca (45) Laura Minca (84)

Deansgate Locks, Manchester Site Presentation Model By Aayu Malhotra

This site looks at a stalled site on Deansgate Locks. 6th Year MAarch student Aayu was asked to regenerate the development and look at potential future uses of the space. He decided to introduce small business’s to the site which would over time, expand and bring further investment to the area. The building form allows for expansion of the development by leaving the top of the building open for additional floors, formed around the core, to be added at a later time.

Aayu (5) As with Aayus other projects, he preferred to convey his design by making a highly detailed model, predominantly by hand, to emphasise the craftsmanship of the individual spaces in the development. Aayu much preferred this method over digital renders which he believed to be more corporate.

Aayu (9) The design is made of lightweight materials to allow for quick construction of additional areas. This idea was carried over into the design of his model with the main materials being paper, card, timber and fabrics.Aayu (11) The majority of the 1:100 scale model was designed and built by Aayu at home. Another benefit of using simple lightweight materials is the ability to make parts without the need for machines and specialist facilities. Aayu (13)

Scale figures were added along with items of furniture that indicate the potential use of a space. These items help to avoid repetition across the model and really bring out the intended mixed use concept. Aayu (12) Aayu (19) Once scale detail had been added the model was photographed in our studio and is now ready for the end of year show.Aayu (24)

Aayu (2) Aayu (15) Aayu (19) Aayu (20) Aayu (21) Aayu (22) Aayu (23)It’s very refreshing to see a model so lovingly hand crafted using minimal input from CAD driven machines. More like this please everyone!

A reimagining of slums, QED, Alexandr Valakh

concept 1

6th year Alexandr Valakh has been researching the anatomy of slum functionality in Rio De Janeiro. Slum areas typically develop due to inadequate employment opportunities and the necessity to live resulting in the irregular and somewhat chaotic appearance of the constructions.

Alex module study (1)Alex module study (2)Alex module study (6)

To reinvent this Alex is proposing a loose set of structural rules that bring some much needed order the the slum idea. By implementing this theory Alex’s idea will allow a basic industry infastructure to help support formal employment opportunities as well as making efficient use of the same geographical footprint.

concept 2

Alex’s bold ‘plug-in-city’ concept involved units that can be adapted and extended to suit their purpose in the community. Units can be extended in any direction thus allowing the construction to climb and create a towering peak. Alex has called the project the ‘Stacked City Prototype’.

Alex module study (8)

Alex produced this 1:100 scale structural flow model to study variable layouts and in turn the conditions it would create for the people using the site. The model was extensively designed in CAD and made using laser cut acrylic and ply wood components to represent different material elements.

Alex (17) IMG_2850 PS IMG_2878 PS IMG_2841 PS IMG_2851ps

“Poppy” Pavilion at Dunham Massey

As we have documented since the start of this academic year, the poppy pavilion project has taken many hours of development and construction to create. Much of the final structure assembly was completed in our store space due to the sheer size of the piece. Alex, Lorena and Nancy assembled of structure in two main parts before transportation to the site.  


The group met on a cold and rainy February morning to assemble the pieces at Dunham Massey National Trust park. The poppy was anchored using 3 fence piles which were fixed to the bottom of the structure. The final assembly too a full day and another morning to complete not to mention some frozen hands by all accounts!

The completed structure held its form well and had withstood the recent stormy weather with no problems. The structure along with the other Pavilion projects can be seen on display at Dunham Massey over the coming months.

Well done all involved!