Belated Happy New Year! – A couple of updates

2-1

  • At long last our flat-bed plotter is up and running in the new workspace at the back of the photographic studio. We are still learning the ropes ourselves but will shortly be listing basic drawing set up requirements on the CAD prep page so check back soon if you wish to use this machine.

Also worth noting that the machine will be used exclusively by first years on 23rd and 24th January as part of their papermetrics brief.

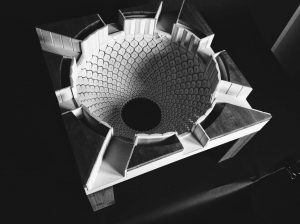
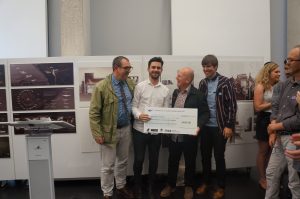
  • We’ll be making an announcement soon regarding this years end of year Modelmaking Awards so be sure to read up on that when we do.

That’s all for now. Much more soon!

X-mas Opening Hours

Hi All,

The workshop will remain open as normal until Thursday 15th December. We will be back from Monday 9th January with normal working hours.

If you’re not in before have a good break and we’ll see you in the new year!

Scott & Jim

Free 3D print file checker

Hi All,

The 3D print file checker we have been using for the last couple of years has been changed restricting the free usage and therefore is of little use to us at the costs involved!

At the recommendation of one of our 6th year students we have ran some tests using another provider which is available for free at www.makeprintable.com where you can sign up to upload your files for checking and conversion to .STL format if necessary.

Please consult our basic set up guidelines here when preparing your files.

See you soon, Scott & Jim

dsc05042

Low-Melt Metal Detail Casting by Jana Kefurtova

Jana explained her project for us:

The 1:10 detail fabrication was my first-ever casting exercise and definitely one of the most exciting tasks I have been involved in throughout my architecture course. It required a lot of preparation and careful planning of each step, but I was extremely happy with the outcome and I would repeat it if I had a chance. The key to success was to understand the casting process and plan the whole procedure beforehand.

Firstly, I modelled the hinge in SketchUp and tweaked it several times to make sure it was water-tight for 3D printing. After it was printed, I added an additional layer of acrylic to increase its thickness in certain areas, which was necessary for creating the mould. This step could have been avoided, had I known better how the mould was to be created. As I learned, it is definitely worth carefully checking your 3D model with the staff before printing. You do not want to 3D print repeatedly due to the relatively high cost of the process and unavailability of the printers during busy deadline times.

Next step was a fabrication of the mould, which was to be as tight as possible in order to save the material (silicone). When pouring the silicone, I did not mix it well enough with the activating agent, which caused it not to dry properly overnight. Luckily, it was still possible to save the mould by additionally mixing more activating agent into, and the whole mould came out really well in the end.

The putrid pouring was probably the simplest step of the whole process, however, there were still lessons to be learned. The mould has to be fixed together very tightly with clamps, as the hot metal is unexpectedly expansive and it will push your two halves of the mould apart. I repeated the casting itself twice, as the first piece was not perfect. This did not require any additional material as the first cast was simply melted.

The metal hinge was then integrated into a sectional model of a timber door to show its function. This was another part of the model-making task, which took almost as much time as the casting itself. One of the unique aspects of this exercise was that apart from the putrid and silicone, I only used scrap material from the workshop: acrylic, timber, plywood and MDF. This significantly reduced the price and proved that almost every piece of material that a student disposes in the workshop can be used further by someone else.

Working with metal left me being amazed by its strength and heaviness combined with plasticity and the ability to be shaped into very fine details. It might seem like a challenging material to handle, but it is in fact incredibly fun and fascinating one. I would recommend casting to anyone who wishes to add something bold and unique to their project.

– Jana Kefurtova 2016

Designing the Mould

When it comes to successful casting the work is all in the design of the mould. There are many considerations to have that require some reverse engineering in your mind before being able to pour the first cast correctly. In this case as Jana was creating her cast detail from scratch she had to first make the detail the the correct scale in order to have the mould be created around it. This was done using a combination of an ABS 3D print and some laser cut elements.

Due to the final cast being in metal a suitable silicone for high temperature casting is essential.

Here are some key considerations when designing a mould:

  • The mould should always be designed to use a minimum of casting material (in this case the expensive heat-resistant silicone) to ensure you are getting the most from it without having to overspend.
  • How are you going to pour material into the mould?
  • The mould must also consider the cast removal – Will the cast piece come out in one? Does the mould have to consist of multiple parts? If so how can we effectively locate these parts to ensure an accurate cast?

Metal Casting Jana Kefurtova (4)In Jana’s case it was decided that the mould could be created in two parts. In order to do this the master model had to be suspended in the middle of the mould casing to allow the first half to be poured. The support piece that was used to suspend the piece would also serve as the pour hole once the mould was ready to be used. In addition to the overall shape of the mould casing Jana also added two location ‘lugs’ which would allow the mould to fit together exactly. These lugs were in place until the first half of the mould had cured before being removed to allow the second half to create the positive part of the lug.

Before pouring the second half of the mould it is important to add a release barrier to prevent the two halves sticking together. In this case a spray wax coating was used but there are several products available for the job. Metal Casting Jana Kefurtova (5) Metal Casting Jana Kefurtova (9) After the second half is cured the mould can be taken from the casing and any overlaps in the pour can be hand trimmed and removed ready for casting.Metal Casting Jana Kefurtova (10) Low Melt Metal Casting

Once the mould has been trimmed and cleaned of any foreign matter you are ready to cast. To ensure the cast is easily removed from the mould it is necessary to lightly dust the mould halves with talc.

Metal Casting Jana Kefurtova (12)Suitable casting metal can then be broken up and melted using a melting pot. All equipment and elements used are specifically for casting purposes and you should always be sure the products are suitable for the job you are attempting.

ALWAYS WEAR HEAT RESISTANT GLOVES WHEN WORKING WITH HOT METAL AND EQUIPMENT!Metal Casting Jana Kefurtova (13)

Once the metal is completely molten in the melting pot it is then time to fill the mould using a suitable ladle. In this case it was necessary to have an extra pair of hands to support the mould whilst pouring.

Pouring in one smooth action will help to get the best quality cast. In this case it was necessary to pour three times to fill the mould. This is not idea but due to the working time with the molten metal the cast was crisp and consistent after a second attempt. (A key benefit of this material is that any failed attempts to cast can simply be broken up and re-melted to be recast meaning little waste material) Metal Casting Jana Kefurtova (17) Allowing around 15 minutes to cool is important so as not to distort the metal when trying to remove it from the mould in a soft state. Metal Casting Jana Kefurtova (20)The competed cast piece was then hand finished before being added to Jana’s functioning detail model. The moulds made for this project and the resulting detail model are currently on display as part of B.15:ARCHITYPES on the first floor of our building.

Metal Casting Jana Kefurtova (21) Metal Casting Jana Kefurtova (23)All equipment and material used here is available from 4D with your student discounts.

3-5

dsc06068

B.15:ARCHITYPES Opening by Dr Raymond Lucas

B.15:ARCHITYPES exhibition was opened with a private view opening on Friday September 16th. The exhibition was opened by Dr Raymond Lucas who spoke about the role models play at the Manchester School of Architecture.

The exhibition is now open 9.00 – 16.30 Monday to Friday for the foreseeable future.

Watch the opening address here:

Thank you to everyone who has supported in donating their work and who came along to the private view event. In particular to Saul ‘Dr Magic’ Parker-Backhouse who had a hand in everything involved in the making. 

Scott & Jim

img_0386 img_0377 img_0371 dsc06567

Welcome to 2016/17 Academic Year at B.15

Welcome to all new students and those returning for another academic year!

What’s New at B.15? 

image1 image2

  • During the summer break several rooms have been rearranged and cleared in the basement to allow us to now occupy a new room to house our model archive and temporary model store in Room B.19. This room can be accessed by asking either of us.
  • With the new B.19 model store in place we have been able to rearrange part of our materials store creating space for new machines.

image6

  • The main addition to this area is a new spraying area which will shortly be commissioned to allow us to spray model components. As with all new equipment you will be required to ask us to demonstrate the correct practice before using the machine on your own.

image5

  • Access to the Photographic Studio can now be made through the materials store thanks to the addition of a new doorway. The old doorway to the studio space is now for staff use only when dealing with material orders.

2-1

  • We have also taken delivery of a new Flatbed Cutter which will soon be commissioned and located in a re-purposed area of the photographic studio space. This machine will initially be staff operated only until its applications have been clearly established.

2-2

  • As an upgrade from our previous belt sander/ disk sander combination machine we have now purchased a new and larger belt sander (Also known as a Linisher) which is situated at the back of the workshop next to the bobbin sander. Normal operation and health and safety rule apply when using this machine – as always if you are unsure then please ask for help before using a new machine. This will be up and running next week.
  • New Morticing Machine which is used for making squared mortice joints in joinery. This will be particularly useful for 1:1 scale detail models. This is a staff only machine at present but should your project require such a detail we will be on hand to use the machine.

image4

  • New Reference Books – We have added four new books to our modelmaking library.

Architectural Model as Machine by Albert C. Smith, 2004 is an in depth historical look at the application of modelmaking in architecture from antiquity to the present day.

Advanced Architectural Modelmaking, 2010 by Eva Pascual I Miro, Pere Pedrero Carbonero, Ricard Pedrero Coderc. This book goes into detail outlining construction methods and provides a good selection of case studies.

Design for Eternity: Architectural Models from the Ancient Americas, 2015 by Joanna Pillsbury, Patricia Joan Sarro, James Doyle, Juliet Wiersema. Published alongside the exhibition of the same name this book provides an interesting look at modelmaking in ancient American history and displays the often overlooked duel function of models as tools and art.

The Spatial Uncanny, 2001 by James Casebere. The artwork of James Casebere demonstrates the amazing perspective images that can be achieved through photographing interior models.

dsc06558

  • We have a new restructured and re-branded permanent exhibition space on the first floor here at Humanities Bridgford Street; B.15 ARCHITYPES. The exhibition gives a categorised breakdown of model types and features a wide range of applications in the context of projects you may have to produce during your time here as students and beyond. Please get yourself over to have a good look around pick up a free new guidebook whilst they last!

image3


  • Lastly we are now on social media Instagram and Twitter where we will be sharing work and events @b15workshop

See you all soon!

Scott & Jim


B.15: ARCHITYPES Exhibition

ARCHITYPES PosterWe are very pleased to announce a new modelmaking exhibition of student projects opening September 2016: ‘B.15: ARCHITYPES’

The exhibition charts the different applications of modelmaking used by students of Architecture at the Manchester School of Architecture acting as a point of reference and inspiration in the subject.

4.4

Featuring over 80 pieces of varied types and styles from across 5 years of education. The display is supported by a brand new guidebook describing the projects material make-up and context.

2.9


Private View Opening

The exhibition will be opened with a private view on Friday 16th September from 17.30 onward. Dr Raymond Lucas will be present to officially mark the opening with a short introduction. This event is free for all so please come and join us in celebration of the subject there will be refreshments provided.

The exhibition will then be open 9.00 – 16.30 Monday to Friday.

Please contact us if you require any further information: scott.miller@manchester.ac.uk

Hope to see you there!

Jim & Scott

B.15:45 comes to an end. Something else begins……

The B.15:45 retrospective Modelmaking exhibition has now finished after 2 great years. The exhibition has proved an invaluable tool to us and we hope for many of you as well.

We couldn’t let such a useful resource disappear and have been working hard to bring together a revamped fresh look display to improve and expand where possible. 

We are very pleased to announce that the new as yet untitled exhibition will be opening in time for the new academic year this September.The exact opening date will be confirmed soon. We will be announcing further details on the blog so check back when you can!
Thanks to all who continue to support our work. Hope you’re having a great summer break!
Scott & Jim

Workshop Closed until Friday 1st July

Dear All,

Please be advised that the workshop will now be closed until Friday 1st July.

Jim is off to his allotment to pick some veg and chill out!

I’m off to the Venice Biennale and to attend our own Symposium, Frontiers of Responsive Architecture: https://fora2016.wordpress.com/

Would be great to see some of you over there!


image2

image1

We have collected all the models that we received requests for storage for. If you urgently need to access these please get in touch with me via email but I will be back next Friday.

Thanks to everyone who helped out putting it all together and taking it down. The feedback has been very positive all round.

Speak to you soon!

Scott & Jim