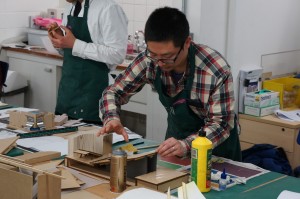
Philip Lam explains to us how he used his model to convey his ideas for increased space and performance capacity:
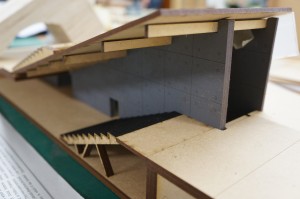
“On a site with limited space, my design tries to increase the audience capacity of a performance centre. The main space is found underground while the introduction of an outdoor space sits on top. The exterior space has been designed to respect and interact with its surrounding buildings.
The idea behind this model was to communicate and understand the spatial and structural qualities of my design.
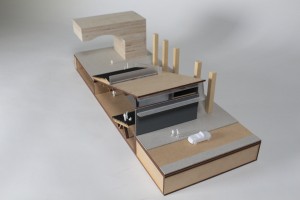
As part of the brief, our tutors asked us to include a staircase and double volume room. By making a sectional model, it is possible for a viewer to see these components as well as help understand the use of space inside. Also by modelling a section cut, my buildings load bearing structure had to be modified to allow for missing components.
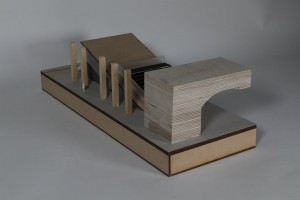
 The material primarily used in my design is concrete. To mimic this in my model, I used laser cut MDF covered with spray painted sandpaper. Rather than making a mould and casting it, this was a quicker and more economical representation of the textural and structural qualities that were required. The half-arch was made using plywood blocks which were stuck together, cut and shaped using the band saw and bobbin sander. The grain in the plywood helped replicate brick and mortar. For the seating, I needed a material which is thin, yet strong enough to sit on the wooden support frames and decided on using mount board. Finally, I used laser cut frosted acrylic pieces to represent the translucent cladding found in my design.
By making this model, I have gained further experience working with new materials, tools and techniques. I have realised that using the laser cutter is a fast and precise way to cut materials, but it can also slow you down if there are errors in measurements and tolerance. Careful planning before starting is essential. I really enjoy the process of constructing a good considered model and it is invaluable in further helping evaluate my design.”
Philips project pays attention to construction detail and his considerations with regard to material constraints and component accuracy come across well. It’s great to see turning points in project and there were several such points in this one. Philips model threw up issues such as floor levels and door placements that, once evident, were resolved through further making. We look forward to some more projects from Phil next year!


 The material primarily used in my design is concrete. To mimic this in my model, I used laser cut MDF covered with spray painted sandpaper. Rather than making a mould and casting it, this was a quicker and more economical representation of the textural and structural qualities that were required. The half-arch was made using plywood blocks which were stuck together, cut and shaped using the band saw and bobbin sander. The grain in the plywood helped replicate brick and mortar. For the seating, I needed a material which is thin, yet strong enough to sit on the wooden support frames and decided on using mount board. Finally, I used laser cut frosted acrylic pieces to represent the translucent cladding found in my design.


